How To Grow Chia Seeds

Chia seeds are a great source of nutrients and have been used for thousands of years. However, many people don’t know how to grow them at home.

In this article, we will show you everything you need to know about growing chia seeds from the comfort of your own home. We’ll start by talking about what they are, where they come from, and why they’re so good for you before moving on to how exactly to grow these tasty little treats in your garden or even inside if it’s too cold outside.

What are Chia Seeds?

First things first, let’s talk a bit about what Chia Seeds are. They’re tiny black or white sprouts from the Salvia hispanica plant, native to Mexico and Guatemala. The Aztecs were said to eat these plants as early as 900 AD but didn’t catch on until recently when health nuts started touting their nutritional benefits all over social media sites like Instagram and Pinterest.


Image caption: https://assets.bonappetit.com/

Chia seeds are rich in Omega 3 fatty acids, fiber, and antioxidants. Because they’re so rich in dietary fibers, they’re great for keeping your digestive system regular. Many people also like to sprinkle chia seeds on top of yogurt or cereal because they act as tiny little sponges that soak up all the liquid around them, which helps to prevent soggy breakfast foods.

The Chia plant has several stems arising from its base. During late spring or early summer, the chia plant will start to grow flowers. Each set of these flowers produces a seed head of tiny gray or brown seeds. The seed heads look like dandelions. 

After harvest, the seed heads are allowed to dry in the sun. Once they are dry, they are either threshed by hand or machine to remove the seeds from the inside of the flower head. The seeds are then cleaned and dried again.

Black and White Chia

When you see black and white chia in the store, note that they don’t come from different varieties. They both come from the same species of plant, but they grow under different conditions. Black Chia, which is dark purple/blue/black, comes from the coastal regions where it gets more rainfall and summers are warm. White chia, on the other hand, comes from desert regions with hot, dry summers. 

You may also see dessert chia or golden chia, known as salvia hispanica, the same species as black and white chia. However, it can’t be used in drinks since its sweet flavor won’t go well with liquids. Chia seeds can also be planted to grow chia pets or plants. When they sprout, the roots will hold onto a figurine to make it stand upright. However, the sprouts won’t last for very long.

When to Plant Chia

The Chia plant does well in USDA zones 8 to 12. Frost may kill immature plants and prevent flowering on mature plants. However, you can still plant your chia as an annual if you don’t live in these zones. Chia plants need warm temperatures and full sun to start glowing.

Chia seeds also prefer sandy, well-drained soil. They can’t stand wet feet because they are prone to rotting. They are also sensitive to extreme temperatures, so before planting the seeds, make sure that your gardening soil is not too hot or cold.

When to plant chia seeds depends on the time of the year and the type of seeds you have. If you are growing chia in a container, make sure to transplant it when the outdoor temperature is warm enough. Chia plants will grow slowly in cold conditions. You can also start planting indoors in 4-inch containers about two weeks before the last frost date for your area.

How to Plant Chia Seeds

You can purchase chia seeds from the supermarket and use them to plant or buy organic chia seeds from a health food store. Chia seeds do well in small containers which have good drainage holes at the bottom. Fill the container with potting soil up to an inch below the rim.

Now you are ready to place the seeds on top of the soil. Don’t worry about spacing; just spread them evenly in a thin layer across the surface. Smooth out so that your seeds are all at the same level, and press gently with your hand to secure them in place. Sprinkle chia seeds on the surface of the potting soil and cover with a thin layer of more soil.

Do not plant too deeply, or you will lose some seeds below the surface as they need light to germinate. Chia seed is so small that it can be hard to see and space evenly. Keep these tips in mind for the best results.

Planting Chia in Microgreens

If you don’t want to plant your seeds in the garden but still want to enjoy the health benefits of chia, use sprouts as microgreens. Place your seed raising mix in a shallow, wide container, then sprinkle chia seeds over the surface and cover with a ¼ inch layer of more seed raising mix. Keep moist, not wet, until your seedlings emerge.

How to Care for Chia Plants

When it comes to harvesting chia plants, they’re easy to grow and require low maintenance. You can use both the leaves and seeds in your recipes if you don’t have a garden, plant chia outside in the partial shade or in containers where it will get at least 6 hours of sunlight per day.

How to Care for Chia Plants
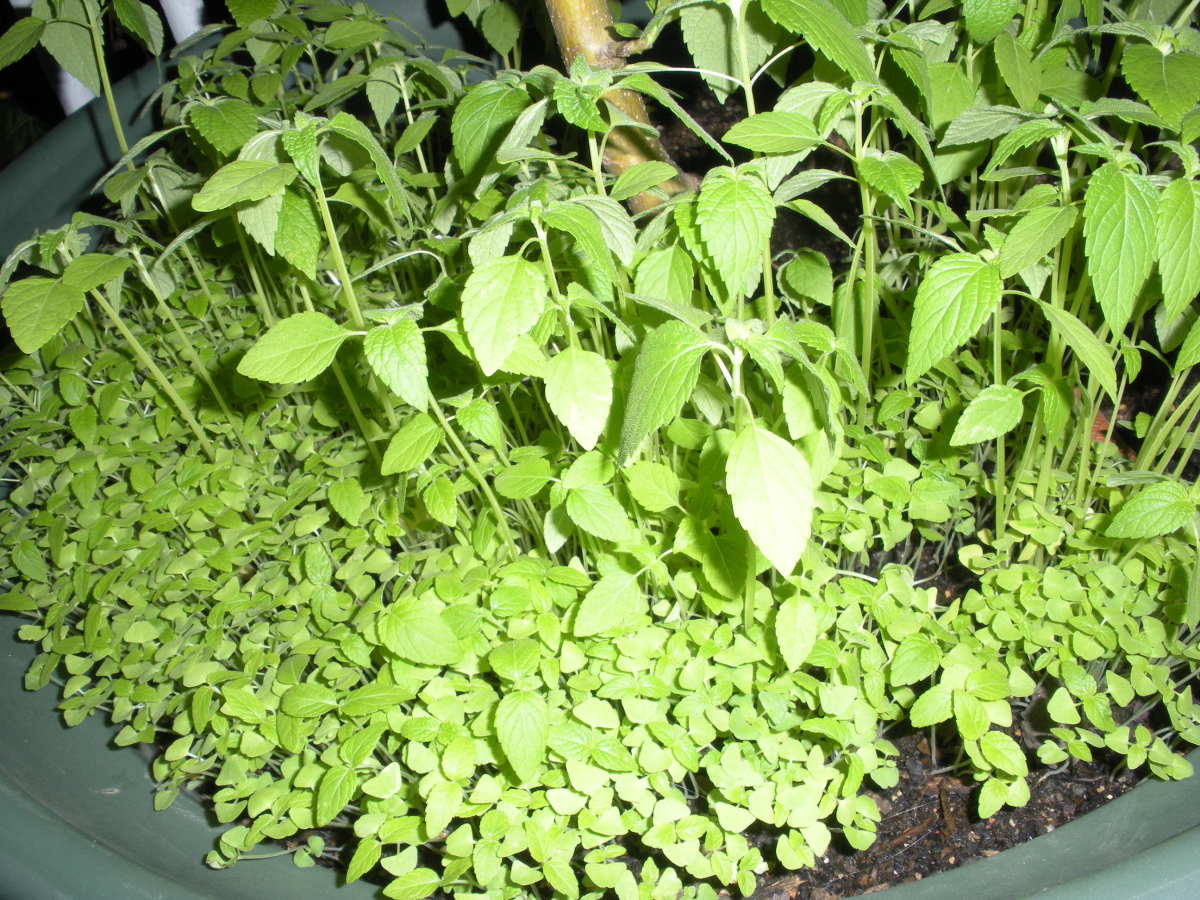
Image caption: https://images.saymedia-content.com/

Light

Chia plants do well in full sun. They’re very tolerant of hot weather because they can go for several weeks without water. Avoid planting your chia plants in the afternoon because the leaves will be burned by the hot sun.

Mix and Soil

The right soil is just as important as other strategies to grow healthy chia plants. Use a potting mix combined with perlite or sand for optimal drainage. Chia thrives on a wide range of soil conditions. Good drainage is also important as chia plants don’t like wet feet. 

If growing your chia in pots, use a commercial potting mix combined with sand or perlite. Then use unglazed terra cotta pots for the best drainage. Terra cotta pots are porous and will absorb moisture, which will increase humidity around your chia plants. For outdoor planting, use topsoil mixed with sand or compost. No need to test soil pH as chia seeds can do well in all soil types.

Water

Chia seeds are very drought tolerant. In that case, you need to water them only when the soil is dry. Bear in mind that they need water whenever their leaves look wilted and start to curl up. During the blooming phase, chia plants require abundant watering (it’s like with humans). However, wait until their second set of true leaves develops before you begin watering them regularly.

How to Sprout Chia Seeds

Besides being essential fatty acids, chia seeds sprouts are also a natural source of linoleic acid that strengthens hormones. Chia seeds are also a natural source of linoleic acid that prevents the hardening of blood vessels. They also help to lower cholesterol and high blood pressure.

The Covered Moisture Method

In this method, you’ll need a bowl and a piece of cloth. You can use a paper tray or plastic tray, but you can use whatever works for you. This is to cover your growing seeds so that they don’t dry out.

The Terra Cotta Tray Method

This requires more work than the covered method, but it has better results. You can use a plastic tray again, or you can opt for a terra cotta dish. The tray must be filled with chia seeds and enough water to allow your sprouts to grow well.

The Chia Pet Method

You can easily grow chia seeds in the form of a pet you like. This is because they can grow chia seeds with the shape of anything you put them in. All you need is to pick pottery, terra cotta dish, or any other form that’s available and fill it with chia seeds and water. You can then wait for the sprouts to grow little by little.

The Chia Pet Method
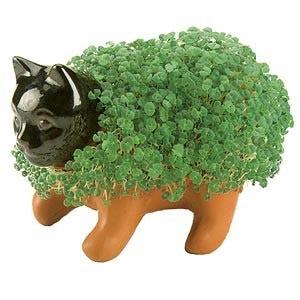
Image caption: https://www.gannett-cdn.com/

The Jar Method

In this method, you can use any container with a lid where you can put your sprouts in and screw the lid on tightly. Make sure you use a jar with a wide mouth to cover the linen cloth and secure it with a rubber band. Add water and let it soak overnight. Your chia seeds will turn into gel overnight. The following day, drain the water in the jar by opening the lid to let it flow through the cloth. You can also use a mason jar to get the best results.

Companion Planting for Chia

Chia plants can grow up to five feet tall, so plant them with herbs that won’t compete with height. You can plant chia with another mint family, parsley, sage, cilantro, and thyme.

Harvesting Chia

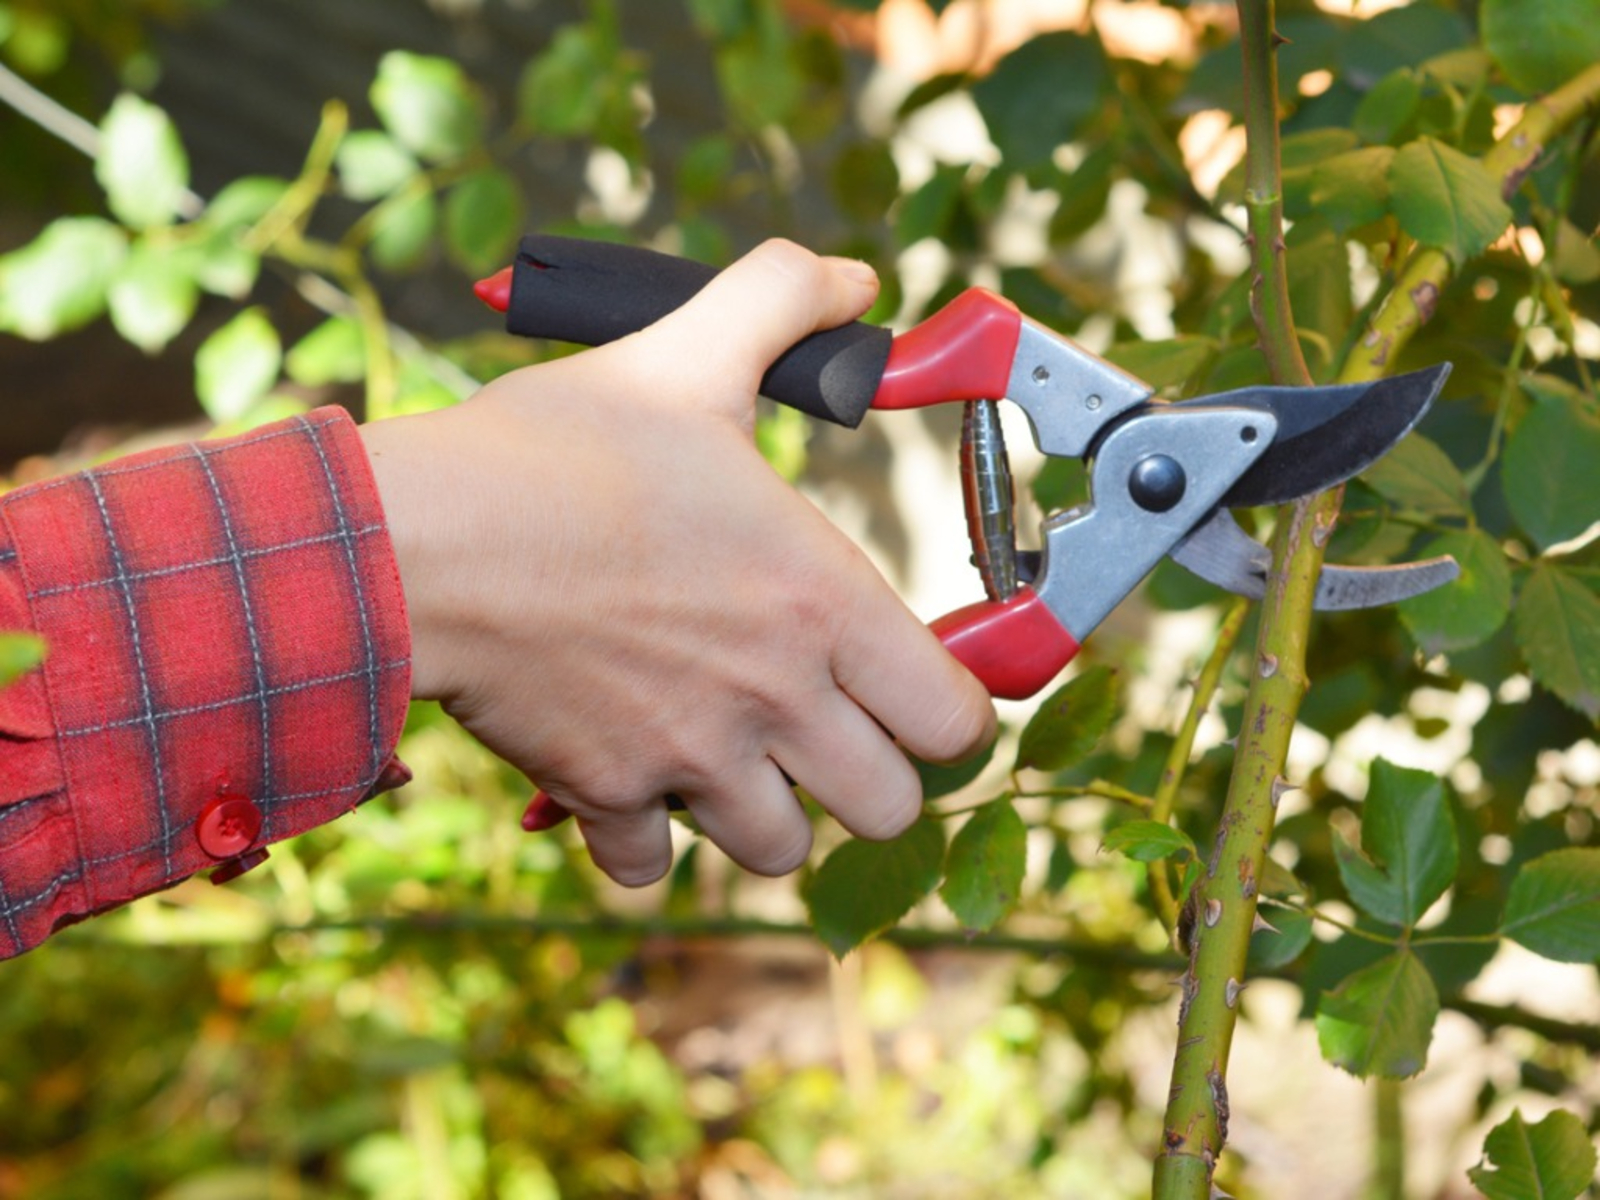
When it comes to harvesting chia, timing is very important. Make sure you harvest them before they self-seed. Don’t allow your flowers to turn brown, as you’ll lose much of the seed harvest. Once the petals have fallen off the flower, cut the flower heads off. After harvesting, don’t hang your flowers to dry; instead, put them in paper bags to dry. After drying, remove them carefully and place them on a flat, clean surface. The seed heads should be dark brown and dry.

FAQs on How to Grow Chia Seeds

How long does it take to grow chia seeds?

It takes around two weeks for chia seeds to develop after germination.

How many inches tall can chia seeds grow?

The height of the chia plant is about 14-18 inches tall.

Can you eat chia seed sprouts?

Yes, you can use them in your salad or sandwich. They are very healthy and nutritious too.

Final Thought on How to Grow Chia Seeds

Chia can be grown at home. It is a very beautiful plant and will add color to your room too. In addition, if you have pets or kids, they will benefit from this wonderful plant.


The post How To Grow Chia Seeds appeared first on Kitchen Infinity.

Did you miss our previous article…
https://www.thelavkitchen.com/?p=268

Dining Room Paint Colors

Dining room paint colors are an important part of creating a beautiful and inviting space.

It is important to consider what color will work best with the rest of your home, while also considering how light or dark you want the space to be.

In this article, we will teach you more about dining room paint colors and how to make the best decision for your space. Keep reading to find out more. 

Why are the right dining room colors important?

When you are trying to create a beautiful, inviting space in your home, one of the most important factors is choosing the right paint color. While many people consider the rooms that need the most attention in their homes (like bathrooms and bedrooms), it is also important to keep your dining room in mind. 


Image Credit: http://sherwin-williams.com

This often gets overlooked because it doesn’t need as much work; however, if you want this space to be used frequently and look its best when guests come over, then you will want to consider all of your options carefully.

Since this room tends to be small and doesn’t get a lot of natural light (because it isn’t typically located near windows), we recommend painting the walls a light color – like white or cream – to keep the space looking bright and inviting.

When your colors are too dark, it not only makes the room smaller but can also be overwhelming for guests as they enter. The color will also make the other areas in your home feel darker and more closed off than if you were to choose a lighter color.

How do I know what dining room paint colors to use?

One of the main factors we recommend considering when choosing your paint color is how light or dark you want the space to look. If you want this room to feel serene and calm, then painting it a soft white or cream will allow natural light from windows (or electrical lighting) to reflect beautifully throughout the space.

We also recommend choosing one hue and sticking with it throughout the room so that everything feels cohesive. For example, this can be done by simply painting one wall of your dining room orange while painting another wall yellow instead of each wall a different color. 

Neutral color palette

A neutral color palette throughout the room can also help keep it feeling calm while adding pops of color here and there with accent pieces will keep your guests entertained as they relax.

If you want to use darker colors throughout the space, then we recommend painting all of the walls with these colors. This will create a more dramatic look that won’t be as bright as lighter hues but is still inviting enough for most people.

There are no hard rules when it comes to choosing what color(s) you should paint your dining room; however, we recommend considering how light or dark you want the space to look and find a color palette that works well with those choices. Once you’ve decided on one main tone, try finding accent pieces in other colors that will bring in a bit of variety.

Steps to choose the right dining room paint colors

Step 1: Determine how light or dark you want your space to look

The first thing we recommend doing when trying to decide what color(s) you should paint your dining room is determining how much natural light comes into the space and if it would be better off painted a lighter color, darker color, or left alone completely. 

You can do this by simply pulling a chair up to one of your windows during the day and looking at how much light reflects onto the walls while also considering what other colors are surrounding it.  If there isn’t much natural light coming into this area, then a brighter color might be best for you as darker colors will absorb the light rather than reflect it.

If there is a lot of natural light coming into this area, then we recommend painting the walls a soft white or cream tone to make the space feel bright and inviting for guests. This also allows other colors in the room (furniture, accents, etc.) to pop more and create an overall cohesive look to your decor.        

Another option is painting them a deeper color depending on where they are located in your home. For example, if these walls are located near windows that receive a large amount of natural light then we recommend painting them a lighter color to reflect this light and open up the space. However, if these walls are located near windows that might not receive much natural light, then we recommend painting them a darker tone that absorbs most of it and closes in the room.

Also, consider the mood that you want to feel when in your dining room. This goes hand in hand with the color that you choose.

Once you have determined whether or not to paint your walls a lighter or darker color, then go to step 2.

Step 2: Find whatever colors work best with those choices

Now that you’ve decided whether or not to paint your walls a light or dark tone as well as what kind of mood you would like painted throughout the rest of this room, it is best to find colors that work well with those choices.  If you want a bright dining room then pairing colors such as green, yellow, or white will make this space feel larger and more open. 

If you want to create a dramatic ambiance then pairing colors such as purple, blue, or red with dark wood furniture is another way to bring lots of contrast into this area.

However, if you do not like the idea of painting your walls a bright color or would like for them to match with certain furniture pieces already in your home, there are many ways to incorporate these hues through other objects. 

Decorating your room also includes the furniture itself, so feel free to paint a piece of them in your dining room if you would like to replace it with a new piece or just freshen up a tired old one.  

Step 4: Make sure anything that goes with these colors matches

You have decided on whether to paint your walls a lighter or darker color as well as what kind of mood you’d like painted throughout this area and now it is time for things such as furniture and accents to come into play.  If you want this space to be bright and welcoming then painting furniture pieces white will make them pop beautifully off of those light walls while also creating an overall cohesive look throughout the rest of your decor. The same logic used for the dining room might be applied when thinking about the potential of painting furniture.

Defy The Trends And Pick Something Bold For Your Dining Room Paint
Image Credit: http://franklinpainting.com

Final thoughts on dining room paint colors

In conclusion, interior design is a complex and imaginative process. Designing the perfect dining room might take some time but it’s totally worth it and in the end, will make you feel at ease in your home.

If you want to get started on improving your home, we invite you to use these tips for inspiration.

The post Dining Room Paint Colors appeared first on Kitchen Infinity.

Did you miss our previous article…
https://www.thelavkitchen.com/?p=265

How to Use Core Aeration

Maintaining a healthy lawn is hard, but there are a number of steps you can take to achieve this. You need to fertilize your grass, mow it at the right height, and water it regularly. But if nutrients don’t reach the soil underneath your turf, you’re going to have problems with thatch build-up and nutrient loss.

Lawn aeration helps improve drainage by removing plugs from the top layer of soil, allowing air and water in a while, helping reduce soil compaction below ground level. It also brings up minerals that were trapped beneath the soil surface into contact with roots for better absorption.

If you’re looking for ways to achieve and maintain a beautiful lawn, then this article will help you learn more about using core aeration. We’ll discuss why it’s needed and what it involves. Read on!

What is Core Aeration?

Core aeration is one of the best practices for lawn care because it improves overall health and appearance while reducing weed growth potential. The process involves using an aerator machine or core aerating tool which removes plugs from two inches deep or more depending on how long you run the machine over your lawn’s surface. This will help loosen compacted soil and allow water and air to reach the lawn’s roots better.


Image credit: https://www.fairwaygreeninc.com/

What is the Best Time for Core Aeration?

For cool season grasses, core aeration should be performed in early fall or early spring. For the warm season grasses, core aeration should be done in late spring to early summer. When aeration combines with growth, grasses recover quickly and fill in areas where aerator equipment exposes soil.

When Do Lawns Need Aeration?

All lawns can benefit from core aeration, especially when the soil is compacted. Lawns in heavy shade or with thatch build up are great candidates for core aeration. Any time grass has difficulty growing or staying healthy due to compaction or poor drainage, this indicates that core aeration might be needed. Soils high in clay also benefit from core aeration.

Also, note that dethatching and aerating are two different things, although they work in handy. Thatch is the layer of decomposing organic matter that forms at the lawn surface between soil and grass. The thatch works like compaction to block the passage of air, water, and fertilizer to the roots.

Dethatching removes some grass blades while aerating opens up channels in the soil to allow air, water, and nutrients to reach grasses’ root systems. Aggressive spreading grasses like Kentucky bluegrass in northern lawns and Bermuda grass down south form more than any other grass type.

If your grass looks stressed and your soil is hard to the touch, you may have compaction problems. You can confirm that by using a simple screwdriver test. Take your regular screwdriver and stick it into your lawn’s soil by hand.

Why Core Aeration Helps Lawn

Lawns get heavy use, such as acting as neighborhood playgrounds and racetracks. Kids and pets running around the yard can also lead to soil compaction. That said, your grass roots need air, water, and nutrients to grow thick, deep, and strong. When the soil becomes compacted, it will inhibit the flow of essentials that supports thicker, healthier tuff growth.

Excess lawn thatch and heavy organic matter buried under the grass surface can also starve the grass of essential elements. Therefore, the hollow tine core aeration will help alleviate additional compaction so air, water, and nutrients can reach grass roots.

If lawn grasses are deprived of their basic needs by compacted soil, they’ll struggle, especially in stressful situations such as heat and low rainfall, thus losing their healthy, rich color. The grasses will gradually thin and die out completely. If there’s no oxygen, water and nutrients will be inches away.

Other Methods of Aerating Your Lawn

Apart from plug aerators or core aeration, there are other methods of aerating available equipment. They include:

Spike Aeration

Spike aerators have hollow tines that penetrate the soil and remove small cores of soil. Spike aeration is quick, easy to install, and can be used on lawns with little maintenance. The spikes create holes for water and nutrients by pushing soil aside.

Spike Aeration
Image credit: https://cf-images.us-east-1.prod.boltdns.net/

Slicing Aerators

These are blades attached to a wheel, which slice through the lawn’s surface. This method is similar to the spike aerators in that it also removes cores of soil from your lawn. The slices will give rise to new shoots and roots, giving rise to thicker turf.

How to Aerate Your Yard

You can find lawn aerators, power rakes, and other power equipment at your local store, hardware stores, and some big-box retailers. You can also hire lawn service from equipment rental companies and lawn and garden stores. Here’s how to aerate your lawn:

Flag Utilities

Flag utilities or other pipes loosen the soil around those with a shovel. Remove plugs from holes, then drag the aerator behind you across your lawn. With space between each pass, turn over all of the soil that was brought to the surface. Replant grass seed or transplant seedlings as desired

Time Your Aeration Right

For best results, time your aeration to coincide with your lawn’s physiological stage of development. Late summer is the best time for quick relief from compacted soil, while late spring or early fall are ideal times for lawn restoration and strengthening. Aerate when the soil is soft, like after an irrigation cycle or a recent rainfall. 

This will allow the hollow tines to penetrate the soil easily, making it easier to do their job. Hollow and solid-core aerator tines will struggle to penetrate hard, dry soil, making the process less effective.

Be Thorough

Cover your entire lawn at least once and the second time at a cross angle. Pay attention to lawn surfaces with heavy foot traffic, driveways, and sidewalks because these sections will be more compacted. If your lawn is smaller, you may only need to do it once.

Forget the myth that if you apply a pre emergent herbicide on your lawn in the spring, it will destroy your herbicide barrier. This is not always true because aeration won’t affect crabgrass control or weed prevention.

What to Do After Aerating

After aerating, if possible, combine lawn aeration with other lawn care maintenance such as fertilizing, adding soil amendments, and overseeding. Water, fertilizer, and grass seed needs to get through the lawn surface into the soil where they can start growing grass roots. After aerating your lawn, let soil plugs or extra soil dry where they fall.

What to Do After Aerating
Image credit: https://peppershomeandgarden.com/

Core aerating will open the soil to allow water, fertilizer, and seed to move down in the soil for faster root growth. You can also help restore your lawn by application of fertilizer immediately after core aeration. Better yet, make your compost for this purpose.

FAQs on How to Use Core Aeration

When should you core aeration?

Core aeration can happen anytime, but the best time is usually in the spring and early summer or fall. It’s recommended to core aerate when there’s the most root growth.

Should you water before core aeration?

Yes, you should water one to three days before aerating. This is because the soils must be moist to help the machine penetrate through to remove soil plugs. Do not aerate overly soaked and completely dry soil because the aerator will pull out small soil cores from the lawn, which should be left to break down.

Final Thought on How to Use Core Aeration

As you can see, adding aeration to your annual task list will help you maintain your lawn and make it look more beautiful. Plus, you save money in the long run by having a healthy lawn.


The post How to Use Core Aeration appeared first on Kitchen Infinity.

Did you miss our previous article…
https://www.thelavkitchen.com/?p=261

International Laundry Care Symbols

Laundry care symbols are used to help people understand how to wash their clothes.

Some symbols indicate the type of fabric, while others tell you how much water and detergent are needed for a specific kind of item. There are different ways that clothing labels provide this information as well, including by using words such as “Wool” or “Delicate.”

In this article, we’ll explore why it’s important to know the symbols and how you can find out which symbol your clothes have. Keep reading to find out more. 


Image Credit: http://ihateironing.com

What are laundry care symbols?

The symbols on your clothing labels or tags are called laundry care symbols. These can give you general washing instructions, like whether an item is dry-cleaned only, machine washable, or hand wash only, and/or more specific guidelines on how to care for the piece of clothing. 

By using the laundry care symbols, you can get closer to understanding how to take care of your clothes. Some symbols indicate the type of fabric, while others tell you how much water and detergent are needed for a specific kind of item. 

How do you decipher them?

Different countries use different laundry care symbols. Therefore it is important to note that there isn’t just one universal set of washing instructions on clothing labels around the world. 

The United States often uses basic graphics on their tags (including dots inside shapes) while other countries might include text like “Machine wash cold,” or “Do not bleach” in addition to or instead of symbols. It is great to know what the laundry care symbols are for your favorite clothing brands, but it can be even more helpful to learn how you can decipher them yourself.

Why is it important to know the symbols?

Knowing and understanding how to read your clothing labels can not only save you money in laundering fees and ensure that clothes last longer, but also help reduce the amount of water pollution you create.

Laundry care symbols can indicate whether a piece of clothing needs to be washed in cold or warm (or even hot) water, which often helps cut down on energy costs for heating wash water.

This can be especially helpful if you live in an apartment with communal laundry facilities where the machine already has hot water running through it before you start using it. Another great benefit is that by giving your clothes the proper care and attention they need, you will be able to maintain their appearance and make them last longer. 

How you can find out which symbol your clothes have

Since there isn’t just one universal set of washing instructions on clothing labels around the world, it’s best to look up how your favorite brands recommend caring for each piece of clothing. 

Many major companies with multiple locations across different countries provide information about laundry care symbols on their website or online help section. Additionally, if you know where a garment was purchased and plan on returning there again in the future you can ask an employee what type of symbols it has so that you can know what to expect when you care for it in the future.

For clothes from brands without a website, you might have to do some more investigating. With a small amount of research, you should be able to find out which laundry care symbols they use and how those correspond with general washing instructions around the world.

If you know the symbol, but don’t understand what it means, you can use an online translator or speak with someone who speaks both English and the language that matches up to your washing instructions. Most importantly, if you’re buying clothes for yourself or caring for clothes that were bought as a gift for someone else, make sure that they are washable before purchasing them.

Where else do you see these symbols?

When it comes to doing laundry, remember that laundry care symbols aren’t just found on laundry tags. They can be found on just about anything that you might wash in the washing machine. Most common are clothing care symbols, but you can also see them on your bed sheets, towels, curtains, and even tablecloths.

How to Wash Clothes | Laundry Tips and Tricks
Image Credit: http://tide.com

The next time you go to do a load of laundry or send something out for dry cleaning make sure to look up its symbols so that you know what kind of care it needs. This will help cut down on costs from using the incorrect amount of detergent or having your clothes accidentally bleached.  

International Laundry Care Symbols – FAQ

How did the international laundry care symbols come about?

The development of a common set of symbols was born out of necessity, in response to the great demand for standardized symbols within internationally operating textile companies. The need for easily recognizable symbols that are not language-dependent but are valid worldwide has been widely recognized over recent years by garment manufacturers, laundries, and consumers alike.

How do I clean my washer?

Cleaning a washer is more than just putting some clothes in and pressing a few buttons.

It takes some planning, preparation, and the proper use of cleaning products; it’s important to know how to do it properly.

There are many different types of washers – top-loaders and front loaders being the main types. This means that washing machine cleaning is a little different depending on the type you have. But there are a few general rules that clean all washers: don’t overload your washer, avoid using too much detergent or bleach, and always follow the instructions given by your manufacturer for safe usage.

Final thoughts on international laundry care symbols

In conclusion, there are a wide variety of symbols used in laundry care symbols. The main goal for these symbols is to make sure that clothes can be safely washed and cleaned. Even with the development of new cleaner ingredients, these symbols will still work effectively so it’s important to pay attention to them before washing your clothes.  

The post International Laundry Care Symbols appeared first on Kitchen Infinity.

Did you miss our previous article…
https://www.thelavkitchen.com/?p=258

How to Cover a Chain-Link Fence and Give Yourself Privacy

Chain link fences are a popular choice for boundary markers because they are inexpensive and easy to install. However, the openness of these fences leaves them exposed to prying eyes. If you’re looking for privacy but don’t want to replace your fence with a solid wood or vinyl panel, there are still ways around it.

Once these fences are installed, they’re hard to remove, even with a tractor because they’re deeply buried and encased in concrete. But there’s no need to live in constant fear of being watched from outside your house if you have a chain-link fence installed in front of it. 

Here’s how you can add some privacy without having to spend too much money on expensive fencing materials.

Purchase a Bamboo Fence

You can purchase bamboo fences online or at your local home improvement store. Rolled bamboo fencing is constructed from attached poles ranging in thickness from 3/4 -inch to 2 inches. You can install full bamboo pole screens by attaching the poles to the top and bottom of your chain link fencing. This will not only give you privacy, but it’s also a visually attractive addition to your backyard.


Image credit: https://cdn.shopify.com/

Full bamboo screens are easy to install, and they’re designed for maximum strength and durability. Depending on how much privacy you need, you can use them in front of or behind your pool. If it’s for organic coverings, then full bamboo is durable but for organic material, it will slowly deteriorate unless you keep maintaining it.

Choose the poles cut on the bamboo nodes because they’ll do better than poles with exposed ends. This will extend their life as the nodes act as caps for the poles. While bamboo screens will last for a while, you need to maintain them regularly to get life out of them because various weather elements can deteriorate them. Also, if you’re doing a long fence, then you’ll need multiple bamboo rolls.

Chain Link Fence Slats

Fence slats are the ideal barrier material when you need to fence in an area for privacy purposes. The poles make it possible to see through the screen, but they also prevent anyone from seeing what’s on the other side because of their height. These fences allow for long, narrow pieces to be inserted vertically, so why not do your entire fence with these?

Chain Link Fence Slats
Image credit: https://m.media-amazon.com/

Plus, these privacy screens are economical compared to other types that are made specifically for private areas. Fence slats are made of high-density polyethylene or aluminum.  You can also spray paint them with whatever color you like to help match them with the color of your home or complement your home color.

Because of their material, chain link slats can last for a long time. But depending on the weather in your region, you can repaint them once in a while. They’re also easy to replace, so don’t fret if they get damaged.

Reed Screens

This is another option for covering your chain-link fence. Reed screens are thinner than slats, so they may be the best choice if you want something light-weight yet easy to handle. You can install reed screens on top of panels or suspended above them by using L-shaped brackets. This gives you more privacy while still letting fresh air in.

They are about as wide as a drinking straw, making them easy to roll up and transport. If you’re looking for a light-weight fence covering, reed screens are a great choice. On the downside, they are not as sturdy in strong winds because of their thin diameter that can bend under pressure.

They’re very easy to install. You only need to secure them to the chain-link fence using metal wires. They act as a privacy screen, especially if they’re new but will deteriorate and drop as they age.

Wooden Fence Panels

A more permanent solution is to install wooden fence panels. They come in all shapes and colors, but they are commonly used to divide property or act as fencing. You’ll need someone else’s help to hold the panel while you attach it to the chain-link fence.

Wooden Fence Panels
Image credit: https://www.homefortheharvest.com/

It can also be installed with brackets like reed screens, using bolt cutters to cut the fencing wire. They’re the most attractive option when it comes to upgrading your chain-link fence. Using u brackets, screw the wooden fence panels to the main fence line. The brackets are available at any home improvement store.

Since these panels have already been pre-constructed in the factory, there’s no need to individually nail up boards. Wood fence panels are very durable, and if you use cedar, they’ll last nearly as long as the fence they are attached to. You can preserve wood panels by preventing ground contact.

However, you’ll need to obtain a fence permit to attach these panels in front of your chain link fencing. You also need to be handy and inventive to get the best option because there are no hardware kits and systems to help you make conversions.

Mesh Wind Screen

A Mesh wind screen is also called bird netting, which is very effective against pests and has no gaps between the metal mesh that might allow small children to put their heads through. Mesh fencing is already installed into prefabricated panels that you can buy at your local hardware store..

The Mesh privacy screen is water and wind permeable. It also has a double-thick trim around the perimeter, plus brass grommets on the trim to enable you to attach it to the chain-link fence with zip ties. The brass grommets and zip ties make them easier to install and remove than other options.

Mesh screening is highly durable. It’s a non-organic UV rated with high-density polyethylene, enabling it to last for many years. It’s also the lowest cost when compared with other privacy screens.

On the downside, they are more about utility than beauty. They’re often used in industrial areas, schools, tennis courts, and swimming pools, making them unsuitable for home options.

Make Hanging Slats

Choose one cedar plank on top of your privacy panels and lay it horizontally on the ground. After that, lay two smaller cedar boards vertically over the plank. These smaller boards will help support the round lattice panels.

Ensure the side boards are level to prevent the slats from hanging straight on your chain link fence. Space the rest of the cedar boards evenly and nail them in place. The remaining cedar planks will form the rest of the panel. Measure the space between the top and the bottom of the slat the place the remaining cedar planks in between them.

Plant Bushes and Trees in Chain Link Fence

Covering a chain link fence with wood planks is not the only option you have. If privacy and security are what you’re after, then plant bushes and trees in front of your chain link fence. This will help conceal the area and create a more secure feel.

Make sure you pick the tree that is suitable for your growing location. Choose a plant-based on the temperature in your region, plus consider if you need a plant that will survive well in sunlight, dry soil, and keep its color year-round. If you’re going with bushes, trees, or shrubs, they’ll require weekly maintenance and can take a few years to grow to full size. Also, trim the plant evenly along the top and sides and keep the top wider than the base so light filters down to the lower branches.

FAQs on How to Cover a Chain-Link Fence and Give Yourself Privacy

Can you put a privacy screen on your fence?

Yes, you can put a privacy screen on your chain-link fence depending on where you live. The local homeowners association always restricts installing screens into your fence.

How deep do chain link fence posts need to be?

Chain link fence posts must be deep enough in the ground to support your fencing and any additional security features you add on.

Can I use vines for privacy?

Vines are an excellent choice of plant material because they can grow quickly, provide shade, give privacy and save money.

Does a chain link fence increase the resale value of a property?

Yes, having a chain-link fence can increase the resale value up to 4% because it’s practical and stylish at the same time. But not every fence is the same. If you’re looking to increase your resale value, you can opt for the wood-paneled fence.

Final Thought on How to Cover a Chain-Link Fence and Give Yourself Privacy

As you see, there are so many ways you can add privacy into your chain link fence and stop prying eyes and outsiders from peeping through the fence. There are so many different plants you can plant to give yourself privacy. You can screw these in your existing fence and get the impression that your chain link fence has disappeared.

Moreover, planting grass around your fence is a great idea since it will help you achieve that perfect green lawn. It doesn’t matter where you live or for what reason you have installed the chain link fence; there are always ways to improve the look and feel of the fence, make it more private, and do something with all that open space.


The post How to Cover a Chain-Link Fence and Give Yourself Privacy appeared first on Kitchen Infinity.

Did you miss our previous article…
https://www.thelavkitchen.com/?p=254

Vinyl Plank Flooring Review: Pros and Cons

Finding the right flooring for your home can be a difficult and time-consuming task. You want something durable, stylish, and affordable. Vinyl plank flooring may be your solution to all of these problems. It’s waterproof, so spills are no issue, it comes in many styles and colors to match any home decor, and it’s very affordable. 

The best thing about vinyl planks is that they’re easy on your wallet while still giving you all of the design flexibility and customization options offered by other types of flooring. And unlike wood or stone, these floors will never warp or crack under pressure. They’re waterproof, durable, and available in many different colors, textures, finishes, and styles. 

Keep on reading to learn more about vinyl plank flooring!

What is Vinyl Plank Flooring?

Vinyl Plank Flooring is an alternative to hardwood floors made from PVC plastic. They look like wood planks but without the maintenance that real wood requires. Since World War II, the material has been around when soldiers used sheets of it as makeshift armor against shrapnel. 

Today, this versatile product can be found in furniture, cars and boats, and even clothing, making it one of the most popular materials. This type of floor covering looks great and offers some other benefits, including being easy to install. Learn how to install vinyl plank flooring here and see how easy the process can be.

Plank vinyl floor, also known as a luxury vinyl plank or luxury vinyl floor, is vinyl flooring in long, narrow strips and not the traditional square tile shapes. 

Sheet vinyl is a flexible vinyl with a printed top layer covered by a clear wear layer, while vinyl plank flooring is a multi-ply product with four features. Therefore, luxury vinyl is five times thicker than traditional sheet vinyl. 

On the other hand, plank vinyl floors have deeper embossing and better graphics, bringing it to a closer simulation of wood, unlike the previous sheet vinyl flooring and plastic laminate flooring.

What is the Difference Between Luxury Vinyl Plank and Luxury Vinyl Tile?

A luxury vinyl tile (LVT) is considered luxury vinyl plank flooring, but it’s not the other way around. LVT is also more expensive than vinyl planks. Vinyl tiles are thinner than flooring planks, so even though both products are similar in technical terms. The thickness of the mat will be an obstacle to the imaginary wood grain effect. Their main difference is their appearance. Vinyl plank looks like a wood plank, while luxury vinyl tile looks like a tile.


Image credit: https://www.flooringamerica.com/

What is the Difference between Vinyl Plank and Vinyl Sheet

Vinyl plank and vinyl sheet are almost the same. They share the same disadvantages. Vinyl sheet is absolutely perfect for utilitarian roles such as basement flooring and bathroom flooring. But vinyl sheets are totally different from vinyl planks.

dvantages of Vinyl Plank Flooring

Vinyl Plank Floor is Water Resistant

If you are looking for water-resistant wood flooring, then vinyl is the best option. It’s not as water resistant as laminate flooring, but it doesn’t crack and warp like hardwood floors do when exposed to too much moisture. Vinyl plank is always water-resistant because it’s made of plastic.

Vinyl Plank Floor is Water Resistant
Image credit: https://vinylplankflooringprosandcons.com/

Most vinyl plank floors can be easily installed, making them waterproof as well. This makes it perfect for a mudroom and any other room that is frequented by dirt and wet.

Simple and Easy to Maintain

Vinyl plank flooring features a tough surface that is simple to clean. A single wash with the right product will remove most dirt and grime from your floor’s surface, making it look new again. They don’t require special maintenance like wood floors.

You can clean vinyl floors regularly, but you don’t need to stick to the cleaning schedule or use any expensive specialty product. Also, these floors should never be steam-cleaned, varnished, or waxed. The pressure of a steam cleaner can drive moisture down through the seams to the wooden subfloor.

Vinyl Plank is Great Scratch Resistant

Apart from being water-resistant, vinyl plank is also great scratch resistant. Thanks to its ultra-durable wear layer, it’s super hard to scratch, unlike hardwood, which will show dents and dings after years of use.

Easy to Repair

Repairing vinyl tiles is much easier than traditional wood flooring. All you need is to remove the damaged plank and install a new one without sanding and refinishing the entire floor. As you can see, you don’t need to break the bank to clean and maintain this type of flooring.

Installing a new vinyl plank for your flooring project is also easy as long as you follow the installation instructions on the purchase.

Highly Durable Flooring Option

Both luxury vinyl planks and tile flooring are stains, scratch, and dent resistant, making it great for high traffic areas, kids, and pets friendly. It’s extremely versatile and great for the bathroom and kitchen because it doesn’t chip or scratch easily. 

However, you should pay attention to your flooring because low-quality vinyl flooring may scratch and blend easily. The floor shouldn’t be nailed down to reduce the appearance of black water stains around the nail’s head and also prevent interference with vinyl flooring’s waterproof and water-resistant ability.

 You may need to use wood plastic composite [WPC] and stone polymer core [SPC] in subfloors. This is because some WCC and SPC flooring are thick enough to let vinyl flooring float on them, but not all WPC and SPC can do so.SPC vinyl flooring is thinner and has more density, especially the stone-based core.

Vinyl Flooring is Long Lasting

If you’re looking for long-lasting flooring material, then vinyl flooring is a perfect choice. Vinyl flooring has a lifespan of more than 25 years, so it’s unlikely you’ll ever need to replace any part of your flooring unless you damage it on purpose.

 The lifespan of this type of floor material also depends on several variations. These variations include installation process, quality of the flooring, wear layer thickness, and maintenance. And if any planks get damaged, you can easily remove and replace them.

Luxury Vinyl Plank Can Go Where Hardwood Can’t

The perfect feature of luxury vinyl planks is that you can install them in places where solid wood flooring isn’t a good choice, such as below a radiator or a heating register. Because the rigid core keeps these planks from bending, you won’t have to worry about them wrinkling and buckling underneath the bulbous radiators.

It’s not affected by heat and humidity, making it a great alternative for wood floor bathrooms. Its water-resistant and waterproof nature can make it withstand even wet climates. Plus, vinyl plank is impervious to termites, so that you can install it outdoors as well. Vinyl flooring offers a good alternative in areas where wood installation will be tricky.

Vinyl Plank Flooring Can Add Resale Value to Your Home

Another benefit of vinyl plank flooring is that it adds resale value to your home. It’s easy to clean and maintain, so once you install them in a new home, they will stay looking fresh for years. Its durability will make the homebuyer know they’re getting a beautiful floor that will last for a long time.

Vinyl Plank Flooring Can Be Customized With Various Designs and Styles

You can get luxury vinyl floors with the same styles as the most expensive hardwood flooring. Get vinyl plank flooring in different colors, textures, and prints to create beautiful patterns on your floors. 

This way, you can get vinyl floors that look just like luxury vinyl tile or any other kind of wood floor without paying five times more for real wood! Vinyl plank flooring is regarded as superior flooring to sheet vinyl and laminate flooring but less prestigious than solid hardwood and porcelain tile.

ffordable and Comfortable Flooring

Vinyl plank flooring is a more economical choice than genuine wood flooring but more comfortable and luxurious than laminates. With a vinyl plank floor, you get the same beauty as with the most high-end wood floors and extra comfort from walking on it. The base of the rigid core is attached with foam or cork underlayment to add comfort and provide sound absorption.

Vinyl plank flooring is usually made from recycled rubber tires mixed with plastic, and the rubber makes the floor more comfortable and reduces noise. Vinyl plank is also moisture resistant, making it a good choice for kitchens and other high traffic areas because of the slip resistance feature, which you will find important if you have children or pets.

Disadvantages of Vinyl Plank Flooring

Just like other floorings, both luxury vinyl and rigid core vinyl flooring have their disadvantages. Here are those cones:

Disadvantages of Vinyl Plank Flooring
Image credit: https://homeinspectioninsider.com/

Vinyl Floor is Not a Natural Wood Floor

The disadvantages of vinyl plank flooring are all based on its lack of resemblance to real wood. Vinyl plank is just that,plastic. If you want a real hardwood floor look and feel, then vinyl is not the right choice for you. No matter how better the floor photograph mimics the natural wood, it will still feel hollow and hard when you walk on it. It won’t make the house feel as luxurious as natural wood.

It’s Prone to Fading and Discoloration

The second disadvantage of vinyl plank flooring is the inherent threat of fading. All hardwood flooring contains some amount of sunwood in their construction, including luxury vinyl and rigid core vinyl planks. Sunwood is a natural component found in real lumber that allows it to expand and contract with changes in humidity levels.

However, just because it contains wood does not mean your vinyl plank flooring is safe from the sun’s harmful rays. If you leave your home without blinds or drapes, and it doesn’t matter if you live, the sun will fade your floor within months. These products are prone to fading when exposed to direct sunlight.

Hard to Remove

While installing vinyl plank flooring is easy, removing the glued-down vinyl is quite another story. Think again if you consider vinyl plank flooring because it is easier to maintain than real hardwood.

Susceptible to Dents and Damages

The wood composite core is soft and susceptible to dents. It can handle some misuse for some time, but pulling and pushing furniture, dropping sharp items, and walking with high pointed heels will scratch, dent, stain, and gouge the flooring.

Give it some time after installation before bringing in your furniture. Also, select a padded back version of SPC flooring to prevent unwanted noise and vibrations when people walk into the room.

Vinyl Plank Floor Cannot Be Refinished

The vinyl plank floor is very light and thin to refinish and repair. The top prefinished wear and tear-resistant layer make it hard to repair. If you misplace the plank, it cannot be refinished with a matching shade or texture.

Seams on some vinyl plank floors are too noticeable and may require tile-look lines rather than the usual straight line installation pattern. It is preferred that you plan your layout before installing to avoid visible seams in your home.

Vinyl Plank Floor Resale Value is not as High as Hardwood

This flooring material has limited resale value, unlike hardwood. The value of the house is limited and not too much unless you change the material or upgrade.

It’s a Non-Biodegradable Material

The manufacturing of vinyl flooring requires the use of toxic chemicals, and after installation, it emits high volatile organic compounds which are not eco-friendly. These off-gassed VOCs can affect the health of indoors, especially if there are no windows or proper ventilation.

The New Engineered Vinyl Plank Flooring with Adhesive Strip

This is the latest version of vinyl flooring. It’s quite different from the traditional one with its smart courses. The designs are purposely created to prevent visible seams, no gapping or expansion gaps, and resistant to most chemicals, including pet urine, water damage, mold, and mildew.

 You can install this type of vinyl plank flooring much easier than the old version; peel and stick. It can be installed in just an hour or so in a moisture-free work environment. However, the downside is that this type of vinyl plank flooring is more expensive than the old version.

You can also call it a more water-resistant engineered wood floor because moisture changes won’t affect the vinyl core like a layered engineered core.

FAQS on Vinyl Plank Flooring Review

Is vinyl plank flooring toxic?

Vinyl flooring emits a gas that is considered toxic, especially to people with underlying respiratory conditions.

How long does vinyl plank flooring last?

It can last from 5 to 25 years, depending on the quality and your level of maintenance.

Final Thought on Vinyl Plank Flooring

Vinyl flooring has many benefits. It’s not as expensive as hardwood, and it’s easy to install and maintain. The biggest selling point of vinyl planks is that they’re durable, waterproof, and scratch-proof. So, if you don’t want to worry about refinishing for years, then vinyl planks are a great choice.


The post Vinyl Plank Flooring Review: Pros and Cons appeared first on Kitchen Infinity.

Easy Color Schemes From A Color Wheel

A color wheel is a perfect tool for deciding on a paint job or designing your next room.

Knowledge of what colors are opposite each other can be used to create entire palettes, and some schemes are more appropriate than others depending on where you plan to put them to use.

In this article, we’ll show you the most important things to know about color schemes and offer some advice on how they can be used in your home.

Let’s dive deep into this topic. 

The color wheel is a great way to get inspiration for your next paint job.

Whether you’re looking for kitchen paint colors when you have white cabinets or need to find the right bedroom colors, a color wheel is a great tool. The same goes for exterior house painting. Each color you see has similarities and differences to other colors on the wheel based on their level of intensity and brightness (or dullness). You can use these findings to determine what color would work best in your home.


Image Credit: http://blog.closetomyheart.com

Choose colors that are opposite one another on the wheel

The complementary scheme is when two opposite colors – typically one warm and one cool – are paired together in a room. For instance, you can paint your walls in an intense yellow hue, then pair it with a strong navy or cobalt blue color for accent pieces. This particular pairing is one of the most visually appealing color schemes around.

The triadic scheme is when three colors are evenly spaced on the wheel. This particular scheme can be very versatile because it offers a wide array of options for harmonizing your room. For instance, warm neutrals make great compliments to this plan, as do earthy or muted hues.

Don’t limit yourself to just two or three colors either – try adding a complementary or contrasting color for some visual interest and appeal. It’s also important not to overdo it – sometimes less is more when it comes to planning out your perfect palette.

Sometimes color inspiration can come from the most unexpected places. If you’re trying to figure out what color of yellow would look best on your kitchen or bathroom walls, then taking a peek at the color wheel may help you get inspired.

When looking at paint for your walls it’s important to note that some colors are better than others depending on where they are placed in your room (obviously paint with super high VOCs should not be used near windows). Note how pink looks amazing against lighter shades of blue and gray but clashes with too much orange. Similarly, green pops when paired with light neutrals like yellows and grays but will clash if placed next to purples or reds (unless that is its complementary scheme).

There are many color schemes out there

To avoid clashing, you’ll need to know a little bit more about complementary and contrasting colors. Complementary schemes are when two colors directly opposite each other on the color wheel are paired together. This pairing creates a vibrant look but also one that may be too overwhelming depending on how dark or light the hues are.

That’s why it’s important to pair your complementary colors with those from either side of their analogous group (this is where our third scheme comes in). The split complementary scheme pairs a color from its analogous group with two colors from either side of its complementary group.

The triadic scheme is another way to harmonize your room using three different colors – typically one warm, one cool, and one either neutral or vivid. You can also try new things like tints, tans, and shades which are color hues that have been altered with black, white, gray, etc.

There are endless color schemes to choose from but it’s important to remember that too many contrasting colors won’t look great together unless you’re going for a bolder look. Experimenting is one of the best ways to find out what works for your home so don’t be afraid to try something new.

Steps to choose the right paint colors

Follow these steps to learn how to choose the right paint colors

Step 1: Find Your Color Scheme

Choosing colors for your walls is an important part of decorating, but it can feel overwhelming. There are thousands to choose from between paint, fabric swatches, and accessories so it’s important to narrow down the best place to start your search.

Color schemes are found all over home design so you can take inspiration from anywhere – whether it’s a trendy interior blog or your favorite nature scene on a postcard – and translate that feeling into color palettes for any room in your house including living rooms, kitchens, bedrooms and children’s rooms.

Color schemes work well on their own but they also pair well with one another so if you find a scheme you love, try playing around with different combinations to see what you like best.

As you’re choosing your colors, it’s important to keep in mind that some areas of your home receive more light than others so dark shades will show the most wear and tear. 

Step 2: Choose Your Wall Color

This is where things can get exciting – play around with different accent walls or use all four ideas to bring out the best of any space in your house. Paint swatches are available at every hardware store but if painting isn’t an option, consider using vinyl wallpaper instead. It has become incredibly popular over the last few years because it’s quick and easy to install, removable, and comes in so many different colors. It also looks great against darker accent wall hues since lighter shades can be overwhelming.

If you prefer the look of fabric wallpaper but don’t want to put too much work into finding the right color palettes, consider using paint chips instead. They’re available at every hardware store and are an inexpensive alternative to paint that easily allows you to play around with various ideas until you find that perfect hue for your walls.

Step 3: Curate Your Accessories

Now that your floor plan is done and you have all four room color schemes ready to go, it’s time to pick out accessories. This is all about personal style – you might like to decorate with modern art or vintage pieces, black and white photography, or colorful botanicals. Find what you love and make it the focus of your room.

Step 4: Decide on the paint colors

The final step is choosing paint colors for hardwood floors, baseboards, crown molding, and window frames – these elements might not be included in your floor plan but they’re still just as important in bringing out the best of each space in your home.

For example, a minimalist interior might not include much in the way of trim or molding but that doesn’t mean you can’t bring out the best in your home. It’s possible to have an incredibly beautiful space with little more than smart paint color choices and the right accessories.

Whether you’re looking for French country style inspiration or modern simplicity, we’ve got a wide range of palettes available to make every room in your house as stylish as it is comfortable.

There are thousands of paint colors to choose from but using color scheming will ensure that your room looks intentional – even if it’s full of eclectic pieces.

Color Psychology: How Do Colors Affect Mood & Emotions?
Image Credit: http://londonimageinstitute.com

Final thoughts on easy color schemes 

In conclusion, starting to use color scheme generators might be hard because it is quite easy to get confused by all the different options offered. It is however a very good way of getting started into the world of color theory and understanding how it works. I think that once you have used these kinds of tools for some time, you’ll feel more confident in choosing your colors, knowing why you are using them, and what emotions they are evoking.

The post Easy Color Schemes From A Color Wheel appeared first on Kitchen Infinity.

Did you miss our previous article…
https://www.thelavkitchen.com/?p=247

How To Grow Horseradish

Horseradish is a hardy perennial plant that can be grown in many areas. It’s also very easy to grow, so everyone should have it in their garden. This plant does require some special care and attention. If you want to add horseradish to your garden, you must learn how to take good care of it.

We’ll cover how to grow, harvest, store and use your own fresh homemade horseradish sauce.

How to Plant Horseradish

The roots need a long growing season to produce large roots. Plant horseradish in full sun, although it will also tolerate partial shade. Grow horseradish in well-drained soil and ensure you remove stones and lumps that might cause the roots to split. To plant horseradish sets, dig a hole about 1 foot deep with plenty of compost mixed in. Drop one set into the hole and backfill with your potting mixture.

Horseradish grows in cool weather, so for the best flavor, plant it after the last anticipated frost date for your area. Set the crowns at the soil for spacing and planting, then plant horseradish roots in a shallow hole or trench at least 12 inches apart. Slice the horseradish root cuttings at a 30-degree angle, then fill the trench until the wide end of the horseradish root is covered. 


Image credit: https://cdn.harvesttotable.com/You should space horseradish roots 24 to 36 inches apart. Other plants such as potatoes and yams are the companion plants you should plant with horseradish. Make sure you choose a container that will allow horseradish roots to grow at least 24 to 30 inches deep.

Horseradish Care

Light

Horseradish plants tolerate full fun and partial shade. However, too much shade or more heat won’t be good. They should receive at least six hours of direct sunlight a day. Locate the beds with exposure to full sun, moist but well-drained soil, and protection from strong winds.

Water Horseradish Care

Horseradish requires consistent watering, moist soil, and cool weather. However, don’t overwater it, or you can get moldy or woody roots with weak flavor. You should water the plant daily with about 1 inch of water to keep the soil moist, not wet. Weed growth can hinder light penetration in summer, so weed out excess growth as hot weather approaches.

Soil Care for Horseradish

To get the most out of your horseradish crop, it’s very important that you select a planting site with rich soil. Horseradish grows well in most types of soil but prefers a moist, loamy texture. After you’ve plowed up the area for cultivation, add a generous amount of manure or organic compost to enrich the soil. Also, make sure you test the soil pH and ensure it’s neutral because horseradish thrives in slightly alkaline conditions.

Temperature and Humidity

Horseradish thrives in cool weather. Horseradish grows well in temperatures ranging from 45-75 degrees and requires a humidity level of at least 70%. But humidity won’t be an issue if its soil moisture needs are met and good airflow around the plant.

Fertilizer

Fertilize your horseradish during planting time and after every four weeks. You can make compost to use for this, use compost tea, or a commercial 10-10-10 vegetable fertilizer and ensure you follow the product’s instructions.

Pruning Your Horseradish

Horseradish won’t need pruning if you grow it as a food crop. But if you plan to use the root for medicinal purposes, cut back the top of the plant after harvesting in April or May, depending on your climate zone. The greenery will rejuvenate after this type of pruning and continue its life cycle.

Protecting Your Horseradish from Pests and Diseases

Keep your horseradish healthy by keeping it weed-free and applying mulch over the soil after planting. Horseradish has few pest or disease problems, but if you see insects eating the plant’s leaves, be sure to treat them immediately because this could spread to nearby plants.

Propagating Horseradish

The most common way of propagating horseradish plants is by saving root cuttings. This isn’t only an inexpensive way of creating new plants, but it will allow you to use excess roots you don’t eat.

Propagating Horseradish
Image credit: https://www.gardeningknowhow.com/

How to Harvest Horseradish

When it comes to horseradish harvest, these plants take one year to mature. In warmer climates, it may take a little longer, but most gardeners start harvesting their roots in the fall of the first year. Be sure to harvest them before they go to seed.

If you plant them in the early spring, wait until the following early spring to harvest them. They’ll take roughly 140 days to harvest. They’ll develop well during the late summer months. Avoid harvesting horseradish until late fall or early winter, even if the harvesting time has passed.

How to Harvest Horseradish
Image credit: https://mnprairieroots.files.wordpress.com/When harvesting horseradish, loosen the soil around it. You can use a garden shovel or a garden fork to carefully dig up the horseradish roots. It’s important to harvest horseradish before the first frost of winter

How to Store Horse Radish

Once harvested, store horseradish in an airtight container. Make sure you clean the roots under running water and scrub any dirt before storing them. Allow the roots to dry before you store them. Store horseradish in damp sand in the root cellar in a dark area. If you want to use it immediately, keep a small supply of roots in a perforated plastic bag in the refrigerator for a couple of months.

Recommended Varieties

The common horseradish Armoracia rusticana is not the only variety available. There are also some varieties, including common horseradish and bohemian horseradish. A common horseradish has broad, crinkled leaves with superior root quality but is more susceptible to disease. 

On the other hand, bohemian horseradish has narrower, smoother leaves and is more disease-resistant. It has a slightly lower root quality. Plus, there’s wasabi, also known as Japanese horseradish. Wasabi and horseradish come from one family. They both have juicy flavors, even though they’re distinct. Wasabi leaves are also not long like horseradish leaves.

Preparing Horseradish

Freshly grated horseradish emits fumes that irritate eyes and noses. Wash horseradish roots, but do not scrub or peel them since the skin helps prevent enzymes in the root from turning to mush when grated. Rinse off any dirt after washing with cold water. Peel three to four sections of the root, then cut into half-inch chunks and drop them in your blender or food processor. Add a quarter cup of cold water and a bit of crushed ice and grind to a fine texture.

Making Horseradish Sauce

Mix your grated horseradish sauce with white vinegar or lemon juice, salt, sugar, and crushed ice to get a thick paste that won’t separate when you put it on your food. For mild horseradish, add the vinegar immediately after grinding.

Cooking with Horseradish

Horseradish is known as a classic accompaniment to hot and cold roast beef. However, there are still other ways to use the inimitable flavor of homemade horseradish. You can blend it with yogurt and sour cream to make a raw sauce that pairs well with seafood, such as shrimp and oysters. 

You can also mix your horseradish with sugar and lemon juice for a sweet and sour sauce to accompany boiled or fried fish. Horseradish also makes an excellent marinade for beef before cooking. When you make roast beef sandwiches using horseradish, spread it on both pieces of the bread. When using it in hot dishes, add it before serving because cooking will destroy its flavors.

FAQS on How to Grow Horseradish

Can you plant horseradish from the grocery store?

Gardeners used to grow horseradish from plants and root cuttings in the spring or fall. Finding seeds is very difficult, but you’ll find roots at farmer’s markets, supermarkets, and retail and mail-order stores.

re horseradish leaves edible?

Yes, the leaves can be eaten raw or cooked, although they can be poisonous in rare circumstances.

Final Thought on How to Grow Horseradish

As you can see, horseradish is packed with a lot of benefits. It’s also easy to grow, although harvesting is difficult to work. The first step should be familiarizing yourself with what this plant looks like so you know when to harvest it.

The post How To Grow Horseradish appeared first on Kitchen Infinity.

Did you miss our previous article…
https://www.thelavkitchen.com/?p=244

25 Best Plants for Rock Gardens

Do you have a rocky landscape and are looking for something to grow there?  Consider growing perennial plants that can withstand your soil and harsh conditions. Rock garden plants are non-demanding plants that can grow easily in your rocky landscape.

These plants are also drought-tolerant, and any poor soil conditions or extreme heat won’t stop them from making a colorful splash in your rock garden. As long as there’s good drainage, these plants will thrive and elevate the hardscape look provided by gravels and rocks. Take a look at these best rock garden plants.

1. Rock Cress

Rock cress is an evergreen perennial that grows to just 12 inches high. It makes a nice edging plant with narrow leaves and blooms in late winter through spring. Its clusters of pink or white flowers make this creeper plant beautify any rock garden.


Image credit: https://www.gardenia.net/

Both full sun and partial shade are accepted by rock cress, but well-draining soil is highly needed. It can be grown in any soil type except for water-logged conditions. Rock cress is also a hardy plant that matches rock garden aesthetics and requirements.

2. Thrift

Thrift is also known as sea pink, native to the coast of Great Britain. This evergreen perennial grows 1 foot high with grassy green foliage and flowers that last for a long time. It can be planted in a rock garden due to its small size. 

This is a low-maintenance plant that you don’t need to worry about much. Like other perennials, this sea pink plant prefers well-drained soil because poor drainage can cause rot issues.

3. Blue Fescue Grass

Blue fescue is ornamental grass and is suitable for rock gardens and small spaces. This grass type can trail or cover the ground, making it a perfect choice to spread around rocks of any size. It produces its best foliage in full sun but can also tolerate a little shade.

4. Creeping Phlox

This plant produces clusters of small flowers which are pink in color. The creeping phlox can grow in rock crevices with minimum maintenance. It is a perfect ground cover if you have an area that gets at least four to five hours of sun each day. It grows well in sandy soil and can tolerate heat and drought better than some other phlox species.

Creeping Phlox
Image credit: https://gardenerspath.com/

5. Sedum Autumn Joy

This versatile perennial is perfect for your rock garden. They’re drought tolerant and adapt well to full sun and part shade, which means they’re suitable for any area of your yard or garden. It blooms bright yellow flowers in late summer through mid-fall fall and does best in well-draining soil. With its height and density, sedum autumn joy is a suitable substitute for shrub.

Sedum Autumn Joy
image credit: https://www.almanac.com/

6. Russian Sage

This fragrant flower is a good choice for rock gardens and other low-maintenance garden beds. It tolerates drought and heat well and forms blue, white, or purple flowers from mid to late summer. The fragrant leaves emit a strong scent as they warm in the sun, making them a great addition to outdoor spaces.

Russian Sage
Image credit: https://www.thespruce.com/

7. Red Creeping Thyme

Another beautiful choice for rock gardens, this low-growing plant is hardy, drought-tolerant, and spreads out to create a nice ground cover. The flowers are pink in the summer, with their leaves being evergreen. 

Red Creeping Thyme
Image credit: https://kiwinurseries.com/

It tolerates heavy rainfall well but doesn’t do so hot in dry conditions. With its delicate greenery and fragrant pink blooms, red creeping thyme can be tucked among pavers and along walkways to add beauty and repel weeds.

8. Soapwort

This plant grows to about 8 inches and bears pink flowers. It is extremely drought tolerant and does well in the sun or shade but doesn’t work well in wet conditions. The flowers of soapwort resemble the look of phlox blossoms. They are usually small and produce a sweet fragrance. In terms of lower color, these alpine gardens bloom in shades of pink and white, and the green foliage can have some tinges of blue.

9. Thyme

Thyme can be a great decorative accent to any rock garden. It’s recommended to use thyme to cover more specific areas like an empty corner. But if you want to cover the entire ground, don’t worry because you can still find thyme varieties for the job. Thyme herbs have bright green foliage and light purple flowers. You can also use their aromatic properties to season your food.

10. Irish Moss

If you want to add a splash of lively green into your rock garden, then consider this lush groundcover. Irish moss thrives in full sun but can also tolerate intense heat. It requires regular watering, so plant it in a location that is easy to reach with water and remove it because the plant can also suffer from overwatering.

11. Prickly Pear Cactus

Prickly pear cacti are low-growing perennials, so place them in the rock garden to give it a unique look. It is an excellent plant for containers since it can’t survive cold temperatures and won’t require much maintenance. Prickly pear cactus also have pines on the leaves, so take care while planting them in your garden.

Prickly Pear Cactus
Image credit: https://upload.wikimedia.org/

12. Ice Plant

Ice plant, also known as glacier plant, is an evergreen perennial that will remind you of glaciers found in the mountain. It can be used to make low hedges or walls due to its compact structure. You should remember that an ice plant requires full sun, making it perfect for rock gardens. This compact plant is also heat and drought-tolerant but will die if it doesn’t have good drainage.

13. Purple Fountain Grass

If you want your garden to make a statement, plant this perennial plant as a focal piece in your rock garden. This ornamental grass grows best in full sun but can also tolerate little shade. You can use it as a standalone specimen plant or plant it as groupings for greater impact. With its low-maintenance and non-invasive, this perennial flower will continue to wow gardeners for many years to come.

14. Snow-in-Summer

If you want to have low-maintenance flowers and come back every year, plant the Snow-in-Summer perennial flower. It’s a small shrub with white blooms which can give off a mystical vibe to your garden. The plant will grow 1 to 3 feet tall so that it won’t take up too much ground space in your garden. 

Snow-in-Summer
Image credit: https://www.gardeningknowhow.com/

It gets its name from its pristine white flowers that bloom in early summer and blanket the ground like a snowfall. It’s a low-growing plant and can thrive in poor rocky and sandy soil as long as the drainage is good.

15. Hens and Chicks

This succulent plant comes in different varieties like the Hens and Chicks Rough, which has red and yellow flowers. It blooms from early summer until the first frost. The plant only grows 4 to 8 inches tall, so it’s perfect for small spaces, rock gardens, or even ground cover. 

Hens and Chicks
Image credit: https://www.gardeningknowhow.com/

This plant doesn’t need a lot of water to grow, making it ideal for rocky soil. This plant is also a flowering plant and is a great addition to the garden anytime because of the leaves’ red, pink, and purple highlights.

16. Candytuft

Candytuft blooms in mid-spring with showy flowers and is commonly used in rock gardens or as edging.  Its petals form a pretty pattern, and the flowers have an unpleasant aroma. Plant the seeds in early spring. It is best to group about three or four plants or use them as edging. 

It has bright yellow flowers that are very attractive to bees, butterflies, hummingbirds, and other pollinators. Like most golden glow families, this plant needs little watering because it’s adapted to dry soils. The flower blooms in early spring and summer.

17. Geranium Shepherds Warning

It blooms in late spring to late summer and is easy to grow from seed. It does well in either normal or clay soil but will tolerate drought. They look good when planted with other flowers, herbs, and vegetables. With its pretty pink flowers, it can be used in most border garden areas or containers. 

18. Dragon’s Blood Stonecrop

Dragon’s blood stonecrop is a small rock garden plant classified under creepers. It can tolerate some drought and shallow rocky soil. This plant can spread up to four inches and will bloom from late spring to early summer. If planted under the sun, it has purplish stems and leaves with red flowers. It’s a great rock garden plant that should be cultivated for its easy care and unique look.

19. Lavender

If you want to add a sweet fragrance to your rock garden, this is the best choice. Lavender is a small herb plant that grows from two to three feet. It has narrow leaves and flowers growing on the top of the stalk. Lavender loves sunshine and will bloom in summer.

Lavender
Image credit: https://www.gardenia.net/

Lavender is suited for hot weather and poor soil, making it ideal for rocky landscapes. It grows well on its own and can also do well when grown with other shrubs and ornamental grasses. It requires a good amount of sun exposure and medium moisture, plus well-drained soil.

20. Ajuga Black Scallop

Ajuga Black Scallop with green leaves and fragrant blue flowers has an interesting texture. It is a low-growing plant that spreads to form clumps of foliage that are very effective for ground cover. The dark scalloped edges on the green leaves are eye-catching, especially when set against the light lavender-colored flowers.

 Ajuga Black Scallop is a hardy plant that requires bright sunlight and moist to dry soils. It will do best in USDA zones 4 to 9 but can be grown perennial even in colder regions by protecting the roots with mulch during winter months. This low-maintenance plant flowers from mid-spring until fall and do not require deadheading.

21. Lamb’s Ear

Lamb’s ear is an herbaceous plant grown more for its ornamental value than for culinary purposes. This plant is very easy to grow and thrives in full sun or part shade. Lamb’s ear has silvery gray leaves that are quite soft to the touch.

Lamb’s ear requires moist soil but can be easily grown in poor soils by adding compost before planting. Its tolerance for drought and poor soil also makes it a good rock garden plant. You also need to learn how to care for and control lamb’s ear for it to grow well.

22. Rugosa Rose

Rugose rose is native to East Asia and bears small, white flowers in the summer. This plant requires full sun but can tolerate light shade. Rugosa rose has grey-green leaves that turn reddish-orange during the fall months. 

The blooms are edible and resemble miniature cabbage roses. Good air circulation and avoiding wet soil are what this rocky plant needs to remain healthy. Annual pruning is also needed to keep this shrub in a pleasing shape.

23. Columbine

Columbine is an herbaceous perennial plant native to Western Europe, North America, and western mountainous regions of Asia. Columbines can grow in any rocky environment and thrive with full sun exposure to partial shade and medium moisture.

It produces beautiful blooms in blue, purple, white, or yellow coloration. It spreads easily from seed, so cutting and removing the seed heads following bloom will help keep it in the garden.

24. Euphorbia

Euphorbia leaf plants are a genus of flowering plants with about 2,000 species. Euphorbia plants prefer rocky and dry environments, thriving in full sun exposure to partial shade and drought resistance. 

If you live in warm climates, this type of plant can be used in landscapes, including desert rocks. Euphorbia, like cacti, can store water in its leaves or stems for days when there’s no rain or moisture; it will take care of itself even without you.

25. Alyssum 

Alyssum is a genus of low-growing, often branching subshrubs native to the rocky mountainous regions in the Northern Hemisphere. Alyssum flowers are mostly white or pink, with four or five petals that may resemble daisies.

However, this type of plant does not need sun exposure and can survive drought conditions. As a ground cover, it can serve to prevent soil erosion. This plant is also appreciated for its subtle-like honey fragrance.

FAQS on Best Plants for Rock Gardens

Can you plant roses in a rock garden?

Yes, roses can be planted in rocky gardens as long as you make some amendments before planting because of the poor nutrients and less water in rocky landscapes. For them to grow well, you must learn basic care such as how to prune roses

Final Thought on Best Plants for Rock Gardens

As you can see, many types of plants can be included in a rock garden. It depends on the look that you want to achieve and your personal preferences. For example, if you love blooming flowers, there is a wide array of plants for a rock garden that will bloom in different seasons. As much as possible, it is best to choose low-maintenance plants.

Finally, it is very helpful to find out what kind of soil or substrate your specific plants need. With that knowledge, you will be able to choose the best plants for rock gardens.


The post 25 Best Plants for Rock Gardens appeared first on Kitchen Infinity.

Did you miss our previous article…
https://www.thelavkitchen.com/?p=238

How to Prune Roses

Pruning roses can be a tricky thing to do. If you don’t know what you’re doing, your plants could end up looking worse than before. One of the things that make pruning roses difficult is that there are so many different types of roses and it’s hard to know which ones need to be pruned, when, and how much they should be cut back. But if you know how to plant roses then you should also know how to prune them.

Fortunately, we provide you with step-by-step instructions on how to prune roses properly. It’s easy enough for beginners but also has some good tips even if you’ve been working with rose bushes all your life. Let’s get started!

When to Prune Roses

Pruning roses is not something you should do too often. The best time to prune these plants is at the end of winter, i.e., after they have completed their blooming cycle and right before the new one begins in spring. Dead flowers can be cut back anytime in the summer. During the flowering season, deadheading spent blooms will encourage more blooms and maintain an attractive shrub. 

Pruning is also determined by the class of the rose plant and the hardiness zones in which it grows. Also, trim longer stems after a first-killing frost to keep your roses from snapping in winter storms.

Where to Prune Roses

The most obvious areas to prune on rose bushes are those with dead or diseased plants, absolutely out of control, and those that show no signs of life. These dead canes may result from disease, pests, or just a general lack of attention.

You should only remove branches from healthy plants as much as you need to allow airflow. In addition, these plants will also need a little trim back now, and then so they don’t take over the entire garden.

To keep the rose garden looking neat, you’ll also need to trim it periodically throughout spring and summer until autumn arrives. You can even use hedge trimmers to add a finished look. The ultimate goal is to maintain a V formation or an open vase shape.

Tools and Materials

Gardening glovesHeavy long sleevesBypass pruning shearsWhite glue

Pruning Steps

Remove all Remaining Leaves

Wear gloves and pull on heavy long sleeves as you’ll be removing leaves that can cause sap to splatter. For this task, you’ll need a pair of pruning shears. Start at the bottom of the plant and work your way up, making cuts where branches grow out from the main stem. Keep in mind these cuts will stop the growth of rose flowers, which is the desired result.

Prune from the Ground Up

As you take the inventory of your rose bush, note down its overall health and shape. Then go slow while pruning the dead canes at the base and opening up the interior to light and air circulation.


Image credit: https://www.gardendesign.com/

Remove any Broken, Dead, and Diseased Material

How do you know that the wood is dead or diseased? You have to cut it, and if it is brown, it’s dead, but if it’s green, it’s living. Cut away any diseased branches. Cut them flush with the bush’s base or at a 45-degree angle, exposing their white insides. If the flesh is not white, cut until you reach the living canes.

Remove any Broken, Dead, and Diseased Material
Image credit: https://hips.hearstapps.com/

Open Up the Center of the Plant

Start pruning the center of your rose bush by removing any canes crossing or rubbing against each other. Cut them at 45-degree angles, exposing the inner flesh. Also, cut off any unneeded growth shoots growing between your rose plant’s main stems and branches.

Remove Thin, Weak Growth

Remove those twiggy canes that are thinner than a pencil. If left, these thin canes can grow gangly and produce weak growth. If they are allowed to grow, the plant will become top-heavy and fall over the next season.

Remove Sucker Growth from the Base of Grafted Roses

Suckers appear at the base of a grafted rose bush. These vary from soft, thin shoots to stronger ones that resemble a small tree trunk. Left on its own, a sucker will turn into another plant entirely and take away needed nutrients from the mother plant.

Remove Sucker Growth from the Base of Grafted Roses
Image credit: https://www.thespruce.com/

When pruning bushes after flowering is finished, stop pruning at least 2 inches above a five-leaflet leaf. When your rose bush has finished flowering, cut off weak growth and remove suckers from the base.

Prune the New Growth

Prune the remaining canes by cutting them at a 45-degree angle and about a 1/4 inch above a five-leaflet leaf. Remove the strongest cane when pruning, leaving three to five of the most vigorous canes for this season’s growth. New stems should grow in the direction of the bud, and they should grow outward and not inward.

Seal Freshly Cuts with White Glue

Cut off dead or dying wood and spindly growth with hand pruners or a knife. Cut at a 45-degree angle where it meets a new stem. Seal fresh cuts with white glue to prevent rot and cane borers from entering the plant. After you have finished pruning, fertilize your bush with rose food for new roses.

Follow with Clean Up

After pruning, make sure you get rid of the debris around your rose bush. Throw it away, burn it, or compost it so that you don’t get pests and diseases in your garden roses, such as black spots and powdery mildew. These can take over quickly if left untreated.

Rose Pruning Tips

For diseased branches, major pruning should be done in early spring. Dead branches can be red, yellow, or splotchy colored. If you don’t know the type of rose bush, then watch it throughout the growing season. If it blooms on the new growth, trim it next year while the plant is breaking dormancy.

If it blooms early on last year’s canes, then it’s an old-time type rose. So, don’t prune it until after flowering is complete. For maintenance during the blooming season, the deadhead blooms to a strong node and removes fallen leaves from the ground.

It’s best to trim roses as soon as they finish blooming because flower buds for the next season form as the current flowers fade. In bloom time, these flower shoots should be removed during deadheading, or they will go to seed and not produce any more flowers this year.

Roses that Bloom Once on New Growth

Modern roses like hybrid teas, grandiflora, and floribunda bloom best on the current season’s growth. Species roses, old roses, and once-blooming shrub roses are also more primitive types that bloom first on dead wood during mid-summer. 

All these types should be pruned in late winter or very early spring before greening up and branching. Create an open vase shape by removing the center stems and any crossing branches.

 These roses bloom more than once per season and they bloom on new wood. Leave a healthy cane evenly spaced around the plant, then cut it at various lengths to encourage blooming.

Roses that Bloom Once on Old Wood

To keep roses like ramblers in check, you have to prune them to remove dead, broken branches, and dead wood after blooming. Rams continue to bloom on old wood, so cut these roses back severely once the flowers fade by about one-third.

Everbloomers

Shrub rose bushes like the knock-out varieties, and the fairy is repeat bloomers, and they flower on maturity. Leave them unpruned the first two years to increase vigor. Then, remove 1/3 of the oldest canes, plus any dead, diseased, and dying canes. Knock-outs are ready for their first pruning in their second or third season.

Climbers like climbing roses and William Baffin Rose may also repeat bloom. So, trim it early to remove dead canes. Avoid annual pruning until summer after the peak of the bloom. Note that climbing roses have two types of roses which include main and lateral.

Everbloomers
Image credit: https://www.gardeningknowhow.com/

Main canes come from the base while lateral canes produce flowers. Lateral canes also encourage blooming. However, you shouldn’t fuss about pruning to the outward-facing bud because shaping climbing roses this way isn’t necessary.

Rose hips should also be left in the warmer climates through the fall and winter just like other roses. Do not trim the last blooms of the season; instead, remove petals. However, in colder climates, you should remove the rose hips before winter.

FAQs on How to Prune Roses

What is the best time to prune roses?

Late summer and early winter is the best time to prune roses because that’s the time new growth begins.

Which type of pruner to use when pruning roses?

Always use a good quality pair of bypass pruners or secateurs when cutting canes, young or old stems, and small branches.

Final Thought on How to Prune Roses

As you can see, pruning is vital to the health of your rose bush. It helps promote new growth and encourages flowering. It’s the type of rose bush pruning that will keep your rose garden healthy for years to come. Pruning stimulates growth and leads to more blooms and a healthier plant overall.


The post How to Prune Roses appeared first on Kitchen Infinity.

Did you miss our previous article…
https://www.thelavkitchen.com/?p=160