9 Best Quiet Bathroom Exhaust Fans

9 Best Quiet Bathroom Exhaust Fans

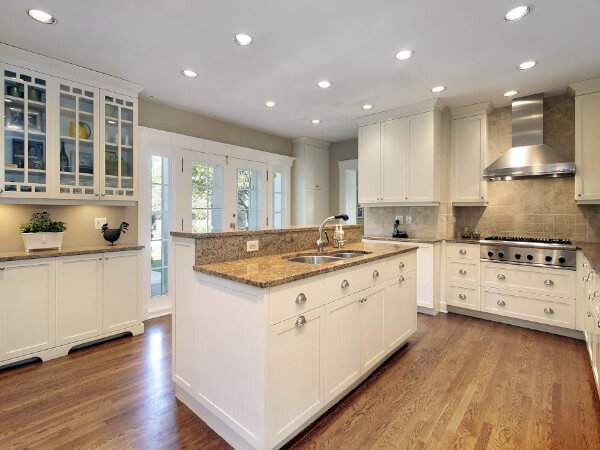
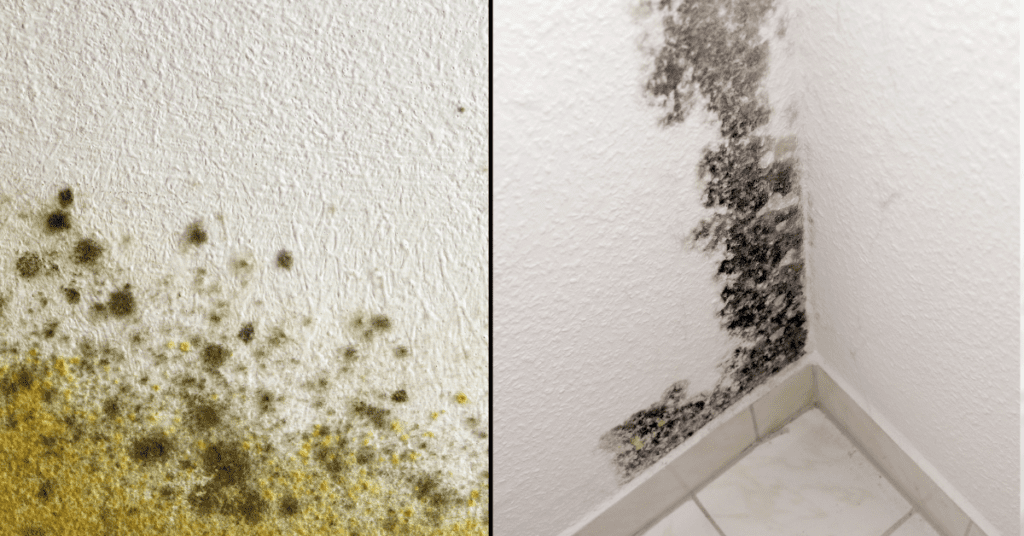
Bathroom moisture and odors can lead to a variety of problems, including slippery floors, damp towels, and unhealthy fungi. Fortunately, installing an exhaust fan in your bathroom is an easy way to keep these problems at bay. Exhaust fans remove moist air from the room so that it doesn’t get trapped inside where it can damage over time.

However, you’ll want to choose the right type of fan for your space before making a purchase. The right type of exhaust fan will also reduce unpleasant odors and allergens like pollen and pet dander without causing any damage to nearby surfaces or leaving behind harmful residue after use.

Here are the quietest bathroom exhaust fans that stand up to the challenge.

1. Panasonic Whisper Fit EZ Retrofit Fan

This is the quietest bathroom fan for those who want a simple and affordable solution to keep the air in their bathroom cleaner, fresher, and free from odors. The Panasonic Whisper Fit EZ Retrofit Fan is perfect for those who want a home improvement project that won’t draw too much attention because it doesn’t look like it came straight out of a science fiction movie.


Image credit: https://dynastybath.com/

This is an incredibly powerful bath fan with a noise rating of fewer than 0.3 sones. This makes it an ultra-quiet bathroom fan with the LED light in the market that you can’t pass by if you’re shopping for the quietest bathroom exhaust fan. This fan is also low profile and comfortably fits a ceiling space or wall.

It’s an affordable choice for delivering quiet, energy-efficient, and effective exhaust ventilation. If you’re doing residential remodeling, hotel construction, or renovations, then this is a perfect choice. Unlike other quiet exhaust fans with plastic blades, this Panasonic product uses galvanized steel blades.

If you’re also looking for a fan that can keep medium to large bathrooms dry without being a noisy nuisance, this is the right choice.

Pros

Ultra silent at less than 0.3 soneEnergy-efficient and durable designPowerful enough to quickly move air and keep the bathroom dryIt’s among the quietest choices in the marketEasy to install in 4 or 6-inch ducts

Cons

It’s one of the expensive options in the marketSome LED bulbs won’t fitUsed for 4-inch or 6-inch, so if you have a 3-inch, you’ll need an adapter

2. Broan Very Quiet Bath Fan

The Broan Very Quiet Bath Fan is for bathrooms up to 75 square feet, which is large enough for the average bathroom. This model is more than half the cost of the most expensive Panasonic fan, allowing you to save a considerable sum of money.

Broan Very Quiet Bath Fan
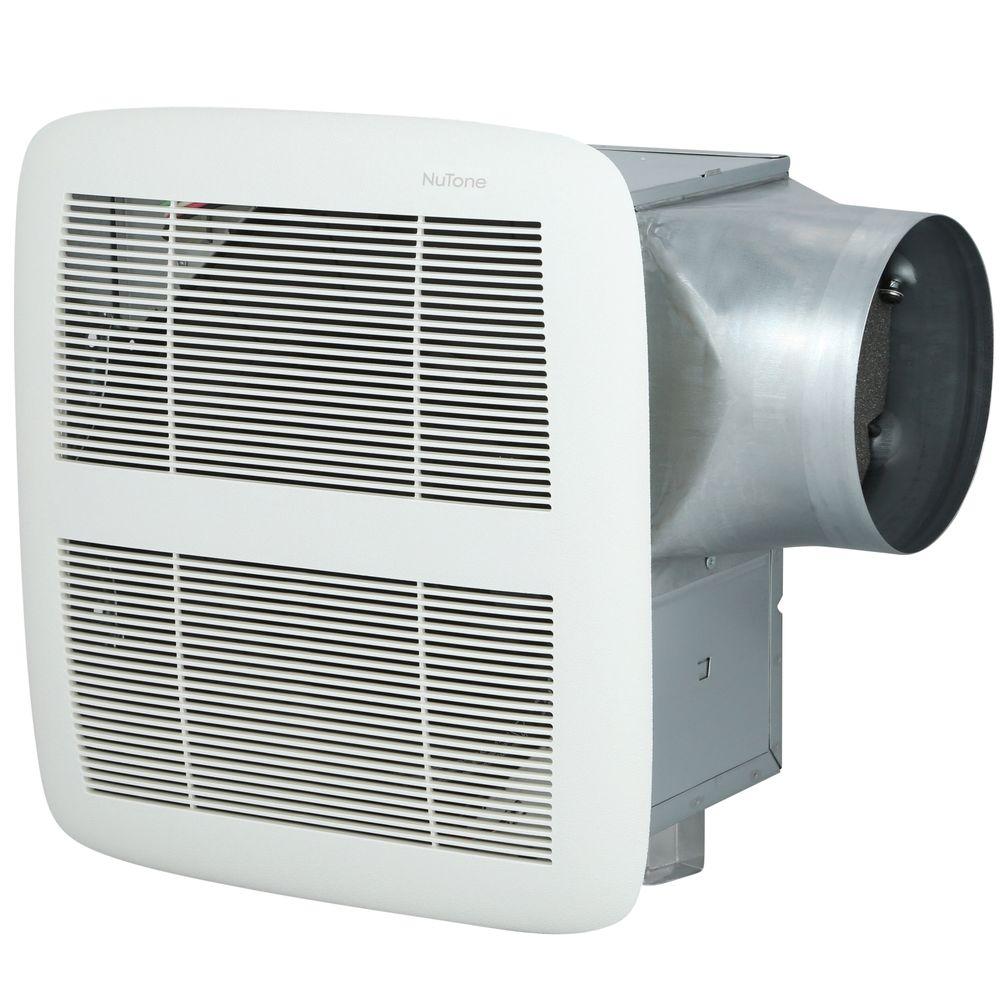
Image credit: https://i5.walmartimages.com/

It comes with True seal damper technology to reduce air leakage by 50 percent compared to similar models. In addition to being quiet and effective, installing this bathroom fan is easy, thanks to its hanger bars for wall placements. It’s also energy-efficient and durable, ensuring you can use the fan for long periods without worrying about power bills or the system wearing out.

Plus, the plastic body of this fan can blend in and even complement the aesthetics of most bathrooms. It’s also a top choice if you’re looking for a quiet fan that delivers clean air and is super easy to install. The unit is HVI certified and energy star qualified. The manufacturer also recommends that it’s used for bathrooms in 75 to 80 square feet.

Pros

It doesn’t require lots of space or special tools for installationIt’s one of the quietest bathroom fansEnergy-efficient designEffectively dries and ventilates bathroomsHanger bar system includedCertified for use over the bathtub

Cons

Difficult to install in existing roomsRequires professional wiring

3. Broan NuTone Quiet Ceiling Fan

We all know that bathrooms can get steamy and wet, making them ideal for mold, mildew, and bacteria. The Broan NuTone makes it easy to remove moist air from your bathroom while reducing odors with its powerful circulation system.

Broan NuTone Quiet Ceiling Fan
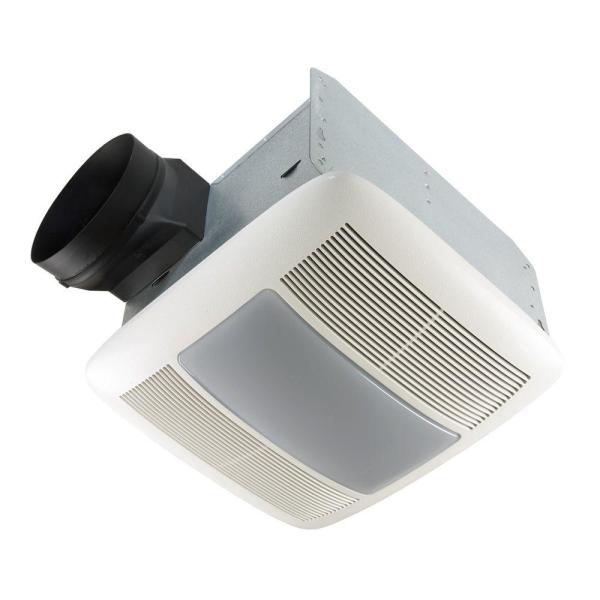
Image credit: https://images.thdstatic.com/

There is no need for an additional ductwork connection. You install this ultra-quiet fan between the joists in your ceiling. The quiet operation of this bathroom exhaust fan makes it ideal for sleeping areas, while its Energy Star efficiency saves money on your energy bills.

This model keeps the bathroom at a comfortable temperature and helps to minimize moisture and fogging. It also comes with a light for added convenience. This fan is suitable for 105 square feet bathrooms. Thanks to the 6-inch hose connector and the anti-vibration mounting, it also comes with easy installation.

Pros

It comes with integrated lightPerfect for medium size bathroomsThe integrated heater helps combat moisture and fogging

Cons

Very expensiveNot as energy-efficient

4. BV Ultra Quiet Bathroom Exhaust Fan

BV Ultra Quiet Bathroom Exhaust Fan is known for its quiet operation. And since it’s also Energy Star efficient, you’ll have the best of both worlds when it comes to this bathroom fan. This model can be used in rooms up to 90 square feet. The humidity sensor helps limit condensation and fogging when the bathroom gets steamy.

BV Ultra Quiet Bathroom Exhaust Fan
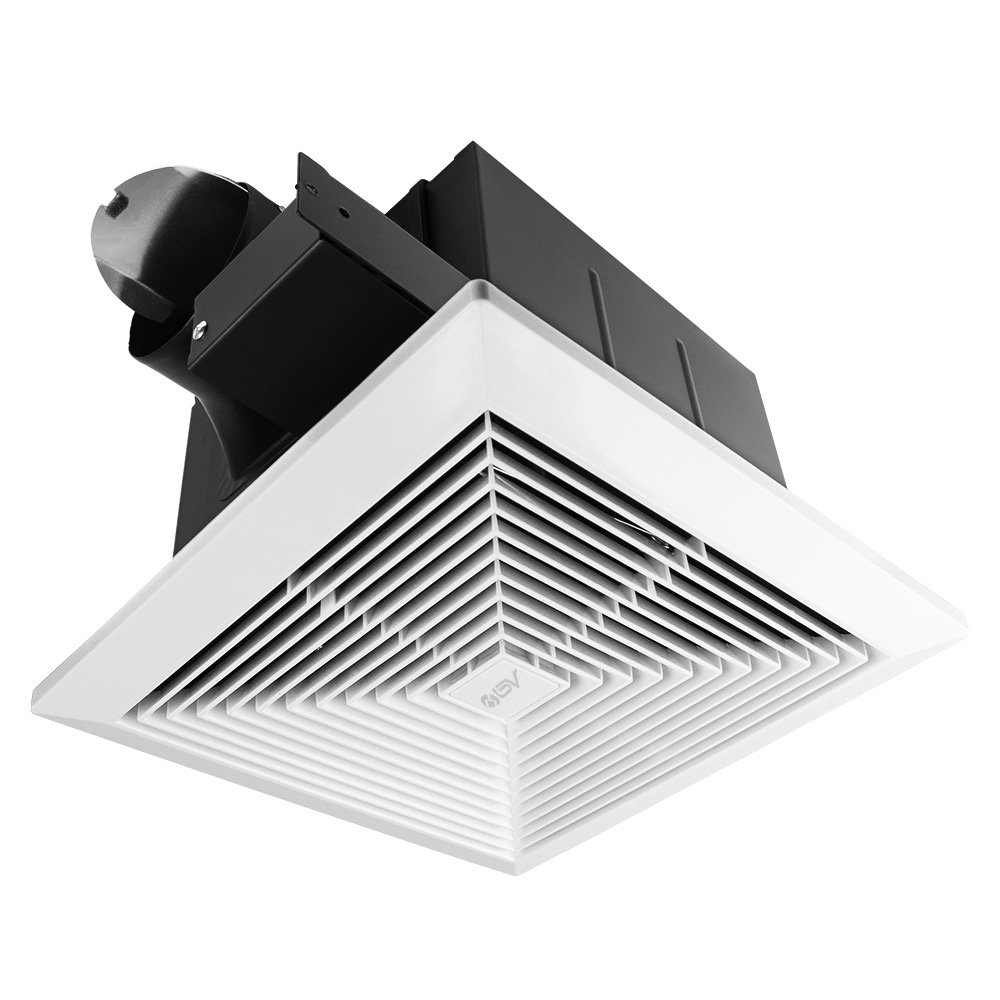
Image credit: https://m.media-amazon.com/

It’s made of a stainless steel body, making it durable. It also has a silent clever technology which makes it a whisper quiet bathroom exhaust fan such that it can be challenging to know if it’s on. Its heavy-duty motor fan is suitable for continuous use, especially if you have a busy bathroom that requires it to be on often.

The fan also comes with an adjustable bracket, making it easy to install. The unit comes with a one-year limited product warranty with technical support service.

Pros

Quiet operationStainless steel bodyOne year limited warrantyAdjustable bracket for installation

Cons

It may be difficult to installComplains of unexpected loudness

5. Delta Breez Near Silent Vent Fan

Delta Breez Near Silent Vent fan is an excellent choice for a bathroom exhaust fan that can be used without worrying about it being too loud. The fan comes with a multi-functional control switch, allowing the user to have full control of its operation. The unit is completely portable and requires no ductwork at all.

Delta Breez Near Silent Vent Fan
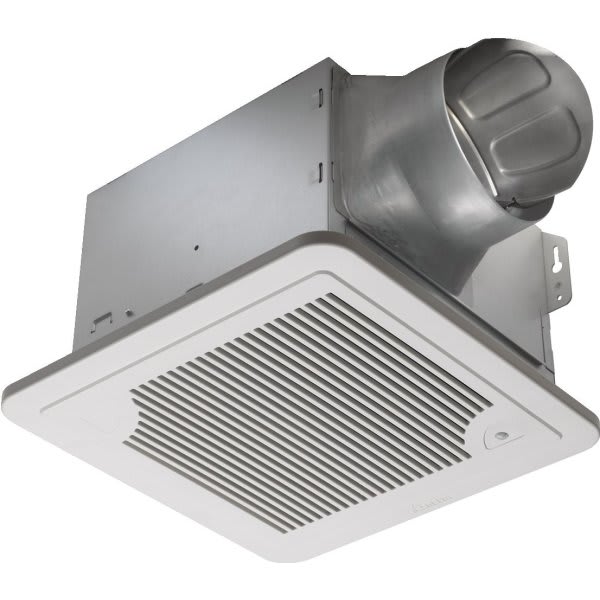
Image credit: https://images.hdsupplysolutions.com/

This bathroom fan has an indicator light to know if it’s on because at 0.6 sones, it may be difficult to know. The motor is a DC brushless type which will probably outlast many other appliances.

Other features boosting this fan’s effectiveness and convenience are its 6-inch duct and motion sensor. The 6-inch duct enables the fan to extract bad air and bring in fresh air faster while the motion sensor automatically turns on the fan when a person walks in.

It also has a humidity sensor that triggers the fan once the humidity level in your bathroom passes a certain level. On the downside, this is the most expensive bathroom exhaust fan. It’s also the least efficient, making it pricey to use. On the other hand, if you need a fan that’s powerful enough to serve a large or commercial bathroom, then this is a great choice.

Pros

Capable of moving a large amount of airSuper quiet performanceDurable buildIt comes with humidity and motion sensor

Cons

Highly expensiveLess efficient than other bathroom fan options

6. Akicon Ultra Quiet Ceiling Exhaust Bathroom Fan

This is a more standard bathroom ventilation fan from Akicon. It comes with noiseless technology that helps it be ultra quiet. The exhaust fan has a powerful motor that works to remove moisture and odors from your bathroom. It’s rated the most efficient of all the bathroom fans on this list, making it a great choice for busy bathrooms.

Akicon Ultra Quiet Ceiling Exhaust Bathroom Fan
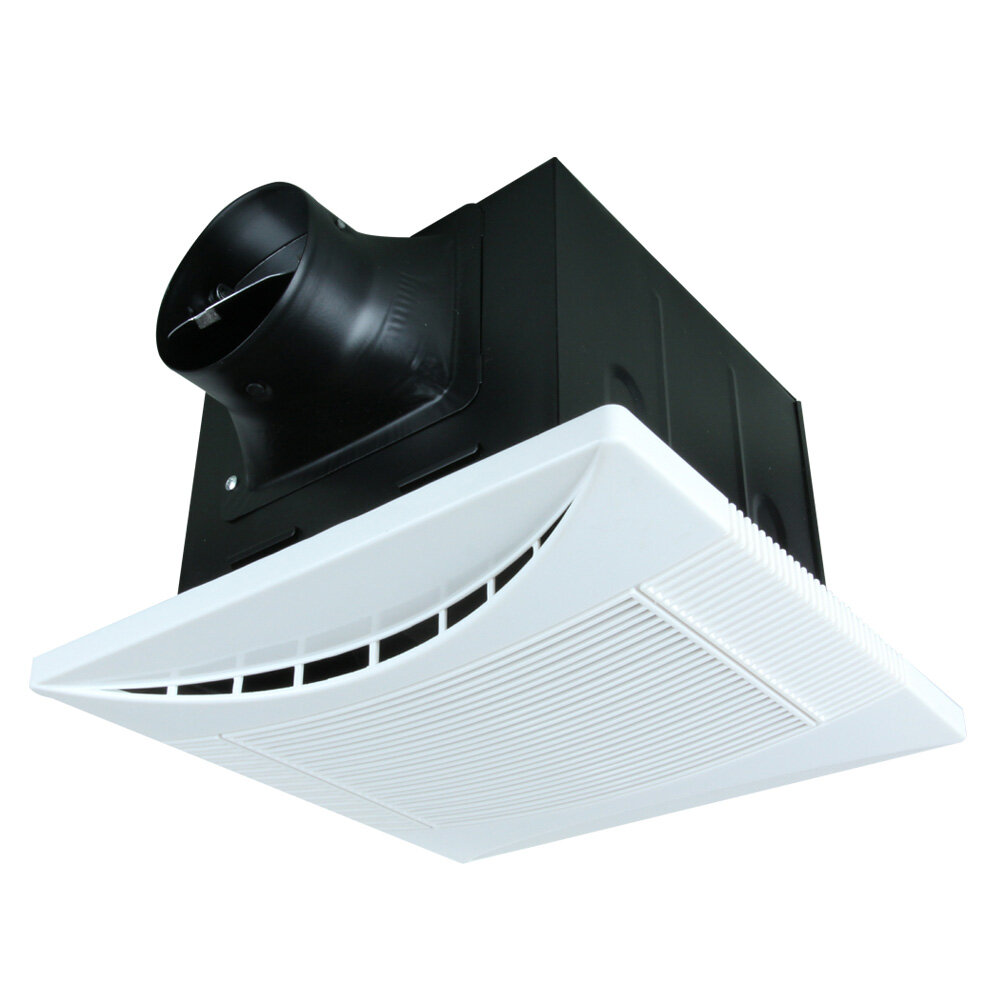
Image credit: https://secure.img1-fg.wfcdn.com/

This fan is suitable for bathrooms with a 4-inch duct connection, and you may need the help of a professional to install it. This is a budget-friendly fan that excels at being quiet, but it’s most effective at keeping smaller spaces dry well and ventilated.

Pros

Long-life ball bearing motorAffordable priceQuiet performanceEnergy star certified for energy efficiency

Cons

Not suitable for larger bathroomsRequires professional installation

7. Kaze Appliance Ultra Quiet Bathroom Exhaust Ventilation Fan Ventilator

The Kaze is a top-rated bathroom fan for less noise and low energy use. The motor is ultra-quiet, making it an excellent option for bathrooms that need to be especially quiet. This unit has a bright LED light with a night light that is easy on the eyes and perfect if you want to avoid turning on overhead lighting. It is also Energy Star certified for energy efficiency and uses only 1.0 watts on the lowest setting.

Apart from being quiet and effective, this fan features high-quality components, including a galvanized steel body and blades. It also features a permanently lubricated motor that keeps the fan running smoothly over long periods. Because of its double hanger mounting bars, installing this fan is easy.

The duct connection also has a backdraft damper that keeps foul air out without stopping the inflow of fresh air. This fan is energy star certified for its energy efficiency, meaning you’ll have fewer worries about your electricity bills.

Pros

Reasonably pricedDurable designQuiet performanceIt comes with a 3-year parts warranty

Cons

The size of the fan’s housing may require resizing your existing ceiling opening

8. Hauslane Ultra Quiet Electric Bathroom Exhaust Fan

Hauslane Ultra Quiet Electric Bathroom Exhaust Fan manufacturers offer a free product warranty for this fan, so you know the manufacturer is confident about its durability. The extra uses suction to remove stale air and smells from your bathroom and is crafted from the highest quality materials.

It’s recommended for spaces up to 120 square feet. This exhaust fan is durable stainless steel housing and comes certified by both UL and ETL. This fan also comes with a double hanger bar system for ideal positioning and standard housing to fit most ceiling joists.

DIY installation also becomes easier, thanks to its 4-inch vent connector. A one-year warranty also backs it.

Pros

Durable stainless steel housingBright LED light panelOne year warrantyImpressive quiet operation

Cons

Unclear instructions in the user guide

9. Win Air Ultra Quiet Bathroom Vent Fan

Win Air Ultra Quiet Bathroom Vent Fan is a powerful and quiet exhaust fan perfect for small to medium-sized bathrooms. Thanks to its simple design, it has a 1/2 HP motor and can be installed in less than an hour.

The white grill matches virtually any bathroom decor, and the unit is pretty simple to install. It’s also designed to be installed with a 4-inch duct.

Pros

0.3 sone ratingRated for small to standard bathroomsDecent price

Cons

It May get louder with usageNot a name brand

How to Pick the Best Quiet Bathroom Exhaust Fan

Sones

One sone of noise is the equivalent to the sound of a quiet refrigerator. The lower the sone rating, the more silent it will be. Sone is a unit of measurement that indicates how much noise a fan produces. Some fans have ratings as high as four sones, but anything higher than one sone isn’t a quiet bathroom exhaust fan.

Cubic Feet Per Minute

This CFM rating tells you how much air your fan can move when it’s on. For example, if the description says this bathroom exhaust fan has an intake of 100 CFM and blows out 106, then theoretically, it will take in 100 cubic feet of fresh air per minute and blow out 106 cubic feet of exhaust air.

Energy Efficiency

Energy-efficient fans will cost more than regular fans, but you could save money by buying one because they don’t use as much electricity. Electronic energy-efficient fans are also quieter because they have a built-in inverter that regulates the speed of the fan, allowing it to run at different speeds depending on how much power is needed for optimal performance.

Price

Exhaust fans are available at a wide range of prices, just like any other product, so what you pay is what you get. Cheaper fans have a lower CFM and less durable components, while pricier ones have more features and last longer.

Instead of settling for the cheapest or most expensive product on the market, opt for ones whose features meet your needs without exceeding your budget.

Ease of Installation

How easy is it to install an exhaust fan? Just like most other products in the market, they come with an installation manual so you can follow the instructions and do the job on your own or contact a professional regarding any questions or concerns you might have.

FAQs on Best Quiet Bathroom Exhaust Fans

How do you choose a quiet bathroom exhaust fan?

This depends on your budget, desired features, and location to mount the unit. Some are easier to install than others, which also affects your choice.

How much noise do bathroom exhaust fans make?

Bathroom exhaust fans are designed to be quiet, but they could still produce some noise depending on their capacity, power source, and location.

Final Thought on the Best Quiet Bathroom Exhaust Fans

Picking out appliances like a bathroom exhaust fan can be a daunting task. However, if you follow the guide above, it would be easier to choose a bathroom exhaust fan that is best for your needs.

The post 9 Best Quiet Bathroom Exhaust Fans appeared first on Kitchen Infinity.

Did you miss our previous article…
https://www.thelavkitchen.com/?p=859

Furniture Arrangement Ideas for a Small Living Room

Furniture Arrangement Ideas for a Small Living Room

Having a small living room can be tough to make it look bigger and better.  When you have a small living room, you can’t just add more furniture to it. You need to make sure that your space is well utilized by arranging furniture in your house properly.

There are several ways in which you can arrange your furniture in such a way that it would appear spacious even though there’s not enough space available. Here are some ideas that will help you with this problem.

Opt for a Symmetrical Living Room Layout

One of the best small living room ideas is making a symmetrical layout for your furniture. In order to do this, you need to put one of your sofas on the longest wall in your living room, along with two chairs on each side of it. Place a coffee table between these chairs and sofas so that it divides them equally.


Image credit: https://cdn.mos.cms.futurecdn.net/

Do not be too streamlined because your small space can feel boxy, so break up lines with plenty of curves and textured surfaces. Try to incorporate seamlessly hidden doors when wall space is at a premium. This way, the seating arrangement in your living room would look balanced and won’t seem crowded at all.

Float Furniture

Floating furniture is another great small living room idea that can help to open up the space. Using furniture that isn’t attached to the walls creates an optical illusion of more space. So instead of using a traditional sofa and chairs, try using a daybed or even a bench as your seating.

Float Furniture
Image credit: https://d28m5bx785ox17.cloudfront.net/

This will also allow you to use the wall space behind the furniture for storage or décor. Avoid the urge to push all your furniture against the wall. Creating space behind the furniture will make the room look bigger.

Consider Vertical Space in Small Living Rooms

Make use of the vertical space that you have in the room. Using floor-to-ceiling shelves will create instant storage and include some design elements in your living room. Utilizing both horizontal and vertical areas will again maximize the amount of space you have available for use.

Consider Vertical Space in Small Living Rooms
Image credit: https://www.thespruce.com/

Built-in Shelving

Whether you inherit a small sitting room or you’re making some renovations to your existing space, built-in shelves for an extra decorating storage zone. Floating shelves are also a great option if you can’t build in. You can build the bottom shelf so that it has enough room for an extra seating option. Keep the same color as the wall.

Layer Coffee Tables

If a set of nesting tables are too small for your room, plus a large and bulky coffee table is out of the question for your small room, don’t worry. Instead, layer two streamlined coffee tables to fit your space. If you can’t fit two coffee tables, these tables also look great as a set. Make sure you go to ornate furnishings and look for a table with simple or delicate lines. The table should seem to disappear to give the room an illusion of more space.

rrange Furniture Around Focal Point

You want to make sure that you have the furniture arranged around your focal points like a fireplace, a TV, a window, and a piece of wall decor to serve as the room’s center of attention. But make sure that the focal point is far enough away from the entrance and exit of the room so that there is enough space for people to enter and exit. Position your furnishings around or directly facing the focal point to maintain a clear view.

Hang a Chair

If you’re short on space, you can hang a chair from the ceiling. This will free up some floor space, and it can be a great place to relax or take a nap. Swing chairs are super fun and seem to be having a design moment right now. They can be a lifesaver in your family room.

Try Cafe Style Seating

Banish the traditional and conventional coffee and end tables instead of cafe-style seating. This is a great way to serve your guests, as it allows them some flexibility when holding their plates or mugs.

A single person or a pair of people doesn’t need a massive dining room table to suit their needs daily. If your living room is serving as a dining room, consider a round cafe table with two chairs. This way, you can easily pull it out from the wall to fit four in a dinner party by adding two folding chairs.

Get Creative with Furniture Layout

Limited space challenges you to think beyond seating conventions. You have to look for ways to maximize your space. If your small room is narrow and long, consider using furniture to divide the space into two separate living areas. For example, place a sofa and coffee table at one end of the room and a TV stand and chairs at the other. This will help to give the illusion of two separate spaces.

Create a Cozy Nook

Blank walls are the enemy of anyone who values cozy nooks. Give your small living room an illusion of depth by hanging a length of fabric behind the sofa, which will make your space seem larger than it is. Quirky niches and recesses can help transform your small room into a comfy seating area without taking much floor space.

Rethink Your Lighting Scheme

Of course, small living rooms also need decent lighting, but table lamps and floor lamps can feel like a luxury when you try to squeeze every square footage out of the floor plan. Consider swing arm wall sconces or ceiling-mounted fixtures to provide light where you need it. These will make stylish reading lamps, leaving side table surfaces free.

Utilize the Back of Your Sofa

In a tiny living room, every space is an opportunity, so think about using the back of your sofa as a low-profile storage unit. A bookshelf or plant stand placed here is the perfect way to display collectibles and offer extra space for small living room accessories, such as remotes and coasters. Make sure you incorporate these elements without interfering with the elegance of your small sitting room.

Utilize the Back of Your Sofa
Image credit: https://loveincorporated.blob.core.windows.net/

Consider Small Living Furniture Colors and Styles

When choosing furniture for a small living room, think outside the box. Go for unusual styles and colors to maximize visual interest and make the space feel larger than it is. With such a limited amount of square footage to work with, every choice you make needs to count. White walls, slipcovers, and accent furniture will make your entire room look larger.

llow the Light to Pour In

If your tiny living room has access to a ton of natural light, don’t block it out with black curtains. Let light pour in to make the space feel more airy and open. Even if you don’t have larger windows and tons of sunlight, choose lighter shades of paint and coverings to let your space feel as airy as possible.

Allow the Light to Pour In
Image credit: https://www.mymove.com/

One trick for letting light in is painting the ceiling a lighter color than the walls, which will give it a more open appearance even if painted a dark shade. This trick works especially well if you have vaulted ceilings or a very tall wall where your living room meets another space.

Maximize Space

Another way to make the most of a small living room is by maximizing your space. When buying furniture, choose those that can do double-duty, like an ottoman that can be used as a coffee table or extra seating. Look for tables and shelving that can be tucked away when not in use, and try to avoid leaving too many gaps that create wasted space.

Choose a Large Rug

Choosing a large area rug is a trick that will make your small space feel bigger. Unlike smaller rugs, larger rugs don’t break up the floor. This can also help you anchor the space and give you a foundation for the rest of your furniture arrangement.

Fill the Room with Furniture

One of the best ways to make a small living room feel bigger is to fill it with furniture. While this may seem counterintuitive, it will help to create visual boundaries and give the eye somewhere to rest. Choose furniture in different shapes and sizes to add interest, and be sure to use mirrors to reflect light and create the illusion of depth (and more space).

Fill the Room with Furniture
Image credit: https://cdn.vox-cdn.com/

When choosing furniture for a small living room, avoid bulky pieces. This will prevent the room from feeling too crowded. Instead of opting for large sofas or couches, choose loveseats or sectionals open on the ends. These can still seat many people, but they don’t take up as much room.

FAQs about Furniture Arrangement Ideas for a Small Living Room

What is the best furniture layout in a small living room?

Armless chairs such as slipper chairs can be great in a small living room. They don’t take up much space, and they add interest with their different shapes and textures. Another option is to use a small corner sofa that fits well in the corner of the room.

Can I use a sectional sofa in a small living room?

Yes, you can use a sectional sofa in a small living room. Just make sure that the sectional is open on one end, so it doesn’t take too much space.

Final Thought about Furniture Arrangement Ideas for a Small Living Room

Whether you’re working on a tight budget or looking for a specific style, you can never go wrong with furniture arrangement ideas for your small space. There’s always a way to make your furniture and room work and look great. You can also seek the help of an interior designer if you feel overwhelmed.

The post Furniture Arrangement Ideas for a Small Living Room appeared first on Kitchen Infinity.

Did you miss our previous article…
https://www.thelavkitchen.com/?p=853

Peat Moss: What It Is and How To Use It

Peat Moss: What It Is and How To Use It

Peat moss is a natural growing medium with many applications, but it can be hard to know how to use it in your garden. But what exactly is peat moss? How does it differ from other types of soil or mulch?

This guide covers everything from the types of peat moss available to how much water each type holds. We’ll cover everything from planting trees and shrubs with peat moss as a potting medium or using it as alternative mulch material in vegetable gardens. You’ll also find out which kinds of plants grow best when grown directly in peat moss without any additional soil mixed into the mix. Let’s get started!

What Is Peat Moss?

Peat moss is a soil amendment that is harvested from peat bogs. Many of these peat bogs are found in wet areas of Canada. Peat bogs are formed over a long period as organic materials partially decompose.


Image credit: https://www.gardeningknowhow.com/

Although sometimes referred to as peat, peat moss and peat are not the same things. Peat moss is one of the products harvested from peat bogs. Other types of peat moss come from the partial decomposition of other organic materials. If you know how to make compost then you must know this type of peat moss. The moss in peat moss refers to sphagnum moss.

Where Does Peat Moss Come From?

Peat moss comes from your flower pot or garden from wetlands or bogs. It’s not decomposed material because the surface of the blogs doesn’t allow oxygen and air to filter underground. This makes the fibers of the sphagnum moss remain intact.

Types of Peat Moss

Sphagnum Peat Moss

The most commonly used type of peat moss is sphagnum peat moss. Sphagnum peat moss has a high ability to absorb moisture and holds ten times its dry weight in water. After it’s harvested and dried, sphagnum peat moss is light in color, making it retain 10-12 times its weight in water.

Sphagnum Peat Moss
Image credit: https://www.gardeningknowhow.com/

Don’t confuse sphagnum peat moss with sphagnum moss, even if their names are similar. Sphagnum moss refers to the plant material harvested when still alive and growing above water. The end product is the light, fibrous material often used to decorate line wire baskets.

Black Peat Moss

This is an important type of peat because it has high nutrient content, making it useful in growing orchids because orchids like organic material in their soil. It’s also used for potted flowering plants and nurseries that produce bedding plants. It’s a little more acidic than sphagnum peat moss and holds more water.

Black peat is harvested differently than sphagnum peat moss in a way that preserves the living plant. It’s cut from Sphagnum bogs in Canada and is probably black because of its high carbon content. It requires more processing before it’s sold but has less dust and fewer contaminants than brown peat moss.

History of Peat Moss

Peat was dried and used as a source of fuel in some countries for centuries. This is because it’s rich in carbon dioxide, just like other fossil fuels. It was until the 1940s that peat had a place in horticulture. Today, it’s used as a soil amendment, soilless mix, seed starting, and mushroom casting.

vailability of Peat Moss

Peat mosses are commonly found in bogs and wetlands of the earth’s northern hemisphere. It’s sold in gardening stores, online, hardware stores, and even supermarkets.

Mining Peat Moss

Before peat moss becomes a useful gardening product, it must be harvested by digging the ground and recomposing the bog’s ecosystem. When it comes to mining peat moss, the process is as follows:

Dig a network of ditches along the peatland to drain the water. Second, remove the native vegetation to get the peat exposed. Third, level the harvest to prevent drainage of the surface runoff. Fourth, harrow the top layer to speed up the drying process of peats. Fifth, suck up the dry peat layer using a large vacuum harvester.

Lastly, the harvested peats will be transported to a processing firm for cleaning, drying, and screening into different labels and packaging.

Pros of Peat Moss

Sterile

Peat moss has a natural ability to kill weed seeds and insects. When peat moss is added to the soil, it leaves no chance for mosquitoes and larvae to grow in your garden. This attribute can be very important if you want to avoid diseases such as malaria.

Cleanliness

Most of the growing materials are not clean. However, that’s not the case with peat moss. If you drop some wet moss, pick it up, get it dried or sweep it up.

Moisture Retention

Peat moss is believed to retain water for longer than other composts. This means that you will need less watering of your plants during dry seasons.

Peat Moss Has Slightly Acidic pH

Peat moss has a pH of 4.9 to 6.5, slightly acidic. This makes it better for soil mix because the acidity helps break down other compounds in the soil. This also makes it a good corrector, especially with plants that cannot stand alkaline soil.

It’s Fully Organic

If you are looking for an organic material to improve the content of your soil, using peat moss is a good option. It comes from bogs and is fully natural. The best part is that it’s now harvested at its optimal stage, further adding that this is an organic ingredient. Also, quarrying and transportation do burn a lot of fossil fuels, so if it’s produced organically, it’s not harvested and delivered organically.

Peat Moss Doesn’t Compact

Even though peat moss absorbs water well, it doesn’t compact, unlike soil. Compaction makes it hard to create space for the water and air to pass through. But if you add peat moss to any compact material, you’ll have solved the compaction problem and made the growing mix drain better.

The Drawbacks of Peat Moss

Poor in Nutrients

Some growers consider peat moss to be nutrient-poor. It doesn’t contain much nitrogen, potassium, or phosphorus, but it does have calcium and magnesium, which are essential nutrients for the growth of cannabis plants. Unlike other organic materials such as manure compost, peat moss is very poor in nutrients.

Dryness Issue

Since peat moss is very dry, it’s not 100% suitable for soil. It can be combined with other organic materials to improve the water retention capacity of your growing medium. When starting seeds with peat moss alone, ensure they get enough moisture. It’s also good to mix it with soils and some other soilless media.

Non-Renewable Resource

Peat bogs are made up of wetland plants accumulating for thousands of years. They are only found in areas where the average annual temperature is lower than 64 degrees F (18C). Peat moss from North America or Canada comes from old-growth forests. In other words, it’s a non-renewable resource that has to be harvested. This is not the case for peat moss harvested in Ireland or Scotland. Their bogs are managed wetland areas that grow peat moss yearly, so they can be harvested without causing permanent damage.

Peat Moss is Expensive

Peat moss exceeds the price of comparable mediums such as coconut coir. If you use it in bulk and the price is an issue, a better alternative is compost.

How to Use Peat Moss in the Garden

Soil Amendment

Peat moss is available in several grades, with different particle sizes. The larger the particles are, the more expensive it is. Use peat moss as a soil amendment to lighten heavy soils and increase water retention. For clay and heavy soils that get compact easily, it softens the soil structure and improves the drainage.

Peat moss helps retain moisture and nutrients for plant roots for sandy soil. If you intend to use it as a soil amendment, you should know that it changes soil pH levels. Ensure you measure and watch out if the pH level drifts too much by testing the soil pH

Hydroponic Growing

Peat moss is used in hydroponic systems because it creates a soil and nutrient solution barrier. This layer increases the stability of the system, keeping the plant roots away from harmful products that are designed to kill them.

People using it use it with other growing media like perlite and vermiculite to balance the moisture and aeration. When using peat moss for pure hydroponic growing, you should know some facts about it’s not appropriate.

Because it’s an organic matter, if provided with plenty of oxygen and nitrogen, it will start to decompose, making the material compress around plant roots and choke off your plants. So, better mix it with other materials.

Seed Starting

Peat moss is often used as a base layer to germinate and grow plants like vegetables and flowers. It provides aeration to the root zone, and it’s very easy to use for newcomers in hydroponics. When using peat moss for seed starting, you also need special trays with drain holes on the bottom because if you don’t, the peat moss will expand and block the water flow out of your seedling flat.

For this purpose, use the peat moss alone or in a mixture with some soils. You can also remove the hassle by getting the peat pellets sold on the market. Many people also prefer a soilless mix of peat moss, perlite, coconut coir, and others in different amounts. This prevents diseases, fungi, bacteria, weed seeds, and other bad things commonly found in the soil.

Peat Moss for Plant Transplants

Using peat moss granules is also the best way to transplant young trees and big plants. It can be easily handled since it is lightweight; you can use it with other components like the potting mix but make sure not to include any fertilizers or pesticides.

Peat Moss for Plant Transplants
Image credit: https://www.gardeningknowhow.com/

It provides nooks and crannies where new, tender roots can grow. Peat moss also keeps humidity high, essential when plants have a new home. It also corrects the acidity of the soil and breaks down the consistency and texture of the soil, especially if it’s clay soil.

Growing Acid-Loving Plants

Peat moss is also used to grow plants that prefer soil with low pHs, such as rhododendrons, gardenias, heathers, tomatoes, Pieris, azaleas, and camellias. These plants need a peat moss mixture for their acidic soil. When combined with the correct potting mix, these plants enjoy having an environment where they can take up essential nutrients from the soil and conserve water.

Peat Moss Alternatives

Compost

Compost can be used as peat moss alternatives. These are usually less expensive but do not have the pH balancing effects of peat moss, therefore it should be used in conjunction with other ingredients to create the correct balance for acid-loving plants.

Compost is made from decayed organic materials like rotted plants, leaves, vegetable scraps, and animal manures. It has a lot of commonalities with compost peat, like excellent water holding capacity and great material for soil amendment.

Compost is cheaper than peat moss and fully sustainable in that you can easily make your own. On the other hand, compost won’t last long like peat moss, and you’ll have to add compost regularly. And lastly, compost will compact faster and easier than peat moss, but to have a comparable effect, you can add sand, shells, and eggshells to the soil to improve its texture.

Perlite

Perlite is a volcanic rock heated and expanded with steam to produce a fine white, shiny-type growing medium, which lets good drainage and aeration of the roots. It is also widely used as an additive for potting soil or seed starting mixes as it helps increase the porosity of the root environment.

It provides an excellent oxygen supply to plant roots and will not compact under heavyweight. Perlite is a good natural drainage layer for the bottom of your containers, and it will also help prevent any root rot problems that can occur from sitting water in the bottom of the container.

Coco Coir or Coco Fiber

Coco coir is the partially processed fiber of the coconut husk. It’s sold compressed into bricks or blocks or in a loose form that can be expanded by adding water. Coco produces excellent drainage and aeration qualities with good retention properties.

Coco provides an ideal air to water ratio – twice as much air space compared to water-holding capacity. Coco coir is a sustainable resource that has been used for centuries to protect the health of natural shorelines and reefs. It’s highly resistant to insect, microbial, and mold attacks, making it perfect as a growing medium for both hydroponics and soil applications.

Vermiculite

Vermiculite is a naturally occurring mineral heated to expand it into wormlike particles that absorb moisture and provide aeration. Vermiculite provides the nutritional requirements of plants while allowing for excellent drainage and aeration qualities.

Organic Matter

Organic matter is what makes the nutrients in your soil available to plants. It increases the number of good, healthy microorganisms in your soil by providing them with food and habitat. Organic matter also absorbs water during irrigation, reducing runoff.

What’s more, organic matter improves porosity in your soil by opening tiny spaces between soil particles for air and water, giving your plants room to grow.

Sand as Peat Moss Alternative

Sand has very coarse particles that do not release nutrients to plants easily. It does not change the pH of your soil, but it also doesn’t hold nutrients well, so adding sand on top of a peat moss/vermiculite mix is not ideal. Sand may be preferable if you are planting trees or other plants that don’t need consistent nutrients.

FAQs on Peat Moss

What is wrong with using peat moss?

Peat moss is not a natural substance. It is the partially decayed remains of plants that have been harvested from peat bogs and mires, an ecosystem formed by the incomplete decomposition of organic matter in wetlands. Peat bogs are fragile habitats that take thousands of years to form.

When should you use peat moss in your garden?

You should use peat moss as a soil amendment or potting mix, especially when growing fruits and vegetables such as tomatoes, blueberries, and camellias which are acid-loving plants.

Final Thought on Peat Moss

There you have it. Peat moss is harvested from bogs or mires and is used in planting or potting soil mixes for acid-loving plants. Peat moss is not a natural garden soil ingredient, but it will help your garden grow lovely flowers and delicious foods.

The post Peat Moss: What It Is and How To Use It appeared first on Kitchen Infinity.

How To Grow Black Lace Elderberry

How To Grow Black Lace Elderberry

If you are looking for a beautiful and unique ornamental plant, black lace elderberry is an excellent choice. It has dark purple foliage and blackberries, making for a dramatic landscape focal point during the growing season. This beautiful shrub goes by many names, including black lace, elderberry, common elderberry, black elder, European elderberry, Judas tree, and blue or black elderberry.

This versatile plant provides year-round beauty without much effort on your part. Whether you’re looking for a new ornamental shrub or simply want fresh fruit at your fingertips, this variety of Sambucus canadensis is sure to please. In this article, we’ll talk about everything you need to know about growing black lace elderberry.

Uses of Black Elderberry

Elderberry plants have gained popularity thanks to their lovely appearance and important uses in traditional industries, culture, and medicine. They fall under early spring flowers since they bloom creamy pink flowers in the spring. These are followed by blackish-red fall berries, which can be harvested for making elderberry wine and jam. You can also leave the elderberry wine on the plant to attract birds and other wildlife.


Image credit: https://www.thespruceeats.com/

Black lace berries are also edible and high in vitamin C. If you want to plant them for food and drink, then the American elderberry, also known as Sambucus canadensis, is the better choice than the European type known as Sambucus nigra.

The intense purple black foliage is finely cut, giving it an effect similar to Japanese Maple, also known as Acer palmatum. Some designers are even using it in the more tender maple varieties since black lace is extremely durable and adaptable.

It can also be used as a dramatic accent plant, planted en masse for a troublesome high hedge, or incorporated into the mix or perennial border. Black lace is also suitable for use in woodland gardens, rain gardens, and attracting birds and butterflies to the yard. You can also plant a black lace next to a shrub with brightly colored leaves to create contrast and interest.

This is a very cold hardy, and easy-to-grow plant adaptable to most sites. In addition, this plant is deer resistant, drought tolerant, fall heat tolerant, and a landscape plant. It can also be used as a potted shrub on the patio. It’s good in groupings or masses or perennial and shrub borders.

Common elderberry plants are deciduous plants or small trees that can reach up to 20 feet in height and width. Some specimens have grown as tall as 33 feet in their natural habitat.

Planting Black Lace Elderberry (Sambucus racemosa ssp. melanocarpa)

Black lace elderberry can grow in USDA plant hardiness zones 4-7 but is susceptible to winter damage. It is best planted in fertile, loamy soil with excellent drainage and receives full sun or partial shade. If planting specimens near homes or other structures, it is a good idea to place a barrier of mulch or fencing around the plants to protect them from being damaged by lawnmowers, mower debris, and deer.

Planting Black Lace Elderberry
Image credit: https://www.gardeningknowhow.com/

They are relatively easy to grow. They can be propagated from seeds, softwood cuttings, or semi-hardwood cuttings. Seeds need cold stratification. Seeds should be sown in the autumn and kept moist for 60 days before planting. A thin layer of vermiculite on top of the soil helps retain moisture. It also does well in wet soils.

These plants also do well in acidic to alkaline soils, but it’s also important to look for slightly acidic soil. Before planting this shrub, amend the soil with compost to ensure healthy growth. You can easily make your compost to use for the purpose. After that, it will benefit from regular fertilizing with compost once every year in the spring.

Due to their sporadic growth, elderberry plants tend to form a lot of suckers. So prune it regularly if you want to maintain size and shape for your shrubs. Pruning involves removing unhealthy, damaged, old, or dead branches in early spring.

Black Lace Elderberry Care

Black lace elderberry is self-pollinating, but if you wish to have as many berries as possible, you can plant another cultivar near your black lace elderberry for increased pollination.

Black Lace Elderberry Care
Image credit: https://i.pinimg.com/

Light Requirement

In the North, while black lace elderberry will tolerate partial shade, it will produce more flowers and a more attractive foliage color if grown in full sun. At the southern end of its range, it will benefit from afternoon shade.

Soil Requirements

Black lace elderberry grows best in slightly acidic, loamy soil that is moist but well-drained. The black lace elderberry bush also tolerates clay soil types better than many shrubs, but it performs better over time if planted in soil that drains well. Black lace does best in moist soil, although it will tolerate dry soils. It thrives under acid or alkaline soils.

Watering Common Elderberry

Black lace elderberry is a drought-resistant shrub and does not require large amounts of water to thrive. However, it benefits from supplemental watering during dry periods and in hot summer climates. The plant prefers evenly moist soil. And since elderberry shrubs often grow near wetlands, it tolerates wet soil better than many other plant species.

Fertilizer and Transplanting

This deciduous shrub needs to be fertilized in early spring by applying a slow-release fertilizer specialized for trees and shrubs. If you wish to transplant an existing plant, do so in spring or early summer while the soil is moist and warm. Elderberry shrubs do not recover well from root disturbance, so take care when moving them. You may harm or kill the plant with poor planning or execution.

When growing elderberry bushes in the home garden, plant them near a water source such as a drip irrigation system or pond, especially if rainfall is infrequent. Ensure that the roots get at least 1 inch of water weekly and keep an eye on soil moisture levels so you can provide supplemental watering during dry spells.

Pruning Elderberry

Best if pruned immediately after blooming. The correct time for pruning this plant is late winter or early spring. Pruning will keep it attractive, vigorous and check its spread. As the woody stems become older, they become weaker and less attractive. So, remove the older stems to direct more energy into the newer, more attractive ones.

Pruning Elderberry
Image credit: https://www.gardeningknowhow.com/

Propagating Common Elderberry

Cutting the branches of the elderberry bush back to four inches gives you a convenient place to collect cuttings.

To propagate common elderberry, remove the smaller tip shoots from grown branches’ end and dip them into rooting hormone. The best time for this operation is fall or early winter. Remove all leaves on the cutting except the top two pairs. This makes it easier to dip into rooting hormone and reduces the chances of disease spores falling into any open cuts.

Shorten all side branches by half their length to direct energy into the main stem. Root the cuttings in a pot filled with sand, peat moss, and perlite at a ratio of 1:1:1. Water sparingly until roots form.

After three weeks, the cuttings should be ready to plant in your garden or for overwintering. Select a location that gets at least six hours of sun per day and has well-drained soil.

Common Pests and Diseases

Prone to a number of diseases, including canker, leaf spot, and powdery mildew. Apply Neem oil once pollination begins for best results. Also, make sure there is proper spacing to promote good air circulation, irrigate at soil level, and keep mulch six inches away from the main stems of the bush.

FAQs on How to Grow Black Lace Elderberry

What plants are compatible with black lace elderberry?

White pine trees and quaking aspen are good elderberry companion plants, especially if you’re looking for something taller than the shrubs.

Final Thought on How to Grow Black Lace Elderberry

Elderberry plants are very popular plants that you can never miss. Not only do these shrubs look splendid and very familiar, but they’re also low maintenance in almost any environment and growing conditions.

The post How To Grow Black Lace Elderberry appeared first on Kitchen Infinity.

Did you miss our previous article…
https://www.thelavkitchen.com/?p=848

Removing Shoe Odors With Baking Soda

Removing Shoe Odors With Baking Soda

Shoe odors are caused by bacteria growing in moist, dark places. They can also be caused by sweat and oil from your skin that gets into the fibers in the shoes.

The great news is that baking soda is a great way to get rid of shoe odor – sometimes once and for all.

In this article, you will learn how to remove shoe odors from your home and shoes, along with other crucial tips to remember when it comes to getting rid of annoying odors in your home.


Image Credit: http://housewifehowtos.com

What the most common sources of shoe odors are

Shoes are often lined with materials that cause odors to build up during everyday use.

This buildup of sweat, bacteria, and oil is known as foot funk, shoe funk, or shoe odor.

Other sources of shoe odor include dirty shoes that have been worn without socks, smelly shoes that were never cleaned before being placed in storage, and smelly athletic gear that needs washing after heavy use.

How to remove shoe odors from your home and shoes

Baking soda will do the trick for most people when it comes time to clean out old stinky shoes or get rid of new stinky shoe smell.

There are several simple ways you can use baking soda to remove the funky smells from your shoes.

Simply sprinkle baking soda into the inside of your smelly shoes and lace them up as usual for a couple of days or until the stench is gone.

Another way to use baking soda to remove shoe odors is to make a thick paste with water and baking soda, apply it to any surfaces that have been affected by the odor, let it dry, then take a damp rag and wipe it away.

It’s also a good idea to place a small container of baking soda in your closet, gym bag, or other places where you store your shoes as this will help absorb any lingering foot funk.

When removing shoe odors from carpeting or hardwood floors, porous materials can be treated with a mixture of baking soda and water, or baking soda can be sprinkled on the carpet or floor and brushed with a broom.

Please note that this method will not work for concrete floors, most sealed wood floors, tile floors, linoleum tiles, vinyl tiles, varnished wood floors, granite countertops, etc., because baking soda cannot penetrate the surface to neutralize the odors from below. In other words, these surfaces would have to be stripped of their coating for the baking soda to get through to where it’s needed.

However, if you want to clean sticky grease off kitchen cabinets, then baking soda is the way to go.

How do I use baking soda for removing shoe odors? What do I need?

You’ll need a jar or container that’s big enough to hold the shoes you want to soak, baking soda, water, and an old towel. Then, follow these steps:

Step 1 – Fill your container halfway with lukewarm water Step 2 – Mix in 3 parts baking soda with 1 part water. For example, for every cup of water use 1/3 cup of baking soda or for every liter of water use 10 tablespoons (about 80 grams) of baking soda. Adding more baking soda will lead to better results but it could take longer to dry out.Step 3 – Soak your shoes in this mixture for at least 12 hours (for larger shoes like boots you may need even more time). Step 4 – After you’ve soaked your shoes for as long as needed, take them out and put them in a cool dry place to dry off. If you have a fan nearby set it to blow on low. This will speed up the process of drying your shoes and prevent any mildew from forming.Step 5 – Once your shoes are completely dry, sprinkle some baking soda inside them and leave overnight so that they can absorb any odors still left behind. You should do this before wearing your shoes again or putting them back into storage.

Why baking soda is the best way to get rid of shoe odor

Baking soda neutralizes odors naturally by absorbing unpleasant smells into itself where it then breaks down into inert components that are not likely to cause any further harm. This makes it much safer than other household cleaners which typically mask bad odors with artificial fragrances or kill bacteria with harsh chemicals like bleach or ammonia.

Using these types of cleaners often causes the stinky shoes you’re trying to get rid of to smell even worse and in some cases, the fumes can be harmful.

Baking soda is also a natural deodorizer so it will not only remove shoe odor but also any other odors that may be present in your home.

Tips for using baking soda in your closet, on carpeting, and hardwood floors

When cleaning your home with baking soda it’s important to keep these tips in mind.

Test an inconspicuous area before applying baking soda to a large surface

Applying baking soda to an inconspicuous area should be enough to test if it’s safe to move forward. In addition, this will also help you determine how long you should leave the baking soda on the surface before rinsing it off.

lways use a damp cloth when wiping away baking soda residue – dry surfaces can become scratched.

A damp cloth will help you remove any residue without scratching the surface. This is especially important when cleaning delicate surfaces like wood floors or furniture.

Never mix baking soda with other cleaners – this can create hazardous fumes.

When it comes to removing shoe odors using baking soda it’s always best to stick with just the baking soda and water. This is because other cleaners like bleach or ammonia can react with baking soda and create harmful fumes.

Keep in mind that baking soda may not be suitable for all surfaces

You should avoid using baking soda on marble, granite countertops, tile floors, varnished wood floors, painted walls, etc. If you do so, it can leave behind a dulling film or even etch the surface if left to sit too long before being washed away with water.

Do not pour water onto baking soda if it is being used in shoes – this will damage the footwear.

Baking soda should always be used dry in shoes. If it gets wet, for example from a spilled liquid, the material will start to break down and eventually turn into a sticky mess that can damage your shoe.

Baking soda can be harmful to pets

Put your pets away when using baking soda to clean as it can be harmful if ingested. Baking soda is not poisonous to pets but it can cause them to vomit or have diarrhea if they consume too much of it.

Removing Shoe Odors With Baking Soda – FAQ

Why should I use baking soda to remove shoe odors?

Baking soda can help you keep your stinky shoes smelling fresh. It’s the best way to deodorize and neutralize smells like those from your athletic shoes, footgear, and boots.

How to Clean White Shoes with Baking Soda | Arm & Hammer™

Image Credit: http://armandhammer.com

Is it safe to use baking soda in my shoes?

Baking soda is a safe way to soak up any odor-causing bacteria or fungus which may be living in your sneaks. It’s also an all-natural remedy that has no side effects. However, if you happen to have any open cuts on your feet please refrain from using this method because of the risk of infection.

What if my shoes are wet?

If your shoes are wet, removing as much water as possible before using the baking soda is ideal. You can do this by using a shoe dryer, airing them out in the sun, or stuffing them with newspapers. Once your shoes are mostly dry, you can then proceed with the baking soda remedy.

Can I use this method for all types of shoes?

This method should work for all types of shoes, but if you have leather or suede shoes be careful not to soak them for too long. Baking soda can be harsh on these materials and may cause discoloration or damage.

Odors from sneakers, footgear, and boots can be a real nuisance. But with a little baking soda, these smells can be neutralized and removed in no time. Soak your shoes in a baking soda and water solution, or sprinkle some baking soda inside your shoes to help absorb any unwanted smells.

Baking soda can also be used tomake DIY laundry detergent so you can keep your clothes smelling fresh too.

Final thoughts on removing shoe odors with baking soda

In conclusion, using baking soda is the best way to deodorize and neutralize smells such as those from your athletic shoes, footgear, and boots. This safe solution can help you ensure your stinky shoes start smelling fresh.

The post Removing Shoe Odors With Baking Soda appeared first on Kitchen Infinity.

Did you miss our previous article…
https://www.thelavkitchen.com/?p=845

How To Remove Mold And Mildew

How To Remove Mold And Mildew

Mold and mildew can be a real problem for homeowners, especially if they’re not dealt with quickly.

Mold is notorious for growing in damp areas, such as bathrooms or basements that don’t have proper ventilation. Mildew grows where there is too much moisture present, such as on wet surfaces like windowsills or carpets.

In this article, we will discuss how to remove mold and mildew from your home.

What are mold and mildew?

The two types of mold and mildew work together to grow rapidly and cause health problems by releasing toxic spores into the air which can affect anyone who breathes them.

Image Credit: http://goldeagle.com

This combination can lead to symptoms such as coughing, sneezing, headaches, and difficulty breathing among other things. It’s important to take the issue seriously and eliminate it right away before it spreads any further.

If not, it can cause structural damage to the building and lead to costly repairs.

How do mold and mildew grow?

Mold needs three things to grow: darkness, food, and moisture. Mold spores are everywhere—inside your house or outside, in your plants or the soil. You might even have spores growing in areas of your home that you can’t see.

Mildew needs two of those things to grow: moisture and food. It feeds on a variety of organic materials, including plant sap, wood, paper, paint, and dust. Mildew can also grow on dirty fabrics.

How to clean mold and mildew

The best way to clean mold and mildew is by using a mixture of water and bleach. You can either use a spray bottle or a bucket.

Be sure to wear protective gear such as gloves and a mask while cleaning, especially if the area contains lead paint which can cause lead poisoning if not handled properly.

If the area is too large or the mold is too thick, you might want to consider hiring a professional to take care of it. Here are the steps involved when it comes togetting rid of mold

Clean off the mold or mildew with a solution of water and bleach

You can use a brush, cloth, or sponge soaked in the mixture and gently scrub away at the area.

It’s best to avoid using any chemicals that contain ammonia as this could increase your risk of breathing in harmful spores. Once you’ve finished cleaning, let it dry thoroughly before allowing anyone inside the area again.

Fill up the affected area with hydrogen peroxide then let it sit for 10 minutes before scrubbing it away You can fill up a bucket or spray bottle with hydrogen peroxide and apply it directly on top of the affected areas. Then leave everything alone for about ten minutes until you come back and scrub the surface clean. Use a fan to dry out the area after you clean it to prevent future growths

Now that the area is free of both mold and mildew, simply dry it thoroughly by sweeping or using a vacuum cleaner. Open up all doors and windows inside your home so that there is good ventilation throughout the house.

You can also use a fan for faster drying time if you don’t want to leave anything open overnight.

Be sure to wear gloves when cleaning anything that could contain lead paint, which can cause lead poisoning if not handled properly

Lead poisoning can be very serious depending on how much one has inhaled over an extended period. Make sure you’re wearing protective gear when cleaning any surfaces that might contain such paint.

Inspect the area for any signs of future growth and take steps to prevent it

Mold and mildew can grow back quickly if you’re not careful. Be sure to inspect the area regularly for any new growth and take measures to prevent it from happening again.

Mildew vs Mold – What's the difference? | Woodard

Image Credit: http://woodard247.com

This could include fixing any leaks in your home, increasing ventilation, or keeping surfaces clean and dry.

Other surfaces where mold and mildew might need to be removed

Mold and mildew can grow on a variety of surfaces both inside and outside your home. Here are some other areas where you might need to take action:

Basements: Basements are often damp and dark, making them the perfect place for mold and mildew to grow. Be sure to clean any spills or leaks as soon as they happen and increase ventilation by using a fan or opening up windows.Bathrooms: Mold and mildew can form on shower curtains, tile grout, caulking, and even the bathtub itself. Be sure to clean these areas regularly and keep them dry at all times.Sinks: Sink drains are a common place for mold and mildew to grow. Be sure to clean out your drain at least once every two weeks to keep it free of any buildup.Windows: Mold can form on window sills if they’re not cleaned regularly. Be sure to wipe down these areas with a bleach solution whenever you notice the growth of mold or mildew.Cooking surfaces: You might want to avoid using any wooden chopping boards, sponges, or brushes to prevent the growth of mold and mildew whenever you cook.Flooring: Many types of flooring can be affected by mold and mildew including linoleum, wood, and laminates.Vehicles: If left unattended for long periods, mold can grow underneath car seats which may lead to breathing problems.Clothes: Mold and mildew can form on clothing if they’re left to sit for too long without being laundered. Machine washable clothes should be washed after every few uses while non-washables should be cleaned with a solution of water and bleach then hung out in the sun to dry.Stucco: If you notice any areas of your stucco walls that are peeling or bubbling, then there’s a good chance they’re infected with mold. Be sure to scrape off the affected areas then apply an anti-fungal paint or primer directly onto the surface to prevent further growths.Cleaning stucco is a technical process and you should contact a professional if you aren’t sure how to handle it.– Wood: Both the inside and outside of your home’s wood walls need to be properly maintained for them to avoid any serious damage from mold growths. Be sure to inspect these areas regularly and treat them with a protective coating of paint or primer whenever they start showing signs of wear.

Removing mold and mildew from your home can be a bit of a daunting task, but it’s important to take action as soon as possible to prevent any long-term health problems.

Final thoughts on how to remove mold and mildew

In conclusion, removing the mold and mildew from inside your home is a necessary step to take if you want to keep yourself and others safe. Remember, mold and mildew can grow back quickly, so make sure to inspect the affected areas regularly for any new growths.

The post How To Remove Mold And Mildew appeared first on Kitchen Infinity.

Did you miss our previous article…
https://www.thelavkitchen.com/?p=842

What is the KonMari Method?

What is the KonMari Method?

Many people live in cluttered homes which end up complicating their life as well. It’s not that they don’t know how to declutter your room but the process itself is very complicated.

Well, if you could focus on the things in your home that give you joy, then everything else would fall into place. Marie Kondo has developed a method that makes this easy and simple, so you can get rid of clutter fast without having to sort through every item in your house one by one. It’s called the KonMari Method because she says we should only keep items that spark joy.

Here’s everything you need to know about the KonMari method.

What is the Konmari Method?

KonMari, also known as KonMarie or Marie Kondo, is a tidying expert in Japan. She has written several bestselling books on the process she uses to transform individuals and families. Created by Marie Kondo, professional home organizer and author of the bestselling book, The Life-Changing Magic of Tidying Up, the Konmari method emphasizes removing clutter from your home and surrounding yourself with things that spark joy.


Image credit: https://tidycasa.com/

In other words, the konmari method is a simple but effective tidying method that ensures you’ll never relapse to clutter again. It uses unique selection criteria by choosing what sparks joy. Through this tidying process, you can reset your life and spend the rest of your life surrounded by the people and things you love most.

After the release of the Netflix TV show Tidying Up with Marie Kondo in 2019, many people globally have been using Marie Kondo’s tips to declutter their homes and stay organized.

How Does the KonMari Method Work?

KonMari has six basic rules that can help you declutter, get organized and create a home filled with items that make you happy. Here’s how the KonMari method rules work:

Commit Yourself to Tidy Up

The KonMari method is not a quick fix for a messy room. Instead, it’s a chance to reset your entire life, but only if you commit to following its principles. The first rule of tidying is setting your intention to seriously tidy up and resolving to put in the time and effort required.

When approaching your tidying festival with a clear vision and a can-do attitude, you’ll find the energy and motivation you need to tidy all your belongings in one go. The effort will be worth it in the end, and you’ll not only experience the joy of living with objects that you love, but you’ll also be on the path of establishing your ideal lifestyle.

Marie Kondo’s theory is the more you can get rid of, the easier it will be to tidy up and remain organized. So, don’t get discouraged if the process takes longer than a day.

Imagine Your Ideal Lifestyle

Before you start, imagine your ideal lifestyle and identify the objects that make it a reality. If this is your first time tidying up, you might not be able to picture what your perfect life looks like. But it’s never too late to change and improve after all.

Marie Kondo’s tidying process isn’t about decluttering your house or making it look neat on the spur of the moment for visitors. It’s all about tidying up in a way that will spark joy in your life and change it forever.

Consider what kind of a house you want to live in and how you want to live in it. Make sure you describe your ideal lifestyle. You can draw and sketch out what it looks like if you like. You can also describe in a notebook or cut out photos from magazines.

When you imagine your ideal lifestyle, you’re clarifying why you want to tidy and envision your best life. The tidying process represents a turning point, so make sure you consider the ideal lifestyle you inspire.

Finish Discarding First

Once you know what your ideal lifestyle is, you’ll be able to decide which items have value in your home and fill a purpose for that lifestyle. Considering each item and sorting them to keep and discard piles allows you to create more space for the organization and storage solutions that come later in the Konmari method.

Discarding items is not the point of the Konmari method, but it’s important because it provides the opportunity to determine the items that will help you live your life as you envision it as well as those items that no longer fit into your lifestyle. After you’ve discarded, you can turn your full energy and attention to what sparks joy.

Sort by Category, Not Location

The Konmari method advises sorting by category rather than the room. This allows you to work on one type of item at a time and ensures that each category is treated with equal importance. In other words, you’ll have a hard time getting motivated to finish if all of your clothes are in one room and the books are in another.

If you’re cleaning your home room by room, you’re most likely rearranging items and tossing out only a few things since it doesn’t feel like a ton of clutter for that room. Tidy by categories such as clothes, books, papers, miscellaneous items and sentimental items.

This way, you’ll be on the right track to success. If you find yourself doing this, try to give each category its own dedicated space and do your best not to keep related items together. The Konmari method prefers that you spread out categories throughout your entire home.

Follow the Right Order of Tidy

This is probably the most important aspect of Konmari. You want to tidy up in the correct order to meet your tidying needs by starting with what’s most necessary first.

The right order for this method includes clothes, books, papers (all documents and manuals), miscellaneous items like small electronics and accessories, and mementoes.

sk Yourself if it Sparks Joy

Deciding if something sparks joy is the criteria for keeping and discarding items when decluttering. In the Konmari method, your feelings are the standard for decision making, especially knowing what sparks joy. To determine this when tidying, you need to pick up each object at a time and ask yourself quietly if it does spark joy.

Pay attention to how your body responds. Joy is personal, so that everyone will experience it differently. By selecting only those things that inspire joy, you can precisely identify what you love and what you need.

How to Use The Konmari Method at Home

Clothes

The first category you need to tackle for a tidy house is clothing. While you might be used to cleaning out clothes in your closet and then your drawers, the Konmari method suggests gathering clothes and accessories from all over your home, including your bedroom closets, coat closets, drawers and under the bed and put them all in one pile.

This will allow you how much you have and help you realize how much you don’t wear. If an item sparks joy, keep it and if not, give it to gratitude and donate your clothing. You can then learn how to iron the clothes remaining ones correctly and arrange them the right way.

Books

After clothes, the next category on the Konmari method checklist books, gather every book in your home and put them in a pile to decide which ones spark joy and which ones don’t. If your ideal lifestyle means that your space is filled with books, keep them.

Books
Image credit: https://www.shortform.com/

Papers

Every paper in your home, including documents, letters, bills and receipts, should be sorted using the Konmari method. Keep only what you need or use daily, plus one copy of everything else.

Miscellaneous Items

Any other items that don’t fit into the above categories should be put in a pile to determine what sparks joy and what doesn’t. Sort through everything carefully. Create groups like electronics, beauty supplies, home decor, canned goods and writing utensils.

Miscellaneous Items
Image credit: https://storage.googleapis.com/

It might be tempting to go room by room for an extensive category; make sure you gather items from all over your home and put them in one pile. That way, you’ll be able to store similar items together to easily find them and not have anything to spread out.

Sentimental Items

Sentimental items hold deep meaning and can be tough to part with. If you’ve ever seen the episode of ‘Hoarders’ where the woman won’t get rid of her deceased mother’s old suitcase, this method isn’t for you.

Sentimental Items
Image credit: https://justagirlandherblog.com/

Keep only those sentimental objects that truly bring you joy and store them in a designated area. That way, you’ll have them but won’t be reminded of them at every turn.

How to Store Items that Spark Joy

After deciding what to keep in your home, good storage solutions will help you keep everything organized. Here are some of the best Konmari organization and storage tips:

Try Konmari Folding

The Konmari folding method is perfect for organizing your clothes. Marie Kondo didn’t only create her method of decluttering and organizing, but she has also shared a unique folding technique for clothes and linens. The Konmari method of folding helps keep drawers, baskets and bins neat and tidy.

Use Boxes in Drawers

Don’t toss them out if you have gift boxes, shoe boxes, and jewelry boxes. These are great DIY home storage solutions for keeping small things like jewelry, beauty supplies, phone chargers and other miscellaneous things organized in drawers and cabinets.

Store Papers in File Organizers

The paper file organizer is perfect for storing mails, bills and other papers. It protects your documents from getting lost in the clutter of the drawer.

Invest in Wicker Baskets

Wicker baskets are great for keeping your cupboard free from clutter. Use them to store foodstuffs, dry fruits, snacks and other kitchen essentials.

FAQs on What is the KonMari Method

Is the Konmari method effective?

The Konmari method is a highly efficient and effective organizing strategy that has helped many people declutter their homes. The beauty of this method is that it doesn’t follow any specific order in tidying up – you can start from anywhere and go on to the next activity.

What are the benefits of the Konmari method?

The Konmari method advises people to get rid of useless, unnecessary belongings. If applied correctly, this will help you find more relaxation and peace in your life. It also teaches you not to keep hold of things that do not bring joy into your life.

Final Thought on What is the Konmari Method

Do you have items that spark joy that you can’t fit in your home? Well, get organized with these temporary storage solutions with extra space storage to keep items that fit your ideal lifestyle, even if you don’t have room for them now.

The post What is the KonMari Method? appeared first on Kitchen Infinity.

Did you miss our previous article…
https://www.thelavkitchen.com/?p=837

Install A Prefabricated Unit Or A Tiled Shower

Install A Prefabricated Unit Or A Tiled Shower

It’s not always easy to decide whether or not you should install a new shower unit in your home. There are many different types of showers available on the market, and there are several factors that come into play when determining which type is right for you.

In this article, we will take a look at the pros and cons of installing a prefabricated shower unit vs a tiled shower. We will also provide you with some tips on how to make the decision that’s right for you.

Let’s get right into it.

Image Credit: http://homeadvisor.com

Most important considerations

The most important thing to consider before installing any shower unit is what you will be using it for (for example, if it will primarily be used by individuals with mobility impairments, then your choice might be easier).

A prefabricated unit would likely be best for this use case because they’re typically easier to get in and out of than tiled units, but there are other considerations as well. These include cost, installation process, pros/cons of tiled showers vs prefabricated units, etc.

In addition to this, it’s important to consider if you have the skills necessary to install a prefabricated unit. If not, then installing a tiled shower will likely be your best option.

Prefabricated vs Tiled

Here are the basic things you need to know about these two types of showers.

Prefabricated

Installed in sections and brought into the home already assembled (typically more expensive than other options)

Pros:

Easy installation, generally considered to be more leak-proof than other types of showers

Cons:

More expensive than other types of showers, may not be as aesthetically pleasing as some tiled showers

Tiled

Built by gluing tiles directly onto the surface of an existing shower; typically installed with mortar on floor and ceiling (more labor-intensive but less costly than prefab units)

Pros:

Aesthetically pleasing, can be customised to fit any space

Cons:

More difficult and time-consuming to install than prefabricated showers, may be more prone to leaks

Other types of showers you might want to consider

Shower kit

A pre-made shower unit that uses standard fiberglass or acrylic tub/shower unit with a built-in shower receptor. These units typically have a vinyl liner and come in a variety of colors.

Pros:

Inexpensive, easy installation

Cons:

May not be as aesthetically pleasing as other types of showers, may not last as long as other types of showers

Sliding tub door

Installed like a typical tub/shower combo except that it uses sliding glass doors instead of curtains; typically installed in bathtub area (preferred by many for its ease of use)

Pros:

Easy installation, no curtains to deal with, typically more watertight than other types of showers

Cons:

May not be as aesthetically pleasing as some tiled showers, can be expensive if the glass is used

Steam shower

A closed unit that uses steam to create a sauna-like environment; typically installed in a separate room

Pros:

A relaxing, invigorating environment, can help with respiratory problems and skin conditions

Cons:

Installation can be expensive and complex, may not be suitable for all homes

There are many different types of showers to choose from, so it’s important to take into consideration what you will primarily be using the shower for.

If you’re looking for something easy to install and relatively leak-proof, then you’re likely best off with a prefabricated shower unit. If on the other hand, you want something aesthetically pleasing but still easy to use, then installing a tiled shower will likely be your best option.

Cost Analysis

When considering the cost of installing a shower unit, it’s important to remember that there is a wide range of options to choose from. A prefabricated unit will likely be more expensive than other types of showers, but it may be easier to install and less prone to leaks.

Conversely, a tiled shower will likely be less expensive than a prefabricated unit, but it will require more labour and may be more difficult to install.

Installation process

The installation process for a shower unit can vary depending on the type of shower you choose. A prefabricated unit will likely require less labour than a tiled shower, but it may be more difficult to install if the existing plumbing is not compatible. Conversely, a tiled shower will require more labour, but it may be easier to install if you already have the necessary tools and materials.

If on the other hand, you choose to install aDIY walk-in shower, the process will be even more straightforward. Since these units are designed to be easy to install, you simply have to plan the space for the shower, cut the proper size holes in your floor and ceiling, and fit the pieces together.

The most difficult part of the installation process is usually cutting the holes in the floor and ceiling, so be sure to have a good saw on hand.

Leak-proofing

One of the biggest concerns with showers is whether or not they are leak-proof. This concern is especially important if you plan to install a tiled shower, as even a small leak can cause extensive damage over time.

There are a few things you can do to help ensure that your shower does not leak. First, be sure to use waterproof sealant around all of the joints to create a watertight seal. You should also consider using tile grout that is specifically designed for showers, as it will be more water-resistant than other types of grout. Finally, be sure to use a quality shower pan to help prevent water from seeping through the floor.

If you’re still concerned about leaks, you may want to consider installing a shower unit that comes with a warranty for water tightness. This will give you peace of mind that your shower will not leak, even if it is used frequently.

Leaks cause all kinds of headaches, no matter if you’re trying to fix a leaking shower,leaking ceiling, or even aleaky bathtub faucet. Be sure to take all the proper precautions to prevent any water damage in your bathroom.

Install A Prefabricated Unit Or A Tiled Shower – FAQ

What is the difference between a prefabricated unit and a tiled shower?

A prefabricated shower unit is a ready-made shower that is installed in your bathroom as a complete unit. A tiled shower, on the other hand, involves installing tiles over an existing bathtub or shower base.

Which is better – a prefabricated unit or a tiled shower?

There is no definitive answer to this question as it depends on your specific needs and preferences. Some people prefer the look of a tiled shower, while others find that prefabricated units are more convenient and easy to install. Ultimately, it comes down to personal preference.

How do I choose between a prefabricated unit and a tiled shower?

The best way to decide between these two options is to consider your budget, bathroom space, and installation skills. If you are on a tight budget, a prefabricated unit may be the better option. If you have a large bathroom and plenty of installation experience, then a tiled shower may be the better choice.

How do I install a prefabricated unit?

Most prefabricated units come with detailed installation instructions that you can easily follow. However, if you are unsure about how to install it, you can always hire a professional installer.

Shower Pans - Tile vs Solid Surface - Select Kitchen And Bath

Image Credit: http://selectkitchenandbath.com

How do I install a tiled shower?

Installing a tiled shower is a more involved process than installing a prefabricated unit. You will need to remove the existing bathtub or shower base and install the tiles over the new shower base. If you are not confident in your tiling skills, you may also want to hire a professional tiler to do the job for you.

What are the advantages of a prefabricated unit?

A prefabricated unit can be a good choice if you want a contemporary look in your bathroom and don’t have much time for installation work. They are also cheaper than tiled showers, so they may be better value for money.

Final thoughts on installing a prefabricated unit or a tiled shower

In conclusion, there are several factors to consider when installing a prefabricated unit or a tiled shower. Cost, ease of installation, and durability are all important factors to consider when making this decision.

Prefabricated units are generally less expensive than tiled showers, but they may not be as durable. Tiled showers are more expensive to install, but they can last for many years if properly maintained.

In the end, the best option for your home will depend on your specific needs and budget. Be sure to weigh the pros and cons of each option before making a final decision.

The post Install A Prefabricated Unit Or A Tiled Shower appeared first on Kitchen Infinity.

Did you miss our previous article…
https://www.thelavkitchen.com/?p=834

Replacing A Water Heater

Replacing A Water Heater

Many people have had to replace their water heater at some point in their lives.

Most homeowners can expect to shell out around $1,000-$2,000 every decade or two to replace a water heater that has reached its expiration date. This article will give you information about what kind of things you need to consider before replacing your hot-water heater and tips for making the process of replacing one as easy as possible.

Let’s dive deep into this topic.

What is a water heater?

A water heater provides hot water for the household and is an insulated steel tank filled with an acid solution called ‘water glass’. This solution heats up and stores the energy to provide warmth when it’s needed. A gas burner or solar panels which use either natural or man-made gas create just enough heat to keep the water at a set temperature.

The right water heater for each household depends on several factors such as climate, average electricity and gas prices in your area, how often you use hot water, and the size of your home.

Why should I replace my water heater?

There are a few reasons why you might want to consider replacing your water heater:

If it is more than 10 years oldIf it has a leakIf you are experiencing water pressure problemsIf the tank is rusty or damagedIf you are not getting enough hot water

The most common reason for needing to replace a water heater is that it is old and past its prime. The average lifespan of a water heater is around 10-12 years, so if your water heater is older than that, it might be time for a replacement.

Image Credit: http://familyhandyman.com

Another reason to replace your water heater is if it leaks. If there is a hole in the tank, it could potentially cause extensive damage to your home. A leaky water heater can also lead to high utility bills as you will be using more energy to heat the same amount of water.

If you are experiencing water pressure problems, this is a sign that your tank needs to be replaced. This can be caused by sediment build-up which usually happens over time. Sediment buildup will eventually reduce the amount of hot water your tank can supply and it could also affect the efficiency of its heating system as well as the thermostat control.

Finally, if you find yourself not having enough hot water for an entire household, this is another sure-fire sign that you need to have a replacement unit installed. A new tank should increase your flow rate so each person in your home won’t have to wait forever for a warm shower.

How do I replace my water heater?

There are several steps involved with replacing a water heater, and if you did not purchase the new unit yourself, you should check with your home insurance company before starting work.

You will need to shut off the gas supply or turn the power off at the breaker box.

Before disconnecting anything, you must do a few things:

Take photos of all the connections (this is an easy way to make sure they get reconnected properly) and mark them with a piece of painter’s tape so there isn’t any confusion while reassembling everything later on.

Write out a list detailing which connection is for what and where each one goes. Once everything has been marked and recorded, you can start disconnecting and collecting tools and supplies needed for installation.

Tools needed for installation:

JigsawBreaker barTape measureFlat tip screwdriverBig wrench or channel locks for gas supplyPhillips head screwdriver

The first step is to drain out all the water in your tank. This can be done safely with a small pump, but if you want to do it the old school way, shrimp nets are great for catching all that yucky sediment. Once you’ve drained out most of the water (and possibly all of the sediment), remove any panels on your tank and disconnect anything connected to it such as new water lines or pipes leading from your home’s plumbing system.

When everything has been disconnected, disconnect any electrical connections by turning off breakers and pulling them apart. You should also remove the temperature and pressure relief valves. This will give you a bit more room to work with while removing your unit’s insulation.

Now that your tank is ready, lift the water heater out of its place and carry it outside where you can begin removing it from its casing. Use a flat-head screwdriver if you encounter any stubborn screws on the way down. After all the screws have been removed, pry off whatever pieces might still be holding your old tank together. You’ll notice that most tanks are made up of different-sized sections – some larger than others which makes for an easy breakdown later on during reassembly.

Once all of the pieces have been separated, clean them thoroughly so they look new again before putting in your new water heater. You might also want to consider purchasing a new gasket kit – these tend to wear down over time and can cause water leakage.

Now it’s time to start putting everything back together.

Water Heater Installation & Replacement in Maryland | BGE HOME

Image Credit: http://billygo.com

Start by reassembling the tank using the photos and list you took before starting disassembly. It’s important that each pipe is reconnected properly and that nothing leaks when you turn on the water again. If you do encounter any leaks, stop and troubleshoot before continuing. It could be something as simple as a tightened screw or an improperly connected pipe.

Once the tank has been reassembled, connect the pipes leading from your home’s plumbing system and then reconnect the electrical connections. If you’re having trouble remembering where each pipe goes, you can always use the photos you took as a reference.

Turn on the gas supply (or flip the breaker box back on) and check for any leaks. Once everything has been checked and double-checked, it’s time to turn on your water and give it a test run. Take a shower, run the dishwasher – just make sure everything is working properly before calling it a day.

Replacing a water heater can be an intimidating task, but with a little bit of preparation and careful following of instructions, you’ll be able to do it like a pro. Not only will you save money in the long run by avoiding costly repairs or replacements, but you’ll also have the satisfaction of knowing that you did it yourself. So before you call a professional, give it a try. You might be surprised at just how easy it is.

Other things you need

Heavy-duty work gloves – You will have to touch the tank once it’s been removed from your home so be sure that you have a good pair of protective gloves.

Scouring pads – These are necessary for removing surface rust from the outside of the tank. Make sure that you use one that is free of harsh chemicals as they can seep into your water.

Heavy-duty work boots – The ground will get wet and slippery when you drain your tank so make sure you have a good pair of boots on to keep yourself from falling. If possible, avoid wearing other types of shoes as they will not keep you dry or safe.

Shrimp nets – These are great for removing sediment if you decide to do it the old-school way.

Flashlight – You might need light once everything has been disconnected inside of your home so make sure that you bring your flashlight along with already charged batteries (extra batteries wouldn’t hurt either). It’s also helpful if you decide to do any troubleshooting that might arise while reassembling your tank. Trust me; nothing is more frustrating than being in the dark.

Once you have all of these items, you’re ready to start your replacement project. Just be sure to take your time and follow the instructions closely – it’ll save you a lot of headache (and maybe even a little bit of money) in the long run.

Final thoughts on replacing a water heater

In conclusion, replacing a water heater is a big job but it’s one that most homeowners can do themselves with a little bit of instruction and preparation.

Make sure to have all of the necessary tools and supplies on hand before you start and be sure to take your time while following the step-by-step instructions. If you run into any problems, don’t be afraid to stop and troubleshoot – it might just save you some time (and hassle) in the long run. Good luck.

The post Replacing A Water Heater appeared first on Kitchen Infinity.

Did you miss our previous article…
https://www.thelavkitchen.com/?p=831

DIY All-Purpose Vinegar Spray

DIY All-Purpose Vinegar Spray

Vinegar is a miracle cleaner and disinfectant. It can be used to clean many surfaces in the home, including kitchen counters and sinks, toilets, bathtubs and showers , windows and mirrors, as well as floors.

In this article, I’ll tell you how to easily make vinegar spray so you can start using it to clean your home. Let’s get right into it.

Making DIY All-Purpose Vinegar Spray

Making and using vinegar and water spray is so easy and cheap, you can almost do it with your eyes closed.

Image Credit: http://livesimply.me

All you need is:

A spray bottle (if it’s plastic go for the 1-litre size if it’s glass get one of 0.5 litres). The small 0.25 litre plastic bottles are also great because they are small enough for storage purposes yet large enough to use when cleaning larger areas.Vinegar. Plain, white distilled or apple cider vinegar will do fine here. You can also make your fruit-flavored vinegar by adding some juice from oranges, lemons, or apples to regular white distilled vinegar in a ratio of about 1 part fruit juice to 3 parts white wine vinegar. For each cup of fruit juice you use, add 1 tablespoon of sugar to the vinegar.

To make the spray:

Fill your spray bottle with white distilled or apple cider vinegar. If you’re using fruit-flavored vinegar, fill it halfway with that and halfway with white distilled vinegar.Fill the rest of the bottle with water.Shake well before each use.

That’s it. How easy was that? Now you’re ready to start cleaning your home with this powerful natural cleaner.

Important Tips To Keep In Mind

There are a few things to keep in mind when using your DIY all-purpose vinegar spray:

Using A Paper Towel

Using a paper towel will help to avoid streaks on surfaces like mirrors and windows. Just spray the vinegar mixture on the surface, wait a few minutes for it to work its magic, then wipe off with a paper towel.

Safety First.

Vinegar is a powerful cleaner, so always take precautions when using it. Never mix it with other cleaners (such as bleach) or use it near an open flame. Keep it away from children and pets, and never drink it.

Do Not Use On Marble Surfaces

Vinegar is very hard on marble surfaces so don’t use this cleaner if you have marble floors. This is especially true with marble kitchen countertops. Marble can be damaged by vinegar, so use this spray sparingly if you have marble surfaces in your home.

Using Lemon Juice In Place Of Vinegar

Lemon juice is a great replacement for vinegar in most cases when making DIY all-purpose cleaners. It has the same disinfecting properties as vinegar, but I find it’s less harsh on my hands and smells better too.

A good way to get rid of bad odors is to mix some lemon juice (room temperature) with baking soda until it forms a paste-like substance, then spread it over the areas that smell bad (such as fridge shelves or garbage bins). Let sit for 15-30 minutes before wiping with paper towels. This will help to remove the bad odor and also disinfect the surface.

Don’t Spray It Directly On Your Skin

If you do happen to get a bit of vinegar spray on your hands or skin, make sure to wash it off quickly with water. If you have sensitive skin, you may want to wear gloves while cleaning with this spray.

Using Baking Soda Along With A Vinegar Spray

While there are manyincredible uses for white vinegar, one of my favorites is using it in combination with baking soda. These two ingredients, when used together, can form an amazing all-purpose cleaner that’s great for tackling tough messes. Here are a few ways you can use them together:

To clean your oven, mix 1/2 cup vinegar with 1/4 cup baking soda. Spray the mixture on all surfaces of the oven and let sit for 30 minutes before wiping off.To clean countertops and kitchen surfaces, mix 1/2 cup vinegar with 1/4 cup baking soda in a spray bottle. Shake well before each use and spray on the surface. Let sit for a few minutes before wiping off with a paper towel or sponge.To remove water stains and mineral deposits, spray some vinegar and baking soda mixture on the surface and let it sit for a few minutes.Cleaning your painted cabinets properly with baking soda is a great way to remove stubborn dirt and grime. Just mix equal parts of vinegar and baking soda in a bowl, dip your brush in, and start scrubbing. Rinse off the brush when you’re done and give it a good shake to get rid of any excess water.

Using Essential Oils In Your Diy All-Purpose Spray

If you like to use natural cleaning products that not only disinfect but also leave behind a lovely scent, adding 5-10 drops of lavender or tea tree oil is an easy way to do this. Adding the essential oils will help mask any unpleasant odours from the vinegar while also ensuring that your home smells fresh and clean.

DIY Disinfecting Spray Cleaner - Clean Mama

Image Credit: http://helloglow.co

As I mentioned earlier, lemon juice is another great replacement for vinegar (in most cases) when making DIY all-purpose cleaners because of its disinfecting properties and pleasant citrus smell. But feel free to experiment with different essential oils to find the scent that you like best. Just make sure that the oil is labelled as “pure” or “undiluted” so that it doesn’t contain any harmful chemicals.

Final Thoughts On DIY All-Purpose Vinegar Spray

In conclusion, this DIY all-purpose vinegar spray is a huge money saver and works just as well as most off-the-shelf cleaners. It doesn’t matter if it’s vodka or vinegar, if you can clean something with vodka then you can do the same with vinegar since they both have antiseptic properties.

Vinegar and vodka contain about 80% water so unless you want to spend $30 on a bottle of stuff with 60% alcohol content, I’d go for good old-fashioned distilled white vinegar that costs around $3-4 per gallon.

The best part about this whole procedure is also that after doing it once you no longer need to buy any cleaning products anymore because you now have an endless supply at your disposal every day for a very cheap price.

The post DIY All-Purpose Vinegar Spray appeared first on Kitchen Infinity.

Did you miss our previous article…
https://www.thelavkitchen.com/?p=828