Growing plants in water is not a common practice. Houseplants that grow in water are beautiful and easy to care for. You don’t need any green thumb or special equipment to start growing these plants. All you need is a jar, fill it up halfway with clay pebbles at the bottom, add soil on top of the pebbles. You can then plant your seeds or seedlings and wait until they bloom.
The best part about houseplants that grow in water is that they will last forever without replacing them every year like other types of plants do. These are low maintenance indoor plants which means there’s no need for watering them very often or fertilizing them.
What which ones are those plants? This article outlines 10 houseplants that grow in water and would be perfect for your home.
1. Spider Plant
This is a very decorative and popular houseplant with many small white flowers, perfect for decorating your home. Spider plant also makes one of the best plants for the bedroom, thanks to its beauty and air purification. It’s great because the leaves on the Spider Plant are so big and add contrast if you place them in a group with other smaller plants or flowers around them.
To grow this plant, take a few cuttings from the parent plant and place them in a glass jar or any container filled with water. You can leave them there or move them into a pot with soil after they root. If you plan on moving them to a pot, let the roots grow until they seem strong enough to support the plant.
2. Lucky Bamboo
Lucky bamboo is one of the easiest plants to grow in water without much sunlight or maintenance. It’s a popular type of houseplant because it’s believed to bring good luck and fortune to the owner. The hardy stalks of lucky bamboo can become a living centerpiece, no soil required.
The indoor plants grow in water, and a narrow vase is a perfect fit for them. You can purchase these plants online, and their basic versions are inexpensive. The lucky bamboo tends to become top-heavy and will topple in smaller containers, so look for a container that’s sturdy enough.
Plant them in a wider container and surround them with colorful gravel or pebbles, which will add to the ornamental value and provide some support.
3. The Chinese Evergreen
The Chinese evergreen plant is also known as the claw or peace lily plant. The dark green leaves of this houseplant are shaped like claws, and they can grow to be four feet tall. This lush greenery is the perfect indoor plant for beginners because it’s hardy and doesn’t require too much attention.
Chinese evergreen plants are also carefree indoor plants tolerant of low light conditions and general neglect. These features make it a popular indoor plant for those looking for no-fuss greenery. This plant also makes an excellent office or dorm room plant. To grow it in water, clip six-inch-long stems, placing them in a bright room and indirect sunlight as too much light can cause algae growth.
4. Heartleaf Philodendron
Heart leaf philodendron is an easy-to-grow houseplant that thrives even in low light. To grow heartleaf philodendrons in water, cut off any stems hanging over the edge of a container and place them in indirect light until new leaves appear. These vining plants are harder to kill than to keep alive.

Image credit: https://www.thespruce.com/
It has glossy, heart-shaped leaves with stems that can cascade down four feet or more. If you want a more compact plant, occasional pinching back leggy stems will help maintain a bushy growth habit. To grow this tropical plant in water, take a four to eight-inch long stem cutting, remove the bottom leaves, and place them in water.
Keep the container in a site with bright light but away from direct sun. Also, avoid keeping the plant in a cold room as it grows best in temperatures above 70 degrees Fahrenheit. Feed philodendron plants occasionally by adding a drop of liquid organic fertilizer to the water.
5. Sweet Potato Vine
Although the sweet potato vine is a tender tropical, it can be grown in water indoors. Cuttings should be made from green stems and allowed to heal for at least 24 hours before planting them in containers filled with peat-based potting mix or a mixture of perlite or gravel and sand. This trailing plant can grow four to five feet long.
It has lime green, heart-shaped leaves, but many cultivars offer unique and eye-catching foliage. Leaf colors range from burgundy to purple to bronze, and foliage is also varied for layers of interest. You can clip pieces of the stems in autumn to grow indoors over winter, then take six to eight-inch long cuttings, clipping just below a leaf node.
6. Coleus
Coleus plants are easy to propagate and grow by rooting stem cuttings in water, allowing you to create a colony of handsome coleus houseplants. They make a lovely counterpiece in a mason jar filled with water.

Image credit: https://www.chatelaine.com/
To grow coleus, take a six-inch cutting and remove the leaves from the bottom four inches, then immerse it in a jar filled with water and watch it grow for several weeks. Adding a bit of compost tea to the water during monthly changes will help your coleus plants thrive. This plant also requires indirect sunlight, making it a great choice to grow indoors all year round.
7. Peace Lily
The peace lily is a lovely tropical plant with showy white flowers, which enjoys the humidity of the bathroom. It will grow in water as long as you provide it with indirect light and room to spread. In order for your peace lily plants to thrive, you should rinse them carefully before putting them into their jar of water.
This will help remove any built-up fertilizer salts. If you buy peace lilies, examine their roots carefully for damage before planting them. Fill a container with distilled water and not chlorinated water, which will damage the plant. Cut a hole on the top of a plastic stopper and use this to keep the plant in place by placing it at the top of the container.
Insert your lilies in the container and ensure the roots are completely submerged. You can add a few drops of liquid fertilizers or a small quantity of water soluble fertilizer. However, be careful with a peace lily in the house as it’s among the plants that are toxic to pets
8. Wandering Jew
Wandering Jew is one of the easiest houseplants to grow using this method. The plant should be well watered before you place it in its container. You don’t have to worry about fertilizer because it has no nutritional needs.
To grow a wandering Jew in water, submerge the cuttings from the mature wandering Jew plant in a jar of water, submerging only the stem and not the leaves as the latter submerged in water will rot the cutting. Leave in an area with plenty of sunlight and watch it root in just a few weeks.
9. Impatiens
The key to successfully growing impatiens in water is to select the right kind of stem cuttings. Take young, soft shoots that are just pink in color with no flowers or buds. Cut off about 1 inch of these shoots under running water.
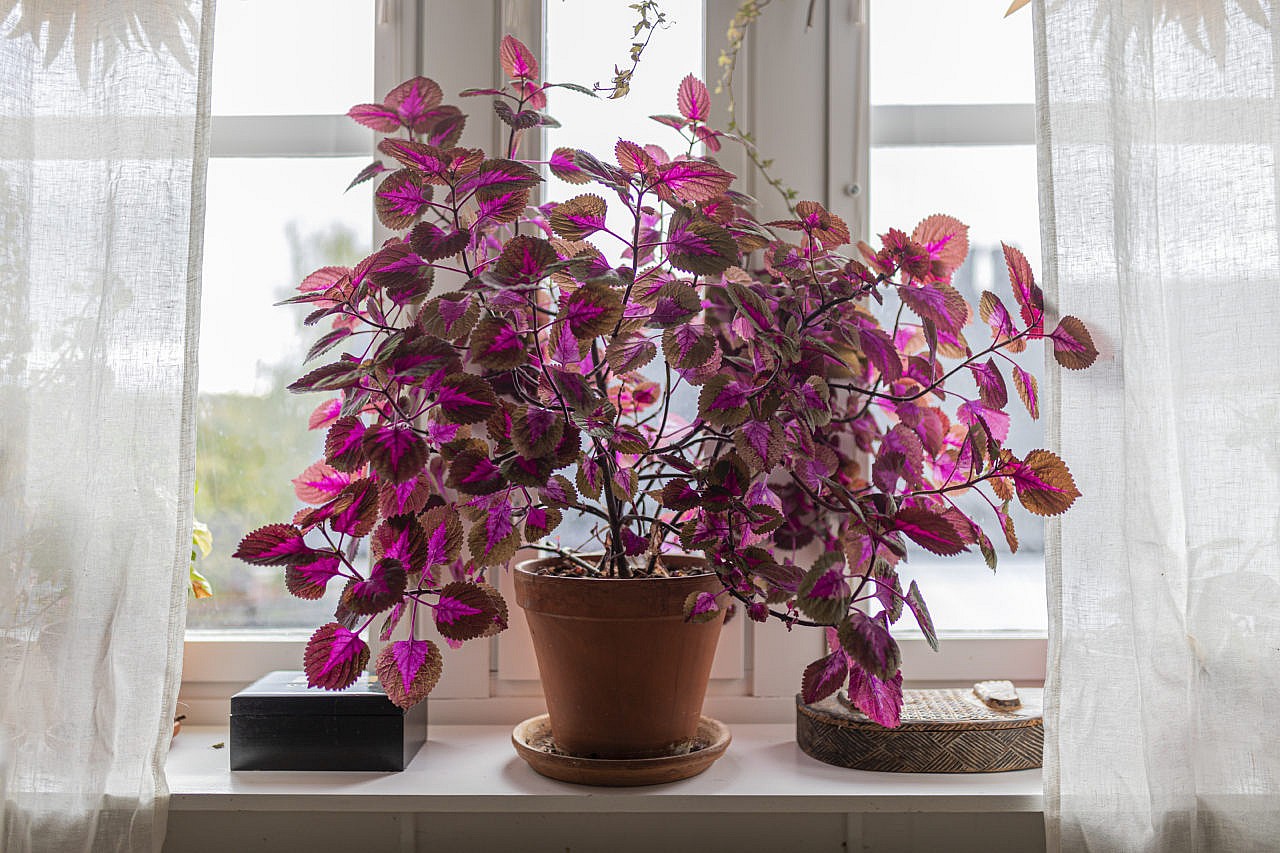
Image credit: https://www.chatelaine.com/
Impatiens can also grow as marginal pond plants, and that’s how much they adore water. Snip off a few stems at the end of the growing season and overwinter them in a vase where they’ll root and grow as clones of the parent plant.
10. Pothos Plant
Pothos plants are some of the easiest houseplants to grow in water. Cut off a stem or two from an existing pothos plant and place them in a vase or jar of water. Plant the stems in the soil as soon as they root (usually within 2-3 weeks). Make sure the potting soil is damp but not wet.
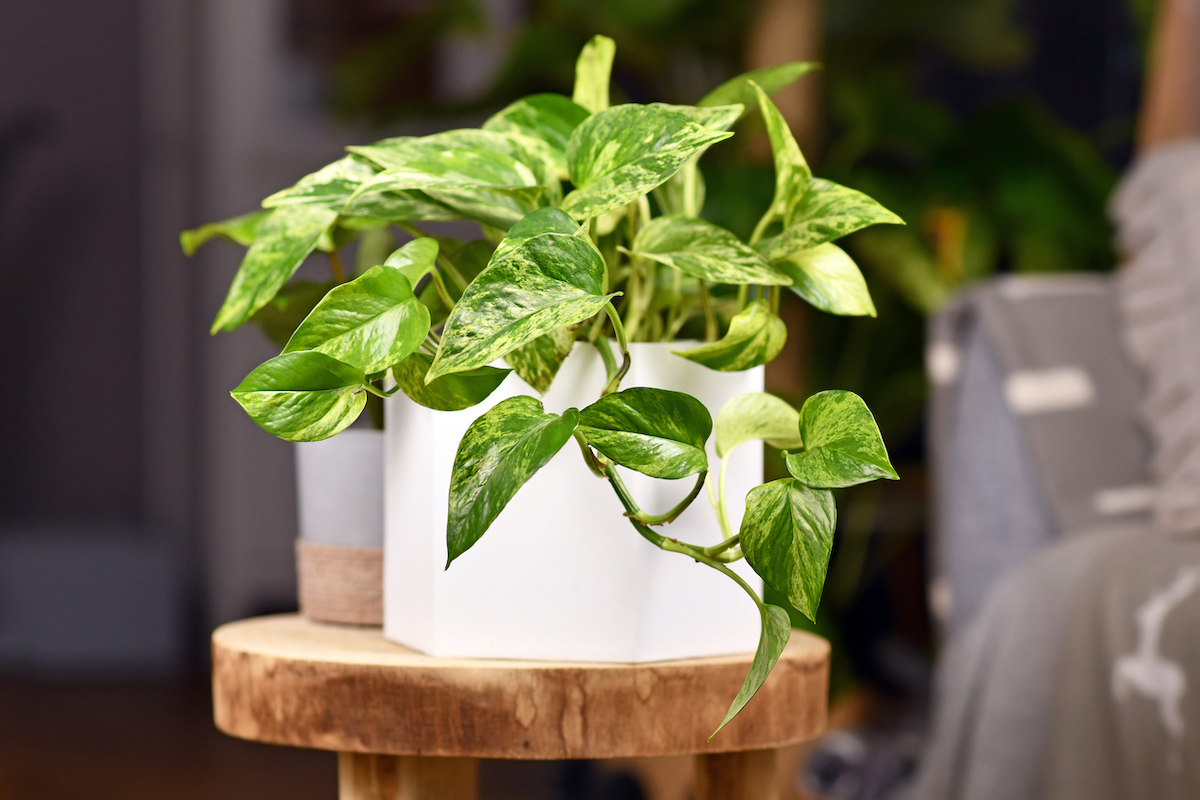
Image credit: https://empire-s3-production.bobvila.com/
FAQs on Houseplants You Can Grow in Water
What are growing plants in water called?
The technique of growing plants in water without soil is called hydroponics.
What are the benefits of houseplants grown in water?
Houseplants grown in water generally have more vigorous growth and lush foliage than those grown in soil. They’re also easier to care for because you don’t have to worry about watering them regularly or fertilizing them.
Final Thought on Houseplants that You Can Grow in Water
Are you looking to add some green cover but lack space and time in your home? Well, with these house plants that need only water to grow, it’s easy to have some plants around that don’t require much attention. In addition, these indoor plants add life to an otherwise dull dorm or living room. So, what are you waiting for? Plant these house plants and enjoy the beauty they bring.
The post 10 Houseplants You Can Grow in Water appeared first on Kitchen Infinity.
Did you miss our previous article…
https://www.thelavkitchen.com/?p=799