Outdoor Treasure Hunt for Kids

Outdoor Treasure Hunt for Kids

Kids love games, and they also love to be challenged. But sometimes, it is difficult to come up with ideas on how you can keep their interest in a game that might have become boring after playing it for the umpteenth time. An outdoor treasure hunt for kids allows them to explore nature while having fun.

It will also help them develop critical thinking skills and enhance their observation skills, which are important when looking for treasures around your home or community. And what’s more? They will get some exercise too.

This guide has printable outdoor scavenger hunt clues so that you can set these treasure hunt riddles in minutes:

What is a Scavenger Hunt?

A scavenger hunt for a treasure hunt is a fun game where you follow clues or riddles and collect small prizes or a large prize at the end of the hunt. For an Easter scavenger hunt, you can even use plastic eggs to hold the clues in. Both individuals and teams can play scavenger hunts. The game is adaptable and has greater activity for smaller and larger groups alike.

Scavenger Hunt Clue Ideas

Nature Scavenger Hunts

A nature scavenger hunt can be a fun way to get your kids excited about being outside and learning about the environment. You can make a nature scavenger hunt as easy or hard as you want by including different items in the list. It can take place in your backyard, a park, or a nature preserve.


Image credit: https://childhood101.com/

It involves searching for items or following clues to find hidden items outdoors. These scavenger hunts are great for every age group, including very young kids. An outdoor scavenger hunt is a great way to engage the senses. So, consider a search that asks players to identify things they can watch, smell and hear.

A nature hunt can also be fun to teach kids about environmental stewardship. You can help beautify a trail by picking up trash you find on your walk. Collecting trash can feel like a menial task, but it can be fun when it’s considered a game. Pass out gloves and plastic bags and offer prizes for whoever collects the most trash and finds the strangest object.

Ensure each group of the kids has adult supervision for safety if they’re collecting trash. Nature scavenger hunt ideas include collecting sticks, pinecones, and leaves in a nature craft. Spot and photograph nature items from a list, and lastly, identify and photograph a variety of bugs, leaves, plants, and flowers.

Neighborhood Scavenger Hunts

A neighborhood scavenger hunt is another type of treasure hunt where players are given a list of items to find in their surroundings. This can be a fun activity for kids who live in urban neighborhoods. Items on the list might include a rubber band, toothpick, a canceled stamp, a cookie, a drinking straw, and a paper cup.

Neighborhood Scavenger Hunts
Image credit: https://columbiasc.momcollective.com/

There are a couple of variations on neighborhood hunt. The first variation is to have teams go door to door where players tell the neighbor who answers the door that they’re on a scavenger hunt. They then ask them for the items on their list. The next variation is holding an outdoor scavenger hunt in the neighborhood like you would have a nature hunt.

This is also a great way of keeping kids occupied during a neighborhood block party. Use discretion with a door-to-door variation of this game, as knocking on someone’s door more than once could quickly become irritating for neighbors.

If you have two teams, each team might go to odd-numbered or even-numbered houses, or one team could go to the north side of the street and the other to the south side. Neighborhood scavenger hunt ideas include finding hidden items in the neighborhood, finding specific landmarks and locations, following hidden clues to find a prize, and going door to door to request items from a list.

Color Scavenger Hunt

This hunt is perfect for younger kids learning the names of colors. Write down the names of commonly known colors and post them in a visible spot. Split kids up into teams and give each team a different color crayon or marker.

Color Scavenger Hunt
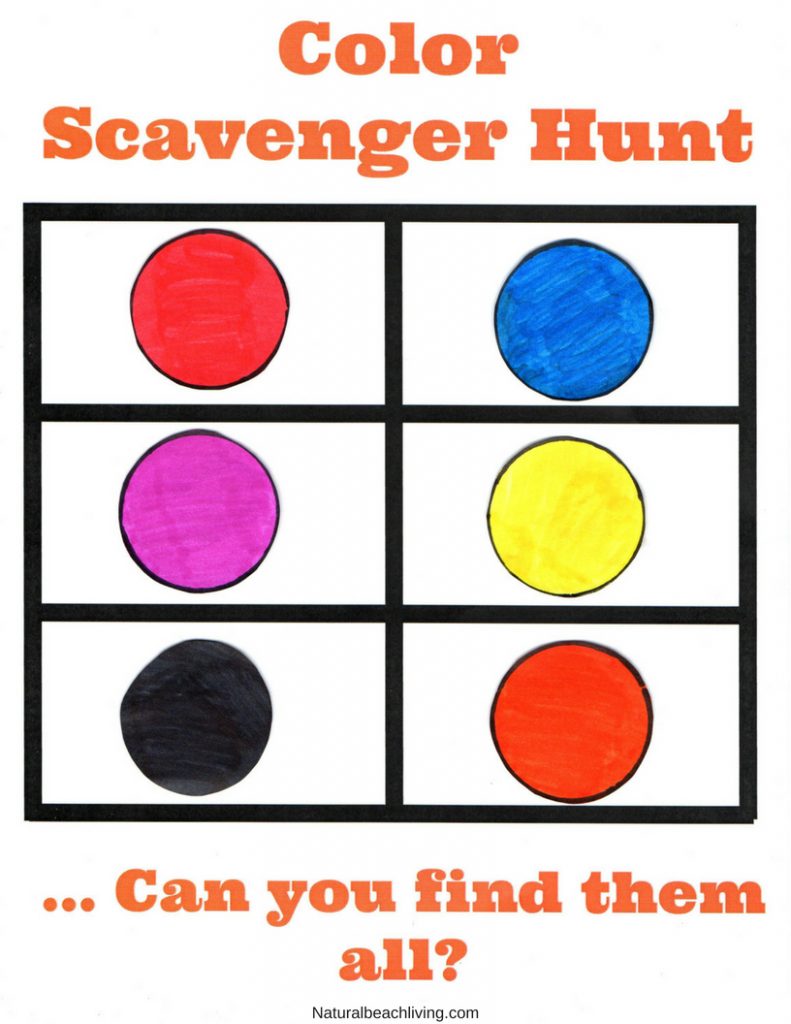
Image credit: https://cdn.naturalbeachliving.com/

The goal is for the kids to find all of the items listed on the sheet in that particular color. Let your child find the colors and label them with the appropriate names on the hunt sheet.

Photo Scavenger Hunt

This hunt is perfect for older kids. Give them a digital camera and take pictures of items listed on the sheet. The items can be anything from a specific color to something found in nature. The best part about this hunt is that you can tailor it to your child’s interests.

Photo Scavenger Hunt
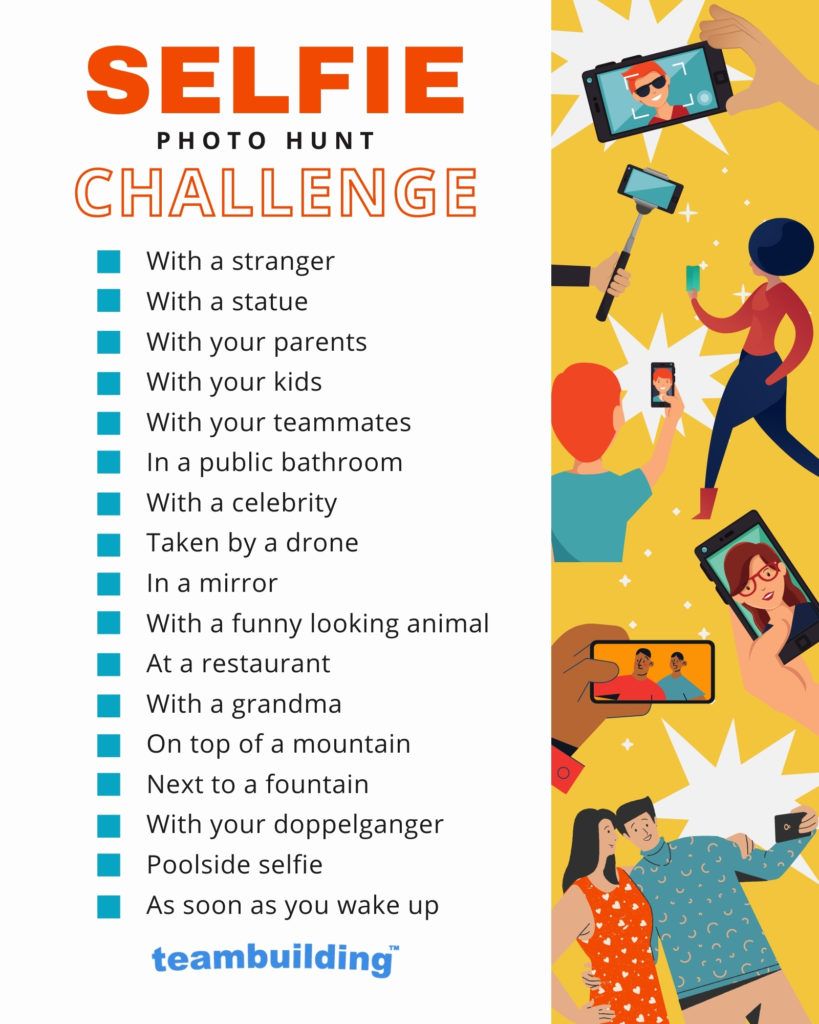
Image credit: https://teambuilding.com/

If they love animals, make a list of items that includes pictures of different animals. If they love nature, make a list of items, including plants and flowers. You can also make the hunt harder by including specific details in the photos, such as something in motion or a picture taken from a distance.

Photo scavenger hunt ideas include items of a particular color or shape, local landmarks, players doing certain activities, and things that start with a specific letter.

Stay at Home Scavenger Hunts

Scavenger hunts can be great at-home activities too. They’re a fun way of breaking up a boring weekend. Sleepovers and birthday party scavenger hunt ideas are especially popular.

Stay at home scavenger hunt ideas include favorite things like favorite foods, favorite colors, and favorite toys. Others include household items and something that starts with A, B, C, D, and more.

Scavenger Hunt Clues for Treasure Map

After creating a list of items or clues, tally up the total number of items and assign a point value to each item. For example, if there are ten items on the list, assigning a point value of five each would make the total points 50.

Now create a simple treasure map with a starting point and an ending point. The path between the two should have several circles or X’s drawn, each representing a clue.

Field Trip Scavenger Hunts

Field trip scavenger hunts can be a great way to keep your kids engaged at museums, zoos, or amusement parks. Scavenger hunts at public places involve finding specific items and clues. This is a fun way to explore new places and learn about unique objects.

Field trip scavenger hunt ideas include certain colors or shapes, items in an exhibit at the museum, items with the logo, and specific rides at a carnival or amusement park. Others include animals at the zoo and vendors that sell specific food items such as cotton candy and popcorn.

When having a scavenger hunt in public spaces, talk to kids about proper etiquette and safety. For example, if your hunt is in a museum, ensure your kids understand that they should talk quietly and walk.

If it’s a noisy outdoor venue, make sure your kids know to stay in designated groups and not wander off on their own. For safety, let an adult or teenager stay with each group if younger children are participating and make a plan of what you’ll do if someone gets lost.

How to Make a Riddle Scavenger Hunt

If you want to make your own outdoor scavenger hunt clues for scavenger hunt games, it’s pretty and easy to do. Even if you don’t consider yourself a creative person, you can come up with dozens of clues and ideas for riddles or games. You can try keeping one child busy and occupied or throwing a larger themed birthday party or traditional Easter egg hunt.

You can turn all these scavenger hunt riddles into whatever theme you like or use on a family camping trip. If you’re looking for a quick way to occupy your child once they’re on a school break, you can raid the dressing up box and toys for some props or age treasure clues with a wet tea bag and use some pennies as a real treasure.

Kids Scavenger Hunt Ideas and Theming

There are plenty of scavenger hunt ideas that you can use to theme your game. Whether it’s finding things around the house or in the garden, there’s something for everyone. You could even go on a treasure hunt and set up a series of clues that will lead players to different items hidden in your backyard or neighborhood.

Traditional Easter Egg Hunt

Alternatively, you could set up a traditional Easter egg hunt with wrapped candy or plastic eggs that contain some prize. You can even get your child’s friends involved and play along too.

Traditional Easter Egg Hunt
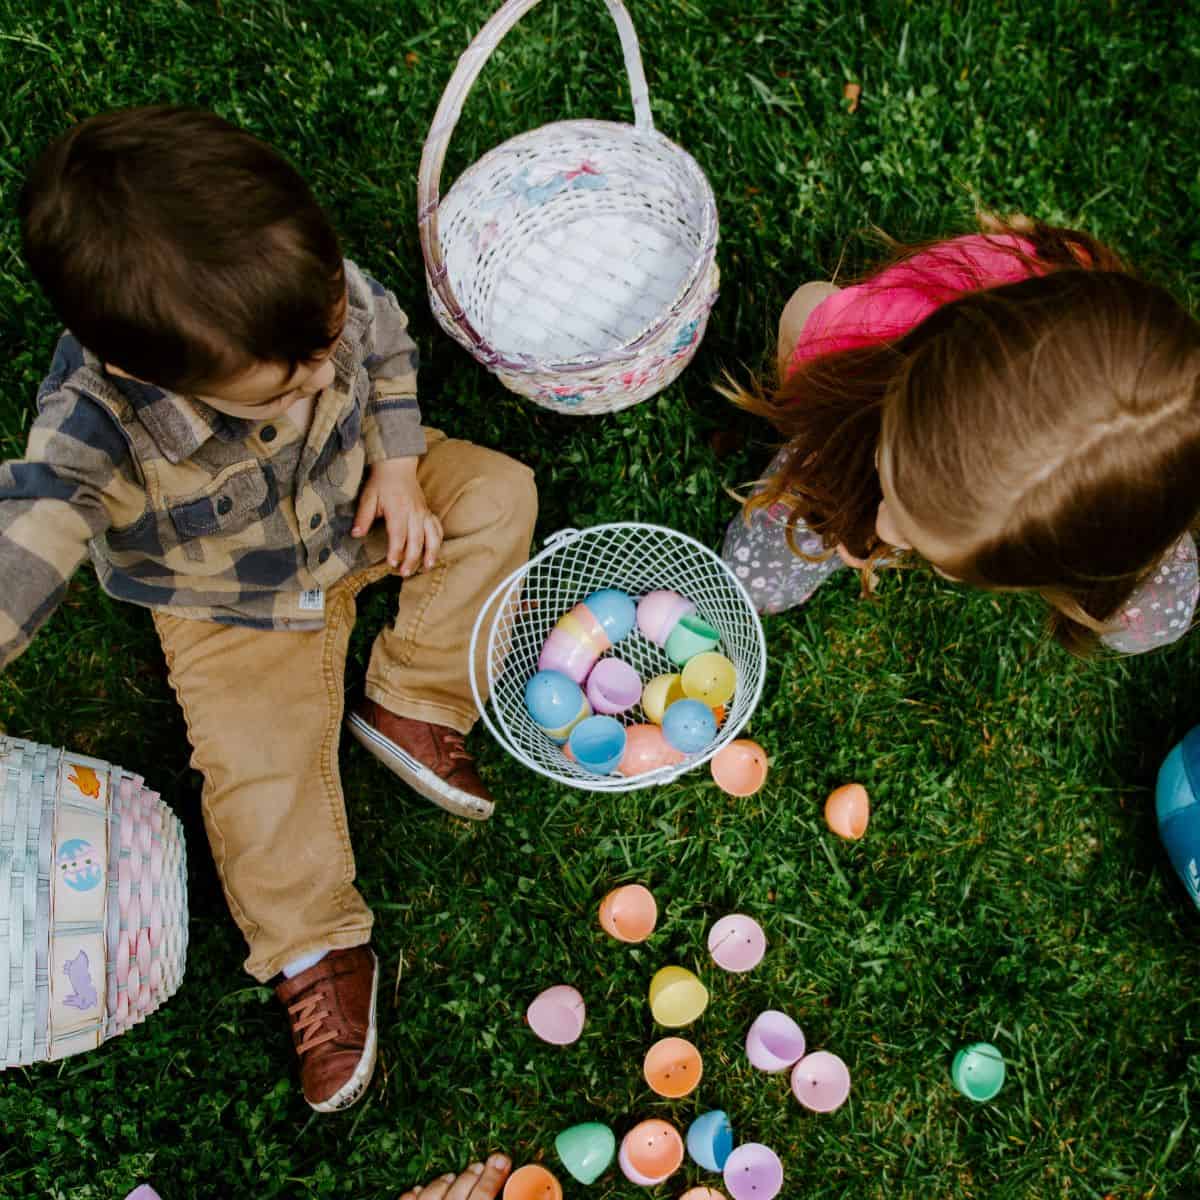
Image credit: https://www.organizedmom.net/

Try our treasure hunts if you’re looking for something truly inspirational and creative to do with the kids. When it’s clear what your theme is and whether you’re holding an outdoor or indoor treasure hunt, you can decide on the treasure hunt clue.

How to Make Your Own Find Things Treasure Hunt

If you don’t want to buy treasure hunt cards or cards with scavenger hunt items like the brilliant find it a game, you can make your scavenger hunt clues for kids or visual treasure hunt questions.

You can cut out magazine or newspaper pictures and stick them to a sheet, then your kids can run around hunting for the treasure hunt items on the list. This also works well for scavenger hunt clues around the house.

If your kids can read, then scavenger hunt clue ideas can include a simple list of the items or write down a subject. For older kids, you can make more elaborate riddles or rhyming riddles for them to solve.

Scavenger Hunt Supplies List

Here’s a list of universal treasure hunt ideas and can be used for an outdoor or indoor scavenger hunt game. You can also add rules like don’t bring anything back that’s alive like worms, a pet, a growing plant, or a flower.

Themed treasured gifts and prizesDecorationsTimerBags or baskets for the itemsPen or pencil to cross off the list itemsPre-printed list or paper and magazine pictures bought treasure hunt cards.

FAQs on Outdoor Scavenger Hunts for Kids

How can you do an online scavenger hunt?

You can use a virtual scavenger hunt to connect with friends and family who live far away. Virtual scavenger hunts are played the same way as in-person scavenger hunts, except that you’ll connect with fellow players over video conferencing.

What are some of the benefits of outdoor scavenger hunts for kids?

Scavenger hunts for kids have many benefits, ranging from inflicting team building to kids, improved outdoor time which helps in getting Vitamin D, which is crucial for the development of kids. Scavenger hunts are one of the best ways to bring kids into the present moment.

Final Thought on Outdoor Treasure Hunts for Kids

As you can see, these scavenger treasure hunts do not require special skills, materials, or investment. They’re also inexpensive and accessible games for people of all ages. So, if you’re thinking of a scavenger hunt, you can make it as simple and elaborate as you want with things you can find around the house and some items on the checklist you find.

The post Outdoor Treasure Hunt for Kids appeared first on Kitchen Infinity.

Did you miss our previous article…
https://www.thelavkitchen.com/?p=649

12 Shrubs with White Flowers

12 Shrubs with White Flowers

Are you looking for plants to brighten your dark spaces? Well, white flowering shrubs may be the perfect solution for you. Not only do they look great in your garden, but also produce a wonderful fragrance.

As an element design, these white flowering shrubs convey purity and they’re often used as the foundation for moon gardens, designed to be enjoyed in the evening. Some flowering shrubs are even valued for the spring color they bring to the garden.

Here are 10 common shrubs with white flowers:

1. Japanese Andromeda

Japanese Andromeda is a flowering shrub that can grow up to 5 feet tall, with white flowers. It’s very fragrant and looks great when combined with other plants. The plant can also be shaped into a hedge or it can be grown as a single specimen.


Image credit: https://www.gardenia.net/

This is a white flowering shrub with drooping clusters of small bell-shaped flowers. The early spring blooming shrub white clusters look like lily of the valley flowers. The benefits of growing this plant include evergreen foliage offering winter interest, leaves that offer attractive red color and an early bloom period.

Also known as Japanese Pieris, this evergreen flowering shrub grows between 9 and 12 feet tall and up to 8 feet wide. To enjoy the attractive white flowering shrubs, grow Japanese Andromeda in full sun to partial shade. With the right care, this shrub will indeed form part of your gorgeous flower garden

2. Rose of Sharon

Also known as Althea, this is a large shrub or small tree that typically grows 8 to 12 feet tall but takes pruning well. It blooms from mid-summer to frost, with clusters of trumpet-shaped white flowers.

Rose of Sharon
Image credit: https://bloximages.newyork1.vip.townnews.com/

This is a hibiscus to grow if others fail you. And if you want an earlier show, try one of the cultivars with variegated foliage. This upright shrub brings late-season color to the yard, making it a darling to many gardeners. Honeybees also love their big flowers.

3. Annabelle Hydrangea

Annabelle hydrangea is a summer bloomer that will flourish with dozens of large, bushy bloomers comprising a multitude of smaller, delicate blooms of any hydrangea. Annabelle hydrangea is loved by gardeners because its blooms are quite large and last from early summer through autumn. It prefers full sun to part shade and blooms well in zones 3 to 7.

4. Mock Orange

The mock orange (Philadelphus coronarius) is an easy to grow shrub that is perfect for novice gardeners. This shrub grows in zones 4 through 8 and blooms heavily in early to midsummer with clusters of sweetly fragrant white flowers. It does best in full sun but can tolerate light shade.

Mock Orange
Image credit: https://www.gardeningknowhow.com/

Smooth mock orange can become overgrown quickly, so a rejuvenation pruning and hard pruning that cuts the bush back low to the ground is a good idea every few years. Soil needs include well drained and loamy soil while it thrives in full sun to part shade.

5. White Lilac Bushes

Lilacs (Syringa) are popular shrub choices for the garden due to their beautiful, long-lasting flowers and strong fragrance. They are an early flowering shrub that offers up large blooms in spring.

Lilacs flower in shades of white, pink and purple depending on the variety, with both single and double blooms available. White lilac flowers grow up to 8 feet long.

White Lilac Bushes
Image credit: https://www.pahls.com/

The white flowering lilac shrubs grow between 8 and 15 feet tall and up to 12 feet wide. Large lilac shrubs are ideal for summer privacy screens or hedges. If you have a small garden or container garden, opt for beautiful white blossoms of various dwarf varieties of lilac.

6. Korean Spice Viburnum

Korean spice viburnum is an example of a shrub that boasts of early spring flowers and fall colors. It has pink buds that open to become clusters of white flowers. It’s named after its fragrance, which contains a combination of sweetness and sharpness.

You can opt to grow doublefile viburnum if you don’t like the touch of pink that its white flowers retain. The doublefile type has white pure flowers but lacks the scent of Korean spice.

Yearly feeding with an acid-enhanced fertilizer will help improve its flowering if your soil lacks the acidity preferred by Korean spice viburnum. Mulching the base of the shrub with pine needles can also improve soil acidity. USDA growing zones 4 to 7 and prefers average, moist soil, acidic and well draining soil.

7. White Spirea Shrubs

White spirea shrubs are deciduous shrubs that typically have a height and spread of 3 to 4 feet. They have arching branches with white flowers in late spring to early summer. The flowers are followed by fruit which is attractive to birds.

White Lilac Bushes
Image credit: https://www.gardeningknowhow.com/

Some outstanding white blooming spirea varieties include garland spirea, bridal wreath spirea and Korean spirea. With their abundant white flower clusters, they brighten up spring and summer gardens.

The upright, rounded shrubs grow between 3 and 9 feet tall, depending on the variety. If you’re growing in containers, consider varieties such as spirea thunbergia, birchleaf spirea and white meadowsweet spirea. Their soil requirements range from medium moisture soil to well draining soil and do well in full sun.

8. Camellia Shrubs with White Flowers

The Japanese camellia is a broadleaf evergreen with showy white flowers that bloom from late until early spring. The early blooming double flowers grow 3 feet to 6 feet wide and consist of up to 2o tightly growing petals in a peony flower like shape. Their stunning flowers complement the lush foliage.

Species of the white flowering shrubs grow various sizes of showy flowers with some being as small as 1.5 feet. The shrubs with their white flowers grow well in containers and shrub borders create beautiful fragrant flowers.

9. Azaleas

Azaleas are another class of abundant white blooming shrubs that are ideal for garden borders or hedges. They bloom in early spring or late spring, depending on the variety. The great white varieties include Northern hi lights, Pleasant White, Delaware Valley White, Cascade White and Bloom a Thon White.

Azaleas
Image credit: https://imagesvc.meredithcorp.io/

Hardiness zones and sizes depend on variety as some are suitable for most climates from zones 3 to 9 and from sizes ranging from 2 to 3 feet to 15 feet. Azaleas are excellent in woodland settings.

Their foliage is unremarkable after the flowers have faded, although some varieties have pleasing fall colors. Unless your soil has the natural acidity preferred by azaleas, feed them with an acid-enhanced fertilizer formulated for acid-loving plants such as rhododendrons, camellias and azaleas.

Their color varieties range from white, lavender, purple, orange, peach, pink and red. Grow this plant in full sun to part shade and soil needs include rich, medium moisture and well drained soil. It also prefers acidic soil.

10. Hibiscus Syriacus

This plant is a deciduous shrub that typically grows 6 to 10 feet tall and as wide. It has an upright growth habit with arching branches. White flowering shrubs with yellow centers appear in late summer to early fall. Plant in partial sun to part shade and soil that is moist, well-drained, and has some organic matter.

11. Snows of Kilimanjaro

This plant is a large tropical shrub that typically grows 6 to 10 feet tall and 4 to 16feet wide. It has an upright growth habit with arching branches. White flowers with yellow centers appear in late summer to early fall.

As a member of the Euphorbia genus, it’s related to that Christmas favorite. Its alternate common name is known as little Christmas flower. As with poinsettias, flowering comes into bloom as days shorten. When the fragrant white flowers emerge, the bush reminds of a giant snowball.

To promote that snowball look, give the plant a severe pruning back in early spring, then another in early summer. When pruning, make sure you wear gloves because you may be allergic to its milky sap. It Grows in zones 10 to 13 and prefers full sun to part shade. Soil needs include medium moisture to well drained soil.

12. Dwarf Deutzia

This plant also has a great look for the winter months. Its leaves are smaller and more along those of perennials. The flowers will emerge in spring as do those from the shrub form.

Dwarf Deutzia
Image credit: https://www.thespruce.com/

What makes it special despite being a shrub is that it can function as a ground cover because it stays so short and is wider than it is tall, approximately 2 feet tall with a spread of 5 feet. It’s a late spring bloomer with small but fragrant bell-shaped flowers.

The foliage on the dwarf variety turns an attractive burgundy in the fall. It needs regular pruning because their branches are fairly short-lived. Soil needs include medium moisture soil and good tolerance for clay soil. Grows in hardiness zones 5 to 8 and thrives in full sun to part shade.

FAQs about Recommended White Flowering Shrubs

What is a shrub with white flowers?

Pieris Japonica, also known as the Japanese Andromeda, is another evergreen, spring-blooming shrub with white flowers and a beautiful scent. It’s easy to grow and has the added benefit of being deer resistant.

Why do these shrubs have white flowers?

The shrubs with white flowers have this color because they contain a lot of anthocyanins. This is a type of pigment that is responsible for the red, purple, and blue colors found in many flowers and fruits. These white flowers enable them to light up a garden in the springtime.

Final Thought on Recommended Shrubs with White Flowers

As you can see, there are several shrubs that can help brighten your garden in the springtime. If you’re looking for plants that will bloom white flowers, then be sure to consider these options. Not only are they beautiful, but they’re also easy to grow and maintain. So, what are you waiting for? Start planting today!

The post 12 Shrubs with White Flowers appeared first on Kitchen Infinity.

Did you miss our previous article…
https://www.thelavkitchen.com/?p=641

The Best Small Sleeper Sofas of 2021

The Best Small Sleeper Sofas of 2021

Whether you’re living in a studio apartment or a four-bedroom house, if you like hosting overnight guests, then they’ll need a place to sleep. Without thinking too much or wasting money on buying another bed, think of a small sleeper sofa.

Sleeper sofas take up very little space, but they can be converted into a comfortable bed in seconds. They come in a wide variety of styles and shapes, so the style that’s best for you depends on which will fit best in your space and your personal preference.

Sure, there are plenty of sleeper sofas on the market, but which one is the best for you? Here are some of the most common types of sleeper sofas of 2021:

Frontgate Wendover Sleeper Sofa

This comfortable sleeper sofa is topped with layers of high-quality foam and memory foam mattresses. You can fold the sofa bed couch to create a queen bed that’s 76 inches long, making it ideal for overnight guests. The microfiber cover is easy to clean, unlike natural leather, but looks just as chic.


Image credit: https://i.pinimg.com/

It’s also made of a kiln-dried hardwood base to ensure that it’s sturdy and won’t warp, even with regular use. It is available in two upholstery options, including natural linen and dove gray that are available for quick ship.

West Elm Henry Sleeper Sofa

This comfortable sleeper sofa is perfect for small apartments or guest rooms. The Henry Sleeper Sofa is 84-1/2 inches long and can be folded out into a queen bed. It also includes two matching bolster pillows that can act as twins or king-sized pillows, depending on your needs.

West elm is also made of kiln-dried hardwood and comes with plush loose cushions for the back and side. When you need an extra sleep surface, the sofa pulls out into a queen-size bed and its mattress is made from a combination of high-density foam and gel-infused memory foam for maximum comfort. This shelter sofa is also available in a wide variety of upholstery materials, allowing you to find the ideal fabric to suit your style.

Wade Logan 85 Square Arm Reclining Sleeper

If you’re looking for the best leather sleeper sofa, the Wade Logan 85 Square Arm Reclining Sleeper is a great option. This sofa is made of top-grain leather, ensuring that it will last for years to come, and features a reclining design that makes it perfect for watching movies or taking a nap.

The button tufting and square arms will blend right in with your mid-century modern living room decor. When your guest arrives, just fold down the back and you have a twin size bed ready to go. Note that it will only sleep, one guest.

Catalina Reversible Chaise Sleeper Sofa

If you’re looking for the best chaise sleeper sofa, then you need to check out the Catalina Reversible Chaise Sleeper Sofa. This sleeper sofa has a classic design with clean lines and is made with top-grain leather, ensuring that it will last for years to come.

This chaise sleeper sofa comes in 61 different fabric colors, two leg finishes, and two queen mattress types, which can be a standard innerspring or 4.5-inch memory foam. You can also position the chaise lounge on either side of the couch to allow you to work around your space.

Wayfair Custom Upholstery Carli Recessed Arm Sofa Bed

With the Wayfair Custom Upholstery Carli Recessed Arm Sofa Bed, you can turn any room in your house into a guest room. This sofa bed features an easy-to-use pull-out queen size mattress that’s just as comfortable as it is practical. If your overnight guests are couples, then you don’t have to worry if you have this sleeper sofa.

Wayfair Custom Upholstery Carli Recessed Arm Sofa Bed
Image credit: https://www.thespruce.com/

It has a queen size innerspring mattress hidden inside and a foam back with double-picked blown fiber that helps to maintain its size. There are almost 500 upholstery options to choose from and you can upgrade to gel seat cushions for additional comfort.

Sarah Shakfin Sleeper Sofa Bed

This is one of the most popular sleeper sofas available on the market right now. Not only does it come with a generous upholstery allowance but you can also add pillows, throw pillows, and bolster pillows to personalize your look. It’s crafted from a mix of solid and manufactured wood.

Sarah Shakfin Sleeper Sofa Bed
Image credit: https://cdn.shopify.com/

It’s sturdy enough to support two sleepers on the queen size mattress. This sofa chair has a timeless, sophisticated look with piped detailing and neutral hues that make it a seamless addition to any7 aesthetic. You can make it your own by choosing from more than two dozen fabrics. So, if you’re looking for a sofa bed made from a mixture of solid and manufactured, then this is the right option.

Sectional Sleeper Sofa

This sleeper sofa will appeal to those who need just a little extra space in their living room or guest bedroom. At first glance, the piece looks like an average loveseat with two attached ottomans. But one of them can turn into another bed for overnight guests.

Sectional Sleeper Sofa
Image credit: http://cdn.home-designing.com/

If the regular sofa isn’t large enough for your needs, add in a sectional sleeper with a pull-out queen size mattress. This sectional sofa has a kiln dried hardwood frame and is covered in a light gray velvet upholstery that will match most decor styles.

It has a classic clean-lined silhouette and comes with three complimentary throw pillows. When you have overnight visitors, pull out the 5-inch thick, comfortable memory foam mattress.

Pottery Barn Buchanan Square Arm Upholstered Deluxe Sleeper Sofa

Pottery barn sofa will make your guests feel like they’re staying at a hotel, thanks to its extra-long plush mattress. This is a splurge-worthy mattress and its 79-inch frame is made of kiln dried hardwood for exceptional durability.

Sleeper Sofa
Image credit: https://assets.pbimgs.com/

Its back and seat cushions feature polyester-wrapped foam for a firmer feel and you have a wide selection of upholstery options to choose from, including family-friendly performance fabrics. Instead of a traditional pull-out mattress mechanism, this sofa features a Tiffany Convertible Mechanism without uncomfortable metal bars or springs.

It’s also 2 inches longer than a standard sleeper mattress. The plush mattress features premium high resiliency foam, ensuring a comfortable night’s sleep every time.

Wayfair Custom Upholstery Jennifer Leather Sofa Bed

This Wayfair Custom Upholstery Jennifer Leather Sofa Bed is perfect for small spaces. Made with a kiln-dried hardwood frame and Sinuous Springs construction, it’s sturdy and built to last. It features high resiliency foam in the seat and back cushions, as well as a comfortable mattress that’s made from genuine leather.

It’s 81 inches long and it has a classic design with rolled arms and short wooden legs. Besides its stately appearance, it’s incredibly versatile, featuring a queen size mattress inside its base. The pull out mechanism is easy to operate and the innerspring mattress is 6.5 inches thick, providing a more comfortable sleep surface for your guests.

Emily Futon Sofa Bed

If you’re looking for the best affordable sleeper sofa out there, the Emily Futon Sofa Bed is a great option. It’s one of the most comfortable sleeper sofas on the market. The Emily Futon Sofa Bed has a simple design with a microfiber fabric cover and a plush-down pillow top. It

It features a full-size mattress that’s comfortable and available in a variety of colors, so you can find the perfect one to match your decor. Other than offering great value, it is easy to transport and is also available as a convertible futon. There’s an armrest option for a more sofa-like appearance. This affordable sleeper sofa is also easy to set up and use.

Mia Klik Klak

Are you looking for a small sleeper sofa? The Mia Klik Klak is a good choice. It’s an efficient sleeper sofa that transforms from a modern reclining armchair into a bed in seconds. The seating has a stylish tufted look, and it features a push-button mechanism with slots on the bottom of the seat for easy conversion to a full-size bed.

This small sleeper sofa also includes an ottoman with storage space for keeping linen. The construction is solid, and the mattress provides a comfortable sleeping experience. Mia Klik Klak converts into a full-size bed.

Joybird Hopson Sleeper Sofa

The Joybird Hopson sleeper sofa is a great choice for small spaces. It’s an attractive, comfortable piece that can be used as both a sofa and a bed. The sofa is made of high-quality materials, including hardwood frame construction and metal frame for longevity and its cushions are filled with high-density polyurethane foam.

The inner mattress is made from layers of high-density foam and cushy memory foam and it’s as wide as a traditional queen size mattress, so it can comfortably accommodate two people.

Crate and Barrel Barret 3-Seat Queen Reversible Sleeper Sectional

This Crate and Barrel sleeper sectional is a great option for small spaces. It’s a three-seater that can be quickly and easily converted into a queen-sized bed. The sectional is made of high-quality materials, including a kiln-dried frame for longevity. It also features a bi-fold 5-1/2 inch innerspring mattress and a locking tilt-up headrest that’s ideal for reading and watching TV.

FAQs about the Best Small Sleeper Sofas of 2021

What should you look for when buying a sleeper sofa?

When buying furniture of this type, you should look for comfortability. A sleeper sofa should fit as a sofa and bed and you shouldn’t have to sacrifice one for the other. Also, consider the height of the armrest, the profile of the backrest, the depth of the seat, and the firmness of the cushions.

Do sofa beds break easily?

Not really because they come with sturdy mechanisms. The one thing you should be careful of is that the sofa bed doesn’t wobble or rock when you’re sleeping in it.

What if I don’t have a lot of space?

There are smaller sleeper sofas that might fit your needs. You can also look for a sectional sleeper sofa, which will give you more options as you can separate the sofa and sleeper as needed.

Spring-based sofa beds are the most common because they provide great support for when it functions as both a bed and couch.

Final Thought about the Best Small Sleeper Sofas of 2021

There you go! Sleeper sofas can be a great addition to your home, and they come in all shapes and sizes. Make sure you choose one that is the best fit for your budget, needs, and space.

The post The Best Small Sleeper Sofas of 2021 appeared first on Kitchen Infinity.

Did you miss our previous article…
https://www.thelavkitchen.com/?p=632

How To Get Rid Of Aphids

How To Get Rid Of Aphids

Aphids are not only annoying but they can also be harmful to your plants.

They can cause all sorts of problems like spreading plant diseases, making flowers shrivel up and die, or even destroying fruit on trees.

Getting rid of them is a difficult task, but luckily there are several natural remedies you can try that won’t require you to use pesticides. If those don’t work, then you might want to consider using stronger chemicals on your plants.

In this article, we’ll tell you everything you need to know about aphids – including how to get rid of them – so you can keep your plants healthy and aphid-free.

What are Aphids?

Aphids are small, soft-bodied insects that feed on the sap of plants.


Image Credit: http://gardendesign.com

Image Credit: http://gardendesign.com

They come in many different colors, including red, green, black, and white, and can be found all over the world.

Aphids can cause a lot of damage to plants by sucking the sap out of them which can lead to problems like stunted growth, distorted leaves, and even death.

How do I get rid of aphids?

Similar togetting rid of flies, there are a few ways you can get rid of aphids naturally without using pesticides. Keeping them away in the first place is much easier than killing them.

Here are some things you can do to help your plants stay aphid-free:

One way is to use insecticidal soap or neem oil. Insecticidal soap is a soap that kills insects by attacking their outer shell. Water plants sparingly. A good way to do this is by using a soaker hose instead of a sprinkler, as they let the water go straight onto the soil and through to the roots where it’s needed most.Don’t overfeed your plants. Aphids thrive on excess nitrogen from fertilizers which causes fast growth in plants. So make sure you’re only feeding your plants as much as they need. If you’re not sure how much food to give them, use an organic fertilizer like worm castings or compost tea every few weeks during active growth (spring and summer). Make sure your plants get enough sunlight. Sunlight is a naturally effective aphid repellent, so it makes sense that plants that don’t get enough won’t be able to fight them off. This means not over-planting and making sure your plants aren’t overcrowded in their pot.Another natural way of getting rid of aphids is using insecticidal soap or neem oil. Insecticidal soap attacks their outer shell while neem oil suffocates them.Finally, you can use a garden hose sprayer to blast the aphids right off your plant’s leaves. Aphids are tiny and light so they’ll blow away in the wind when sprayed with water. Just make sure you’re using water that is warm enough to dissolve the soap or neem oil you want to use.

Going for stronger measures

If natural methods don’t work, you might want to consider using stronger chemicals on your plants.

Pesticides and systemic insecticides are two options that can be effective in getting rid of aphids, but you should only use them if you have a serious infestation.

Measure to take if using insecticides:

Remove any affected plants from the area and discard them in the trash.Put on protective clothing, including long pants, a long-sleeved shirt, shoes and socks, and chemical-resistant gloves.Make sure to cover your hair, too.Mix the insecticide according to the instructions on the label.Spray the insecticide directly onto the aphids using a handheld sprayer.Reapply as needed, but be careful not to overuse or you could damage your plants.

If you’re considering using a systemic insecticide, it’s important to read the label carefully first and follow all of the instructions. Systemic insecticides are absorbed by the plant’s roots and then move throughout the plant, killing any aphids that are feeding on it.

They are a more effective treatment than contact insecticides, but they also come with a higher risk of harming your plants. Make sure you only use them if you really need to and always test a small area first to make sure the insecticide won’t harm your plants.

Also, be sure to read the label carefully before applying any pesticides or insecticides to your plants.

Other considerations to get rid of aphids

When getting rid of aphids, you should also take into account the environment and other living creatures in your garden.

Many natural predators of aphids, such as ladybugs and lacewings, can help keep populations under control. You can encourage these predators by planting flowers that attract them, like yarrow, cosmos, or dill.

Get Rid of Aphids on House Plants - BBC Gardeners' World Magazine

Image Credit: http://gardenersworld.com

You can also buy predatory insects from a garden center or online.

If you’re using a pesticide or systemic insecticide to get rid of aphids, make sure it won’t harm any of the predators in your garden.

And finally, always be careful when using any type of chemical in your garden. Follow all of the instructions carefully, wear protective clothing, and avoid getting the chemical on your skin or in your eyes.

How To Get Rid Of Aphids – FAQ

What are aphids?

Aphids are small, soft-bodied insects that typically measure 1/8 to 1/4 inch in length. They can be green, black, or red, and often have a pair of antennae protruding from their head. Aphids are sap-sucking pests that feed on the leaves of plants and can cause extensive damage to crops if left untreated.

What are some common methods for getting rid of aphids?

There are several different methods for getting rid of aphids, including physical removal, horticultural oil sprays, and insecticidal soap.

Physical removal is probably the simplest method for getting rid of aphids. This involves manually picking them off of the plants with your hands, or using a garden hose to spray them off.

Horticultural oil sprays are another option for getting rid of aphids. These sprays are made from plant-based oils and work by suffocating the insects. They can be used as a preventative measure or to treat an existing infestation.

Insecticidal soap is a chemical spray that is effective at killing aphids. It is made from potassium salts of fatty acids and works by breaking down the outer layer of the aphid’s exoskeleton. Insecticidal soap is safe to use on most plants, but should not be used on edible crops.

What if natural methods don’t work to get rid of aphids?

If you are unsuccessful at ridding your plants of aphids using these methods, there are a few other options available to you. One option is neem oil, which is an organic pesticide made from the seeds of the neem tree. This product is effective against aphids, but may not be safe for all types of plants or crops.

Another option is the pyrethrum, which comes from chrysanthemums and kills aphids by disrupting their nervous system. Pyrethrum can be used on most plant varieties and crops, but it may need to be reapplied after heavy rainfall or watering of the plants.

Finally, try an insecticidal soap spray with added rosemary oil; this may provide some extra protection against aphids, and rosemary oil has been shown to boost the effectiveness of insecticidal soap. It’s also good to know that these methods can be used toget rid of ants and other annoying creatures.

When is the best time to treat aphids?

There isn’t any one “best” time of year to treat for aphids; this will depend upon your climate, local plant species, and various other factors. One thing you can do is look at the plants that are infested with aphids (and plan on treating them), and see if they’ve ever been treated in the past. If they haven’t been treated before, then try treating them now while they are still small. That way, you have a better chance of successfully ridding them of their pesky invaders.

Final thoughts on how to get rid of aphids

Aphids can be a real nuisance in the garden, but there are many ways to get rid of them. Using natural methods, like providing enough sunlight and food, is often the best way to go. If those methods don’t work, you can try using insecticidal soap or neem oil. And if you need to, you can use a pesticide or systemic insecticide, but be careful to follow all of the instructions and take into consideration the environment and other living creatures in your garden. Happy gardening.

The post How To Get Rid Of Aphids appeared first on Kitchen Infinity.

Did you miss our previous article…
https://www.thelavkitchen.com/?p=613

Interior Designer vs. Interior Decorator

Interior Designer vs. Interior Decorator

Are you thinking of redecorating your home? Are you looking for someone who can help you? Well, before diving into the many personalities, portfolios, and design styles of many professionals available, you should determine the kind of assistance you need.

You want to redecorate, but you don’t know if you need an interior designer or interior decorator. Many homeowners believe that these two terms are synonymous, but that’s not the case. Interior designing and interior decorating are not similar as you may believe. Keep on reading to understand their difference.

What is an Interior Designer?

Interior designers are trained professionals who have a degree in design and experience with creating floor plans, specifying materials, choosing furniture and lighting, and overseeing the installation of it all. Interior designers have an understanding of human behavior that allows them to create functional spaces for their clients.


Image credit: https://www.mymove.com/

They do not typically provide labor for installing the items they specify or purchase on your behalf. Instead, they will recommend contractors who can perform these services for you at an additional cost. Here are some of the things to look for in an interior designer:

Education

Interior design is a profession that requires specific schooling and special training. The work of designers includes studying color and fabric, computer-aided design training, drawing, spacing design, furniture design, and architecture.

Upon graduating, the interior designers apprenticed with a registered interior designer before setting up their own companies.

Credentials

In some states and provinces, professional designers are required to pass an exam and become registered with a governing council before they’re called designers.

However, there are some places where credentials are not an issue. So, it’s a good idea to know the situation in your area before starting your search for a designer.

Functions of an Interior Designer

The main focus of interior designers is space planning, and they can help design and renovate interiors. Their special skills range from drawing floor plans to placing the last decorative accent. They enhance the look and enhance the function of a room.

Functions of an Interior Designer
Image credit: https://idinstitute.in/

Most designers deal with furnishings and decor and building plans, the social context of the project, codes and regulatory requirements, and environmental sustainability. Interior designers are squares, while interior decorators are rectangles.

The designers work closely with architects or a design firm to create interior designs and space planning ideas beyond helping a client select a piece of furniture.

When Should You Hire an Interior Designer?

Designing a home is a tough job that you can’t only leave to interior architecture to make decisions in terms of style and convenience. It’s not easy to stand with your architect and explain how you want your house to look, especially when you don’t know what you want.

That’s where you need a designer to help you. Aside from being able to help you with ideas and concepts, they already have a wide range of items that they sell under their brand. They’ll be able to work more closely with architects, designers, or contractors to create your dream home.

What are Interior Decorators?

Interior Decorators are individuals with no formal education who offer their unique style and taste for your home decor. They source products from various sources, including wholesalers, discount stores, and online retailers like Amazon, and often mark them up.

What are Interior Decorators?
Image credit: https://www.thespruce.com/

They may also assist with some project management duties such as scheduling contractors or handling other details involved in finishing a room over time instead of all at once.

Schooling

As mentioned before, interior decorators are not required to have any formal training. They focus solely on decorative details, meaning they don’t require standardized education to provide their skills. They provide an artistic eye and a flair for creating design magic in your home.

However, if you want to pursue a career in decorating, you will need to obtain an education from an accredited school. Interior Decorating Schools offer programs that teach you how to design and plan interior space, as well as the history of interior design and furnishings.

Decorators focus primarily on aesthetics and don’t participate in renovations and structural planning. An interior decorator comes after the structural planning and execution are completed to focus on the surface look of the space.

Credentials

Even though no formal education is required to become a decorator, many programs and courses are available. The courses often focus on color and fabric, room layouts, space planning, and furniture styles.

Special Skills

When selecting beautiful furniture and home decor, interior decorators are specialists. They can understand what will look right in a space, how much you should pay for when buying furniture, and how to make it all come together. Experienced interior decorators have experience with paints, fabrics, furniture, window treatments, and accessories.

They also provide fantastic direction for selecting a color palette, arranging space layout, hanging wall art, and selecting items to give your home the personality and style it needs. Interior decorators do not require professional training like interior designers. All they need is their imaginative eye and experience.

When Should You Hire an Interior Decorator?

People hire interior decorators for various purposes. Many look to them for inspiration, especially if they are unsure of their style or how best to achieve it. Others seek help with creating a theme for their home, such as welcoming and cozy. Decorators don’t work with contractors or architects. Their structural work is usually complete before they come on board.

Eventually, you need to bring them when you completely need to redo the design of your existing space in a chic and savvy way. They’ll help you with interior decoration, take your dream designs, and bring them to life. A decorator will sit you down if you don’t know how to decorate your room

The decorator will look at your space and listen to your concerns, then give you recommendations on how to transform it into the house of your dreams. An interior decorator is an expert in design and style and uses their expertise to help you select paint colors, floor coverings, window treatments, and furniture that will perfectly suit the needs of your family as well as enhance the beauty of your home.

Which One Should You Hire an Interior Designer vs. Interior Decorator?

The difference between an interior designer and an interior decorator is that an interior designer has a more comprehensive understanding of architecture, engineering, and construction. They collaborate with architects to develop interior structural changes and go through building codes and have a lot of building expertise.

If you are looking to make significant changes to your home – such as adding or renovating rooms or changing the layout – you need to hire a designer. They will work with you to create a plan tailored to your specific needs and ensure that all the necessary permits are obtained, and the work is completed to code.

On the other hand, an interior decorator can help you with smaller changes such as paint colors and new window treatments. An interior decorator will not be responsible for the structural changes of your home. Still, they can help you select all the finishes – such as flooring, countertops, and cabinets – that will go into the final design.

FAQs about Interior Designer vs. Interior Decorator

Who should you hire when you’re planning to add changes to the structure of your home?

Consider hiring an interior designer in this situation because they are licensed professionals who have the necessary training and experience to carry out the job safely and properly.

What is the difference between an interior designer and an interior decorator?

Interior design is a comprehensive planning process that integrates art, architecture, furnishings, fabrics, and accessories into one seamless concept or theme for a specific space, building, or neighborhood.

On the other hand, decorating focuses on layout, space planning, and what furnishings go where. An interior decorator will not necessarily be skilled in color palettes or artwork selection from an objective viewpoint.

Final Thought about Interior Designer vs. Interior Decorator

Whichever professional you choose for your next design project, it’s important to make sure they understand both the creative and functional aspects of interior design. Make sure you choose the design specialist you feel comfortable with and the one that speaks to your design needs. After all, choosing the right professional depends on the skills of the particular professional and not the job title.

The post Interior Designer vs. Interior Decorator appeared first on Kitchen Infinity.

Did you miss our previous article…
https://www.thelavkitchen.com/?p=610

Should You Mount a TV Above a Fireplace?

Should You Mount a TV Above a Fireplace?

For every person, tv is one of the things to buy for a new house no matter the size. But once you buy it, the main problem comes with the appropriate place to mount it for a perfect viewing experience.

Mounting a TV above a fireplace is not something new. You can see lots of homeowners doing that in their homes and even offices. But have you ever thought about the possible implications of mounting your television set over an open fire? Mounting your TV above a fireplace is both bad and good.

It’s good because it saves you space, but it can cause damage to your television set as well as health problems. If you’re thinking of mounting your TV above the fireplace, you should know that certain aspects need to be considered before doing so. Read below to understand.

Is it Okay to Mount a TV above a Fireplace?

Mounting a TV above a fireplace is more of a viewing experience and user comfort than with the damage to the electronics. In some cases, the fire might become hot enough and surpass the safe temperature range of your equipment’s internal electronics and the lower part of the casing.

Pros of Mounting a TV Over a Fireplace

Creates a complete Entertainment and Lounging Area

The main pro for mounting a TV above a fireplace is the all-in-one experience it provides. By mounting the TV directly above the fireplace, you are creating an entertainment and lounging area all in one. This can be great when you have guests over and want to create a space where they can gather and watch television together while enjoying the aesthetics of crackling fire.

Saves Space

Having television and fireplace streamlined in one place can also be great for tight space. Mounting the TV above the fireplace eliminates the need for a separate television stand, which can take up precious square footage in your home.

Great Focal Point

When you mount your TV above the fireplace, it becomes the room’s main focal point. First and foremost, people will notice the fireplace; however, after spending time in your home, they’ll begin to appreciate all of the hard work that went into creating an entertaining space.

Cons of Mounting a TV Over a Fireplace

Uncomfortable Viewing Angle

You may need to adjust your viewing angle to see your screen if it’s not at eye level. Viewing distance will also be somewhat restricted. You don’t want to feel like you’re inside an interrogation room

TV May be at Risk of Irreparable Damage

If you cannot heat the fireplace properly, your television may be at risk of becoming damaged. The heat from the fireplace can cause the TV screen to warp over time, ruining the viewing experience.

It Might be Difficult to Hide Cords and Cables

Connecting your TV to a power supply or a media hub can become a challenge. You may need to build a custom wire-management system for your entertainment area to hide the cords and cables from view.

Why Mounting a TV Over a Fireplace is a Bad Idea

Heat is Not Great for Electronics

It’s advisable not to mount a TV above a fireplace because electronics and heat don’t mix. And the area above the fireplace is often larger than other wall surfaces in your home. When TVs and other devices are exposed to high temperatures, they become susceptible to mechanical failure, which can also sustain lasting damages to inner components.

The damage looks much greater for TVs installed above wood-burning fireplaces. In this case, your TV could accumulate buildup from the particles distributed by the smoke emitted by the burning wood. Even if you store your TV inside an entertainment cabinet, a sooty film can build up on the screen over time.

For example, a gas fireplace can generate 20,000 to 35,000 British thermal heat units per hour. This means that it will take approximately 15,000 BTUs per hour to heat an entire 1,400 square foot house during winter. Excess heating can also lead to the development of phenols, pyroligneous acid, wood vinegar, and other caustic compounds due to the combustion of the shorting circuits.

You can Mount a TV above an Electric Fireplace

When it comes to electric fireplaces, you have a few different mounting options. Because they don’t produce any heat, you can mount your TV above them without worries. In fact, this is a popular way to set up electric fireplaces because it allows you to enjoy the flames without worrying about any safety hazards.

To ensure the wall above an electric fireplace is safe, perform a thermometer test to ensure your wall doesn’t get warm. Natural gas fireplaces are also cooler to the touch than wood-burning fireplaces. If you have a natural gas fireplace, you should use a mantel to hide the flames and make it look more like a traditional fireplace.

TV Height and Viewing Angles Can be Difficult to Get Right

The height of a fireplace mantel can interfere with your home entertainment setup and overall enjoyment. This is a primary concern you need to consider before installing a TV above your fireplace. If you’ve ever had to sit in the front row of a movie theater, then you are probably left with eye strain, neck pain, and even headaches from looking up at the screen.

This same effect can occur if you’re watching a TV mounted above a fireplace. The most comfortable viewing of television should be when the bottom of the TV is at eye level. The best angle to watch TV is at the eye angle when you’re sitting down. This way, you can relax without having to strain your neck when looking up for an extended period.

How do you factor in the screen size equation? This depends on personal preference but makes sure the screen is in the correct position to help reduce eye strain and create a better viewing experience for your guests. A lack of focus on what you’re watching can also be a problem caused by being forced to look up when watching TV.

While a full motion articulating wall mount can help to angle the screen downward, you’ll still be forced to tip your head back when watching TV.

Mounting and Wiring Might be a Challenge

If the screen is raised above the fireplace, that needs to be factored into the equation. A good rule of thumb for mounting a TV above a fireplace is that you want to have 12″ above your line of sight. This distance can vary based on eye level and the size of the TV. If increasing the height, make sure it’s done in proportion.

Also, if opting for a flat-screen TV above the mantel, make sure it’s at least 18″ away from the edge to avoid corner image distortion. If mounted too close, corners will appear smaller than the center of the screen, which can be annoying.

Dancing Flames May Distract from the Cinematic Experience

Despite the beautiful and gentle flames it can be, having a fireplace directly underneath your TV can be distracting for some viewers. This issue is debatable, but it all trickles down to your opinion.

Make sure you find a balance and identify what works best for you and your guests. Note that many people prefer quiet, romantic movies while flames dance beneath the screen as it can not only complement but enhance the cinematic experience. If you value premium picture quality, then a fireplace underneath the TV isn’t conducive for a cinematic experience.

When is Mounting a TV above a Fireplace Acceptable

While there are potential drawbacks of mounting a TV above a fireplace, if you follow the right recommendations and choose the right technology with proper installation conditions, you can enjoy the benefits of both entertainment features.

Make Sure Your Fireplace Has a Cool-Touch Feature

One of the key things to consider before mounting a TV above a fireplace is whether or not your fireplace has a cool-touch feature. If it doesn’t, you run the risk of the television overheating and potentially causing a fire.

Cables and Outlines are Already Available

Many homes already have wiring in place for this project. So if you have this set up in your space, it’s likely that all you’ll need is a new TV mount and some additional cables.

If You Have a Tight Space

When you’re looking to maximize your small living room and bring in as many functions as possible, mounting your TV above your fireplace is a great way to do it. This will free up fireplace wall space for other bookcases, furniture, and wall art. Just be sure to factor in the height of your fireplace when deciding where to mount your flat-screen TV. You don’t want it to be so high that the top of the screen is an eyesore.

Fireplace Spaces to Mount a TV

Mounting TV above Brick Fireplace

If your fireplace is made of brick, you’ll need a special type of mount that can accommodate the uneven surface. There are a number of these specialty mounts on the market, or you could hire a professional installer to help with the installation. Many homeowners are surprised by how easy it is to hide wiring when mounting a TV above a brick fireplace.


Image credit: https://blog.puls.com/

Mounting a TV on a Stone Fireplace

If you have that stunning stone fireplace, such as marble, you’ll need the amount that can be attached to the wall behind. You should choose a mount with enough flexibility to accommodate the spacing between stones and other irregularities on the surface.

Mounting a TV on a Stone Fireplace
Image credit: https://homeaffluence.com/

Mounting a TV Over a Wood Burning Fireplace

Wood fireplaces emit more smoke than any other alternative, so consider your mount options carefully. If your fireplace is open, you can use a traditional wall mount. If your fireplace is enclosed, you might need to use a special mount that hangs down from the ceiling and attaches to the back of the TV. If you’re concerned about your TV, move away from a traditional wood fireplace to a gas unit.

Mounting a TV Over a Wood Burning Fireplace
Image credit: https://thehometheaterdiy.com/

Mounting a TV above a Gas Fireplace

Mounting your TV above the gas fireplace seems more straightforward than other alternatives. There are many different design styles available to suit your tastes.

Mounting a TV above a Gas Fireplace
Image credit: https://southcharlotteservices.org/

Final Thought on Mounting a TV Above a Fireplace

So, should you mount a TV above a fireplace? Yes, with the right professional help and correct measurements, you can mount your TV above the fireplace. Also, think creatively when figuring out the right spot for your large screen TV, and make sure you have your TV mounted with a warranty to enjoy a dream fireplace.

The post Should You Mount a TV Above a Fireplace? appeared first on Kitchen Infinity.

Did you miss our previous article…
https://www.thelavkitchen.com/?p=605

14 Best Home Renovation Apps

14 Best Home Renovation Apps

Home improvement projects can be a tedious process, with much planning and execution required. Besides being time-consuming, these projects can drain your energy if you decide to do it yourself. Fortunately, home renovation apps can help make the process a lot smoother.

Whether you’re a DIYer or a construction professional, these apps can make your project easier. From finding inspiration to getting expert advice, here are the best home renovation apps for every stage of your project.

1. Houzz Home Design and Remodel Ideas

If you’re a homeowner looking for a renovation idea, the best way to find inspiration is through photos of real homes. With its collection of more than 40 million images from 1,200 home design professionals and collectors worldwide, Houzz is your go-to place to search for the latest trends in interior design. Consider it your one-stop shop for all your home remodeling and interior design.


Image credit: https://i.insider.com/

The Houzz Home Design and Remodel app is one of the most versatile home renovation apps on the market. The app also offers a wealth of other features, including articles on home design trends, discussion forums, and the ability to contact professionals directly. It’s highly rated, free to use, is supported by all major operating systems, and has tens of millions of downloads.

Pros

It’s free to useAvailable in App Store, Google Play, and Amazon App StorePresence of 3D visualization feature4.8-star rating in the App Store and 4.6-star rating in Google Play

2. IKEA Place Home Renovation App

IKEA Place Home Renovation App is another free home renovation app worth checking out. This app offers 3D previews of furniture items, and it also allows the user to virtually place them within their homes. It’s very easy to use, supports all major operating systems, and has garnered excellent reviews on Google Play Store and Amazon App Store.

IKEA Place Home Renovation App
Image credit: https://techcrunch.com/

App users with IKEA Place can shop for IKEA furniture and use augmented reality technology to drop images of IKEA furniture into pictures of the home. Once you find something that you love, you can purchase it directly through the app or find a nearby store that has it in stock.

Pros

3D visualization featureEasy to usePresence of augmented reality technology

3. Photo Measures

It can be annoying to get to the hardware store only to find out that you’ve forgotten the notebook at home where you’re writing all your materials for your home renovation project. Not only is that, but even your measurements in that book. You’ll feel frustrated and drained.

However, if you’ve downloaded the Photo Measures app, you would have had all that information in the palm of your hand. All you need to do with this home renovation app is to take photos of your space, draw in your measurements and never worry about forgetting your supplies again.

4. The Home Design 3D App

This is a free home renovation app that has gained popularity. The 3D home design software shows you in real-time what it would look like if you added or removed certain objects from your space. This is also the perfect tool to help you design your entire home and is compatible with mobile phones, tablets, Macs, and PCs.

The Home Design 3D App
Image credit: https://cdn.cloudflare.steamstatic.com/

Designed by Anuman Interactive, this home renovation app was released to the public in 2011 with the company’s first iOS version. Today, this app is available in most app stores and is compatible with all mobile apps and laptops. You can design any part of your home using this app as it allows the user to create multiple floor plans in 2D and 3D, add furniture and decorative items of their designs.

You can also experience your home design using the 3D real-time visualizer. There are also features that allow you to share your design outside the app. This home remodeling app is free to download, and you can use a few basic features at no cost.

Pros

It doesn’t require an internet connectionSupports all devicesAvailable in App Store, Google Play, and Microsoft Store

Cons

No free version for PCsWorks best with iOS devices

5. iScape Home Remodeling App

This app has a very clean and simple user interface that is easy to use. Animations of all changes while designing are smooth and fast, making it enjoyable while building your dream home. The application also supports 3D rendering for outputting images and videos of the design.

If you don’t want to plan a new house but remodel an existing one, this app got you covered with a library of objects and materials to work with. Home renovation projects also don’t need to stay within the confines of your home. Instead, take your space to the next level by tackling a landscaping project, courtesy of the iScape app.

Pros

You can design your landscapeGreat for DYers and landscaping businessesSharing capabilitiesIt comes with a 4.6-star rating in the App Store

Cons

Only available for iOs devices

6. ProjectColor by the Home Depot

ProjectColor is an app by Home Depot that can select paint colors and coordinate them with other design elements in your home. The app has a library of more than 1,500 colors and allows you to save your favorites for future reference. You can also take pictures of rooms in your house to get a better idea of what different colors will look like.

You can also check which paint colors are popular and trending. You can also visualize how the paint will look in any part of your home and save your favorite paints or buy them. If you’re not ready to commit to a full can of paint, paint samples are available for purchase within the app. This app is free and is compatible with iOs and android services. But when it comes to painting, learn how to choose paint colors first before you proceed.

Pros

It’s free to useIn-home color visualizerAvailable for iOs and android services4.5-star rating in the App Store

Cons

2.7-star rating in Google Play

7. Palette Cam Home Renovation App Review

This app helps you visualize what you’re going to paint and allows you to share your photos with friends and family. The home renovation app also provides a way for you to share the images on social media and save or print them, which is useful if you want to show off your painting skills. This app is free but does contain ads.

The Palette Cam app will pull all the colors in any photo to create gorgeous color palettes you can use to inspire your next design project. Whether you’re looking to bring the beauty of the beach into your bathroom or the warm colors of a sunset into your hallway, the Palette Cam app is the right choice.

8. Vivid Home Wall Color Selection App

Updating your wall color can be a big project, but it doesn’t have to be with this app. With the Vivid Home Wall Color Selection App, you can take pictures of your home’s walls and experiment with different colors to see what will look best. This app is free to download and use.

However, choosing between Intense White and Benjamin Moore or Essential Gray by Sherwin William can be a daunting task. But thanks to vivid paint colors, you no longer need to go to the hardware store and pick up bundles of paint swatches. You can search by color or inspiration for paints by top brands like Benjamin Moore, Sherwin Williams, and Glidden.

9. Roomle 3D and AR Room Planner

Roomle 3D and AR Room Planner is another great app for home renovations. If you’re unsure where to start or want to see what your finished product could look like, this app is for you. Roomle 3D and AR Room Planner offer a virtual reality view of your rooms as you renovate them.

This comprehensive home remodeling app helps homeowners design floor plans and use augmented reality to populate existing floor plans with furniture. This app allows you to measure and draw rooms and create your scanned room floor plan.

10. Wayfair App

Wayfair App is a home improvement app for homeowners or renters looking to improve their space on a budget. The app offers interactive 3D models of furniture by room, so you can get the feel of what it would look like in your living room before you buy it. With new products being added daily, this is an awesome app for anyone who wants to remodel on a budget.

This is a great tool when you’re furniture shopping for your home renovation. And if you want to design the complete area of the house with brand new furniture, then you can use a room planner tool to create a 3D design of your place with the products you want until you find the perfect setup.

11. Angi Home Remodeling App

This app is perfect for homeowners looking to do a little remodeling on their own. It includes tips, videos, and how-to guides for various home improvement projects. You can also find local contractors through the app, which is super handy if you’re not comfortable doing the work yourself.

Get your home renovation dreams completed in a snap by downloading this Angi app, formerly known as Angie’s List, to hire contractors in your area.

12. iHandy Carpenter App

This is the perfect app for homeowners who want to improve their homes without hiring a contractor. This app has five tools, including a spirit leveler, stud finder, a plumb bob, and even a protractor. You can use the surface level and bubble level to flat surfaces and plumb bob to access vertical walls. The app can also give you an estimate on how much a job will cost and how long it may take.

13. Morpholio Board

Any interior designer using this app would instantly understand that interior designers designed it. This is a total industry game-changer. This glossy app lets interior designers layout mood boards, design ideas, and collages.

Morpholio Board
Image credit: https://images.adsttc.com/

This app offers you a chance to let your imagination run wild. It is so easy to use, so much fun, and will help you develop ideas when you are in the shower.

14. MagicPlan Home Floor Plan App

This app is a must-have if you’re in the home renovation business. It will help you with everything from creating floor plans to estimating the cost of your project and getting real-time feedback from contractors.

This app is perfect for anyone who wants to undertake a home renovation project but isn’t sure where to start. It takes all the guesswork out of the process and makes renovating your home a breeze. It comes with an estimated feature, meaning no manual calculations.

The magic app also comes with augmented reality and LiDAR scanning features that make visualization and measurements easier. It’s free to download, and you’ll get full access to all of its features for your first two projects at no cost.

FAQs about Best Home Renovation Apps

What are some of the functions of a home renovation app?

Home renovation apps offer a lot of functions. They can help you stay organized, create and design projects, shop for products, and even hire contractors.

Final Thought about the Best Home Renovation App

Home remodeling can make your head spin. It can be overwhelming to stay on top of everything, from choosing wall art to how to level wall hangings, to how to arrange furniture and which color palette to choose. So, why not make these renovation apps simplify your design life in a major way.

The post 14 Best Home Renovation Apps appeared first on Kitchen Infinity.

Did you miss our previous article…
https://www.thelavkitchen.com/?p=594

Sanded vs. Unsanded Tile Grout: Basics, Pros, and Cons

Sanded vs. Unsanded Tile Grout: Basics, Pros, and Cons

When updating or building your own house, it’s important to opt for a great flooring option for your project. And that’s where tile grout comes in. Tile grout is the material that fills the space between tiles and helps to keep them in place.

It’s available in both sanded and unsanded varieties, and each has its own set of pros and cons. So, which type should you choose for your project?

Let’s take a look at some of the most common types of sanded and unsanded tile grouts out there, plus their pros and cons. This will help you can make an informed decision about which one will work best for your needs.

What is Grout?

Grout is a thin mortar used to fill the joints between tiles. It is a mixture of cement, sand, and water applied with a grout float. In addition, grout is a dense, thick fluid made of water, cement, and sand. It also has other uses apart from sealing joints between tiles.


Image credit: https://networx.global.ssl.fastly.net/

Grout is also used as a reinforcement for existing structures and walls, used to fill voids. It’s also used to embed rebar masonry and even connect sections of concrete.

Factors to Consider Before Buying Grout Tile

Project Size

The size of the project will dictate the amount of grout you need to buy. If you are grouting a shower, you may only need a few pounds of grout because the space is small. Larger projects will require more grout. This is because grout comes in many forms and sized containers. You can get grout premade as a powder and in industrial-sized bags for extra-large projects.

Vertical or Horizontal Installations

Grout for vertical applications is often one color, while grout for horizontal installations is usually different colors. Vertical installation grouts are usually sanded or unsanded based on the application you will be using them for. You can also buy adhesive-backed backsplashes with integrated grout to make the process easier and cleaner.

In vertical applications, you’ll need a grout that can handle the tug and pull from the gravity, while in horizontal or floor grout, your grout doesn’t need to be thick or strong.

Tile Type and Size

Grout should also match the type of tile that you are using. For instance, you don’t want to use a soft, unsanded grout with large tiles as the grout will deteriorate over time and become prone to cracking.

Besides being larger than 1/8″, ceramic or porcelain tile is denser than glass, stone, or metal tiles. Even though they’re harder and denser than glass, stone and metal tiles still require sanded grout.

Colors of Grout

Sanded grout is also available in a variety of colors, whereas unsanded grout can only be white or beige. If you’re looking for a custom color, sanded grout is the way to go. Note that the most common grout color is gray. Grout also comes in many colors, including white, black, green, and even orange.

Some brands will also offer dyed grout where you can pick exact colors to match your decor or tiles.

pplication and Drying Time

Sanded grout is much thicker than unsanded, and as such, it takes longer to dry. While unsanded grout dries within four hours, sanded grout takes anywhere between 24 and 48 hours to fully cure or dry out.

This slow drying time means that sanded grout can be a hassle for contractors who need to get the job done and over with, but it also means that sanded grout is extremely durable. As such, sanded grout is more frequently used in commercial settings where durability is a must.

The Cost

Grout is not expensive, but you need to purchase large amounts of it based on the size of your project. The cost includes everything, ranging from the mixing pail, bucket or tray, coloring or special needs, and the application trowels, clean-up tools, equipment, and other items.

Grout Widths

Sanded grout is best for grout lines ranging from 1/8 inch to 1/2 inch. Grout lines of more than 1/2 are impractical and will crack and become unstable. And because unsanded can also be used for 1/8 inch lines, it’s recommended that you use sanded grout and not unsanded.

Unsanded grout is best for grout lines as wide as 1/8 inch and down to 1/6 inch. The unsanded grout is used in this application because the sanded grout won’t properly compact into thinner grout lines. On the other hand, unsanded grout will slump, crack, and not provide the proper fill.

Tile Surface Recommendations

Sanded grout is used for tile surfaces where scratching from the sand content in the tile grout won’t be a problem. If you’re looking regrout and lack much skills, then sanded grout is the way to go.However, unsanded grout is recommended for tile that is easily scratched such as natural stone, glass, certain porcelains and ceramics. The sand content in sanded tile may damage these surfaces. Abrasion from sanded tile is also not enough to scratch the tile surfaces.

Sanded vs. Unsanded Grout

Image credit:

These two types of grout may seem the same, but they are not. Unsanded grout is perfect for smaller projects or areas where less durability is needed. It is a blend of Portland cement, water, and sand that can be easily applied with a rubber grout float by pressing it into the joints.

On the other hand, sanded grout is a blend of Portland cement, water, sand, and lime. This type of grout is recommended for larger projects or areas that need more durability. The sand in the mixture helps to give it more strength and prevents it from cracking over time.

Sanded Grout

As mentioned earlier, sanded grout is a Portland cement-based grout with silica sand, inorganic aggregates, and chemicals. Sanded grout is best for creating wider grout lines.

Sanded Grout
Image credit: https://empire-s3-production.bobvila.com/

This makes it the best choice to consider for tiling applications because sand particles have the ability to lock with each other to form a sturdy joint. Sanded grout is also less expensive than unsanded grout as sand is a cheaper filler than polymers in unsanded grout. These fine particles increase grout stability, reduce shrinkage and offer better resistance to severe cracking of the grout.

Pros of Sanded Grout

It’s thicker than unsanded grout and is more durableLower cost compared to unsanded groutPresence of denser jointsAvailable in more color choicesPrevents shrinkage and cracking

Cons of Sanded Grout

Difficult to force into thin seamsMust be sealed with a pH-neutral, water-based, and penetrating sealerIt can damage smooth tilesIt cannot be used in joints less than 1/8 inch

Unsanded Grout

Also known as non sanded grout, unsanded grout is best for very thin grout lines from 1/8 down to 1/6 inch. Non sanded grout is easier to work with than sanded grout on vertical surfaces such as tile shower walls. The lack of silica aggregate in this grout works well with delicate tile surfaces such as ceramic tile and glass tile.

Unsanded Grout
Image credit: https://diy.sndimg.com/

Non sanded grout is not ideal for large grout lines because it will slump, crack and not fill properly in width more than 1/8 inch. The grout is smooth textured and best for highly polished stone like marble and vertical lines such as bathroom and shower walls.

Pros of Unsanded Grout

Suitable for vertical installation and clings well to vertical surfacesGrout sealing may not be required in some applicationsPreserves sensitive tile surfacesBest for small spaces less than 1/8 inch

Cons of Unsanded Grout

More costly than sanded groutSlumps when applied to wide seamsLess color choices than sanded grout

FAQs on Sanded vs. Unsanded Grout Tile

Why is sanded grout cheaper than unsanded grout?

Sanded grout is cheaper because it doesn’t need to be as dense as unsanded. In addition, the tiny spaces between tiles are usually filled with a material other than grout, such as epoxy or mortar mix.

Which one is best between traditional grout and epoxy grout?

Epoxy grout is used in areas that are continuously exposed to water. Traditional grout can be stained, while epoxy grouts feature a non-porous surface.

Final Thought on Sanded vs. Unsanded Tile Grout

When applying grout on your walls, floors, and even mosaics, you’ll need to grout. The type of grout you need, whether sanded or unsanded, will depend on the product and joint spacing you have. You need to ensure that you get the right grout for your application to hold the tiles and prevent issues like cracking. You should also learn how to regrout tile because you’ll need to do this later on.

The post Sanded vs. Unsanded Tile Grout: Basics, Pros, and Cons appeared first on Kitchen Infinity.

Did you miss our previous article…
https://www.thelavkitchen.com/?p=582

Sewer Cleanout Where To Find It

Sewer Cleanout Where To Find It

Sewer cleanouts are an important part of your property’s plumbing system. Without them, you would have to constantly deal with problems that crop up in the sewer pipes such as clogs and cracks. The good news is that sewer cleanouts are easy to find.

In this article, we’re going to show you what your sewer clean-out is and how to find it. We’ll also speak about how to check if it’s blocked and in such cases, how to clear the blockages. Let’s dive deep into this topic.

What is a sewer clean-out?

A sewer clean-out is a pipe that goes from your house to the city sewer system. It’s usually located in the basement, but it could be anywhere on your property. You can find a clean-out by looking for a water meter or inspection cover near the street.

Image Credit: http://mrrooter.com

If you don’t know where to find one, call a plumber and they’ll help you locate it.

Once you’ve found it, use a garden hose with an attachment to clear any blockages inside. This will fix most of the problems caused by tree roots growing into pipes or cracks in joints or seals.

If the blockage is too severe, you might need to call in a professional plumber to clear it for you. If it’s not too serious, you can also do a cleanup yourself. Let’s discuss how to do this.

How do I clear a blockage?

To deal with tree roots growing into pipes or cracks in joints or seals, use a garden hose with an attachment to clear any blockages inside the sewer clean-out. Here are some tips for clearing the blockage:

1) Connect the hose to your septic or city mainline at least 2 – 3 feet from the street

2) Place one end of the hose as far as possible inside your clean-out

3) Slowly turn on the water supply until you see that all debris has been cleared away

4) For stubborn blockages, turn the hose end to end as you try to clear it out

5) Once your clean-out is free of any debris, disconnect the hose and cap the end. Do not use harsh chemicals because they can damage your house’s plumbing system.

Let’s now move on and look at what causes these sewer cleanout problems in the first place.

What causes a blockage?

Tree roots: When tree roots grow into pipes or cracks in joints or seals, they cause blockages that lead to trouble such as clogged sewers and water seepage. To avoid this type of problem, take care of your trees and keep them trimmed.

Clogs: Hair, grease and other debris can clog up your sewer pipes over time, which will cause a blockage. To avoid this, install a mesh drain cover to catch any large pieces of debris before they enter the sewer pipes.

Sumps: If your house is located on a sloping property, there is a danger that rainwater might accumulate in your septic tank or sewer line and cause a blockage. You can prevent this by installing proper drainage around your house.

Dented or broken pipes: When a pipe is damaged, it can cause a blockage as well. If you suspect that a pipe is damaged, call a plumber to have it repaired.

Remember to take care of your trees, keep your drains clear and install proper drainage around your house to avoid any current and future problems.

Other factors to consider

Remember that your sewer clean-out is just one part of your plumbing system. If you have any other problems such as clogged drains, call a plumber for help. They will be able to clear the blockage and fix the problem.

Also, remember to keep an eye on your water bills. If they start to increase unexpectedly, it might mean that you have a plumbing leak somewhere in your house. Get a plumber to check it out and fix the problem before it gets worse.

Municipal sewer lines are sometimes the cause of a blockage. If you find out that your problem is caused by the city sewer, contact your city council and they will send someone to fix it.

Also, don’t automatically assume that your house’s plumbing system is at fault if you have problems such as an overflowing toilet or low water pressure. Sometimes the problem may be due to another section of the city’s sewage lines instead. Here, it’s also best to get in touch with your local authority for further information about your specific case.

Next, ensure that your waste disposal system is working properly. If it grinds poorly, your drains may get clogged up more easily because there will be a build-up of food waste in them.

Keep an eye on your water meter when you have plumbing problems such as a blocked sewer cleanout. This helps find leaks and pin down any problems to specific times or areas of the house.

Finally, consider having a pipe wrench on hand to loosen any tight fittings that you may come across while clearing a blockage. Being handy will save you the time and money that you would have spent on finding a plumber.

Sewer Clean Out Where To Find It – FAQ

Where is the sewer clean-out located on my property?

The sewer clean-out is typically located in the yard near the house, close to where the sewer line leaves your property. It is a vertical pipe that sticks up out of the ground and has a cover or cap on top. You may also see a small metal box (called a manhole) near the clean-out.

How do I know if my sewer clean-out is clogged?

If water starts backing up into your drains or toilet when you are flushing or running water, then there is likely a blockage somewhere in the sewer line. The easiest way to tell if the blockage is at the clean-out is to pour a bucket of water into it. If it backs up into your sewer drain or toilet, then you have a problem.

The line may be clogged because there is too much water pressure coming into the house or perhaps someone mistakenly dropped something down into the drain that shouldn’t have been there. Dogs are also known to dig holes by the clean-out and cause blockages.

Unclogging your toilet can be done at home with the right tools, but you should really get a professional to look at your sewer cleanout if it is not working properly.

What do I do if my sewer line is blocked?

If you know there is something stuck in your line, use a plunger to try and dislodge it. The best tool for this job, however, is a plumbing snake, which can rid your lines of most clogs with relative ease.

You will need to insert the cable into the clean-out, then feed it down through your line until you feel it drop into the main drain. Then crank the handle to send the cable further down. When it gets near where you know there’s a clog, turn the handle clockwise again to back up any debris that is loose in your line. You should be able to pull out some nasty stuff this way.

What are Sewer Cleanouts and How to Locate Them? - Auger Pros Plumbing and Drain

Image Credit: http://augerpros.com

Why does my kitchen sink smell like sewage?

If yourkitchen sink smells like sewage, you may have some sewage stuck in there. In those cases, find your clean-out and remove the plug. Then you can try using an air compressor to push air into it while someone flushes the toilet to rid the sink of its terrible smell.

Final thoughts on sewer cleanout where to find it

While the inconvenience of having a blocked sewer clean-out is an ordeal, it’s better than getting your entire plumbing system damaged by water leaking through clogged pipes.

Remember to keep trees at bay, keep your drain clear and install proper drainage around your house to avoid problems in the future. If there are any other problems with your plumbing system (such as pipe breaks) never attempt to fix them on your own.

By doing so, you may end up causing more damage to your home and spending much more than you would have if you called the professionals in the first place.

The post Sewer Cleanout Where To Find It appeared first on Kitchen Infinity.

Did you miss our previous article…
https://www.thelavkitchen.com/?p=574

What is the Difference Between Cacti and Succulents?

What is the Difference Between Cacti and Succulents?

Succulents and cacti are popular houseplants, but it can be hard to know their differences as they almost look the same. Unfortunately, most people use the terms interchangeably when talking about these two types of plants. This can be confusing to those new to both of these plants.

Even though cacti and succulents may appear similar, they are actually different. While cacti fall in the category of succulents, there are many succulents that are not cacti. To help clear some confusion regarding cactus vs. succulents, we’ve put together a list of their top differences below. Keep reading!

What Are Succulents?

Succulents are a variety of plants that store water in their roots, leaves, and stems. This characteristic leads to increased drought tolerance. Succulent plants are very popular in home gardening because they require very low maintenance compared to other houseplants.


Image credit: https://succulentplantcare.com/

Succulents are available in more than 60 varieties. Some succulent varieties include aloe, haworthia, sedum, sempervivum, and cacti. So, as you can see, most succulents don’t belong to the same plant family. They differ in their visual, genetic, and geographical features.

Characteristics of Succulents

They have an evolved leaf texture surface that quickly prevents the plant from losing water. Succulent plants exhibit growth patterns consistent with water preservation. They have slow and compact growth consistency with energy preservation, spherical and columnar growth with limited surface area to avoid exposure and evaporation.They have ribs and grooves that allow them to shrink during droughts and swell with water when there’s precipitation.The plant also has Crassulacean acid metabolism photosynthesis, which allows it to open its pores at night to reduce moisture loss and take in carbon dioxide needed for photosynthesis during the day. In some succulents, photosynthesis is conducted by their green stems.They have a shallow root system to allow the plant to absorb moisture at the surface of the soil during drought periods.Some succulents such as the leaves of purslane are edible and can be used in salads and the juice of aloe vera plants, which has several health benefits.The agave plant is also another non-cactus succulent that is edible and is used to make agave syrup and tequila. Other non-cactus succulents include the moss rose, purple ice plant, Angelina stonecrop, Flaming Katy, and Chocolate Drop stonecrop.Another feature distinguishing cacti and succulents is that non-cactus succulents are native to multiple regions of the world, while most cacti are native arid climates.Succulents enjoy the warmth and bright light, but you shouldn’t leave them in prolonged direct sun exposure and excess warmth. Despite their drought tolerance, they can get leaf burn from too much sun exposure.Overwatering a succulent is also a sure-fire way of seeing your plant die because of root rot. But that doesn’t mean that you should never water them. They need water but in excess as this will hurt the plant.

What Are Cacti?

Cacti display the same characteristics as succulents, such as water storage, shallow roots, fleshy stems, and waxy leaves. If you want rock garden plants that can survive all the hardship, try cacti. But there’s always something that sets them apart from other succulents. Maybe it can be their spines or something else.

What Are Cacti?
Image credit: https://cdn.britannica.com/

Features of Cactus

The big difference is that they don’t have leaves and branches but are full of spines. You can also find some cacti without spines. Spines are some of their important adaptation features to survive in arid deserts.Another distinguishing feature is the areoles. An areole is a small bump on the surface of a cactus. It can be light or dark and serves as the site where flowers, spines, and hair grow out. An areole is the most defining feature of the cactus. Therefore, if the plant has spines but no areoles, that’s not a cactus.They don’t have leaves and branches but a succulent stem that photosynthesizes and stores water. Some cacti stem look like pads and flattened segments. They include prickly pears and Christmas cacti. Their large, colorful flowers produce fruit.They also have a water preservation feature, including a shallow root system, grooved stems, slow-growth, and column-like or spherical columns. Most cacti are native to the arid desert, but a few varieties like prickly pear cactus have better tolerance to cold.

Major Differences Between Cacti and Succulents

Cactus Spines

Most cactus varieties produce spines that may be needle-like, bristly, hairy, and woolly. These spines perform several functions. They protect the water-rich flesh of cactus from thirsting animals. They also disrupt the airflow around the cactus stems to prevent excessive water loss, especially in drying desert winds. Each spine also provides a small shade for the plant.

Cactus Spines
Image credit: https://www.gardeningknowhow.com/

Cactus Areoles

Cactus areoles are the small, raised areas of a cactus’ skin from which spines and sometimes hairs grow. These areoles also produce new buds, flowers, and fruits. The arrangement of the areoles on a cactus helps to identify different species. Areole is the defining feature of cacti, which is not found in succulents.

Cactus Flowers

Cactus and succulents all bloom. However, cactus flowers are far larger, showy, and more complex than succulents. Cactus flowers resemble other flowers and are normally pink, yellow, orange, blue, or red. They may be produced singly or in clusters.

Cactus Flowers
Image credit: https://knpr.org/

Cactus Fruits

Even though both cactus and succulents flower, only cactus produce fruits. Cactus fruit is typically hard and dry or fleshy and juicy. Prickly pear fruit and dragon fruit are the most known fleshy cactus fruits edible to humans.

Cactus Flutes, Ribs, and Pleats

Cactus stems are usually cylindrical or spherical but may be flattened. The ribs of cacti provide an efficient means of water storage and help reduce the plant’s weight. Cactus stems contain many pleats that expand and contract easily as they absorb or release water.

Cacti and Succulent Similarities

Although people often use the terms succulents and cacti interchangeably, these houseplants have a slight similarity. All cacti are succulents, but not all succulents are cacti. You need to look into these similarities to understand how these plants are related.

They both have spine presence and cylindrical shape. For example, some succulents also produce spiky thorns like euphorbia, a genus of succulents that is often confused with cactus due to these many thorns. Both plants can survive in both arid and semi-arid areas, thanks to their drought-tolerant features.

FAQs about the Difference Between Cacti and Succulents

Why do you need to differentiate between cactus and succulents?

Knowing how to identify a cactus vs. succulent can help you in keeping these plants’ requirements. Also, it’s good to know what you’re getting to avoid being tricked into buying something that’s not worth it. The blooming should also be a matter of concern.

Can you plant cacti and succulents together?

Yes, whether you want to plant a giant cactus or a small succulent, the way they’re potted means difference in failure and success. They’re both native to dry, low moisture environments.

They both require bright light, well-drained garden sites, and container potting soils. If you decide to plant them together, note that cacti need to be watered less often than other succulents.

Final Thought about the Difference Between Cacti and Succulents

There you have it! Apart from the differences in tolerance of direct sunlight and water requirements, keeping requirements for cacti and succulents are the same. Be sure to learn more about each of them before you get started. Make sure you familiarize yourself with the requirements specification of your variety to ensure you meet their requirements.

The post What is the Difference Between Cacti and Succulents? appeared first on Kitchen Infinity.

Did you miss our previous article…
https://www.thelavkitchen.com/?p=560