How to Fix a Toilet Leaking Around the Base

How to Fix a Toilet Leaking Around the Base

Is your toilet leaking at the base? Are you spotting water on your bathroom floor without knowing where it’s coming from? This can be an alarming experience. However, toilet leaks aren’t something to panic about as long as you know how to fix the problem quickly and easily.

Luckily, fixing a leaky toilet is often easy and inexpensive. Toilet leaks around the base are generally easy and inexpensive to fix. In this article, we’ll talk about the reasons for your toilet leaks, the tools you’ll need to repair them, what to do about the leak, and tips to prevent future leaks. Let’s get started!

Why Toilets Leak at the Base

Loose Tee Bolts

The bolts that connect the toilet tank to the bowl are called tee bolts. These bolts can become loose over time, which will cause the tank to leak. To fix this problem, you’ll need to tighten the bolts.

Improperly Seated Wax Ring

A wax ring is a seal that sits between the toilet and the floor. When the toilet is installed, the wax ring should be properly seated to create a watertight seal. If the wax ring isn’t seated properly, it will cause the toilet to leak.

Loose Water Supply Line

A water supply line is a hose that supplies water to the toilet. If this hose becomes loose, it will cause the toilet to leak. You can fix this problem by tightening the hose connection.

Water is Condensing on the Toilet and Dropping Down

When the weather is cold, water can condense on the outside of the toilet tank. This water can then drip down and cause the toilet to leak. You can fix this problem by installing a tank heater.

Tank Lid

If you notice a toilet leaking at the base, remove the tank lid and check if the leaks are coming from inside there. Look for cracks and if water is getting too high.

If you’re having problems with your toilet leaking around the base, there are a few things that you can do to fix the problem. The most common causes of a toilet leaking are a loose water supply line or water condensing on the toilet and dripping down. By following the tips in this article, you can fix these problems and stop your toilet from leaking.

What You’ll Need

Adjustable wrenchPutty knifeBucketClean towelsLatex glovesBathroom cleanerToilet wax ringPlastic toilet bolts and nutsGasketsWashersScrewdriverHacksawCaulkCordless drill

How to Stop Your Toilet from Leaking Around the Base

Check for Condensation

The first thing you should do is check for condensation. If the toilet is leaking because of water condensing on the bowl, you can fix the problem by adding a coat of wax to the bowl. To do this, put on some gloves and clean the bowl with a bathroom cleaner.
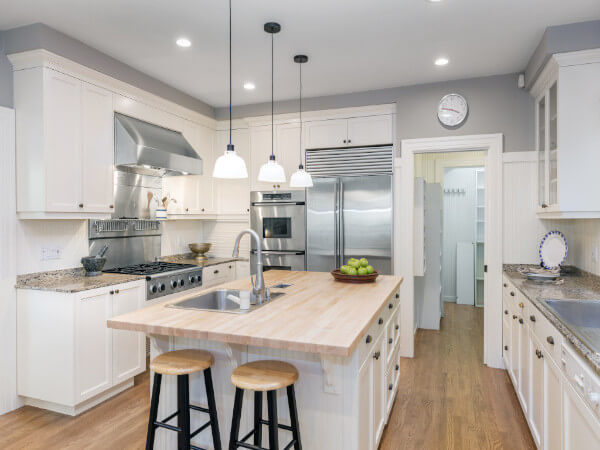

Image credit: https://www.expresssewer.com/

Once it’s clean, apply a coat of wax to the bowl using a putty knife. Let the wax dry, then apply another coat. After that, install a tray and insulate your water tank. Also, make sure your flapper is not faulty, take short, cooler showers, and turn the fan on.

Shut Off Water Supply

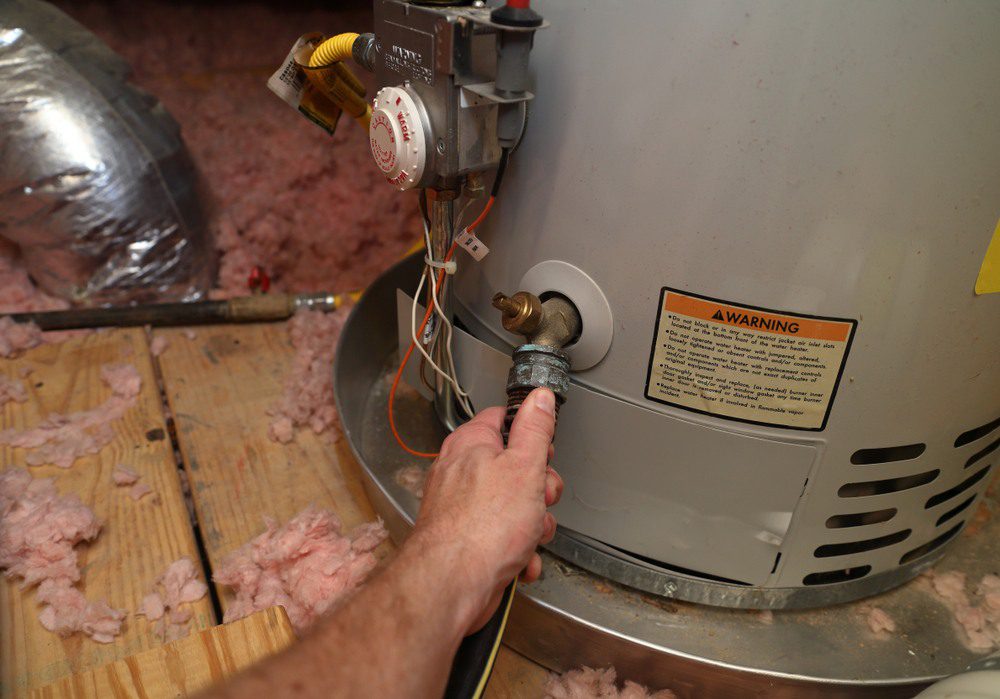
The easiest way to stop your toilet from leaking around the base is to turn off the water supply. You can usually find a shutoff valve behind your toilet, but it may be underneath the sink or at a water heater in a closet. There is a supply tube connecting the valve to the tank. If you cannot find a shutoff valve quickly, take your tank lid off and remove the water supply line from the tank.

Flush the Toilet Water Out

You can also stop the leak by flushing out the water in the tank. This will lower the water level and might stop the leakage. Once you have stopped the leak, you can turn the water back on and continue to fix your toilet. Make sure no new water enters through the fill valve in the corner of the tank.

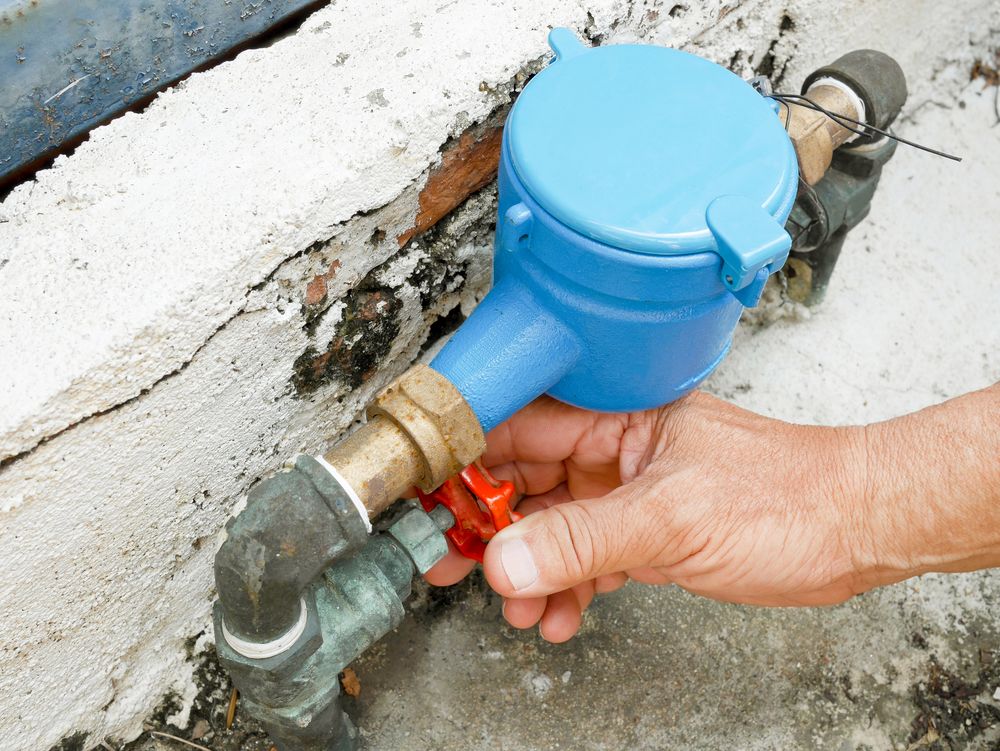
If water continues to enter the tank through the fill valve, then the supply valve to the tank is not providing a complete water stop. Try to locate the main water meter in the home and valve off all the water. Disconnect the supply line from the bottom of the tank using a pair of slip joints or channel lock pliers. Twist the supply line nut counterclockwise to disconnect it from the tank completely.

Tighten the T Bolts

Remove the plastic covers from the base of your toilet on both sides. Tighten the tee bolts using adjustable pliers or a wrench. If the bolts are too tight to turn, spray them with WD-40 and wait a few minutes for the lubricant to work. Reconnect the supply line to the tank and turn on the water at the main valve. Test your toilet by flushing it.

If the t bolts are already tight and can’t be tightened, you may remove and reinstall the toilet to install a new wax ring and new bolts.

Disconnect and Remove the Toilet

Carefully lift the toilet off the floor or ground and sit it on a pair of sawhorses. Separate the tank from the bowl by unscrewing the nuts on top of both. Disconnect all water supply lines from both tank and bowl. Shut off the water to your toilet before disconnecting.
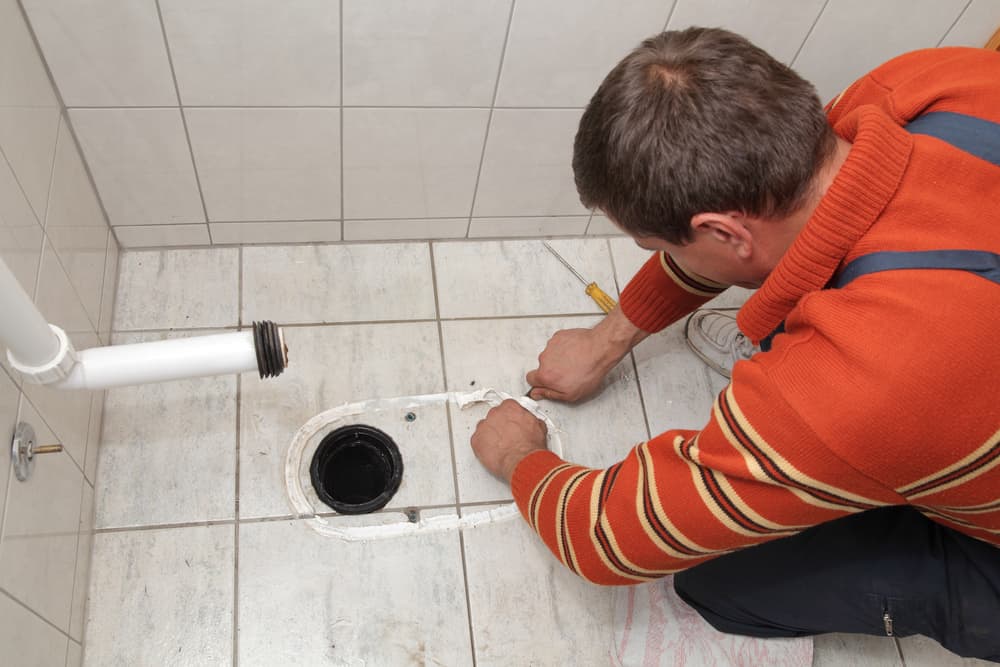
Disconnect and Remove the Toilet
Image credit: https://www.sunrisespecialty.com/

The shutoff valve is located on the left side of the toilet near the water supply tube and the water valve tailpiece. Flush your toilet to drain all water from your toilet and the tank. You can use a sponge or cloth to get rid of excess water in the toilet tank and bowl.

Then, use a screwdriver to unscrew the nut that mounts the supply tube to the fill valve tailpiece. Use a wrench to remove the nuts for the t bolts at the base of your toilet. You can also use a hacksaw to sever each bolt if the t bolts are corroded and won’t turn.

Remove the toilet by lifting it up and away from the floor drain. You may need someone to help you with this or take your time to learn how to remove a toilet before you proceed. Make sure you set the toilet on its side to prevent damage. Also, protect your flooring using a cardboard sheet and place your toilet bowl in this cardboard sheet after removing it.

Remove the Wax Ring and Install a New One

You will need to remove the old wax ring from under your toilet. However, you do not want to use this wax ring again. Use a putty knife to pry up any sections of the old wax ring that are still stuck in place around the drain opening.

Take your new wax ring and place it on top of the floor drain opening. Make sure that it goes beyond the edges to prevent any leaks. Place the ring with the plastic cone facing down toward the drain. Make sure the tee bolts are positioned correctly in the key openings on each side of the flange.

Get everything as clean as possible by using a rag to wipe the underside of the toilet base and the floor flange.

Slide New Bolts into Flange and Place Toilet

When installing a new toilet, it’s important to replace the toilet bolts. Ensure you clean the slots for the bolts in the flange and the bolt holes in the toilet.

Slide the bolts into the slots and place the toilet over the flange. If it doesn’t fit snugly, wiggle it around until it does. Slip the plastic washer over the bolts to compress them to the floor flange and hold them in a vertical position.

Reinstall the Toilet Seat and Tank

If the tank is still attached, carefully lift it and set it aside. Place the new toilet seat on the bowl and line up the bolts with the holes. Push them through until they protrude from the other side. Press the toilet down onto the wax ring, rocking it gently, so the toilet compresses the wax to create a tight seal.

Reinstall the Toilet Seat and Tank
Image credit: https://www.sunrisespecialty.com/

Removing the toilet can be difficult, but placing it back can be more difficult because lining it up correctly over the hole in the floor. That’s why it’s important to call a professional plumber when the need to remove arises. Use a wrench to tighten tee bolts while ensuring they’re not over-tightened, which may cause the porcelain to crack.

When you decide to replace your old toilet with an old chrome plated copper supply tube, think of replacing it with a flexible one made of stainless steel enmeshed polymer.

Reset the Toilet

Turn the water supply back on. Flush the toilet to check for leaks. Sit or kneel on the toilet bowl rim or seat lid, applying your body weight gently, compress the new seal and drive the toilet base down, so it sits flush on the floor surface. Do not wiggle or rotate; apply straight downward pressure.

Reconnect the Water Supply Line

After the toilet has been reset and is not leaking, reattach the water supply line to the tank. If you have a flexible hose connection, make sure the hose is kink-free and no slack in the line. Reconnect the water supply tube to the fill valve and turn the water on.
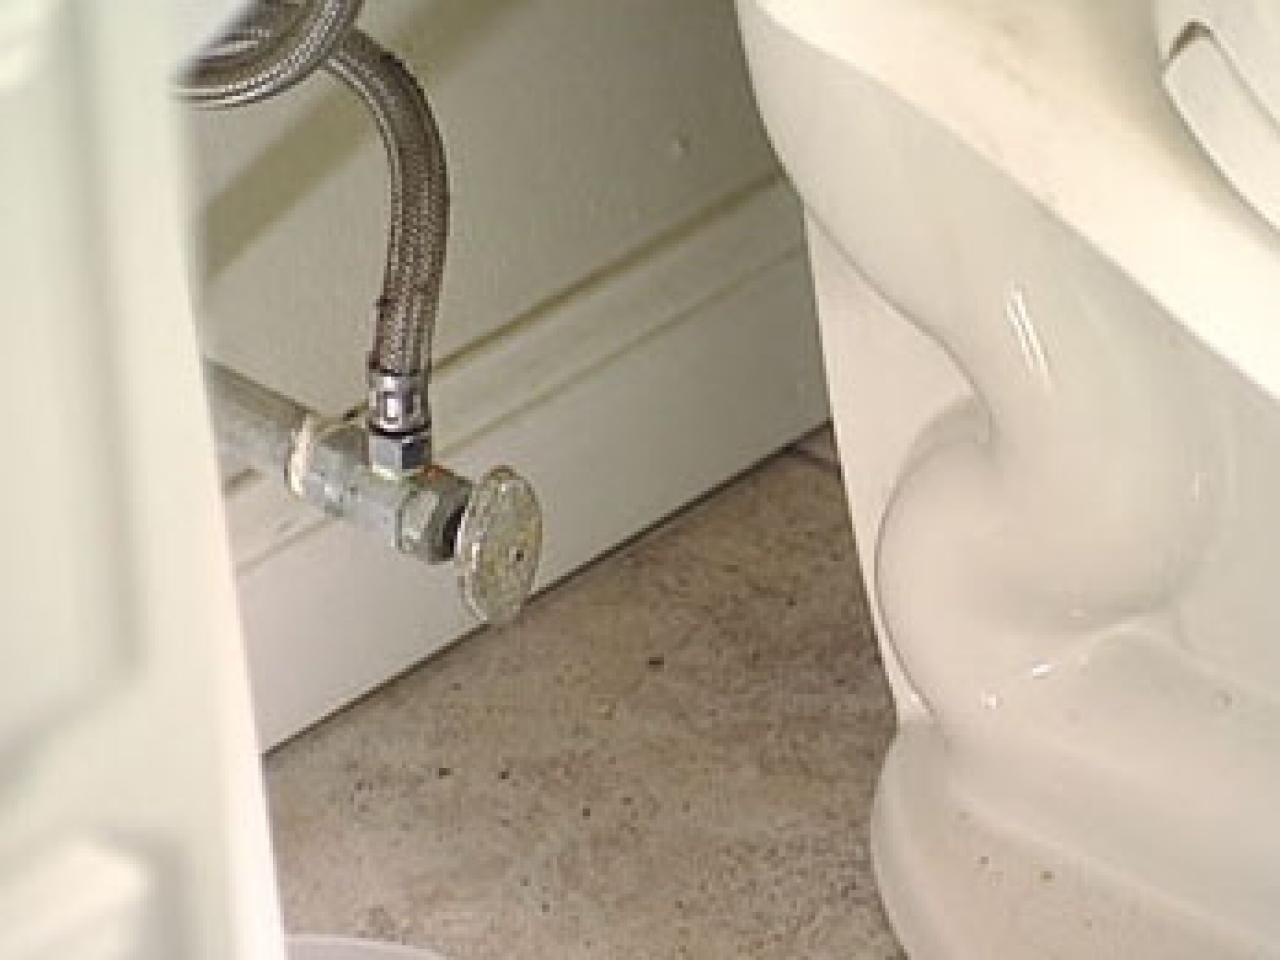
Reconnect the Water Supply Line
Image credit: https://diy.sndimg.com/

After returning the supply valve, allow the tank to fill until the tank fill valve shuts off. Then, use a hacksaw to carefully cut the brass toilet bolts to the height of 1/2 inch above the tops of the nut. Snap on the decorative plastic caps and apply a bead of bath caulk around the toilet base and floor to provide a sanitary seal.

Flush the toilet after the toilet tank fills up, then inspect for leaks. Once you don’t see any leaks, apply caulk to the floor around the base of the toilet. Be sure to wipe down surrounding tiles or wood floors, then allow the caulk to dry before using the bathroom again.

FAQs on How to Fix a Leaking Toilet Around the Base

Which is better between wax and rubber seal?

Most people prefer the rubber seal because it is easier to install and lasts longer. However, some people say that the rubber seal doesn’t create a tight enough seal and causes the toilet to run. Ultimately, it is up to the individual to decide which seal they want to use.

Final Thought about How to Fix a Leaking Toilet Around the Base

As you can see, dealing with toilet leaks at the base is a very simple task. Toilet leaks can be attributed to the toilet being loose, so tighten everything up, and it should stop having problems. If it is not the problem, go over your checklist about what you think might be causing the issue and fix it accordingly.

If you have a severe problem that’s beyond your knowledge, don’t hesitate to seek help from a professional plumber to help you with your toilet leaks. Also, make sure you properly set your toilet to prevent leaks

The post How to Fix a Toilet Leaking Around the Base appeared first on Kitchen Infinity.

Did you miss our previous article…
https://www.thelavkitchen.com/?p=590

13 Finished Basement Design Ideas

13 Finished Basement Design Ideas

A finished basement is one of the best home features that you can have. However, it’s also important to make sure that your basement has the right design so that you can enjoy it fully. A lot of people have finished basements but don’t know how to use them.

Most people turn their basement into a playroom for the kids or an extra bedroom for guests. Some create home offices or even gyms in their unfinished space. Instead of settling on one idea, why not combine all these ideas with our finished basement design?

Here are some of the modern basement ideas to get you started:

1. Consider Studio Apartment

If you don’t need a lot of extra living space, consider turning your basement into a studio apartment. This can be great for guests or older kids who want their own space. You can add a Murphy bed or sofa bed to the design so that you can use the space as both a bedroom and family room.


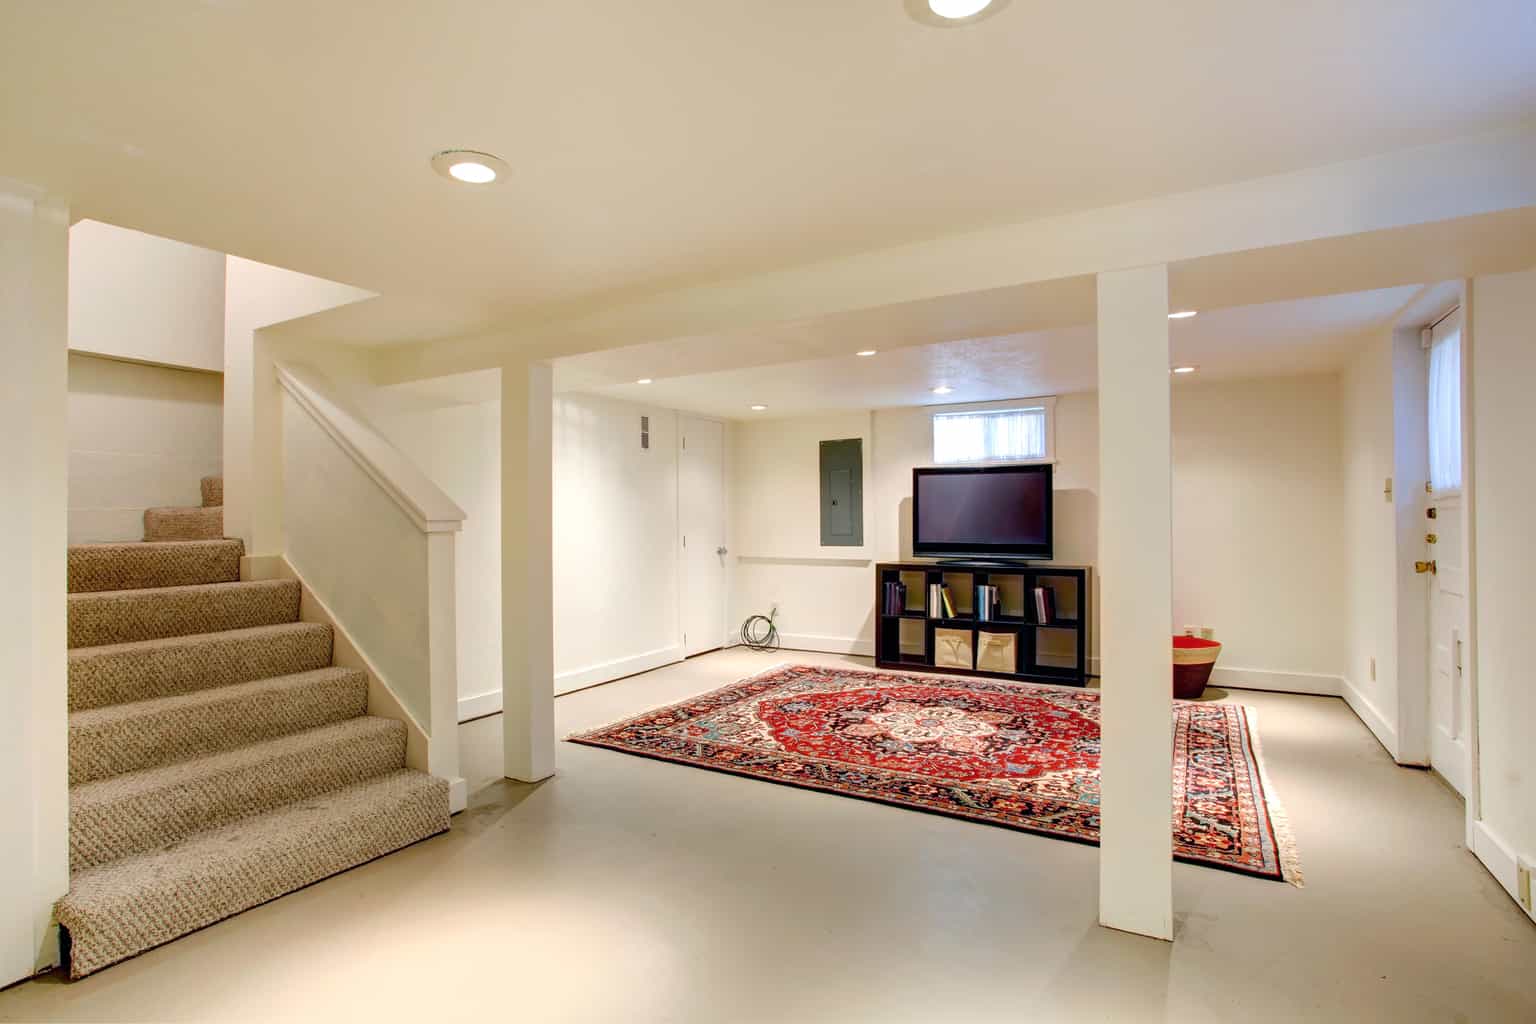
Image credit: https://a0.muscache.com/

A finished basement has many potential, so don’t be hindered by only leaving it unused. From a bedroom to a studio apartment to a coveted man cave, finishing your basement not only adds value to your home but also has a lot of square footage for your entire family.

2. Design a Modern Basement Bar

The sky’s the limit when finishing your basement when it comes to design. Why not consider a modern basement bar? This can be a great place to entertain guests or relax after a long day. You can add a bar area with stools, as well as a small refrigerator and sink.

Design a Modern Basement Bar
Image credit: https://metrobuildingandremodeling.com/

If you have the space, consider adding a small wet bar. If you’re looking for an even more adult design, perhaps consider adding a pool table, dartboard, or television. Another fun idea is to add pinball machines and other arcade games that can be played with your family and friends.

You could also create an intimate area by having sofas and armchairs in your design. Whether you’re just hoping to entertain or building an ultimate man cave, adding a home bar is a great addition to any basement.

3. Create Another Living Room in Your Basement Space

Why have one family room when you can have two? Adding another living area in your basement is a great way to expand if you have the space. This can be done by adding furniture for lounging or designated sitting areas. This design will be perfect if your family spends time watching television together or playing games.

Create Another Living Room in Your Basement Space
Image credit: https://capablegroupinc.ca/

A basement living room is also the perfect place to get together with the family, watch movies and unwind. Creating a cozy basement living room is a great way of creating a fun space at home without sacrificing much.

4. Sweat it Out in a Home Gym

If you are one of those people who love to engage in your favorite outdoor activities during the weekend, the chances are that you build up a lot of sweat. After an exhilarating workout, a home gym might be just what you need to relax. Many homeowners choose to convert part of their basements into home gyms.

You can also create a home office in your basement. This is a great idea if you need a home office but don’t want to take up too much space in your house. A basement home office can also be great for people who work from home.

5. Increase Natural Light

One of the most important basement ideas you can incorporate in your basement early is to welcome more natural light. You can do this by either keeping the basement windowless or including large, well-placed windows. If you have a finished basement, adding a few windows can drastically improve the look and feel of the space.

Not only will it make the space feel brighter and more open, but it will also help to improve air circulation. Choosing light paint colors can also help to brighten up the space.

6. Enjoy a Theater Experience at Basement

What is the better feature to include in your basement than adding a home theater? Basements often have little to no windows, making this dark space ideal for a movie theater vibe. Raise the floor to at least the standard eight-foot ceiling height for comfort.

Enjoy a Theater Experience at Basement
Image credit: https://optic.nordarchitecture.com/

If you have enough space, go higher to provide better viewing angles for your guests and family members. Invest in recessed fixtures with soft lightning; you can dim and swap your TV set with a projector and screen.

7. Customize Your Staircase

Your stairs are what your guest will see when they walk down into your finished basement. Give your guests something to talk about by adding a unique and interesting staircase. Create suspended steps, light-up steps, and glass side panels to add style to your basement stairs.

There are many unique staircase designs to choose from that can fit any style. If you want something sleek and modern, go for a metal or glass staircase. Try a wooden staircase with intricate carvings if you want something more traditional.

8. Consider Your Kids Playroom

Modern basement ideas don’t just have to be for adults. Consider doing something fun for your little ones by turning the basement into a playroom. What better place for kids to play than in their very own space? You can turn this room into anything that you want. It’s your basement, after all.

Consider Your Kids Playroom
Image credit: https://juicy-bits.typepad.com/

Have fun with paint and toy storage options by painting one of the walls with chalkboard paint. This way, your kids can use it as a blackboard as well. You can also install a foosball table or a pinball machine to make it all the more entertaining in the same area. Consider some of the best kids’ playroom ideas for some inspiration.

Keep in mind that if you decide to do this, your children’s game room must be properly ventilated and have proper lighting at all times. Having exposed wires hanging from the ceiling and light fixtures that don’t work will only cause accidents and injuries. Besides, it isn’t safe to play in a room with poor lighting, among other things.

9. Turn Your Basement Space into a Bedroom

You can easily turn it into a bedroom if you have extra basement space by adding in a few basic amenities. For instance, you will need a bed, dresser, nightstands, and lamps. You might also want to consider adding in a television or gaming console if that is something you think you or your partner would enjoy.

Also, if you have a teen that’s tired of sharing a bedroom with a younger sibling, create a basement bedroom to give your teen the space, privacy, and comfort they need for a good night’s rest. If you want that spare sleeping area but don’t have the space, you can create an alcove with a built-in bed and shelves for your smaller basement. Make sure your design ideas also include enough space for bathroom renovations.

10. Get Creative with Flooring

Flooring should be at the top of your basement renovation list. This unfinished basement idea will only look decent if the chosen flooring is attractive. Concrete floors are a popular basement choice because they’re durable and easy to maintain, but this doesn’t mean you have to settle for a boring concrete floor.

You can cover unattractive concrete floors with inexpensive rugs or add a carpet in your favorite color or pattern. Laminate, hardwood, and tile are all attractive flooring choices that are easy to maintain. Create a cozy basement space with wall-to-wall carpeting to make your basement look stylish. There are many good carpets for basement flooring to consider for this project, you just have to be creative enough.

11. Opt for Drop Ceilings

Unfinished basements often look unfinished. An easy way to add color and style to your basement is by installing a drywall ceiling. A drop ceiling with tiles in your preferred color will add visual interest and style to any basement room.

Opt for Drop Ceilings
Image credit: https://www.yourownarchitect.com/

Drop ceilings not only help keep your basement at a comfortable temperature, but they’re also good for soundproofing the space. Also, if you plan to build a spare bathroom and a home theater in your basement, drop ceilings will help to hide the unsightly plumbing pipes and wires.

12. Give Laundry a Designated Area in Your Basement

If you’re like most people, your laundry room is one of the most cluttered and busiest spaces in your home. Why not create a designated area for your laundry in your basement? This will help to keep the space clean and organized. You can either install a washer and dryer in your basement or use a nearby closet to act as storage for your laundry supplies.

If you choose to install a washer and dryer in your basement, be sure to select an Energy Star rated model. This will help you save money on your energy bills. Add tall storage cabinets to store your ironing boards and detergents.

13. Brighten Up the Basement

Take advantage of this basement remodel idea that will make it a light and airy part of your home. The goal is to maximize ventilation, natural light, and a sense of connection with the outdoors. Cut back the floor above by introducing light through the house. You can also install a glass ceiling to borrow light from the windows above.

However, don’t worry if your basement design lacks these strategies or your budget doesn’t stretch. Instead, opt for decor that will make it feel bright and open. On home decor, you can choose a bright white finish for the walls while exposing the ceiling joints and lumber and finish with matte black to increase the feeling of the height.

FAQs about Finished Basement Design Ideas

Is finishing the basement worth it?

You’ll find that you can save money if you finish the basement yourself instead of hiring professionals. While the basement doesn’t add the overall square footage of the house, it can function as a family space, office, home classroom space, and guest room. Remodeling the basement into a modern style also improves the resale value of your home.

Final Thought about Finished Basement Design Ideas

When it comes to designing a finished basement, there are endless possibilities. You can create a space that’s perfect for your needs and lifestyle, whether you use it as a living room, office, home classroom space, or guest room. Remodeling the basement into a modern style also improves the resale value of your home.

With so many different design options to choose from, there’s sure to be one that’s perfect for your needs and budget. So don’t wait any longer; start planning your dream basement today.

The post 13 Finished Basement Design Ideas appeared first on Kitchen Infinity.

Did you miss our previous article…
https://www.thelavkitchen.com/?p=585

The Easiest Fastest Way To Paint A House

The Easiest Fastest Way To Paint A House

Beautiful, fresh paint is the quickest way to make your house look new. But before you can enjoy that feeling of satisfaction, there are some steps you must take first.

In this article, we will discuss the easiest and fastest way to paint your house.

Get all the supplies you need

When learninghow to paint a house, one of the most important things to remember is to gather all of the supplies you will need before beginning. This includes items like primer, paint, a roller, a brush, and painter’s tape.

By having all of your supplies ready to go, you can minimize the time spent running back and forth between your house and the store.

Cover furniture and other items

If you have any furniture or other items in the way, be sure to cover them up with newspapers, tarps, or old sheets. This will protect them from paint splatters and drips.

Furthermore, it’s a good idea to cover your floors with either drop cloths, tarps, or old sheets as well. This will help keep your floors clean and protected from paint drips.

Image Credit: http://houselogic.com

pply primer

Before painting your house, it’s important to apply a primer to the surface. Primer helps the paint stick to the surface of the house better and it also helps to prevent the paint from chipping and peeling over time.

Make sure to read the instructions on the primer canister carefully so that you know how to apply it correctly.

Use painter’s tape

If there are any areas of your house that you don’t want to be painted, use painter’s tape to mask them off. This will help prevent paint from getting on those areas.

Be sure to use plenty of painter’s tape and make sure that it is securely attached to the surface.

Paint one section at a time

When painting your house, it’s important to paint one section at a time and then let it dry for at least 24 hours before moving on to the next section. This will help ensure that the paint dries properly and doesn’t chip or peel.

If you try to paint too many sections at once, the paint might not have ample time to dry and this could lead to it chipping or peeling more easily.

Remove the tape carefully

After you’re finished painting, be sure to remove all of the painter’s tape as carefully as possible so as not to damage any of the paint underneath.

The last thing you want is for your paint job to look worse than before. By taking your time and removing the tape slowly, you can make sure that this doesn’t happen.

If there are areas of paint that got damaged by the tape, use a small brush and some extra paint to touch them up. Touching up areas like these will help ensure that your whole house looks great after painting it. With these steps in mind, you should be well on your way to painting your house.

Choosing your paint color

Wonderinghow to choose your paint color? The truth is that when it comes to choosing a paint color, there’s no one-size-fits-all answer. It all depends on your personal preference and the look you’re going for.

That being said, some tips can help make the process a little bit easier. The steps will help you narrow down the options and make a decision that you’ll be happy with.

1. Choose a light or dark color

When it comes to painting colors, one of the easiest ways to decide is to choose between light or dark shades. Light colors will make a room feel brighter and more spacious, while dark colors can give a room a more cozy and intimate feeling.

2. Consider your surroundings

Another thing to consider when choosing a paint color is your surroundings. If your walls are already colored a certain way, you’ll want to choose a complementary color so that they don’t clash.

3. Think about the mood you want to create

Think about the mood you want to create in the room. Do you want it to be calming and relaxing, or more energetic and fun? This can help you decide on the right paint color.

4. Decide between cool or warm colors

Cool colors are blues, greens, and purples, while warm colors are reds, oranges, and yellows. Cool colors are often seen as more calming, while warm colors can give a room a more energizing feeling.

5. Experiment with different shades

Once you’ve narrowed down your options, it’s always a good idea to experiment with different shades of the color you’ve chosen. This will help you find the perfect one for your space.

By following these simple steps, you’ll be able to choose the perfect paint color for your home.

Painting an exterior or interior house

Painting your house can make it look better and increase its value. However, choosing the right paint color is only half the battle. The other half is obviously the painting of the house.

If you’re painting your exterior house, there are a few things to keep in mind. First, you’ll need to make sure that the surface is clean and dry before you start painting. You’ll also need to use a primer to help the paint stick to the surface better.

7 Ways to Paint a House Fast | Ricciardi Brothers

Image Credit: http://ricciardibrothers.com

Once you’ve done that, it’s time to start painting. Be sure to use long, even strokes and avoid painting over the same area more than once. This will help prevent paint from dripping and create a smooth, even finish.

Once you’re finished, allow the paint to dry for at least 48 hours before moving on to the next section.

If you’re painting your interior house, the process is a bit simpler. You’ll still need to make sure that the surface is clean and dry before you start painting, but you won’t need to use a primer.

Painting your interior house is a lot like painting your exterior house – you’ll want to use long, even strokes and avoid painting over the same area more than once.

Easiest Fastest Way To Paint A House – FAQ

What is the easiest way to paint a house?

The quickest and easiest way to paint a house is by using a sprayer. A sprayer will allow you to quickly and evenly cover the surface with paint.

Which is better, painting by brush or spraying?

Painting by brush will give you a more even finish than spraying; however, it will be much slower. Spraying will give you a less even finish than brushing, but it will be much faster.

Do I need any special equipment to use a sprayer?

No special equipment is needed to use a sprayer. You will, however, need to purchase a sprayer that is compatible with the type of paint you are using.

Can I use a sprayer to paint the inside of my house?

Yes, you can use a sprayer to paint the inside of your house. However, you will need to take precautions to avoid getting paint on surfaces that you do not want to be painted. For example, you will need to cover furniture and floors with plastic sheeting.

How long will it take me to paint my house using a sprayer?

It will usually take between two and four days to paint a house using a sprayer. The time required will vary depending on the size of the house and the type of paint being used.

Can I use a sprayer to paint trim or cabinets?

Yes, you can use a sprayer to paint trim or cabinets. However, you will need to take precautions to avoid getting paint on surfaces that you do not want to be painted. For example, you will need to cover furniture and floors with plastic sheeting.

What are the dangers of using a sprayer?

The main danger of using a sprayer is the possibility of getting paint in your eyes. You should always wear safety goggles when using a sprayer. You should also make sure to keep the area where you are spraying clear of people and pets.

Final Thoughts On The Easiest Fastest Way To Paint A House

In conclusion, there are a few things to keep in mind when painting your house. First, using a professional painter can save you time and hassle. Second, choosing the right paint color can make your house look great. Finally, using the right tools and techniques can make the job easier and faster. By following these tips, you can pain your house quickly and easily.

The post The Easiest Fastest Way To Paint A House appeared first on Kitchen Infinity.

Did you miss our previous article…
https://www.thelavkitchen.com/?p=568

How To Smudge Your House

How To Smudge Your House

Sage smudge sticks are very easy to use. Light one end of the stick, let it burn for 10 minutes, and then blow out the flame. Smudging your house with sage is an ancient tradition that has been passed down through generations just like the feng shui tradition.

It’s a Native American tradition used to purify, cleanse and bless any space, including homes, offices, and cars. This process can be done weekly, but if you feel like there is negative energy lingering in your home, it should be done more frequently.

By burning sage regularly, you will remove all negativity from your life, giving you peace of mind. You can learn how to perform a smudging ceremony by following this simple guide.

What You’ll Need

If you’re new to smudging ceremonies, there are certain things you’ll need to complete the ritual. These include a white candle, incense, and a bundle of dried sage. Native Americans traditionally use an abalone shell as a holder for the smoldering herb, so you can use anything you have at home, such as an unused ashtray or a small bowl.

You can also find a sage kit online or in your local metaphysical shop if you’re getting started. If you’re sensitive to sage smoke, don’t fret, there’re plenty of options. You can use a coffee grinder to grind the dried sage or buy smudge sticks instead of loose sage. You can also dry orange peels if you’re in feng shui. You’ll also need a sage, a vessel for burning sage, a fire source, and a fanning tool.

How to Perform a Smudging Ceremony

Have an Exit strategy

Once you have gathered your supplies, gather your family and friends so everyone is present for the ritual. Banish negativity by playing soft music or singing songs that bring you to a sacred place. If you play music, make sure it’s soft and not something that might entice unwanted guests.


Image caption: https://www.thespruce.com/

Allow everyone to gather in a circle in your designated ceremony area. The circle will keep the energy contained when smudging is performed and protect both the space and your soul from any negativity coming in or going out while you smudge your home.

Make sure you have the window and door opened before lighting up the sage. The smudge stick should be lit in a fireproof container, such as a lighter or a match, and then walked around each wall of your home clockwise. Allow the smoke to flow into every room, including closets, bathrooms, and even under your doorways. Keep going around the house with it until no more smoke is rising from it.

Use Sage if You’re Not Following any Tradition

A number of Native American tribes and other cultures have their smudging ceremonies. And each one of the tribes has its tradition concerning the type of herbs they burn. The number of times it should be done and how much time should pass between one smudging ceremony and the next.

Sage is the most common choice, especially white sage although other forms of sage can be used as well. There are other types of smudging ceremonies, but this is the most common one. You should keep in mind that if you’re not following any specific tradition, then it’s best to stick with the white sage.

Set Your Intention and Say a Mantra

Said, you want to ask for protection. You can repeat a sacred word or phrase that has meaning to you. It could be the name of your spirit guide or God, or it may simply be an affirmation that reflects what you’re trying to protect yourself from.

Before lighting the sage, make sure you take some moment to determine what exactly you want to purify your home from. The more specific you are, the better your smudging rituals will be. After that, decide on a mantra or prayer you will say during your smudging.

Light the Sage and Start Smudging

To fire up your sage, hold a lighter under it for about five seconds or so, making sure to run the flame over every part of the bundle except for where you’re holding it. You can also use matches, but I find the lighter is much easier. After about 30 seconds or so, excess ash will start to fall away, and your bundle of sage will be a beautiful shade of green.

Light the Sage and Start Smudging
Image caption: https://www.thelist.com/

Once it’s completely ashen, take your smudge stick by the end you lit with and wave it gently back and forth over every surface in your home. If there are particular areas that scare you or emit negative energy, go ahead and concentrate your smudging there for a couple of minutes. Once you’re done with the house, be sure to wave it over yourself as well.

Know When to Smudge

When do you want to smudge? You can smudge after you’ve completed building your own home and now moving in. Or you can do it when staying in a hotel room. This will help you feel like you’re more at home. Smudging before guests arrive is another way to ensure that you protect your space and set the mood for company.

When someone in your family gets sick, it’s time to smudge. Sometimes illness can be passed on energetically. You can also smudge when you sense anger, tension, or discord among family members.

Consider Additional Rules Out of Respect

If you smudge a hotel room or a house that someone else owns, always ask permission. Unless you’re an invited guest in the home, be sure to ask before smudging. Different traditions also have different ways of preparing their participants.

Many elders might not have these strict rules but consider following them. For example, do not drink alcohol or take any drug 24 hours before or after smudging. Do not have sexual relations before or afterward, either. Also, make sure all participants are wearing clean clothes and that their hair is clean and combed out before starting the ceremony.

Failure to consider these traditions can weaken your spiritual being. Pregnant and menstruating women are also asked to leave during the ceremony. Smudging may look easy, but it requires practice and knowledge in order to successfully repeat that positive energy in your home. Remember, if you find you are having negative thoughts while smudging, stop and try again another day.

Pray Before You Begin Smudging Your House

Be sure that you are in the right mindset before you begin your smudging. Your mind should be pure and clean. Don’t carry anger or hurt into the ritual. Remember, this is about getting rid of bad energy and attracting good energy into your home, so do not bring any negative vibes to it. You can pray, meditate or remind yourself that you have a clear mind and heart before you even begin.

You can pray for your world’s creator, the spirits, or anything you feel comfortable with. You can also talk about your gratitude towards plants and God’s creation if you don’t want to pray. You can continue praying throughout the ceremony in silence or loud since the smoke will carry your prayers.

Place Your Dried Herbs in a Container or Bundle them Together

For the best results, follow the steps in order. You do not have to pray when you light or smudge your herbs, but this is when you should remember to love and be grateful towards your home and everyone who lives there.

Place Your Dried Herbs in a Container or Bundle them Together
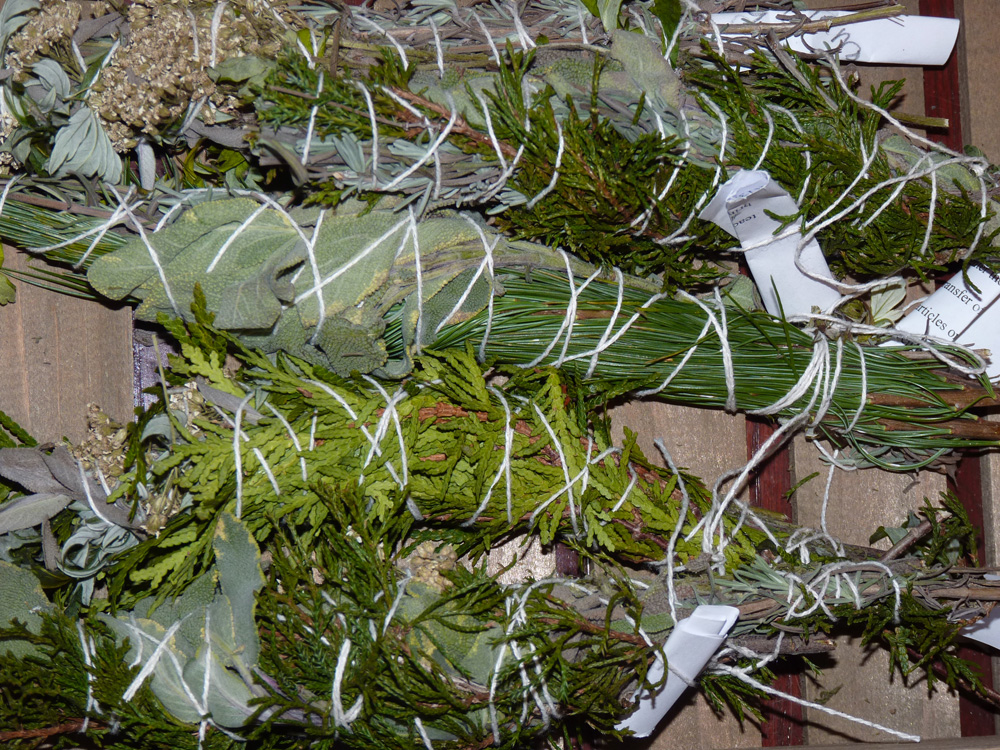
Image caption: https://druidgarden.files.wordpress.com/

So, place your smudge stick or bundle of herbs in a natural container such as an abalone shell, wooden bowl, or clay dish. If you would like to add words to your prayer, place them underneath the arrangement of herbs. You can either lean a sign against it or tape it to the bottom of your container.

Burn Your Herbs to Produce Smoke, Not Fire

When you are ready, light your herbs on fire. If you used a bundle of dried flowers and leaves, it might take a little while for them to catch fire. Don’t panic! Just put them into the shell or dish, still lit side up, and let them smolder.

Burn Your Herbs to Produce Smoke, Not Fire
Image caption: https://cdn.lifehack.org/

You can leave them to burn on their own for a little while, then blow them off so the herbs can only produce smoke. If the smoke starts running out during the ceremony, feel free to relight them and put them back in the bowl.

Purify Each Participant by Fanning the Smoke Over Their Body

Take a deep breath, and start fanning the smoke in a clockwise direction over your body. You can either hold the shell up in one hand and fan with your other or tilt the shell to let the ashes drop out and use a feather or a cleansing plant like sage to move it around your body.

Make sure everyone in your room is purified by moving around slowly to get the smoke everywhere, especially taking care of sweeping it over each participant’s face. Many people like starting with the head and heart then moving the smoke downwards on their arms and legs. You may use any method that you want.

Waft the Smoke in Every Corner and Outside of Your Home

Begin by putting the shell down and fanning or blowing to spread the ashes. Then, pick up the shell again (be careful not to burn yourself!). Walk around your home in a clockwise direction, taking care to get to every corner. Gently waft the smoke into open windows.

Use feathers to push the smoke outside as you pass through an open window or door. This will ensure you get rid of negative energies in your home. You may walk clockwise or counterclockwise as you wish. As in most smudging ceremonies, different cultures and individuals follow different practices.

Close the Ceremony

When you arrive back at your door front, chant your final mantra or prayer. Visualize how your entire home is filled with warmth, light, happiness, and blessings. Then speak your intention for one last time before closing the ceremony. Do not smudge your pets because certain sage varieties are toxic to dogs and cats if you have pets in your house.

Let Your Ashes Cool Before Returning them to the Earth

It’s best not to return the ashes from your smudging ceremony back into nature until they have cooled off. You can keep them in a special container for a few days if you wish, but it is important that they don’t get mixed up with sand, soil, or garbage while still hot.

FAQs on How to Smudge Your house

How often should you smudge?

Some people smudge their homes daily, but it’s best to do so at least twice a year. Once before the New Year and once again around Beltane or Lammas is an excellent time. You can, of course, smudge your house as often as you like; don’t go overboard. Remember that your intention should always be clear when smudging. You can smudge when you feel weighed down by stress or worry.

What do you say when smudging your house?

What to say when smudging depends on several occasions. For example, if you’re smudging because you moved into a new house, ensure you cleanse your family. You can say words such as “fresh start,” “protection,” or “happy.” If you’re smudging because your family feels exhausted, you can say words such as “cleanse” and “clear.”

How do you cleanse your home?

There are many ways to cleanse your home. One common way is to use white sage, sweetgrass, cedar, or any other natural herb. You can buy bundles of these herbs at your nearest local metaphysical shop.

Final Thought on How to Smudge Your House

As you can see, smudging rituals are a beautiful technique to clear your space and welcome positive energy into your house. Also, treat this ritual with respect as it’s a sacred religious practice in some Native American tribes. If you’re not familiar with the ritual and the plant, it’s best to ask someone who practices this religion.

The post How To Smudge Your House appeared first on Kitchen Infinity.

Did you miss our previous article…
https://www.thelavkitchen.com/?p=540

DIY Washer Repair Guide

DIY Washer Repair Guide

You are doing laundry, and suddenly your washing machine starts leaking water. Washing machines are a necessity, but when they break down, it can be incredibly frustrating. They can cause a huge mess and damage to other appliances around them.

The cost of repairs for your washing machine can be expensive and time-consuming. If you have the skills to repair washers yourself, you could save money on the cost of repairs. You can fix this problem in no time at all with some simple tools that you probably already have lying around the house.

Here are seven tips on how to fix your washing machine with common household items that most people already own. These DIY tips can help you save the expenses of a repair call and eliminate some issues, so the problem is easier for the technician to solve. Read on!

Washer Won’t Spin

The lid switch detects the position of the lid and prevents the washer from spinning into the lid. A broken lid will keep the washer from spinning even if the lid is closed. Before you call in the repairman, check to see if the belt is your problem. Your plugs can get bumped loose by animals and fallen objects.

You can do this by removing the broken lid switch. But first, use a continuity tester to test the switch and if you suspect that it’s broken, replace it with a new switch before spending money on professional help.

Check the Breaker Box

Once you’ve properly plugged your washer into the electrical outlet and still won’t run, check your central home electrical box to see if your fuse has blown and the circuit breaker has tripped. Replace the fuse and turn the breaker back on. If the problem persists, call an electrician immediately.


Image credit: https://howtofixit.net/

If the washer is plugged in, the breakers are okay, but it’s still not working; you may need a lid switch to engage for the washer to work. Today’s washer, both front, and top load models require this lid switch to work.

These switches can break and need to be replaced. They also get gunked up with lint and detergent residue. Use a cotton swab and a little bit of rubbing alcohol to clean the contact areas.

No Fill or Slow Fill

With front load washers, it will fill up to the water level you choose. The fill valve could be restricted over time because of lint and debris, so turn off the unit, unplug it and remove the hoses. After establishing electrical power, the next thing you’ll need is water.

If there’s no water entering the washing machine, ensure the water valves are open. Make sure you have two valves, a hot and a cold. They should be marked by a red and blue knob or switch. Even if you wash in cold water, some washers won’t operate unless you open both valves.

And if your machine is getting, but it fills very slowly, you may need to open the valve more. If the water valves are open and still the washer won’t fill, you may have a clog in the filter screen. In this case, unplug the machine and turn off the water valves. Use a bucket to catch the remaining water in the hoses.

There are many things that can go wrong with your washer hoses both inside and outside the cabinet. And transferring a small wire clip from the old switch to the new switch can be a real challenge.  Use a screwdriver to unscrew the hose from your machine and check if there’s a clog in the filter. Clean the hoses of any water mineral build-up to reduce clogs and improve washer performance.

You can also remove the back panel of your washer to access the additional water lines inside the washer that lead to and from the pump and the drain. Use vinegar and hot water for cleaning your washer and clear your clogged and dirty hoses. Any clogs you run into along the way, apply vinegar and hot water and watch the build-up melt away. Make sure you switch the water back on when you’re done with hoses.

Level the Washer to Prevent Noises

Terrible noises happen when you incorrectly load your washer or even your laundry has shifted during the cycle. For standard top load washers, never load clothing on one side of the central agitator; make sure you distribute it evenly around the washer’s tub.

Level the Washer to Prevent Noises
Image credit: https://www.thespruce.com/

For high-efficiency top load washers without a central agitator, the problem could be overloading while in front load models, the noise can come if your machine is underloaded. If the thumping occurs during a cycle, stop the machine and redistribute the wet clothing.

For weird noises such as humming, clicking, and gurgling, the noise can be caught by objects caught in the washer’s drum and internal mechanism. Clicking and gurgling signals an object caught in the water pump and drain line. Make sure you check the pockets before loading clothes.

If your washer is making screeching and squealing noises, then it’s mechanically challenged and requires a service call. For uneven legs, use a bubble level and a wrench to twist the feet to retract and extend them until the washer is level on top.

Washer Leaks

If you are experiencing water leaks, the first step is to determine if it’s a supply hose leak or a water valve leak. Check your washer’s hose connections to the hot and cold water valves. You can use a dry hand and a paper towel to run down the length of each hose.

Washer Leaks
Image credit: https://applianceexpresstx.com/

If you find any dampness, tighten immediately and if the hose has small splits, replace it immediately. A burst water hose is a huge mess and damages the walls and floors. Make sure you check and replace your washers regularly to prevent this mess.

Pay close attention to where the puddle is located, whether in front of the washer or at the back of the washer. The location will tell you what to do next. If you have a front loading machine, make sure you’re using a high-efficiency detergent to remove soapy puddles on the floor.

High-efficiency detergent is formulated to be low-sudsing and to be used in the lower levels of water in a front-loading washer. Front-loading machines have a small overflow system on the back of the machine, and if you have too many suds, then they’re escaping from there.

Clothes are Too Wet After Final Cycle

If you perfectly know how to do laundry but your clothes still come out of the washing machine still wet, it might be because the washer is not draining correctly. To test this, pour a cup of water into the washer and start a cycle. If the water doesn’t drain out, then you’ll need to clear the drain.

Your water pump may be clogged with lint or a small object. If the pump isn’t allowed to work freely and properly, it drains out too slowly, leaving your clothes wet. You can remedy this by simple cleaning.

If that’s not the case, your drain hose could be clogged with lint and hair. You can easily clean this with a thin, long-handled brush. You’ll get the brushes at pet shops to clean the aquarium tubes if you can’t find one at a hardware store.

Go Through the Manual

If you have no clue what’s wrong with your washer, your first stop should be the washer’s manual. It will provide you with diagrams and troubleshooting tips. And if you don’t have the manual, visit the manufacturer’s website or download a manual from one of these sites. This will be time-consuming but much less expensive than a repair call.

FAQs about DIY Washer Repairs

Is it worth fixing an old washer?

Yes, especially if the repair cost doesn’t exceed 50% of the cost of a new washer.

Do washers have fuses?

Yes, they have fuses that protect them from power surges. Washing machines require a lot of power to run.

Final Thought about DIY Washer Repairs

lIf you love to fix things DIY, then appliance repair at home is a great option. Don’t be scared of appliance repair with the help of this article, and go ahead and fix your washing machine without any professional help. But if you think the problem may be beyond your knowledge, don’t hesitate to call a professional.

The post DIY Washer Repair Guide appeared first on Kitchen Infinity.

Did you miss our previous article…
https://www.thelavkitchen.com/?p=532

What To Do When Your Water Heater Is Making Noises?

What To Do When Your Water Heater Is Making Noises?

You may notice your water heater making strange noises. This is a problem because you don’t know what’s causing the sounds or danger to you or your home.

Not all of these sounds mean something wrong with your water heater, but it’s always good to understand the reasons behind them and learn how to fix them. Here are water heater noises to look out for and how to diagnose them:

Sizzling, Hissing, and Crackling

These are typical noises coming from an electric water heater. They are attributed to sediment build up and mineral deposits at the bottom of your water heater. There is nothing to fix this yourself, but it’s not a cause for concern either. Plumbers will sometimes use chemical agents to get rid of the sediment buildup and prevent such sounds from occurring in the future.


Image credit: https://www.easyflow.co.uk/

Irritating noises are not the only symptom of this problem. Expect your heating bills to go up as the water heater struggles to heat the same amount of water with a greatly reduced ability to produce heat from the lower heating element.

A gas powered water heater can also make sizzling sounds, even though the problem isn’t the same. Sizzling noise in a gas water heater is caused by internal condensation, which makes a sizzling sound when dripping down into the burner. If you notice condensation in the tank, there could be a leak, so call a plumbing professional to deal with it.

A crackling sound may also mean that there’s condensation in the water heater burner. A water heater won’t create condensation if the temperature remains consistent, but condensation can form when the tank is full. Make sure the plumber checks the crackling sounds immediately. Also, use a wire brush for clean up and if the sediment blocks the drain valve, it might be impossible to remove the water in the storage tank, so buy a new water heater.

Tankless Water Heater Noise Problems

Apart from regular heaters, other heater models can make annoying noises. For example, an electric tankless water heater has its sound. You should know the normal sounds if you know how a tankless water heater works. A tankless gas water heater can also have the same issue. If you hear a clicking sound from the water heater, it means that the flow switches come on and off.

Tankless Water Heater Noise Problems
Image credit: https://soundproofcentral.com/

And if you hear more noise, check for debris from the hard water area or if there’s build-up within the unit. You can fix this problem by practicing regular maintenance to help you keep on top of any unusual sound.

Popping Sound

Some sounds that you hear may seem irregular or irritating, but these are normal for this type of heater. The first sound you will probably notice is the popping sound. Popping noises occur when the temperature inside the unit rises to 140 degrees Fahrenheit (60 degrees Celsius).

Popping Sound
Image credit: https://www.fenwickhomeservices.com/

However, this doesn’t indicate a dangerous problem. Popping noise is also caused by limescale and sediment build-up within the tank. The sound is created when steam bubbles form under the sediment, then burst as the water heats up. You can quickly diagnose this problem by using a descaling product to help break down the limescale and minerals.

Ensure you flush and drain the tank to remove any sediment. Popping noises can also be caused if an aluminum anode rod within the tank is exposed to high levels of alkalinity. Professional plumbing can solve this problem by replacing the aluminum anode rod with a magnesium anode rod.

Loose Water Heater Element can Cause a Humming Sound

Some water heaters make humming noises. For example, electric water heaters don’t have gas burners. Instead, they have at least one electrically powered heating element associated with a thermostat. If the water falls below the set temperature, the electricity heats up the element, and the water flowing around it heats up.

The heated water then circulates, warming the rest of the water. When the electric heater makes a humming noise, the heating element is loose due to wear and tear or poor installation.

The loose element acts as a tuning fork, vibrating from the push of water cycling around it, creating a humming noise. You can easily correct these humming sounds by making the heating element tighter.

Screeching Sounds can Signal Restricted Water Flow

A screeching noise may indicate the water is too hot. As the heated water comes out of the tank, it can bump into air bubbles in the piping, which creates the sound of metal on metal screeching or scratching.

Screeching noises also show that water flow is restricted either at the valve letting water into the heater or at a valve connected to water in your home. When the relief valve isn’t open all the way, water moves through a narrow space at a higher pressure, creating a high-pitched sound.

The inlet control valve is often to blame for this, and you can easily address it by turning the valve to fully open it to lower the water pressure. And if adjusting the inlet valve doesn’t stop the noise, you may need to replace them.

Ticking Noises

If you can also hear a soft ticking noise, this indicates changes in water pressure. The heat trap can sometimes be the reason for ticking noises. You can easily remedy this problem as long as the changes in water pressure aren’t dramatic and frequent, like rapidly opening and closing the main building control valve.

These tapping sounds are normal, but if tapping sound from a valve is concerning, swap the heat straps with dielectric nipples, smaller fittings that perform the same function. Boosting heat strap nipples can also improve the functionality of the water heater.

Make sure to tighten and replace the pipes if they become loose. This will stop the ticking sound and prevent the pipes from shifting. Lowering the heat by a few degrees may also reduce the expansion of water lines and stop any ticking sounds.

Hammering and Knocking Noises

A hammering noise, also known as water hammering, occurs when pipes aren’t securely anchored. They move and hit against each other and the interior of the wall. Any abrupt change in the water flow can lead to the sound because the pipes move as water does.

Hammering and Knocking Noises
Image credit: https://cdn-apifl.nitrocdn.com/

This can happen when you flush the toilet, run a dishwasher, or a pump with a holding tank is running. Water hammering is not an immediate problem, but it can cause damage to pipes and the surroundings over time. You can diagnose this problem by securing pipes with insulation or installing a water hammer arrestor to stop the knocking.

Rumbling Sound

A few things can cause rumbling pipes. Sediment build-up and mineral deposits are common reasons. Sediment build-up occurs when minerals are suspended in the water flow and accumulate over time. This sediment can also cause damage to the inside of your pipes, but it usually creates a rumbling sound when you turn on hot water faucets.

You can flush and drain that hot water tank with a long hose to remove the sediment or use a descaling solution to break down limescale within the tank. You should take your time to learn how to drain a water heater before doing anything. And if you aren’t experienced with plumbing, have a professional plumber flush the tank once a year.

FAQs about What to Do When Your Water is Making Noises

Is it bad if your water heater is making noise?

The noise might be annoying, but it doesn’t mean that your heater is malfunctioning.

Can a water heater explode?

If there’s steam build up in the heater and there’s no outlet, the increased pressure could cause the hot water tank to explode.

Final Thought about What to Do When Your Water Heater is Making Noises

As you can see, a water heater noise shouldn’t bother you that much. But if you suspect a fault, don’t hesitate to contact a water repair to rectify the situation before it worsens.

The post What To Do When Your Water Heater Is Making Noises? appeared first on Kitchen Infinity.

Did you miss our previous article…
https://www.thelavkitchen.com/?p=520

18 Scandinavian Bedroom Decoration Ideas

18 Scandinavian Bedroom Decoration Ideas

When it comes to interior design, a bedroom isn’t always for an amateur interior designer. Ranging from the bed, choosing the nightstand, and thinking about storage for your clothes and belongings, there’s so much you have to consider.

You want to create an all-white Nordic style or hotel room but don’t know-how. If you’re looking for clean lines, simplicity, light, and airy while still maintaining a sense of calmness and relaxation in your bedroom, then Scandinavian bedroom decor is perfect for your home.

Along with a common culture and language, the Scandinavian countries of Norway, Sweden, and Denmark share this decorating style that is light, airy, simple, and clean. Let’s take a look at the different ways you can create this relaxing space in your own home.

1. Peaceful Scandinavian Style

Scandinavian bedroom decorating style borrows from the country’s history and sensibility. Since many residents of Scandinavian countries reside in small apartments, they have to find ways to maximize space and light. That’s why this Scandi style is popular worldwide, not just in the chilly north. The peaceful bedroom captures the serenity of real Scandinavian decor.


Image credit: https://www.thespruce.com/

2. Lighting is Key in Scandinavian Interiors

Scandinavian bedrooms might be some of the best-decorated rooms in the house. One reason for this is because of the lighting needs of Scandinavian residents; they need to maximize natural light and add simple lighting fixtures such as bedside lamps or overhead chandeliers. This helps to create a restful atmosphere, which is what Scandinavian designs are all about.

So, when thinking about your Scandinavian interior, make sure you provide several types of natural lighting. This will not only create a restful atmosphere but will also help with mood-building purposes.

3. Color it White

Many Scandinavian bedrooms start with the color white. White is a reflection of light and also works very well with other colors. If you choose to paint your bedroom walls white, it is best to leave at least one wall in a different color; this will add depth and interest to your room while maintaining an overall feeling of simplicity and relaxation.

Color it White
Image credit: https://st.hzcdn.com/

The leaning wall ladder is a popular decoration in Scandinavian bedroom design, so when painting your walls, paint the leaning ladder in white color. The ladder can be used in different ways in your bedroom, including storing your robe, a throw blanket, a faux fur rug, and other fabric items.

4. Mid Century Furniture

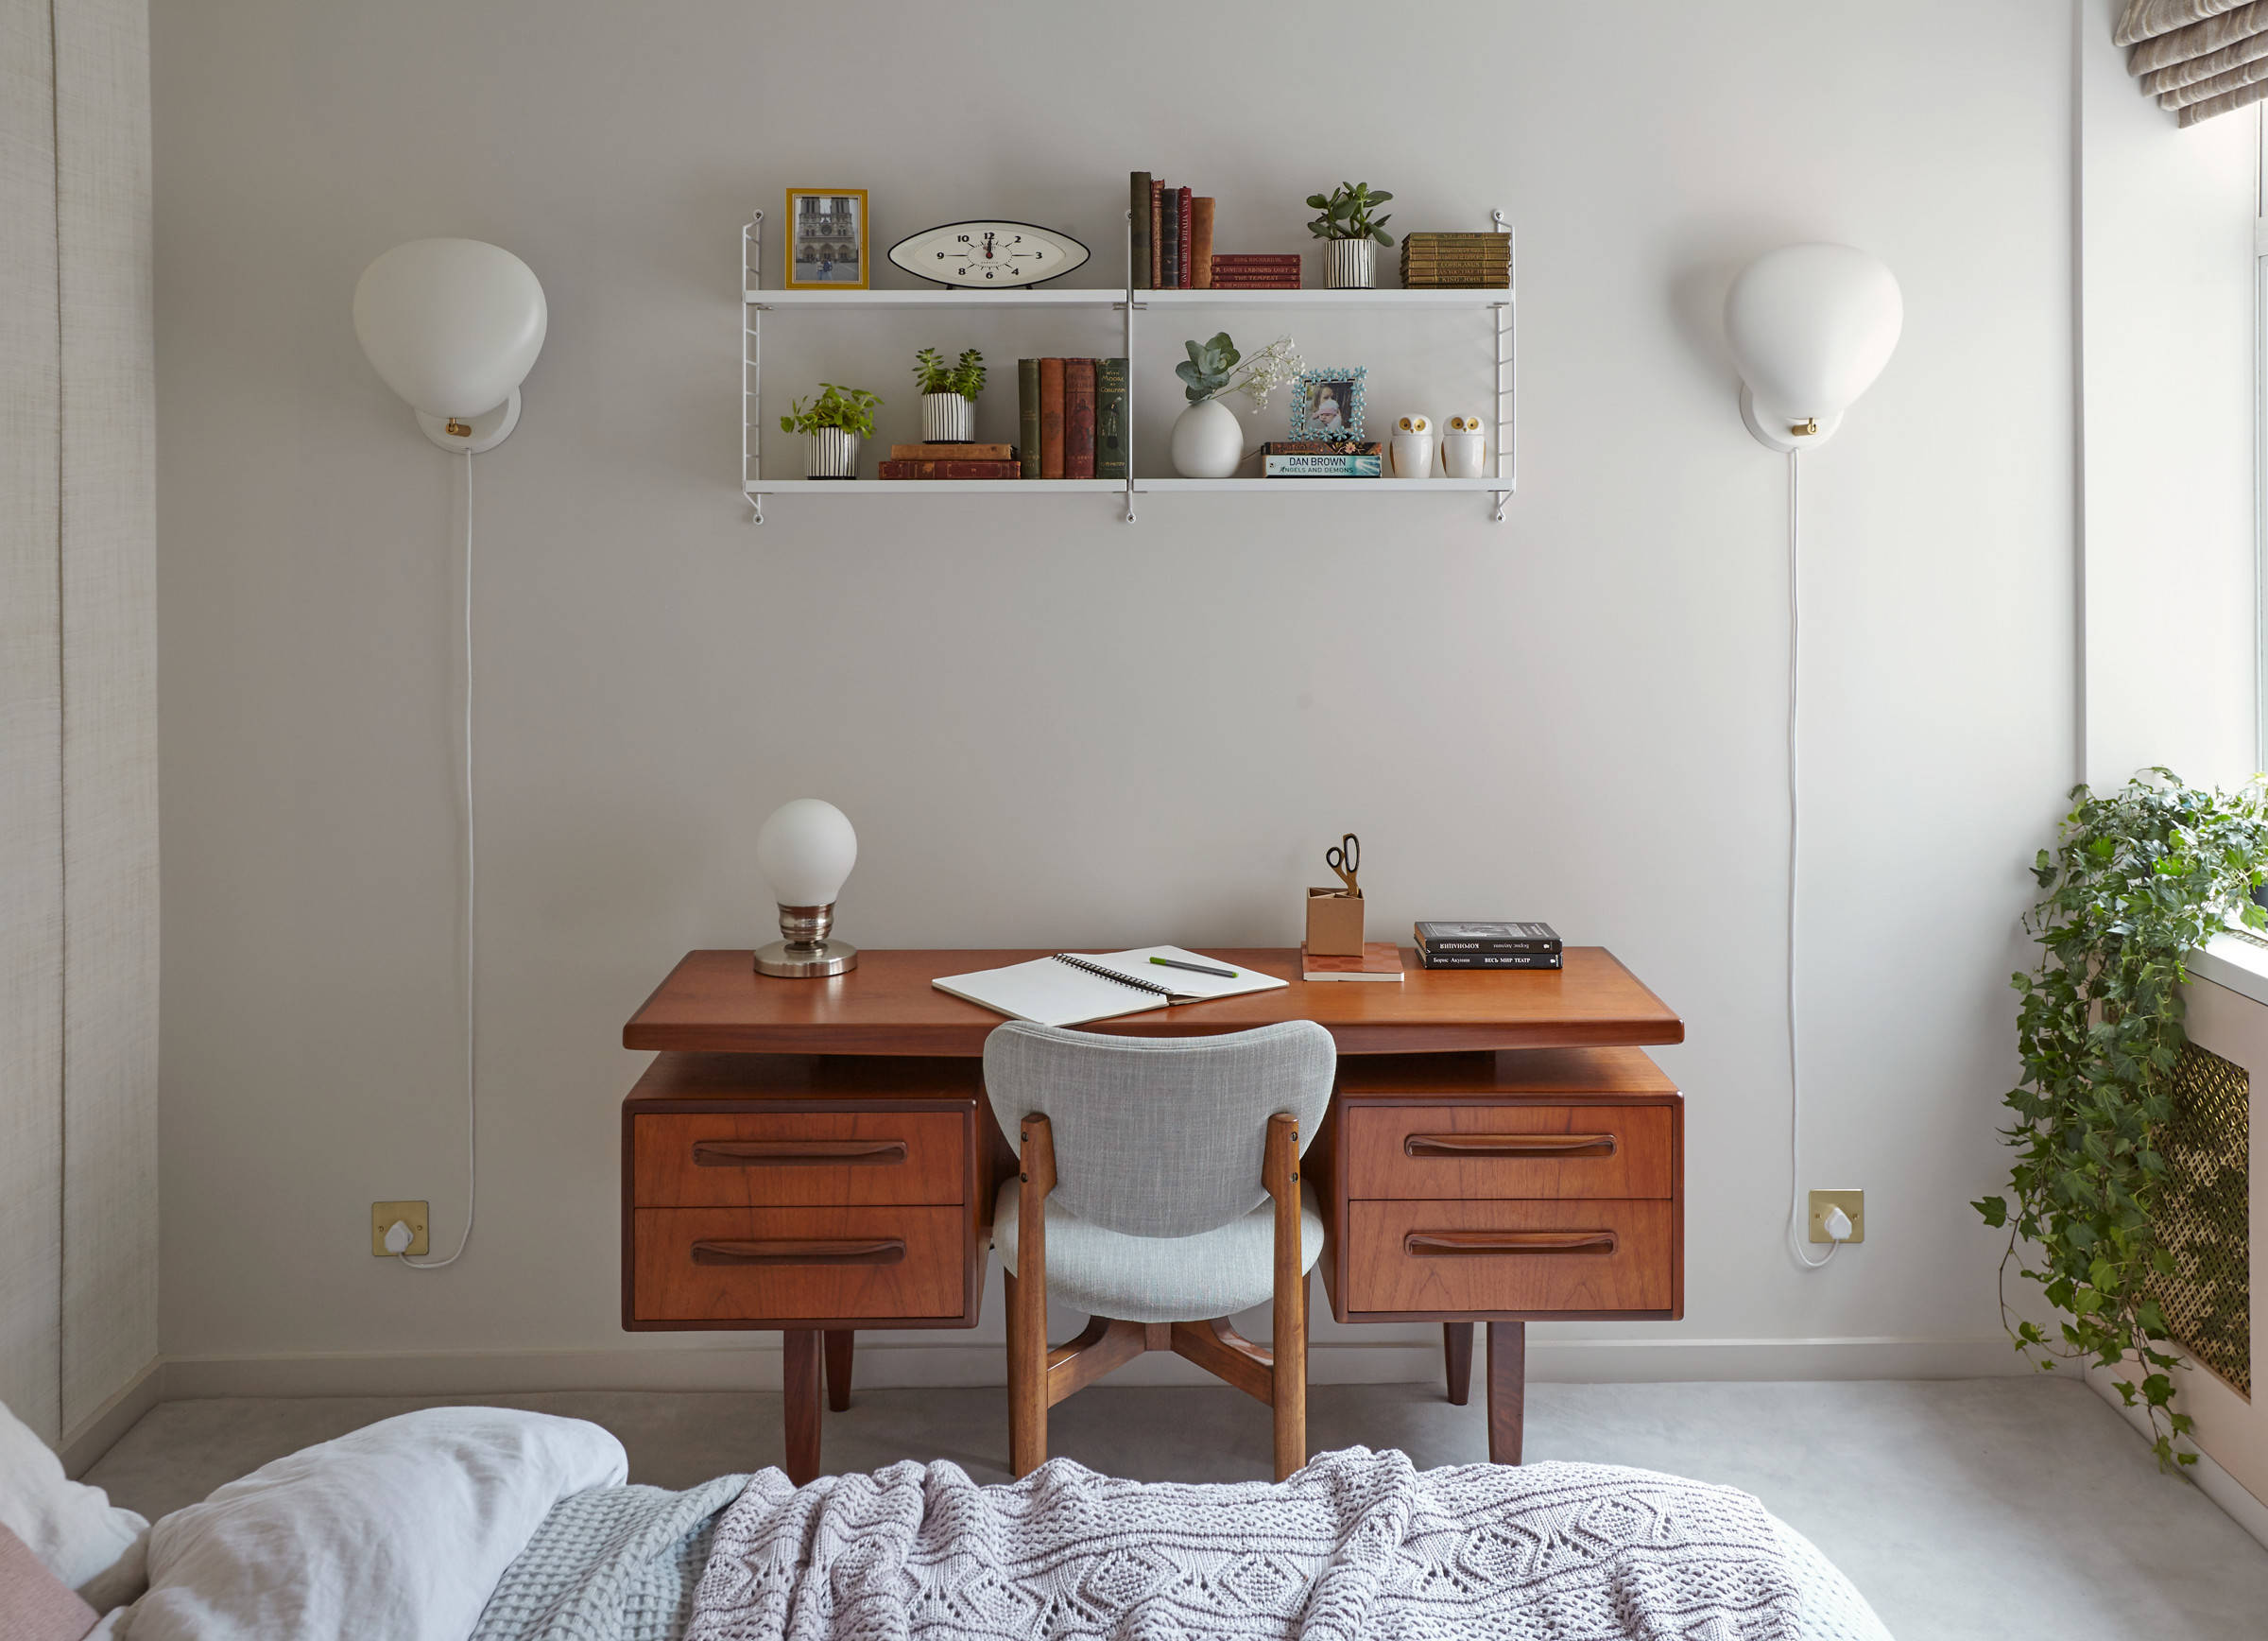
A great feature of Scandinavian bedroom decorating ideas is Mid-century furniture. This style features clean lines, simplicity, and minimalism. Mid-century furniture can be tricky to pair with other designs or concepts.

Mid Century Furniture
Image credit: https://www.thespruce.com/

The best way to introduce the concept into your home would be by choosing a specific room like your bedroom, where you can easily incorporate this type of furniture without worrying about clashing with other styles.

The sleek look of this furniture can work well with the minimal aesthetics of Scandinavian homes. You can also buy a mid-century nightstand, a mid-century bed, and a mid-century dresser to achieve this look in the bedroom.

5. Canopy Bed in a Scandi Bedroom

A modern canopy bed with a dark wood finish is the perfect piece to use to introduce this design concept into your bedroom. The monochromatic colors of the room and simplicity of the design of the bed will create an interesting contrast and fit right in with Scandinavian bedrooms.

6. Black Walls

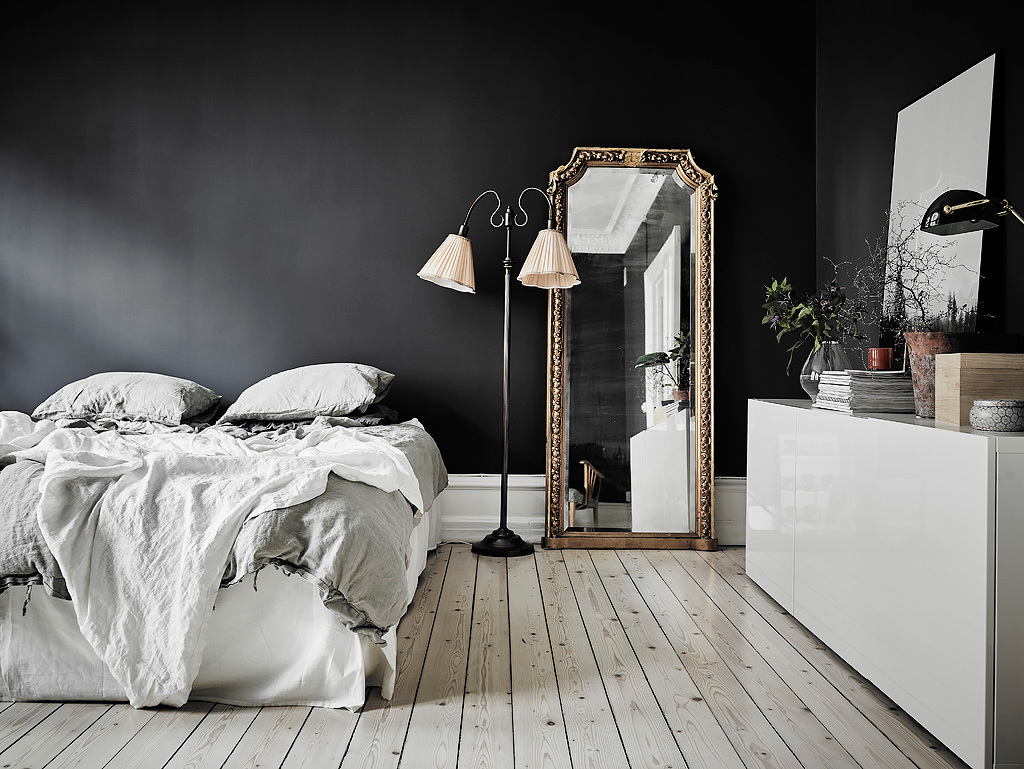
A bold design choice like a black bedroom wall can work well in a Scandinavian style bedroom. Since Scandi style appreciates neutral colors such as black, brown, white, and beige, this high-contrast interior is great for the bedroom.

Black Walls
Image credit: http://cdn.home-designing.com/

Also, people like it as dark as possible when they sleep at night, and the black-painted walls can help you achieve this ideal sleeping situation. Make sure your bed and walls are lighter colors like beige and white to prevent creating an ugly black box.

7. Muted Colors

The ceiling, the floor, and the furniture should be in lighter colors than black if you want to create a Scandinavian bedroom. Most Scandinavian bedrooms are created using muted colors like dark purple, pale pink, and faded blue. There’s also a Scandinavian blue, which is very popular in Scandinavian kitchens.

8. Bring in Natural Light with Large Windows

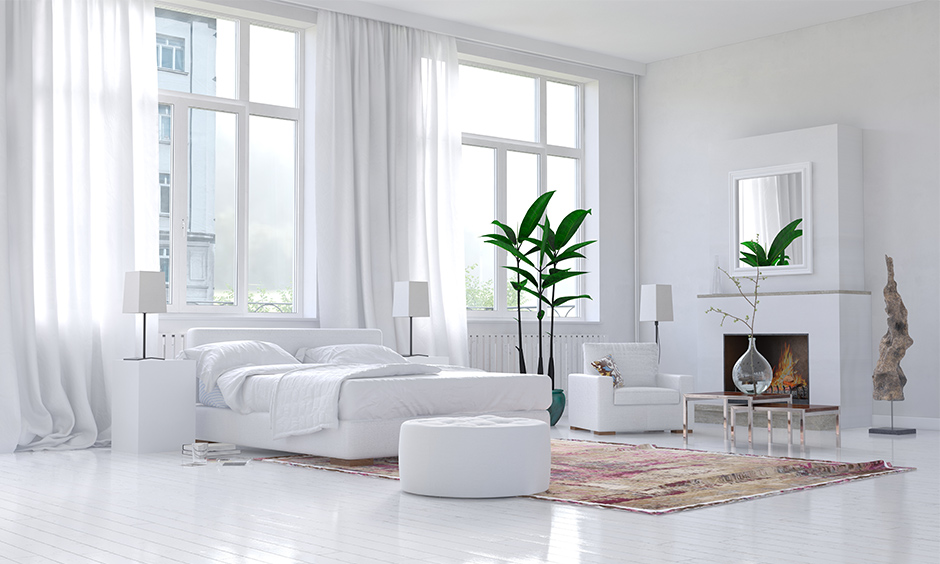
Bring in natural light with large windows to create a more spacious feel. This is what Scandinavians are known for, their love of nature and the outdoors. Make your bedroom full of life by bringing in natural sunlight.

Bring in Natural Light with Large Windows
Image credit: https://media.designcafe.com/

To complement this, ditch heavy curtains and use adjustable window treatments such as blinds and shutters instead. If your windows are not large, try to enlarge them with sheer curtains.

9. Consider a Fireplace in the Bedroom

Most Scandinavian bedrooms have a fireplace as it was originally intended as a room for firewood. In this age of gas and electricity, the fireplace is more for aesthetics, with some models even holding candles.

10. Scandinavian Cottage Bedroom

While the Scandinavian decor is generally pared down and minimalist in feel, it doesn’t mean that there’s no room for personality, warmth, and touches of other decorating themes. The Scandinavian bedroom has a cottage vibe while maintaining the limited palette, clean lines, and airiness typical to Scandi style.

Scandinavian Cottage Bedroom
Image credit: https://st.hzcdn.com/

11. Neutral Wood Beds and Headboards

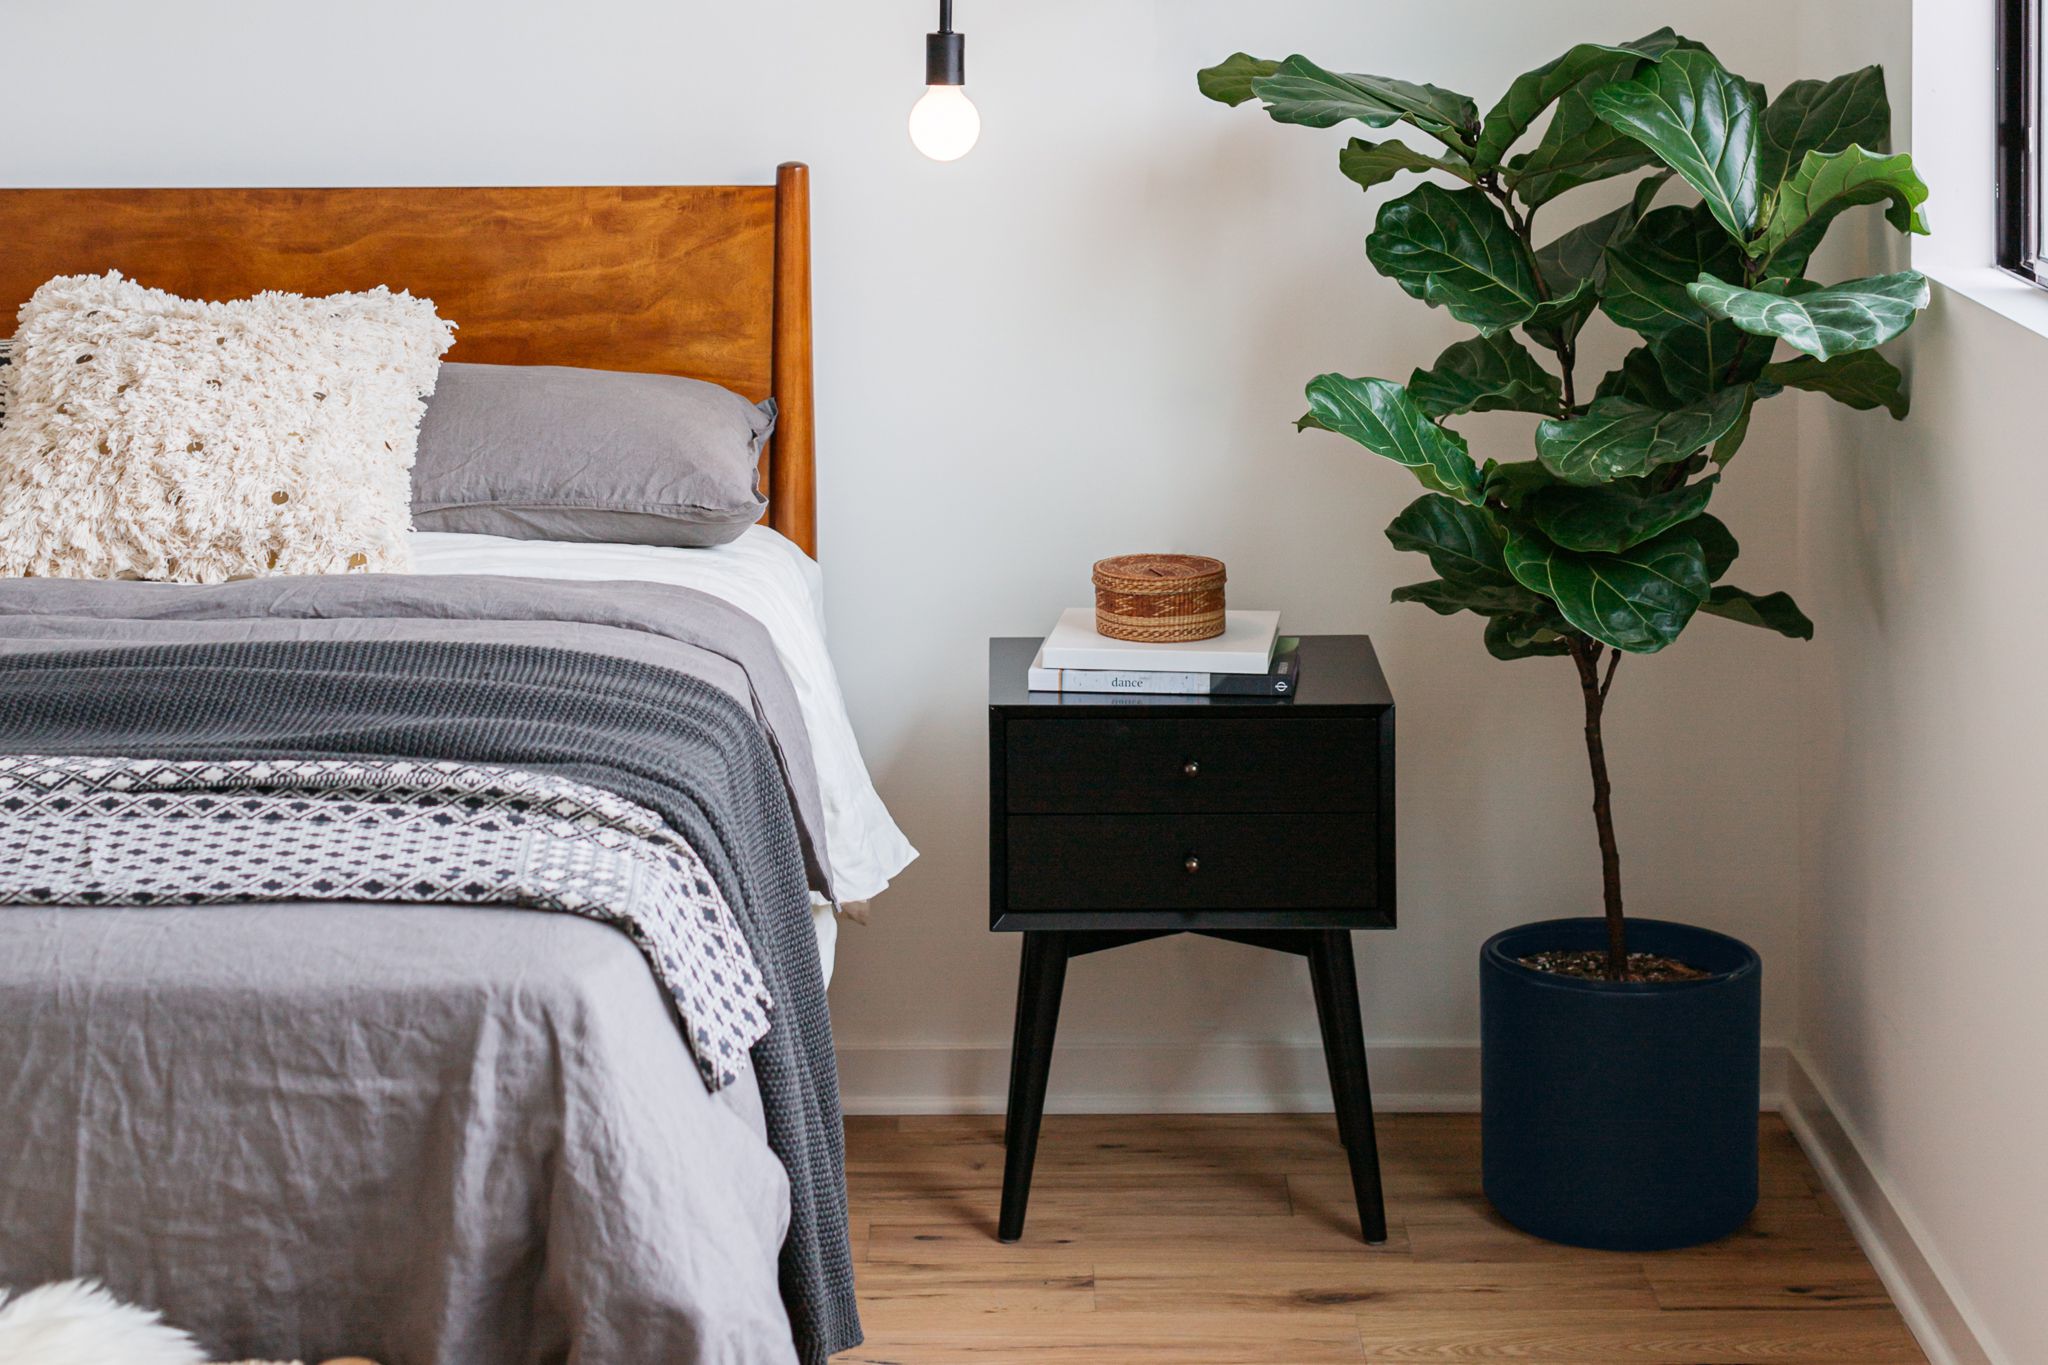
Scandinavian bedrooms often have beds with headboards made of wood. However, other materials can be used for the headboard, including metal or wicker, but wood is most common. But both neutral wood bed and headboard are great Scandinavian bedroom design choices.

It will warm up the bedroom while keeping in line with a minimalist aesthetic. There are no fancy elements with this bed. It’s functional and simple, with two nightstands on either side of the bed that blend well with white walls behind them.

12. Go All Out with Textures

A blend of cozy textures is essential for creating the ultimate Scandinavian bedroom. The room must be warm, inviting, and comfortable so that you can relax better at night. By adding soft cushions and pillows to the bed, you get a cozy reading nook where you can curl up with a book or watch television in comfort after a stressful day at work.

13. Abstract Wall Art

Many Scandinavian interiors feature black and white artwork. There are no representational works in Scandinavian homes. So, stick to abstract shapes and minimalist forms when placing art on your wall. You can opt for drawings, paintings, and sculptures; be sure to keep it minimal and abstract.

While you’ll often find a gallery wall of smaller black and white artwork, it’s always good to big with one large artwork. The larger pieces will add a zing of excitement, while the muted color will keep the overall vibe soothing.

14. Create a Cozy Reading Corner

A beautiful Scandinavian bedroom is often one where you can curl up and read your favorite book while enjoying the comfort of soft pillows, sheepskin throw, fur, cozy blankets, and a steaming cup of homemade tea. This kind of space allows you to get lost in your books while cozying up with loved ones or friends.

15. Go Slightly Bolder with a Colorful Scandi Bedroom Scheme

Now, this doesn’t mean painting the walls bright red or yellow. A Scandinavian bedroom usually sports muted colors like light blue or grey. You can still achieve that light and airy feel of a modern Scandinavian design while adding a playful touch to your decor with traditional folksy prints and rich tones such as mustard and burnt orange.

16. Maintain Open and Airy Spaces

The typical Scandinavian room leaves plenty of open space between pieces of furniture. This gives the room an airy, fresh vibe and prevents any cramped and cluttered feel during the dark winter days.

17. Small Scandinavian Bedrooms

When you’re working with a small space, it’s best to go with simple modern furniture. Twin beds and small side tables can be a great addition when working with a small bedroom design.

18. Add Rustic Touch to Your Modern Bedroom

Love the country charm of large, wooden slatted beds? Pair it with a sleek modern dresser and bedside tables for styling contrast. Choose a stand-out piece of vintage furniture to make your bedroom look more rustic and modern.

FAQs about Scandinavian Bedroom Decorating Ideas

What is a Scandinavian bedroom?

Scandinavian ideas originated from countries such as Sweden, Denmark, and Norway. A Scandinavian bedroom design has many different vibes, depending on the design route you choose.

What makes a Scandinavian bedroom?

Scandinavian bedrooms, just like the rest of their interiors, have a minimal amount of color. These bedrooms feature all dark walls, a dark wall, and richly colored textiles about comfort, coziness, and textures.

Final Thought about Scandinavian Bedroom Decorating Ideas

As you can see, Scandinavian bedroom decorating ideas are very popular not only in the chilly north but worldwide. This decorating style is easy to implement, and the results are very appealing. So, if you’re just learning how to decorate your bedroom, consider the Scandinavian decor and you’ll love it.

The post 18 Scandinavian Bedroom Decoration Ideas appeared first on Kitchen Infinity.

Did you miss our previous article…
https://www.thelavkitchen.com/?p=474

How to Grow Oriental Poppy Plants

How to Grow Oriental Poppy Plants

Growing Oriental poppies is a fun and rewarding experience. However, it can be hard to know what you need to do before planting them in your garden. Oriental poppies are beautiful flowering plants that you can grow indoors or outdoors.

They are usually planted in the spring and bloom during the summer season. The flowers of these plants come in different colors including red, pink, white, purple, maroon, orange, salmon, and peach. These beautiful flowers attract many butterflies and bees, making them a perfect addition to your flower garden.

What are Oriental Poppies?

Oriental poppies, also known as Papaver Orientale are herbaceous perennial flowers with large, brightly colored blooms featuring petals reminiscent of crepe paper. Oriental poppies are grown mainly for their flowers, although they bear attractive foliage in spring.


Image credit: https://www.saga.co.uk/

The big, thistle-like leaves of Oriental poppy are downy, deeply lobed, and rich green, offering aesthetic value in their own right. What makes the Oriental poppy a good cut flower is its tightly packed leaves and stiff and hairy flower stems.

Oriental Poppy Plant Care

Indigenous to elevated lands in Western Asia, the Oriental poppy has naturalized in parts of North America that have cold winters. This cold-hardy plant hates high heat and humidity; instead, this perennial needs cold temperatures in the winter and fares poorly for most parts south of planting zone 8.

Oriental Poppy Plant Care
Image credit: http://1.bp.blogspot.com/

Make sure you mulch around oriental poppies for the first couple of years for winter protection because most varieties are clump-forming. Also, propagate them by seed instead of transplanting because the clumps are slow to become established. Oriental poppy has multiple uses, which makes it a valuable garden plant.

Sunlight Requirements

Make sure you plant your oriental poppies in full sun. This will not only promote better flowering but will also encourage a bushy habit. If you want a tall, slender plant, then choose a location with some afternoon shade. Full sun will also reduce the chances of powdery mildew infestation, which is a potential problem with oriental poppies. At least six hours of sun a day will help your plant to thrive.

Soil Requirement

The soil should be fertile and well-drained. The plants need a lot of water in summer but less in winter. They are extremely intolerant to wet soils, so choose your planting site carefully by avoiding low areas that remain damp for long periods.

Growing your oriental poppy in a well-drained soil enriched with compost will give the best blooms. Oriental poppy also prefers neutral to slightly acidic pH. Root rot can be a problem if the pH is too high so make sure you test the soil pH and ensure it doesn’t exceed the limit.

Water Requirements

Poppies like moist but well-draining soil throughout the entire growing season and regular watering. Make sure you water when the soil is dry and avoid overwatering, especially during dormancy. Poppies grown in containers will need more frequent watering than those in the ground.

Water regularly and thoroughly so that water runs out of the planting holes at the bottom of pots. Poppies are drought tolerant; however, they will flower less and instead put their energy into developing more leaves and stems, making them greener but not as attractive.

Temperature and Humidity

Poppies don’t like it too hot. As a general rule, if you are comfortable outside, the poppy will be happy. It can tolerate temperatures down to 20°F, but you must protect the flower buds from an early frost that could damage or kill them. This plant doesn’t prefer high heat and humidity. They grow in hardiness zones 3 through 9.

Fertilizer

Poppies require well-draining soil and regular fertilization. They respond very well to all forms of fertilizer, including slow-release fertilizer in the spring. Be careful not to over-fertilize. Too much fertilizer will cause the plant’s energy to be put into producing flowers rather than leaves and stems.

Fertilize in spring just before new growth appears. If you already have fertile soil, use ammonium sulfate instead because it also contains some nitrogen. If it is too late for this application, you can side dress the soil with compost or manure tea. Make your own compost for your plants and you’ll like the outcome.

Propagating Oriental Poppies from Seed

If you have an adult poppy plant, the division is easiest to propagate new poppy plants. There are a couple of ways to do this. The first way is called layering. This takes several weeks and should only be done if you want just one or two new plants.

To layer oriental poppy, bend one of the stalks down to the ground, and bury it in the soil where it touches the ground. Hold the stalk down with a rock or other object. Water frequently while your Oriental poppy is lying on the ground to dry out too much. It’s better to do this late after the blooms have passed.

How to Plant Oriental Poppies

Once you’ve purchased these plants from a garden center, plant them from early spring into early summer. Direct sowing is the standard method for growing oriental poppies. Scatter poppy seeds directly on the surface of the soil in spring or early fall, where they’ll receive the sunlight they need to germinate.

How to Plant Oriental Poppies
Image credit: https://www.gardeningknowhow.com/

Poppies grown in containers are easy to plant. You gently settle them in the ground at the same depth they were in the pot. Be careful not to disturb the roots when transplanting. For bare root plants, plant them with the top of the tap root about an inch below the soil surface. Make sure you follow all directions that come with your bare root plant.

Pests and Diseases

Poppies rarely suffer from pests and diseases. But the oriental types can be set back by powdery mildew. This fungal disease can affect the whole plant by covering leaves and stems in white mildew in spring and summer.

Make sure you deadhead spent flowers and cut the plant to the ground level as you also clear fallen leaves to prevent the fungal disease from overwintering in the soil.

Oriental Poppy Varieties

Papaver Orientale Livermere

The most fragrant of all poppy varieties. It has large flowers, is very hardy, and is tolerant of poor soils. It also has a scarlet red flower that is 2 to 3 feet tall.

Papaver orientale Patty’s Plum

Patty’s plum is a variety new to the UK; it has purple petals with white markings. It is very hardy and loves poor soil. It’s heavily textured and plum-colored 2 to 3 feet high.

Papaver orientale Fireball

Fireball is a spectacular poppy with flowers up to 18 inches in diameter with bright scarlet petals, and a golden yellow center. The leaves are dark green and rough-textured, maturing to red-brown tones in autumn. It’s semi-double or double blooms.

Papaver orientale Bolero

Bolero is an amazing poppy containing purple-red flowers with purple eyes. The center of its flower is golden yellow. It’s 2 feet high, and it blooms in mid-summer.

Papaver orientale Princess Victoria Louise

This is another spectacular poppy variety that is 6 to 8 inches large, salmon-pink blooms, and 2 to 3 feet tall.

Companion Plants for Poppy Plants

Plant your oriental poppies in the middle or at the back of the flower bed to let other flowers fill in once they die. Hide the withering poppy foliage with summer bloomers such as Siberian iris, baby’s breath, Russian sage, daylilies, and rudbeckia. Protect the new poppy foliage in fall with bark mulch and pine boughs.

FAQs about How to Grow Oriental Poppy Plants

Do oriental poppies grow back every year?

Oriental poppies are true perennials, meaning the mother plant returns each year and slowly expands overtime to produce a larger plant and more flowers.

Should you deadhead oriental poppies?

Yes, you should cut back and deadhead oriental poppies after flowering. This will stimulate the growth of fresh new foliage and even new blooms.

Final Thought on How to Grow Oriental Poppy Plants

As you can see, growing and caring for oriental poppies is a fairly simple task. If you want to capture the magic of these brilliant blooms, consider planting them near your home or garden as an addition to the landscape.

The post How to Grow Oriental Poppy Plants appeared first on Kitchen Infinity.

Did you miss our previous article…
https://www.thelavkitchen.com/?p=466

How To Wash A Silk Pillowcase

How To Wash A Silk Pillowcase

Washing silk pillowcases is not as easy as you might think. Not only do they require special care, but also dry cleaning can be expensive and time-consuming. Luckily, there are some

simple steps to follow for washing a silk pillowcase at home. Follow these instructions to keep your silk pillows in tip-top shape and avoid the risk of ruining them with improper care. Here we go!

What You’ll Need

Mesh laundry bagWasher or sinkIronDrying rackDistilled white vinegarGentle detergentCold water

Washing a Silk Pillowcase by Your Hand

There’s always a way to hand washing your silk products. However, it will take time to do, and the results may not be as satisfactory as you would like. It’s best to ask a silk product professional for guidance if hand washing is your preferred method, although we encourage you to try it on your own first before taking such a big step. Here are some things to remember:


Image caption: https://www.thespruce.com/

Read the Label on Your Pillowcase to Check How it Should be Washed

Most silk products will come with care instructions that you should always keep in mind. The care label is always on the inside corner of the pillowcase. It would recommend hand washing your pillowcase. If there’s no care label attached to the pillowcase, then get it dry cleaned to be on the safe side.

Fill Your Basin with Cool Water and Detergent

Fill a basin with lukewarm water and add a little bit of gentle detergent. You can learn how to make homemade laundry detergent for this purpose. Mix the detergent well with your

hands before soaking it in the pillowcase. Use your fingers to rub the laundry detergent around all parts of the silk material, making sure it’s properly cleaned. Make sure you don’t use hot water, as this can cause the silk to shrink.

dd Some Drops of Detergent

If you want to make sure the pillowcase is clean, then add a few drops of detergent. Make sure it’s not too much, as this will cause the silk to become dry and rubbery because of leftover residue.

Put in your hand and gently knead that into the silk pillowcase. Unlike how you do laundry or washing your silk in the machine washing, ensure you use less detergent. Excess detergent, even if it’s a gentle detergent, can break down your natural fiber.

Soak Your Pillowcase in the Basin Sink or Bucket for 5 Minutes

Just like the washing cycle, leave your pillowcase to soak for 5 minutes. This will allow the detergent to soften up dirt or oil that has settled into the material over time, causing it to look dirty and dull.

Soak it in a bucket of lukewarm and laundry soap, then set the timer for 5 minutes. Don’t soak it for longer than 5 minutes, as this can damage your silk pillowcase. Swirl the silk gently while soaking but do not scrub or wring as this can damage silk fibers.

Drain Water and Laundry Soap from the Bucket or Basin Sink

Remove the silk from the water and laundry soap. Quickly remove any excess water by squeezing it with your hands. Make sure you do not wring the silk pillowcase as this can cause damage to its fibers.

Refill Your Bucket with Cool Water, White Vinegar, and Fabric Softener

After removing the excess water, refill your bucket with 3/4 white vinegar and 1/4 cup of fabric softener. Stir well to mix the contents. Make sure the fabric softener is safe for the silk before adding it to the mix. The white vinegar will remove excess soap and alkalinity while the fabric softener adds softness and shine to your pillow.

Rinse Your Pillowcase in Cold Water

Once you’ve properly washed and cleaned your pillowcase, finish off with cold rinse water. Do not soak your silk pillowcase in cold water, as this may result in shrinkage. Washing it in cold water will help you clear out all the soap and water, hence keeping your pillowcase clean.

Lay Your Pillowcase Flat on a Fresh Towel to Let it Dry

Once you’ve rinsed your silk pillowcase, lay it flat on a clean towel to dry. Use a fresh towel or rag as this will serve as your drying cloth. After laying the silk pillowcase flat on the new dried cloth, let it air dry before putting it back in place. Never hang your silk fibers in a clothesline to dry, and always dry them out of direct sunlight. Exposing your pillowcase to direct sunlight may cause the colors of your silk pillowcase to fade and deteriorate quickly.

How to Wash Silk in the Washing Machine

Washing your silk bedding in the washing machine is quite possible, but you must follow a specific washing procedure to preserve its silk fibers. Also, ensure you know the washing machine brands to avoid with your silk materials so you don’t end up incurring losses.

How to Wash Silk in the Washing Machine
Image caption: https://lightsleeper.co.uk/

Check the Care Label

The label attached on the inside corner of your pillowcase should tell you whether it’s appropriate to machine wash your silk pillowcase. If it’s not, check the label attached to your silk bedding for washing instructions.

Wash Your Silk Separately from Other Fabrics

Avoid mixing your silk cloth with heavy fabrics, such as jeans or towels, because its fibers are much weaker. Remember to wash it separately from other delicate clothes. Make sure you wash your silk items alone because their fibers are very weak and could tangle with other fabrics.

Fill the Washing Machine with Suitable Temperature Water

Fill the washing machine with tepid water. The maximum water temperature that is safe for silk in a washing machine is around 40 degrees Celsius or 105 degrees Fahrenheit. Make sure you choose the most gentle cycle that the washing machine offers. If you choose a hotter cycle, you risk damaging your silk or causing it to shrink.

Put Your Pillowcase into a Mesh Laundry Bag

Pour the correct amount of silk-specific detergent into the washing machine, making sure you choose a gentle or delicate cycle. Close the mesh bag and put it inside the washer with your pillowcase. The laundry bag will help your silk stay separated from the other fabrics being washed, preventing it from developing pulls or tangling with other items such as the washing machine drums.

Use Mild Detergent

The silk-specific detergent you chose needs to mix with the water before it can spread out and get on your pillowcase. Avoid using harsh detergents such as bleach to protect your delicate fabric from getting damaged.

Put bleach in your washing machine by accident, and you risk ruining the color of your silk or dulling its sheen. If you need to bleach your clothes,  pre-soak the silk in a mixture of water and bleach before washing it to protect the fabric. You can skip the fabric softener and instead use white vinegar to give your pillowcase a fresh scent.

Use the Delicate Cycle

Add a mild laundry detergent and start up your washing machine using the most delicate setting the delicate cycle. If you have a front loader, lower its water level and increase the agitation speed to protect your silk from getting torn or wrinkled. Use cold water to prevent color bleeding and set the spin speed to its lowest level.

Let it Soak with Your Detergent

Unlike other fabrics, silk doesn’t let go of dirt and dust so easily. So to release as much grime as you can, let the pillowcase soak for about 15 minutes with lukewarm water before putting it in the washer. Put a few squirts of your mild detergent and white vinegar into the basin to soften up stains.

Leave the Pillowcase Resting Flat on a Clean Towel to Dry

Remove silk pillowcases from the washer and lay them flat on a clean towel. Leave it there to dry for another half-day before putting it away in your linen closet. Do not dry your silk fabric in direct sunlight, as this can cause yellowing and damage the silk fibers.

FAQs on How to Clean a Silk Pillowcase

How often should you wash a silk pillowcase?

Silk fabrics should be cleaned after every two weeks to maintain their freshness. Don’t skimp on this step if you want to keep your silk pillowcase looking well for a long time.

What detergent is safe for washing silk?

Powdered detergents are ideal for washing silk in the laundry. Since powdered detergents are more diluted compared to liquid ones, you can be sure that it’s gentle enough not to irritate the fabric.

Final Thought on How to Wash Your Silk Pillowcases

If you’re conscious about the appearance of your silk fabric, then it’s best to wash and dry them after every two weeks. You can also clean stains in your silk pillowcase by using cool water and spot stain removers.

Remember not to rub the fabric harshly when washing silk because it may cause damage to the material. With all these tips, you’ll have a clean pillowcase that will not only beautify your night but will serve you for a long time. Feel free to pin and share this article.

The post How To Wash A Silk Pillowcase appeared first on Kitchen Infinity.

12 Inspirational Kitchen Wallpaper Ideas

12 Inspirational Kitchen Wallpaper Ideas

If you are looking for ways to make your kitchen look unique, then try out kitchen wallpaper. Decorating your kitchen is not an easy task. You need to consider the design, colors, and patterns of the wallpapers before you start decorating your kitchen walls. Wallpaper can be used in any room of the house for a stylish look with minimal effort.

Kitchen wallpaper is one such type that adds elegance to any home décor. It can transform an ordinary space into something extraordinary and unique. These days, there are many options available when it comes to choosing from different designs of wallpaper for kitchens.

If you want a creative way to makeover your kitchen wall, try out these new ideas on how you can use wallpaper on your walls instead of paint, tiles, and marble pieces.

1. Pantry Makeover

Adding wallpaper in the kitchen pantry will instantly hide any stains on your walls. However, you must choose the right color that will complement the design of your cabinets. Consider a small pantry that uses uplifting, colorful floral wallpaper as a backdrop for shelving and storage.


Image credit: https://www.classyclutter.net/

Taking risks in this small risk space is a great way of experimenting without huge investment and commitment. Dressing up the utilitarian corners of your home in bright colors and patterns is a small life-affirming act of care for your room.

2. Backsplash

Instead of using a tile backsplash, consider vinyl wallpaper that is easy to clean and replace. If you think that tile might be too permanent, you can try samples of stone-look textured wallpaper attached only temporarily onto the wall with double-sided tape or light adhesive.

Backsplash
Image credit: https://www.thespruce.com/

This way, if your taste changes or you decide to change your kitchen layout,, you can quickly use wallpaper remover to remove it and restore your kitchen to its original look. Vinyl wallpaper will also save you a lot of money in the long run.

3. Feature Wall

Feature walls are a great way to make your kitchen look one of a kind. While everyone else uses subway tiles or standard white tiles, you can stand out from the crowd by putting up wallpaper. You might think this idea sounds too bold, but remember that you can always use accent colors and patterns and be as daring as you want.

Feature Wall
Image credit: https://www.thespruce.com/

Install an accent wall of wallpaper in any pattern that strikes your fancy. Don’t worry about coordinating colors and styles if you want to keep the rest of the space neutral. Feel free to go bold by dressing your contemporary cookie kitchen.

4. Get Inspired by Art Deco

From the late 1890s through the early 1940s, art deco was all about bold colors and geometric patterns. This trend has made something of a comeback over the past few years in interior design, so you can even find wallpapers that look like they came straight from an art deco painting.

Get Inspired by Art Deco
Image credit: https://s3-us-west-1.amazonaws.com/

These art deco prints will never get old despite their age. So, get a huge range of art deco-inspired patterned wallpapers. Make sure you line them up well due to their intricate pattern.

5. Add a Geo Backsplash for a Special Pop

To add a special touch to the kitchen, you can use this glazed Geo backsplash tile. These handmade tiles come in all kinds of colors and shapes. You can choose the right combination for your wall and decorating palette with different colors and patterns. The silky smooth surface of these handmade tiles makes them easy to clean.

However, to keep them in top shape, you need to wipe them with a damp cloth at least once daily. If the bright color doesn’t look appealing, opt for black and white wallpaper in a neat geometric design. Geo patterns can go well with any kitchen color scheme.

6. Consider Shades of Green in the Kitchen

Choosing a green color for your kitchen wallpaper is a great idea. It will add an organic touch to the room without making it look dull and grey. If you want something more striking, use bright lime or grass green shades in your wallpaper design. The dark background makes these colors stand out beautifully to give the room a bright look.

An otherwise simple white kitchen is the perfect blank canvas for a bold usage of pretty graphic wallpaper. Green is also a great color for bringing plants into the kitchen. Grasses, ivies, and ferns will look stunning when paired with these colors. If you aren’t comfortable with grasses and plants inside your home, use different shaped plants like bottles of ferns to give the same effect.

7. Consider Tie in Statement Colors with Existing Wallpaper

When designing your kitchen, you can go bold by using striking wallpaper for the whole room or around one wall. If you want to have an interesting statement wall in your kitchen, try creating a beautiful pattern with various shades of green.

The blue and white wallpaper print makes the teal shiplap and marble countertops look like a match made in home decor heaven. Blue and white is a classic kitchen colorway that always feels fresh.

8. Bring in Dark Floral Prints for a Hint of Dramatic Flair

A pretty floral print on wallpaper can turn your kitchen from dull to fab in one simple stroke. To keep the look from being overwhelming, use it as an accent wall. In this smart and stylish kitchen, there is no room for boring or bland, so they have used their statement wallpaper to beautiful effect.

Bring in Dark Floral Prints for a Hint of Dramatic Flair
Image credit: https://www.thespruce.com/

Green patterned wallpaper is used on the kitchen ceiling, which is unusual, but it adds an interesting feature to this contemporary kitchen. If you are looking for a bold statement and a stylish focal point, go for a dark geometric pattern. The black dots are also echoed in the tiling on the wall behind the cooker unit and the hob.

9. Bring the Texture

The texture is a very important addition to any room, kitchen included. The right wallpaper not only adds visual interest to your wall but can also bring elements of texture to your entire kitchen.

10. Add a Black Kitchen Backsplash

To create a sleek and modern kitchen, you can combine black kitchen cabinets with black countertops, backsplashes, and flooring. It looks very stylish even when it is done in contrast to other colors. Black-and-white geometric tiles give you the opportunity to put your stamp on the kitchen design project. This is an inexpensive alternative to tile and gives you a perfect kitchen backsplash

11. Corner Booth

Wallpaper is a great way to add personality to any room, including the kitchen. One of the underappreciated aspects of this idea is using wallpaper in an unexpected place. When you are tired of plain tile or give up on painting cabinets, consider covering them with wallpaper instead.

Corner Booth
Image credit: https://loyalistforest.com/

12A booth can be used as both a decoration and a functional space, including a dining area where you can have family dinners and late-night drinks once the kids are in bed.

12. Go French Countryside with a Muted Floral Themed Design

You can even buy cloth wallpaper that looks just like the real thing. The best part of this idea is you will have a unique kitchen unlike anyone else’s in your neighborhood.

Thanks to the paned windows and muted floral wallpaper print, a charming kitchen will feel like a traditional chateau off the French countryside. The sage-colored cabinets, marble countertops, and minimal conces add a modern twist that helps the kitchen feel more current and upscale.

FAQs about Kitchen Wallpaper Ideas

Is peel and stick wallpaper good for kitchens?

Yes, peel and stick wallpaper lets you add fun and color patterns to your kitchen without the permanence and expense of traditional wallpaper.

Is kitchen wallpaper a good idea?

Designers say wallpaper is a secret ingredient for creating a unique, whimsical kitchen. Whether you keep it in your backsplash, bar, breakfast nook, or cover every wall, wallpaper can instantly transform your kitchen.

Final Thought on Kitchen Wallpaper Ideas

As you can see, kitchen wallpaper ideas can be easily customized to your specific tastes and requirements. Today, we have seen how an elegant and stylish kitchen can be made just by changing the wallpaper, and this makes it easy for you to go ahead with the same idea to get that stunning kitchen you always wanted.

If you love fun and adventurous styles, then there are innumerable options available at your disposal. So what are you waiting for? Go ahead and give your kitchen a touch of elegance by changing the way it looks.

The post 12 Inspirational Kitchen Wallpaper Ideas appeared first on Kitchen Infinity.

Did you miss our previous article…
https://www.thelavkitchen.com/?p=457