How To Care And Control Lambs Ear

How To Care And Control Lambs Ear

Lamb’s ear is a very common plant that can be easily found in most nurseries. It grows well in most soil types and prefers partial shade. The problem with the lamb’s ear is its invasive nature. It’s used for covering large areas or filling in the ground between other plants.

This perennial plant spreads quickly, taking over the garden without you even noticing it until it’s too late. If left to grow on its own, this spreading perennial plant will take over your flower beds and lawns, turning them into an unsightly mess of tall weeds that are impossible to get rid of by hand weeding alone.

To prevent the spread of lamb’s ear, you need to be vigilant with your maintenance routine for your garden area. You’ll want to keep up on regular mowing habits so that there is no room for new seeds from previous seasons’ plants. If you have no experience in caring for this plant then this guide is for you.

Tips for Caring and Controlling Lamb’s Ear

Sunlight

First of all, you should understand that these particular plants do best in full sun. As long as it gets full sunlight and not too much water, it will spread quickly. They may also benefit partially in the shaded area when planted in more desert-like zones.


Image caption: https://www.thespruce.com/

It also does well in poor soil as long as there’s well-draining in the soil and a slightly acidic pH balance. Although it’s a drought-tolerant plant, some leaves may dry up and shrivel over extreme heat, but the plant will survive. Just remove dead leaves to avoid any rotting.

Lamb’s ear is a perennial that spreads very quickly, creating masses of leaves in all directions. This plant has tall stalks that will rise about 2 feet tall and form fluffy, rounded leaves. The entire plant is covered with fibrous hairs growing many inches long. These hairs are soft if you touch them.

Watering

Lamb’s ear plant likes well-draining soil and needs water regularly to keep the soil moist. They will drop their leaves if they don’t get enough water, but this doesn’t mean death.

But too much water will lead to root rot. This drought-tolerant plant will lose older leaves during the dry spell, but that doesn’t mean that you should remove the entire plant leaves. Instead, remove the brown and those unsightly leaves. After all, the plant will survive. Do not water the plant’s overhead as the leaves will rot. Only water lamb’s ear when the entire plant is dying.

The leaves will also develop fungal spots or powdery mildew if they get wet. Be careful with the leaves that are close to the ground as they’re susceptible to rotting and leaf diseases. You can use a fungicide to prevent this from happening. It’s also sensitive to humid conditions, so fungicide will be of great help.

Soil

Lamb’s ear Stachys byzantina thrives in well-drained soil and full sun. Therefore, it is recommended that lamb’s ear planting should be done in a bed with sandy soil and full sun exposure. Providing the ideal conditions will encourage the growth of healthy leaves and allow the new plants to reproduce at a rapid rate. You should also ensure you test the soil pH and ensure it’s slightly acidic because that’s what’s perfect for lamb’s ear growth.

Treat this perennial flower with any care that you would give to other herbs. If you want your lamb’s ears to grow well, water them consistently and make sure they get enough sunlight. Improve the drainage before planting by adding organic matter or sand. If your area is prone to winter weather, plant lamb’s ear in a protected area or provides a thick mulch layer to protect from the cold. Grow lamb’s ear in an area with enough sunlight or part shade.

The Leaves

You’ll fall in love with the texture of the leaves of this plant, which are velvety soft and fuzzy to the touch. The leaves also have a woolly texture and are silver-gray to pale green. The name lamb’s ear originates from its shape as it resembles the ear of a lamb.

The Leaves
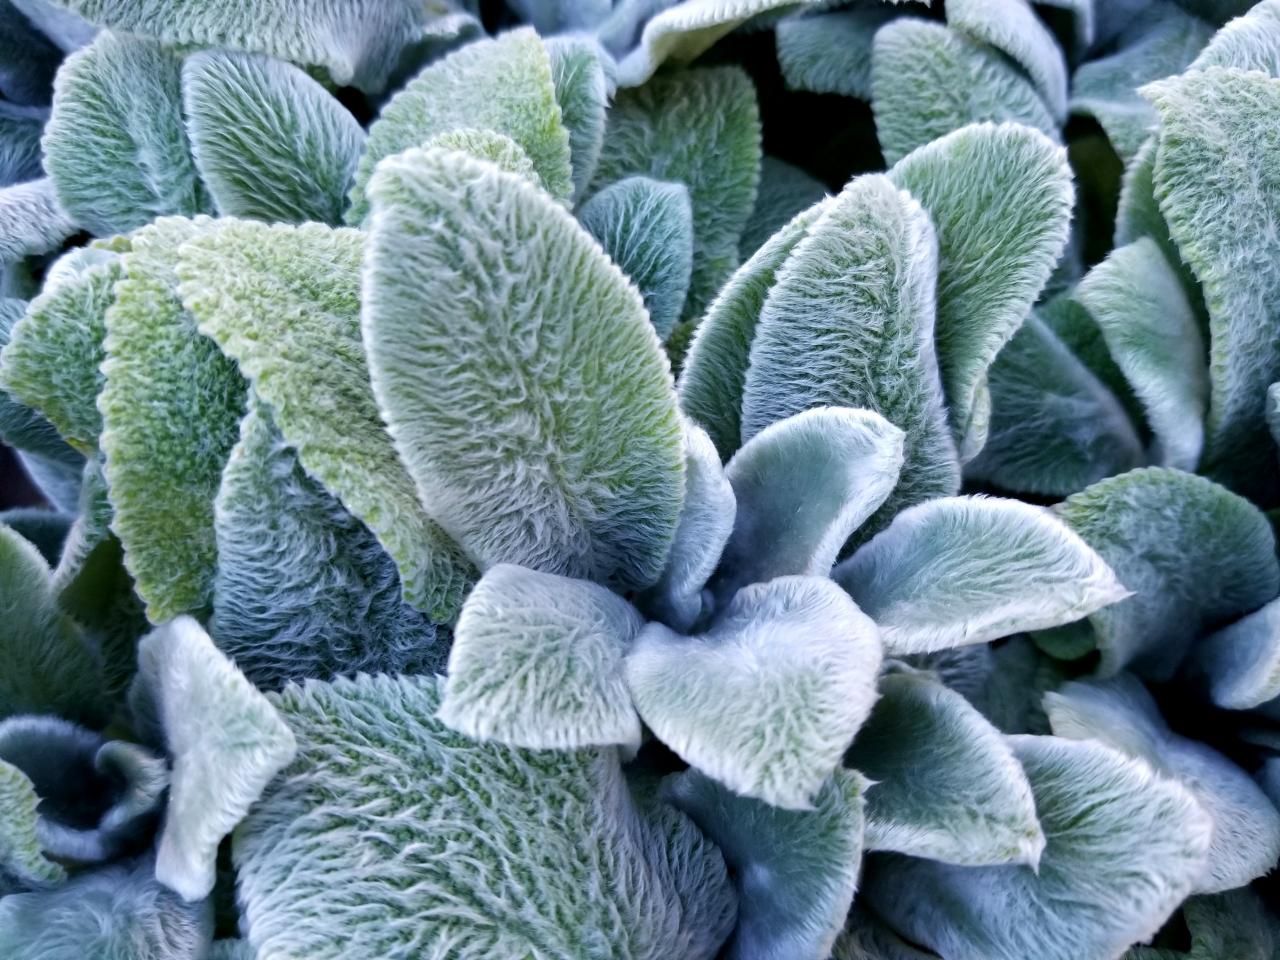
Image caption: https://hgtvhome.sndimg.com/

It always tends to be evergreen, but it can be deciduous in some colder climates. It can look ragged down during dormant months but will do well during the spring. Avoid exposing this plant to humid conditions as it’s susceptible to leaf diseases.
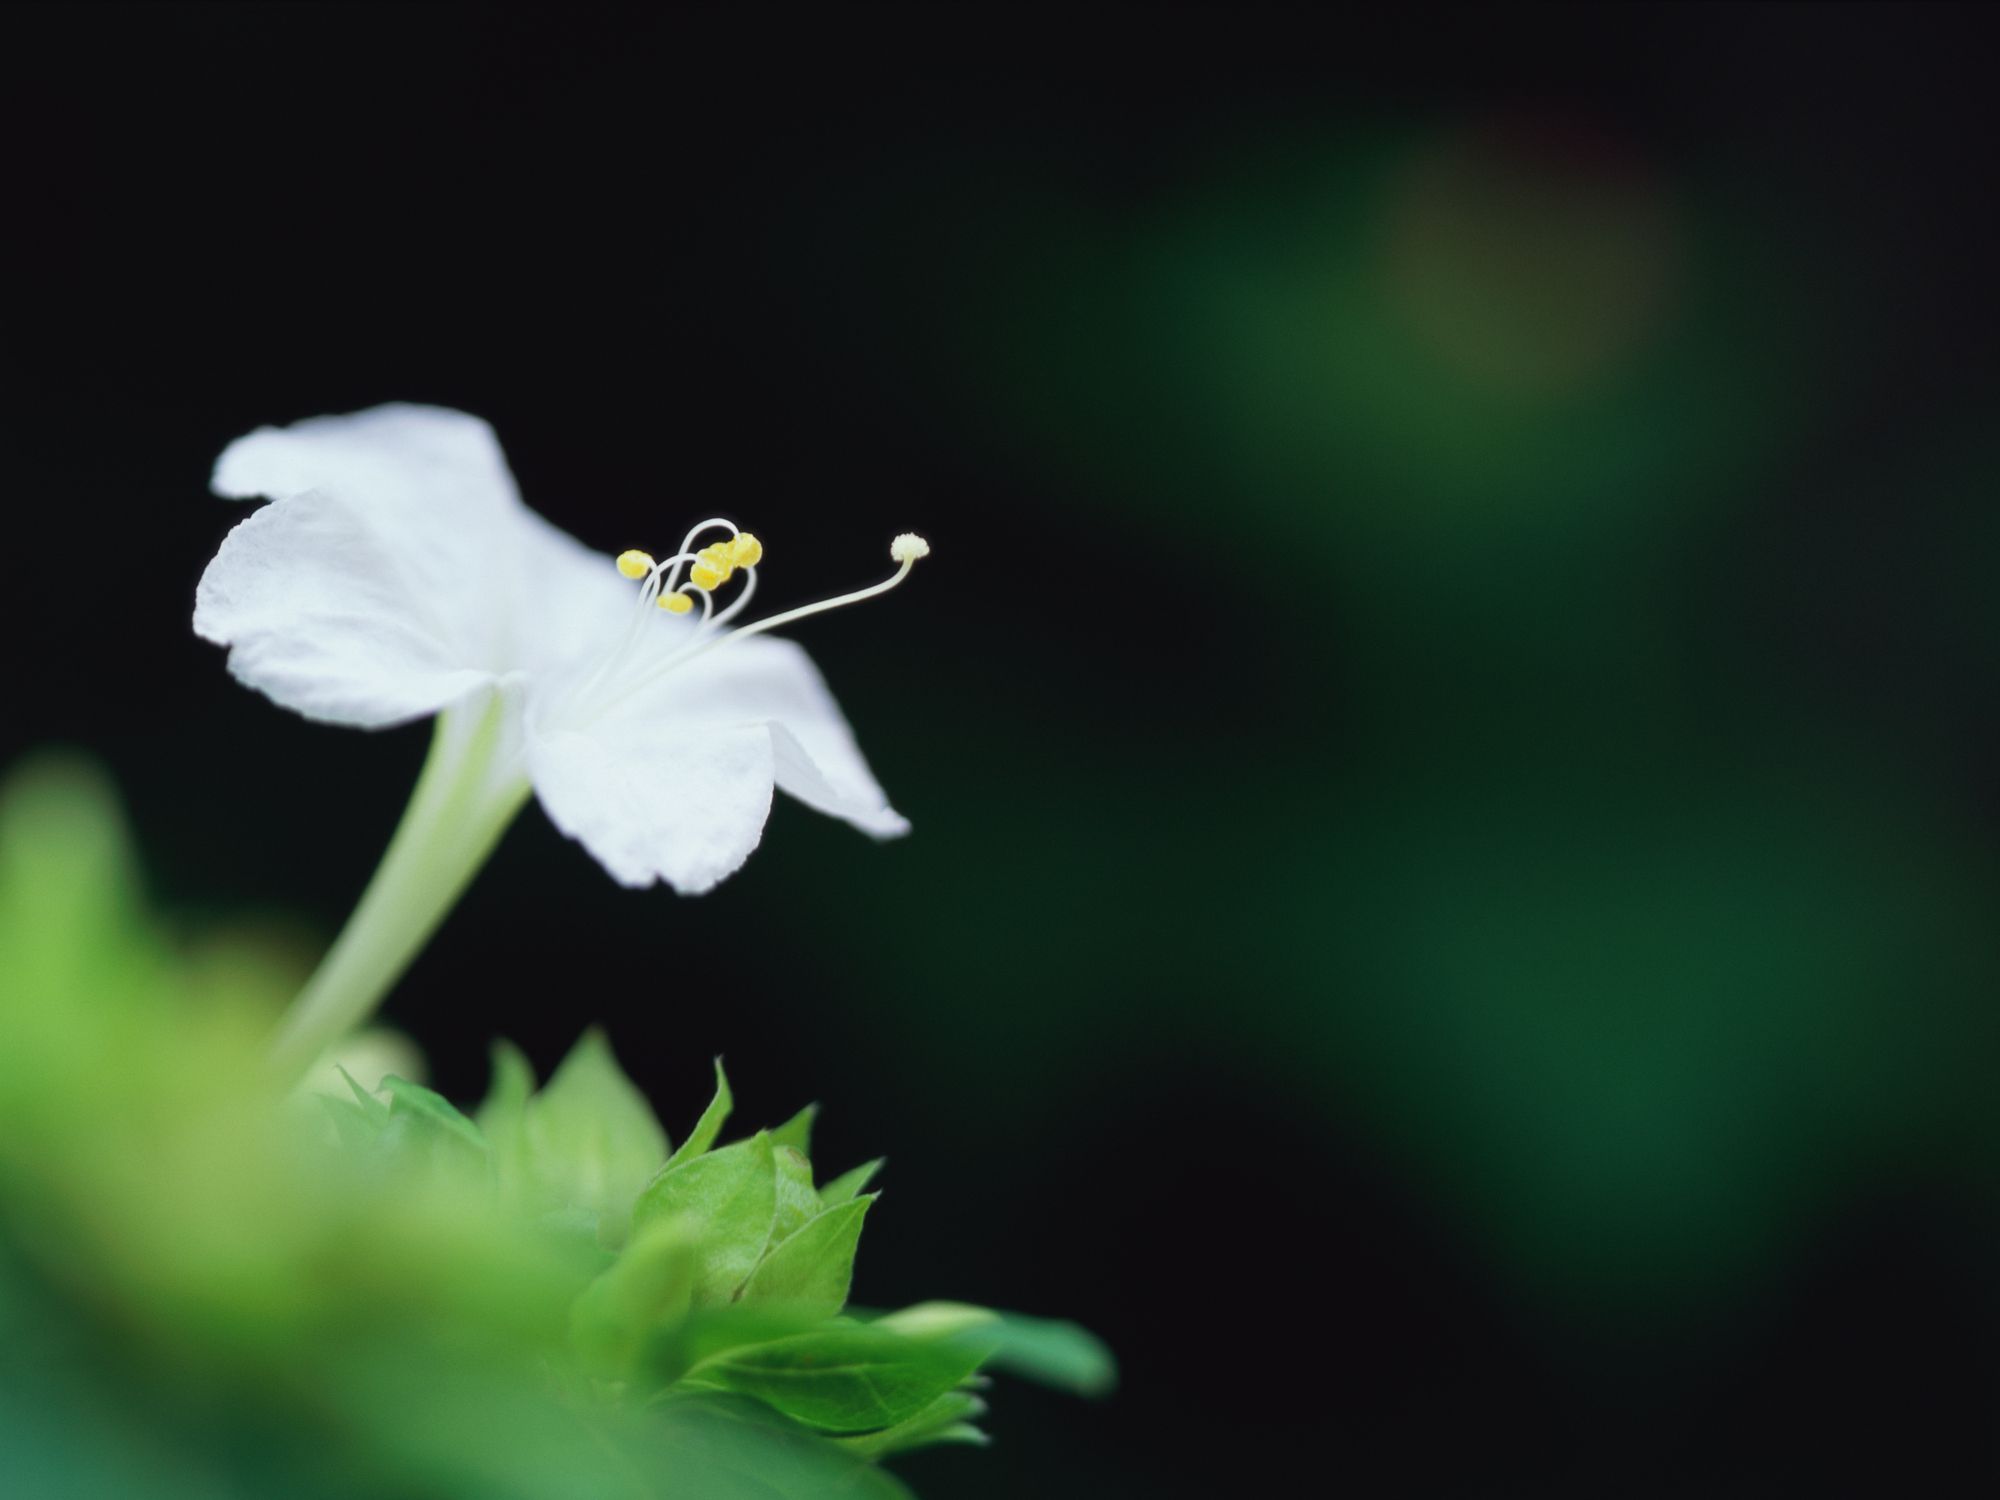
The Flowers

This plant flowers in the late spring and summer months. The flowers are woolly and tiny with a yellowish cast; they also bloom in clusters. Make sure you cut back the creeping stems that are close to the ground level after they flower to make way for new stems and leaves.

The Flowers
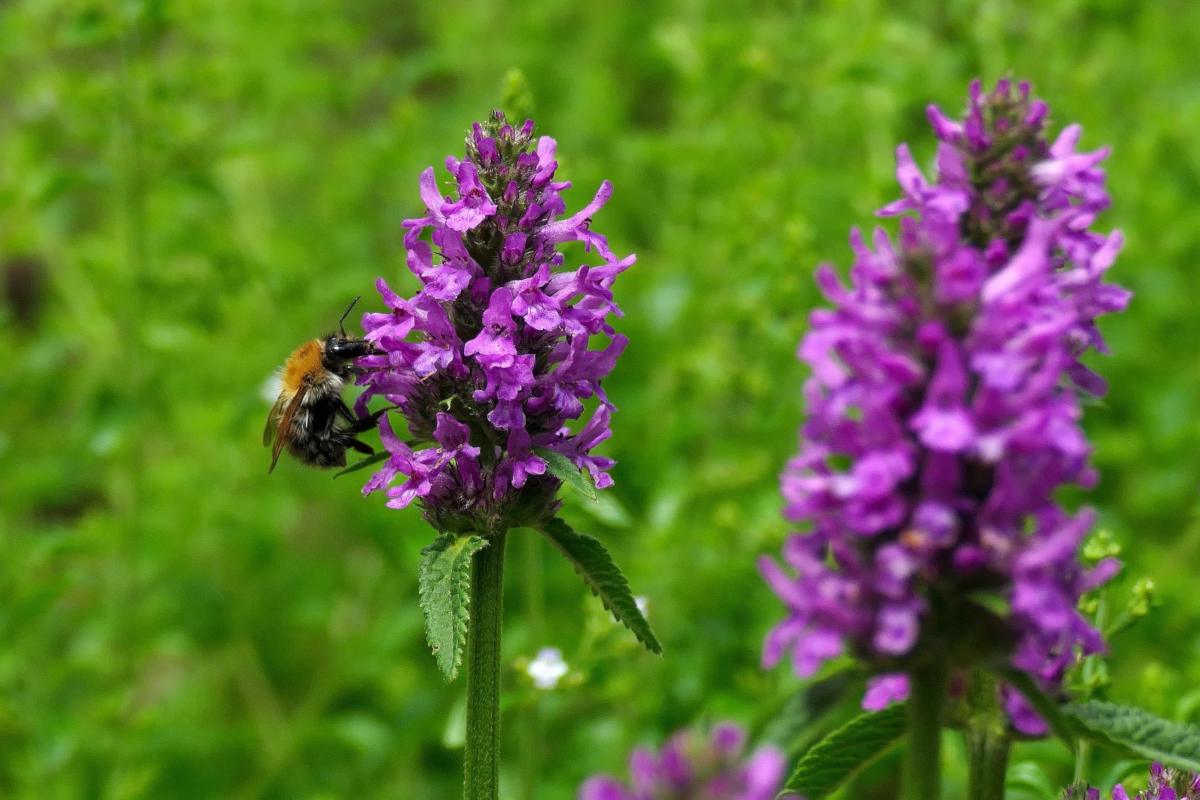
Image caption: https://www.nature-and-garden.com/

The flowers will start as pale green when they are in bud form but turn slightly pink when they are in full bloom.

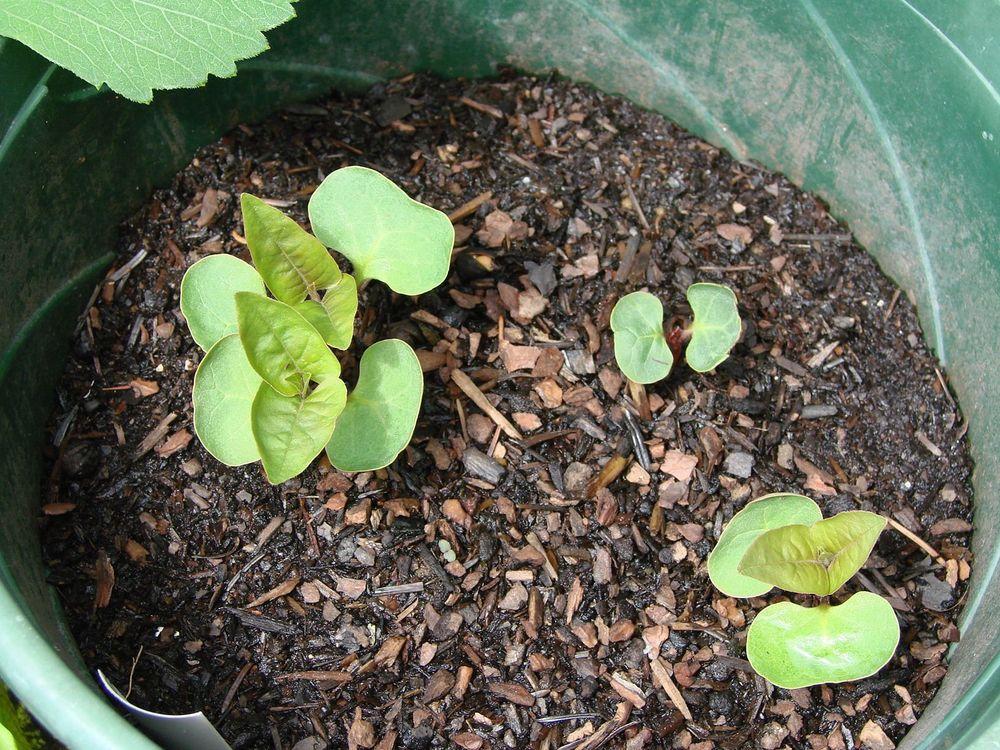
Propagating Lamb’s Ear

If you want to start a new patch of stachys byzantina, you can dig a new plant created by self-seeding or grow your patches in divisions. Make sure you divide the plant every three to four years in the early spring as the new growth appears. Using a sharp garden shovel, dig the area around the plant until you get enough roots free. Separate the plant into two or three sections and replant it in other areas of the flower bed or lawn.

Give the plant a good pruning close to the crown during the spring to remove dead leaves. Pruning will help the plants to bush out and remain more compact. Add some organic matter to the soil after division to retain moisture and control weed. This plant also grows easily from seed and is self-seeding.

Cold Hardiness

Stachys byzantina is cold hardy in zones four to eight. Growing it in intense heat in the warmer zones can be uphill unless you have afternoon shade in your garden. This plant can withstand a range of temperatures but as a ground cover. Lamb’s ear also comes in several varieties, such as big ears, silver carpets, and cotton boll.

The big ear’s variety is quite popular because of its fuzzy foliage. They’re also good disease resistant as they can go for long without blooming. The silver carpet doesn’t flower quite often, which makes it suitable to use as ground cover.

In cotton bolls, flowers don’t emerge as they should be, leaving most gardeners wondering if it’s alive or dead. Gardeners remove it while thinking it’s dead.

Benefits of Lamb’s Ears Plants

Lamb’s ear is a plant that requires little care and is easy to maintain in the garden. The grey-green hairy leaves and silky white flowers make it appropriate for landscaping in shady areas with poor soil. It has low water requirements, and its lamb’s ears form a boundary between dried-out lawns or walkways and other plants.

Many garden visitors find it attractive. Insects such as butterflies, hummingbirds, hawks, and moths are attracted to the flowers for nectar. However, it’s not popular with rabbits, bees, and squirrels. It’s classified as a herb, hence providing medicinal properties.

FAQs on How to Care and Control Lambs Ear

How do you keep lamb’s ears healthy?

Make sure your plants are in an open sunny spot where they can dry out between watering, and ensure your plant gets at least 6 hours of sun per day. You can also feed your plant with the right manure or fertilizer. Your work will be much easier by learning how to make a composter and coming up with your own manure.

Where can you plant lamb’s ear?

Plant lambs near the base of a tree or near an entryway where people will brush against it and release the fragrance. Make sure it doesn’t get in the way though.

Final Thought on How to Care for and Control Lambs Ear

To get the best of your lamb’s ear, plant it in a sunny location and prune flowers. If you do this you’ll have a fragrant garden border that will bring a touch of light and warmth to your evening strolls.

The post How To Care And Control Lambs Ear appeared first on Kitchen Infinity.

Did you miss our previous article…
https://www.thelavkitchen.com/?p=411

Reasons Why Orchids Won’t Bloom and How to Fix Them

Reasons Why Orchids Won’t Bloom and How to Fix Them

Orchids are beautiful and exotic, but they can also be frustrating if you’re trying to grow them.  One of the most common problems people have with orchid growing is that their plants won’t bloom. It’s very disappointing when your plant doesn’t produce flowers because it’s such a rare event.

If you love orchids, this guide will help you get the most out of your investment in these stunning plants.  Even if it hasn’t flowered for years, there are still things that can be done to encourage blooming. Orchids are one of those flowers that require very specific care, so they don’t wilt and die on you before they even get a chance to bloom. Below are reasons orchids won’t bloom.

Insufficient Light

If you want your orchid to rebloom, try moving it near a brighter location. Orchids need at least 12 hours of bright light so they can survive and grow. You should learn how to care for your orchids indoors so they can grow well and bloom.


Image credit: https://i1.wp.com/

To ensure they get enough sun, there are different places to put them in the house, but the ideal place is by a window to get good sunlight exposure. It will also help if you rotate them once in a while so that all sides get enough light. Move your orchid to a place where it gets a few hours of direct morning and afternoon sun.

This will ensure the plant gets enough energy to make a spike with lots of flower buds. Dendrobium orchids and cymbidium orchids are also orchid varieties that require bright light and not direct sun. Lack of sufficient light is one of the reasons why orchids fail to bloom, so if you plant indoor orchids, you may try to grow light to achieve flowers.

Getting Too Much Light

If you’re trying to grow your orchid in direct sunlight, it may die. However, too much shade can also be a cause of failure orchid bloom. Indirect light or morning sun is best for most orchids, and if the light is bright where you live, go ahead and put your plant in direct sunlight. Avoid excess sunlight for the best-blooming orchids.

If you also place your orchid in full sun, you’ll see severe symptoms such as sunburned leaves, and an overabundance of artificial light can also suppress blooming. In addition to cooler nighttime temperatures, the shortening days of autumn can signal an orchid to form buds.

If you’re keeping an orchid indoors, in a room where the light stays 24 hours a day, then your orchid is missing an important natural cue. If you’re using artificial light, then use a timer to simulate the cycle of natural daylight and darkness.

Overwatering

Overwatering is most often the cause of orchids’ failure to bloom. Just like humans, orchids need oxygen to survive. Excess water displaces oxygen in the potting media, starving roots and suppressing blooms. Most orchids need to dry out between watering, and you should allow them to have wet feet by allowing water to saturate in the root zone.

Overwatering
Image credit: https://imagesvc.meredithcorp.io/

Orchids growing in the right kind of potting mix will rarely suffer from overwatering. Signs of overwatering include roots turning brown, while wrinkled leaves can be a sign of too little water or too much water. Don’t wait to see a pot of muddy mix and a dying orchid; instead, give your orchid adequate care while it’s in bloom and out of orchid bloom.

Varying Temperature

Orchids like to be warm and relatively dry during the day, but they require a drop in temperature at night. Orchid flowers need bud building overnight temperatures (under 10 degrees Celsius). For example, Paphiopedilum orchids need temperatures of 70 to 80 degrees during the day and 50 to 60 degrees at night. Warm temperatures between 20 and 25 degrees Celsius will encourage buds to form on your orchid flower spikes.

Cooler conditions can prevent your plant from forming buds. It is possible to have too much of a good thing if the temperature stays above 25 degrees Celsius during the day and night, as your plant will stop flowering. Try to expose your orchids to nighttime temperatures 10 degrees cooler than daytime temperatures for two weeks at the start of the orchid’s growing season.

Orchids Need Proper Nutrition

If you fertilize your plant too much, the excess nutrients can build up in the potting media and cause your orchid to bloom. You also need to feed your orchid well during its flowering season. Give it a regular fertilizer that has trace elements, which will help promote bud formation. But also be careful because too much fertilizer can stop your plant from blooming.

Of course, orchids are not heavy feeders, but an orchid living in the sterile inorganic potting mix may need a nutrient boost for its best performance. The best fertilizer to use is a urea-free fertilizer that provides nitrogen even in the absence of microorganism activity common in rich garden soils.

Moth orchids, in particular, initiate blooming spikes in response to a month and cool nighttime temperatures. At home, you have two options to encourage blooming. These options include keeping your orchid near a bright window at night in the early fall, keeping air-conditioning low during the day, and turning it up at night.

Roots Need Attention

Most orchid growers find it tricky when it comes to repotting orchids. When your orchid media begins to break down, the orchid roots can suffocate from lack of oxygen. In addition, some orchids will resent having their root zone disturbed, and they’ll refuse to bloom for six months to a year after repotting.

Roots Need Attention
Image credit: https://i2.wp.com/

In order to determine whether your orchid needs to be repotted, evaluate the root system and not foliage. If you see the orchid roots turning brown and the planting material resembling garden soil in its density.

Also, if you see more than two roots creeping over the edge of the pot, it may be time to repot. You can also divide your orchid plant to maintain blooming vigor.

Know Each Season of Your Orchid Variety

Each orchid type has a time of the year when it will naturally bloom. It may not be the same season that the orchid was blooming when purchased since nurseries can force orchids to bloom off-cycle. Many orchids bloom in the fall, winter, and spring.

Knowing the season that your orchid bloom will save you the frustrations of waiting for it to bloom. For example, Phalaenopsis orchid grows new leaves in the summer and early fall and sets a bloom spike in the late fall. Most Phalaenopsis orchids are known for blooming off-season for many reasons, but many will follow this pattern.

After you’ve identified your orchid, make sure you learn about its blooming cycle. Vanda orchids, for example, bloom two to three times a year, with each bloom cycle lasting up to six weeks. On the other hand, popular cattleya and cymbidium orchids only bloom once a year, but they’re very easy to maintain, making them popular choices for novice growers.

Underwatering

Underwatering is one of the most common reasons orchid plants won’t bloom. The best way to avoid this problem is to water your orchid regularly, but don’t over-water it. Water generously during spring and summer season but taper off as fall starts to set in. Stop watering altogether when winter begins because this will help your orchid properly rest.

You can test the moisture of your orchid’s medium by pushing your finger into it. If you feel any moisture, hold off on watering until the surface is dry. Remember not to water again until the top layer is dry because this will cause overwatering and root rot.

To prevent underwatering, mix water with some water-soluble fertilizer at the same strength you’d normally use when feeding your orchid. Water generously, but ensure that excess water drains away from the plant’s roots before drying up.

Cut Spent Flower Spikes for a Stronger lant

After your moth orchid has finished blooming, snip off the flower spike. An orchid needs to rest after flowering to build up its energy, so don’t fertilize your orchid for at least a month after it blooms.

Cut Spent Flower Spikes for a Stronger plant
Image credit: https://images.saymedia-content.com/

After this waiting period, you can feed your orchid with a balanced 20-20-20 fertilizer once every three weeks to keep it happy and healthy. Note that some orchid species and hybrids rebloom on old spikes. You can also contact the American orchid society or contact your seller to get a replacement or refund.

FAQS on Reasons Why Orchids Won’t Bloom and How to Fix Them

How long does it take an orchid to rebloom?

Phalaenopsis orchids take a month or several months to rebloom, while most varieties bloom annually.

Why is the orchid not flowering?

If your orchid is not flowering, improper light exposure, incorrect potting media, and overwatering are the most common reasons.

Why did my Phalaenopsis stop blooming?

Phalaenopsis stopped blooming because of root rot which can be caused by too much water or cold conditions.

Final Thought on Reasons on Why Orchids Won’t Bloom and How to Fix Them

If you perform all these steps religiously, your orchid might begin blooming again in no time and you’ll love your gardening skills. Orchids are blooming plants, and as such, they require a lot of attention. However, by following the basic care tips above, you should have no trouble keeping your orchid blooming.

The post Reasons Why Orchids Won’t Bloom and How to Fix Them appeared first on Kitchen Infinity.

Did you miss our previous article…
https://www.thelavkitchen.com/?p=407

How to Clean the Burners on a Gas Stove

How to Clean the Burners on a Gas Stove

Cleaning gas stove burners can be difficult to do by yourself, especially if you don’t have the right tools. There are many different kinds of cleaning products available in your local store, but not all of them will work for all types of stoves. If you’re looking for a quick and easy way to clean your burners on a gas stove, then look no further.

This article will help you eliminate any build-up of grime from inside your stove’s ports as well as its burners within minutes. If you follow these tips, you’ll understand why you should not ditch your gas stove as it will be as clean as new. Let’s get started!

How Gas Burner Works

The burners on your gas stovetop consist of a burner assembly attached to a small gas intake valve on the front or at the top of the stove. Gas stove burners operate by receiving an air-gas mixture that is sent through the main gas line. Gas stoves have a gas valve that attaches the main gas line to the stove and sends the air-gas mixture to each burner.


Image credit: https://engineer.decorexpro.com/

When the burner control knob opens the intake valve, it allows gas to flow through the venturi tube. The gas then enters the venturi tube through one of the wide ends, increasing in pressure as it passes into the narrow section of the tube. The burner head is a hollow metal disk with holes and slots in the outside edge.

The burner head sits atop and directs flames emerging from the burner head. The older burners have a pilot light, while the newer gas stove burners have a small spark pilot located on the side of each burner. A light pilot or electric spark pilot controls the airflow, allowing you to generate more or less flames as possible.

How Often Should You Clean Your Stove’s Gas Burners?

Gas stoves are simple and trouble-free. Typically, you can clean the burner once a year. But, it’s important to clean it when the flow of gas becomes hindered due to food residue that may spill on the pots and pans. Food residue can clog the ports around the burner heads.

If left unattended, this food residue can be quite hard to remove. Clean your burners whenever the burner becomes irregular and exhibits a yellow color. Below are the steps you need to take to clean your gas stove burner properly. Take time and refer to your owner’s manual if necessary:

What You’ll Need

Old toothbrushNon-abrasive scrubbing padDish soapDry towelBaking SodaPaper clipDamp cloth

Read Manufacturer’s Instructions

Before you start cleaning, it’s always a good idea to refer to your owner’s manual. This can serve as a safety reminder, and it may reveal some tips on the best way to clean your burners.

If your cooktop didn’t come with the manual, you could always download a manual online via the manufacturer’s site. The manual will recommend tools and cleaning products, saving you from many hassles.

Turn Off Gas Supply Valve

Clean gas stove burners before turning them off. Make sure you shut off the valve before doing anything else. Before removing the burner caps, ensure your gas is off. Look under the burner caps and access the burner heads.

Proper gas flow is dependent on clean burner heads, so ensure you clean stove burners first. A valve will be nearby, connecting your stove to the main gas line. Make sure you turn off the valve before cleaning. Also, ensure the stovetop and burners are completely cooled before you begin cleaning.

Remove Burner Caps

Remove the burner caps and set them aside. Once a sturdy grip is established, twist each cap counter-clockwise to remove it from the stovetop. The order of the caps does not matter because you will reattach them later on during the cleaning process.

Remove Burner Caps
Image credit: https://www.thespruce.com/

Many gas burners have a removable ceramic disc that sits atop the burner to diffuse flame. If you have this kind of burner, lift the disc off the burner, making sure that the burner is completely cool before doing so.

Remove Burner Heads

Use a flathead screwdriver or other suitable tool to loosen and remove the burner heads and caps. Take care not to damage the gas line connected to the burner because you will be reinstalling them later on during the cleaning process. Set aside and inspect each burner head as you remove it from the stovetop.

Look for built-up debris inside the gas jets, at the edge of the burner head, where it sits on top of the stovetop surface. Be careful not to damage the venturi tube beneath when lifting the burner head.

Soak and Scrub the Removed Parts

Place the burner heads and caps into a bowl or other suitable container. Fill this with warm water and liquid dish soap and let it soak for 30 minutes. If you find that there is still residue on the parts, try soaking them overnight instead.

Once they’ve soaked, pull them out and scrub them with an old toothbrush to remove debris. If the toothbrush can’t remove some debris, use a straightened paper clip to unclog the head and cap holes. Make sure you don’t damage the metal of the burner head as you clean.

You can also use one part water and one part baking soda to remove stuck-on debris. You can also make your cleaning paste with one cup of baking soda and half a cup of vinegar. Apply a paste on the surface of your stove using a clean cloth or sponge.

Rinse the Parts

Use whatever you used to make the paste and rinse it off with running water. Make sure the area is dry before replacing the parts. Shake to remove excess water, then dry with a damp cloth.

Rinse the Parts
Image credit: https://www.thespruce.com/

Allow all the parts to air dry completely before reassembling the burners. As the parts are drying, turn your attention to cleaning other parts of your stove. Make sure you learn how to clean drip pans and grills. soak and scrub all these parts well.

Reassemble and Test Your Burners

After you’ve washed and rinsed your burners, pat them dry with a towel and set them aside. Let them air dry until they’re entirely free of water. Once the burners are dry, reassemble them. Reassemble the drip pans, grills, burner heads, and caps.

Reassemble and Test Your Burners
Image credit: https://www.forkandspoonkitchen.org/

Before turning on your stove, inspect all of them to make sure they aren’t dripping water. On electronic ignition stoves, take care not to bend or damage the ignition electrode as you install the heads.

Relight the Pilot Lights

After you’ve reassembled your burners, relight the pilot lights by pressing down gently on each knob. Open each gas valve slowly and light the burners. If there’s no flame, ensure that the knobs are turned to the pilot setting.

As you do this, make sure you follow the manufacturer’s instructions for relighting the pilot flames. Test the burners to ensure they operate correctly as unusual flame color and shape may indicate that the burner heads are not completely dry.

FAQs on How to Clean the Burners on a Gas Stove

How do you clean the grates and burners on a gas stove?

If the grates contain dirt, grime, or grease, mix three parts of baking soda into one part of water. Coat the grates in the mixture and wait for 20 minutes. Wipe down the burners with a soft cloth and if you have burners coated in baking soda paste, rinse first to avoid damaging the finish.

How do you deep clean a gas stovetop?

You can use a soft bristle brush and a mixture of vinegar and water in a spray bottle with baking soda paste when deep cleaning your gas stove top. If you notice sputtering, shut off the burner and clean out any food build-up left in the gas line before turning the gas back on.

Final Thought on How to Clean the Burners on a Gas Stove

Cleaning your gas stove burner shouldn’t be an uphill task. Take your time and be thorough with your cleaning process. Make sure everything is properly rinsed before drying. This way, you’ll have clean stove top burners that are ready to fire up your next meal.

The post How to Clean the Burners on a Gas Stove appeared first on Kitchen Infinity.

Did you miss our previous article…
https://www.thelavkitchen.com/?p=398

14 Bad Cleaning Habits You Need to Break

14 Bad Cleaning Habits You Need to Break

Cleaning is a never-ending task. It’s something everyone has to do, and no one wants to do, especially when we think about the time it takes and how much effort it requires. We all have bad habits when it comes to cleaning our homes, but these mistakes can cause damage not only to your home but also to your health.

You need proper tools and methods to get the job done right. With this guide, you will learn about bad cleaning habits to stop doing to live in a cleaner environment.

1. Using Dirty Cleaning Tools

When it comes to bad cleaning habits, cleaning tools are the first culprit. How can you expect the best results when using dirty cleaning tools to clean your home? If your washing machine has some odor from built-up bacteria from some detergent residue, it will make your clothes stink.

If your vacuum bag is filled with dust, it won’t do a good job sucking up anymore. A dirty mop and a dirty sponge will push around more soil and bacteria. So, take your time to thoroughly clean tools by emptying completely and washing them in hot water after every use. Also, use enough disinfectant to kill the germs. Replacing new tools is also a good idea.

2. Leaving Wet Towels and Shower Curtains Bunched Up

If you’re tired of spending too much time in your laundry room scrubbing mold and mildew on your bathroom surfaces, don’t worry. You can easily break these bad habits and have more time to focus on other tasks. Avoid leaving wet shower curtains bunched up and wet tower curtains in a heap on the floor.


Image credit: https://www.enchantehome.com/

Always hang up your non-slip shower mat after each use. By hanging the shower curtain, it will dry more quickly and discourage mold and mildew growth. By hanging wet towels to dry, you’ll be able to re-use them without having to wash out the mildew smell.

3. Leaving Dirty Dishes on the Sink

Your dirty dishes are a breeding ground for bacteria and germs that you don’t want in your kitchen. Leaving dirty dishes in the sink is a jackpot for hungry insects. Rinse off your plates before stacking them in the sink. Load the dishwasher every time it’s full, so you won’t have to worry about leaving food scraps from last night’s dinner sitting out on the counter overnight.

You can also break this bad cleaning habit by training everyone in your household to either put the dishes in the dishwasher or wash them immediately. After washing your dishes, wash out your sink with hot soapy water, spray with Vital Oxide, and let it dry.

4. Using Disinfectant Wipes

Don’t use disinfectant wipes on surfaces that food touches. This includes countertops and cutting boards. Wipes are less harsh, but they don’t do a great job of killing bacteria.

Using Disinfectant Wipes
Image credit: https://www.lysol.com/

If you want to keep your kitchen clean with disinfecting wipes, it’s important to understand that you can’t swipe on everything and expect your home to be germ-free. Make sure you buy wipes that can kill viruses and bacteria. Also, ensure that you’re using these disinfectant wipes the right way; otherwise, you risk cross-contamination. For better hygiene learn how to make disinfectant wipes for home use.

5. Allowing Paper Clutter to Accumulate

Even with the emerging technology, including online billing and banking, there’s still a mountain of papers that ends up in our homes. These include magazines, newspapers, flyers, school papers, and projects. These papers tend to pile up. However, this is one of the easiest bad cleaning habits to break.

Instead of letting the paper pile up, designate a place in your kitchen for all this paper clutter. Also, keep a shredder and recycling bin nearby and sort it at least once a week. For children’s school papers and projects, opt for a designated storage bin, select a few to save space, frame a few, and hang them up. Learn how to declutter your room properly and you’ll never have trouble with cleaning.

6. Ignoring Product Directions

This is especially true for general cleaning supplies like dishwashing soap, general cleaners, and fabric softeners. Product directions are there for a reason. Ignoring it is a surefire way to make cleaning fail. Also, not following product directions might render the product useless if the solution is wrong.

The manufacturers will have recommendations on using the product, how much you need, and where it should be used. Application methods are also different, so it’s always important to read the label. This also applies to cleaning tools; follow the manufacturer’s instructions to prevent injuries.

7. Wearing Outside Shoes in the House

This is especially important when you have wooden flooring because this can cause scratches on the surface. It’s highly recommended to remove your footwear before entering the house. This way, you can keep your floors looking new longer.

If needed, apply an environmentally friendly wood polish to clean and protect the wood from damage caused by extreme weather elements. Whether your entryway is through the mudroom or the front door, make this cleaning habit simple by providing a bench and a chair for shoe removal. Get a shoe tray closed for wet or muddy shoes. Plus, provide a bin to collect each family member’s footwear.

8. Using Harsh Cleaners

Using too much cleaner can be a bad cleaning habit; using a harsh cleaner can damage your floors. Using harsh chemicals can strip the finish of wood floors, leaving them dull looking and requiring you to refinish them. For example, chlorine bleach is good in disinfecting, but that doesn’t mean it’s good on all surfaces.

Using Harsh Cleaners
Image credit: https://4.bp.blogspot.com/

Chlorine bleach is not a good dirt and grime remover, and the fumes can be toxic. It’s important to use gentle cleaning products to produce the best results. One of the safest and widely used home cleaning products is cleaning vinegar

9. Not Completing Tasks

Yes, we all get distracted while cleaning, but always try to finish a task once you’ve started it. For example, if you’re dusting the living room, don’t stop for a social media break until you’ve dusted the entire room.

If you have a few minutes to clean, start by removing the clutter and putting items in their proper place. Then if you’re interrupted, you can come back later to do the deeper cleaning.

10. Waiting Until the Cleaning Task is Overwhelming

If you have a huge cleanup job ahead of you, don’t try to bite off more than you can chew. Break the task into small pieces that are easier to manage. Don’t wait for the task to become overwhelming. Putting off cleaning and waiting until the task becomes overwhelming is one of the worst cleaning habits to break.

But if you do a bit of cleaning each day, like load, empty the dishwasher before the dishes pile, vacuum one or two rooms, and complete your load of laundry, then cleaning the entire house will not be as overwhelming.

11. Relying too Much on Bleach

Of course, bleach has been a household staple long cleaning and disinfecting agent. But it turns out that bleach isn’t as good a cleaner as once thought. Bleach is intensely harsh and can irritate the eyes, lungs, and skin.

Relying too Much on Bleach
Image credit: https://cominguprosestheblog.com/

The fumes are also toxic. A better alternative is baking soda or vinegar. If you still doubt how harmful bleach is, these reasons should motivate you to skip the bleach next time you begin your spring clean.

12. Leaving Your Bed Unmade

This might not be a big deal in the colder months when you’re bundling up under your covers and keeping your home well heated. But in the summertime, leaving bed linen unwashed can pose a real threat to your health. Experts recommend changing sheets every two weeks for best cleaning results.

Even if the rest of your bedroom looks neat and clean, the unmade bed can make it look messy. Making your bed each morning will keep the rest of the room and the entire house organized. You can as well make this task simple by selecting bedding that is easy to spread up neatly.

13. Storing Cleaning Products Incorrectly

Do you spend a lot of time trying to find your cleaners and tools? Well, this bad cleaning habit is quite easy to break. Gather all the cleaning supplies you’ll need for each area of your home and store them close to that area. Place them in a plastic carryall for bathroom cleaners and stash them on a shelf or under the sink.

You can also create two baskets of supplies if you have upstairs and downstairs bathrooms. Keep your dusting and furniture cleaning products in the kitchen. And all your laundry products should be kept in the laundry room. Make it easy to get started, and this will likely lead you to clean more often.

14. Hoarding Food in the Refrigerator

It’s a common bad habit to keep too much food in the fridge. Resist this temptation as your refrigerator does not have an infinite capacity and cannot store half-empty containers of milk, cream cheese, cottage cheese, or yogurt that will not be used up within a few days.

Hoarding Food in the Refrigerator
Image credit: https://lh5.googleusercontent.com/

If you and your family hate leftovers, then don’t stash them in the refrigerator. Go ahead and toss it instead of storing it because improperly stored food promotes mold and bacteria growth, making cleaning the refrigerator daunting.

FAQs on Bad Cleaning Habits You Need to Break

Can cleaning make you sick?

Yes and no. Cleaning will not make you sick, but it can make you sick if you use improper cleaning methods. Plus, using harsh chemicals that can cause mild irritation and affect your health negatively.

Is it ok to clean regularly?

If you maintain a cleaning routine, it will be easier to break these bad habits. Cleaning should not harm your health or make you feel worse.

Final Thought on Bad Cleaning Habits You Need to Break

Whether it’s the cleaning and our lives in general, we all have these bad habits. We like cutting corners when cleaning. Everyone wants to make their chores easier and get them done faster. However, taking these shortcuts can have a lot of negative impacts on your life.

That’s why it’s important to break bad cleaning habits. They might be tolerable or even bring some benefits, but they shouldn’t be part of your life if you want to live a healthy and cleaner lifestyle.

The post 14 Bad Cleaning Habits You Need to Break appeared first on Kitchen Infinity.

Did you miss our previous article…
https://www.thelavkitchen.com/?p=388

How to Grow Four Oclocks Mirabilis Jalapa

If you are looking for a beautiful plant that will grow in your garden, then a four O’clock family is one of the best choices. However, it’s not easy to get started growing them.

The good news is that it isn’t hard if you follow some basic steps and use our guide on growing at four o’clock. We also have tips on how to make sure they thrive in your garden or pots so you can enjoy their beauty every day.

This article has everything you need to know about these plants, including what they look like when fully grown, where they come from and why aren’t more people using them? You’ll also find out which soil mix works best with these flowers, as well as how much water and sunlight they require for optimal growth. Finally, we’ll show you step-by-step instructions on how to care for this plant.

Four Oclock Plant Care

As we’ve already mentioned in this article, Mirabilis Jalapa, also commonly known as four o’clock flowers, is a species of flowering plant which belongs to the genus Mirabilis and is a member of the family Nyctaginaceae. Native to South America but now cultivated worldwide, it has a very long blooming season that starts in the early summer and goes until late autumn. It can also self-seed, but that’s not a bad thing as it ensures the survival of species as well as maintaining good soil quality due to the dropping of its seeds by heavy rains.


Image caption: https://www.gardeningknowhow.com/

Maintaining four o’clock is not that difficult. They also grow through other plants nicely, making them great for underplanting. Make sure you water your plants regularly if there are no rains. It’s better to water them early in the morning to not wet their leaves under the hot sun for hours. If you have children, don’t forget to keep it away from reach as they might get poisoned when nibbling on its juicy fruit.

Light

Four o’clock does well in full sun. This means that they need approximately six to eight hours of direct sunlight. If your four o’clocks are not doing very well, try repositioning them in a place with more sun exposure. They also tolerate partial shade, although they might not bloom as heavily.

Water

Water your four oclocks regularly during the growing season so that the soil’s surface is always moist. It’s better to water them early in the morning to not wet their leaves under the hot sun for hours. This will also keep your plant safe from rot and mildew.

Also, avoid overwatering as this could lead to fungal diseases due to root rot. On the other hand, make sure that your four o’clock does not dry up. These plants can also grow in wet soil, but make sure that the soil drains well; otherwise, they may suffer from root rot or stem rot which could eventually kill them. You can also keep the soil moist by mulching around the base of the plant.

Temperature and Humidity

Four o’clocks thrive in warmer temperatures and are grown as annuals in colder regions. They should be grown outdoors if possible during the summertime to enjoy their fragrant blooms. However, they can still bloom indoors if you provide them with enough light and warmth during winter.

Four o’clock prefers an average temperature of around 70 degrees Fahrenheit or 21 degrees Celsius for best growth. When grown in cooler climates outside their growing zones, the plants will die once the frost date and cold fall temperature arrive. So, they must be brought inside for winter.

On cloudy days, the flowers droop and do not fully open. On sunny days, the flowers are more erect and shiner than on cloudy days. This is not due to lack of light but because of lower temperature than usual.

When it comes to humidity, mirabilis Jalapa is a bit particular. The plant must not be exposed to high humidity during its blooming stage in order to prevent the development of fungal diseases, especially on foliage and flowers. When grown indoors, misting with water can help increase humidity levels for short periods.

Soil

Mirabilis Jalapa grows best in rich, loamy, and well-drained soil. Plant or transplant seedlings in nutrient-rich soils with acidic pH. Plant mirabilis Jalapa is very deep so that the base of the stalk is covered by at least 2 inches of soil. This plant prefers neutral to slightly acidic soil and is a heavy feeder, so ensure that you add plenty of organic matter to enrich your soil with nutrients. Mirabilis Jalapa grows poorly in alkaline soils so you must ensure you test the soil pH

Mirabilis Jalapa can be grown in pots or planters at least 10 inches deep and 10 inches wide, with an adequate drainage system to prevent root rot. Be sure to provide plants with plenty of sunlight, even when grown indoors. Mirabilis Jalapa cannot tolerate low light.

You can plant seeds or existing Mirabilis Jalapa plants. Sow seeds 1/4 inch deep in potting mix and covers with a fine layer of sand to retain moisture. Keep the soil moist until seedlings germinate.

Fertilizer

Apply general-purpose fertilizer in the spring and continue feeding them monthly until the plants are in full flower. But if you already have rich soil in your garden, you should not need to fertilize. You can also make a composter and feed your plants with manure rich in nutrients.

Flowers

Four o’clock flowers open in the late afternoon when the sun is going down and close the next morning. This characteristic makes Mirabilis Jalapa one of a large group known as moonflowers. The late afternoon flowers attract butterflies, which love its nectar, so your garden will benefit from this plant even if you have nothing to gain from eating them. It also attracts nocturnal pollinators such as bats and night-flying birds.

The trumpet-shaped portion of four o’clock flowers resembles those of tropical hibiscus. If you have a greenhouse or grow house, they are well cultivated as permanent flowers.

Plant Propagation

Four o’clock plants are grown from large seeds, making them easy to plant. Four o’clock seeds germinate quickly and grow faster. Make sure you keep your seedbed moist during germination. Plant four o’clock seeds directly to your yard or garden before the last frost in your area.

How to Grow four O’clock Plant from Seed

Four o’clock seeds can be sown directly in the garden once the soil has warmed in the spring. Or, you can start them indoors 6 to 8 weeks before the areas projected for the last frost date. Sow your four o’clock seeds 1/4 inch deep and cover with fine sand to retain moisture. Keep the potting mix moist until germination occurs (7 to 10 days).

How to Grow four O’clock Plant from Seed
Image caption: https://garden.org/

Place them by the light source and keep the soil moist but not soggy for the first three weeks. Gradually introduce them to more light over the next month. Feed four o’clock plants every two weeks until they are in full bloom with a water-soluble fertilizer high in blooming ingredients.

Make sure you plant four o’clock in full sun or partial shade as they can tolerate both. These plants are native to Mexico and South America but are grown in the United States as annuals. They’re also called Marvel of Peru. You can grow this marvel of Peru in garden beds, containers, borders, around patios, and walking paths.

Overwintering

After your plant is done blooming in the fall, cut the stalk down to a few inches. You can leave this in place or remove it, whichever you prefer. Store it in a cool, dark place. You can then replant them the following spring in warm temperatures.

Insects and Diseases

Insects and diseases are not common problems with four o’clock plants. The four o’clock plant is disease resistant, unlike other plants. You can also treat insects and diseases if they become a problem. Rust, especially white rust and brown rust, and leaf spot can affect four o’clock. Insects that may attack four o’clock plants are spider mites, thrips, and aphids.

How to Get Four O’clock Plants to Bloom

Four o’clocks mirabilis Jalapa bloom each year, starting from summer towards the fall. They have large, attractive, scented flowers. The tubular flowers are known for their strong fragrance and come in different colors. Mirabilis Jalapa blooms after its leaves are fully grown, so you can expect to see the first flower within six weeks of sowing the seeds.

How to Get Four O’clock Plants to Bloom
Image caption: https://www.thespruce.com/

If the plant doesn’t bloom, the problem may be environmental. Four o’clock needs at least six hours of full sunlight every day to bloom, so if you live in a place with alternating periods of sun and rain, four o’clock plants will never produce flowers. You can also try to affect the blossoming time by changing the growing season or temperature.

Poor soil can also lead to sparse blooms. Make sure the four o’clock has enough room to spread its roots throughout the pot. When you water the soil, make sure it’s moist but not soggy. Spent flowers also don’t naturally fall off; instead, they require to be manually removed when they become too shabby.

FAQs on How to Grow Four O’clock Plants

Why is it called the four o’clock plant?

The four o’clock plant derives its name from the flowers that usually bloom open between four to six in the evening. They stay open until six the following morning before closing up again.

How often should I water my four o’clock plant?

It is recommended to water your four o’clock twice a week during summer, and once every three days in winter. Make sure the soil stays moist but not wet or soggy.

How long does it take four o’clock to grow?

Four o’clock takes about six months to grow. However, growing four o’clock can be sped up drastically by cutting off flowers that are starting to fade. This should be done every two weeks.

Final Thought on How to Grow Four O’clock Plant

As you can see, growing and maintaining these morning glories is simple. With minimal effort, you will be able to watch these beautiful flowers take over your yard in three months or less. The best part about growing four o’clock is that once they are established, it won’t take much work on your part to keep them alive and healthy.


The post How to Grow Four Oclocks Mirabilis Jalapa appeared first on Kitchen Infinity.

Did you miss our previous article…
https://www.thelavkitchen.com/?p=292

Travertine Flooring Review: Pros and Cons

You want to add luxury and timeless beauty to your home, but you don’t have the budget for expensive marble or granite. Travertine is an affordable alternative that can give any room in your house a luxurious look with the durability of the stone. It’s perfect for kitchens, bathrooms, living rooms, and more. 

And because it comes in so many different colors, you can easily find one that fits your style perfectly. While it is true that travertine has a timeless appeal, this natural stone does have some drawbacks. It’s not without flaws in terms of maintenance and installation. If you’re still interested in learning more about travertine flooring pros and cons, then keep reading.

What is Travertine Flooring?

Travertine is a natural stone that is deposited by geothermally heated hot springs. It’s considered a type of limestone that forms due to the rapid precipitation of calcium carbonate. Travertine comes in a variety of earth tone colors, including tans, browns, rust, and beige hues.


Image credit: https://kleanstone.com/

It’s a very durable stone and easier to care for than other natural stones. Plus, its heavy and porous surface requires you to seal the surface regularly. If you’re looking for a natural stone flooring solution that won’t break the bank, then travertine may be right up your alley. 

This versatile material is available in dozens of beautiful shades, shapes, and sizes, so there are plenty of options to choose from when creating your custom design.

Pros and Cons of Travertine Tile

Natural stone is a material that can have both advantages and disadvantages. And travertine limestone falls under this category. As much as it has benefits, this stone also has some drawbacks. 

Travertine Tile Pros

Travertine Flooring is Available in Various Designs and Color Schemes

One of the best advantages of travertine is the diversity of color schemes and designs it allows. Travertine flooring is available in a rich variety of colors, ranging from ivory to beige to gold and deep-reddish brown.  This flooring material’s subtle color blends and its natural veining make it easy to create one-of-a-kind patterns and designs you’re looking for.

You can choose from its four different finishes, ranging from matte honed, tumbled, brushed, and polished. The most popular choice is the honed finish with a smooth and natural-looking while the rougher brushed, and tumbled finishes provide textural finishes.

Travertine is Environmentally-Friendly Flooring Material

Travertine is a natural stone that combines silica, calcium, and magnesium. You can add a healthy and environmentally-friendly touch to your home decor if you choose travertine flooring. In fact, the manufacturing technology of travertine requires less water usage and emits fewer greenhouse gases into the environment. 

This process also creates minimal waste in landfills or does not cause harmful air or water pollution. The use of limestone also dates to ancient architecture in Rome when they would use Aqua Traiana, a pure water source, to create the smooth white-colored marble stones. It’s more eco-friendly than laminates. Natural stone tile can also be reused or repurposed.

Travertine is Durable and can Last Long if Properly Maintained

Travertine tiles are very durable; these durable stones are both water and moisture-resistant. All you need to do is to give them proper care. They won’t crack easily if you handle them with care, enabling you to keep the good condition of your home for long years.

Travertine adds another value: your house will look new, courtesy of the travertine tiles. Travertine floors, countertops, and pavers are very robust and can easily survive the test of time. When you look at some of the ancient places where travertine was used, you’ll see how this natural stone has stood the taste of time by lasting for a very long time. 

The hardness rating of flooring travertine is compared to that of marble flooring, so it’s suitable for heavy foot traffic areas. Since this material is a natural stone, it might have holes in it. These holes might get bigger and deeper in time, thus ruining your flooring. Make sure you give your travertine flooring proper care for it to last long.

Having ceramic tiles or granite in your kitchen and luxury vinyl in your bathroom may look nice, but travertine floor throughout your home can increase its value. Travertine can outlast other natural stones as long as you maintain it.

Travertine Tiles are Resilient

These tiles can tolerate extreme weather fluctuations, thus making them suited for both indoor and outdoor installations. You can install travertine pavers for your garden pathway, pool, and retaining wall of your house without worrying about the scorching heat that can damage your travertine.

It Has a Naturally Non-Slippery Texture

The non-slippery nature of travertine makes it suitable for installation in swimming pools, bathrooms, showers, flowers, and on pool decks. It has holes and pits due to its porous surface, making it rough and not slippery in an unsealed and unpolished state.

Replacing Travertine Tile is Quite Easy

Even though flooring material is durable, accidents can still happen after a few years of use. This way, it can get damaged or ruined. However, you don’t need to fret if you have damaged travertine. With several travertine variations, it’s possible to find not the same but the one similar to travertine stone. 

You can replace travertine tiles with new ones with matching tones or colors. In fact, no one would be able to notice the difference. You can also invest in a few travertine tiles just in case your tile gets damaged.

The Color Variation in Travertine Makes Each Tile Unique and Beautiful

The natural colors of travertine stone range from grey veining to rusty red with white veins and light brownish tones with cream, beige and orange tones. A single tile may have a layer upon layer of pastel colors and various patterns like stripes and veins.

Cons of Travertine Tile Flooring

It Can Get Damaged from Weather and Sun Exposure

Travertine is a very soft stone. It tends to wear away over time and can easily get damaged by weather and sun exposure. You need to be careful while using chemicals for cleaning purposes because they might corrode the calcium deposits in the tile, which will give out discolorations. 

You should avoid using travertine in your garden or on your back patio because it doesn’t hold well outdoors under constant moisture conditions.

Travertine is a Porous Material

Travertine is a porous material, meaning it will need to be sealed. Make sure you seal your travertine with a high-quality sealer before grouting it. This will prevent the grout from seeping into the surface and causing discoloration or colored dyes to appear on your floor. 

Failure to seal may attract mildew after experiencing some staining. You also need to consider how often your travertine is exposed to moisture and cleaning products before sealing. 

Travertine Tiles are Highly Reactive to Acidic Substance

A major disadvantage of this flooring material is the sensitivity towards acidic substances such as alcohol, vinegar, coffee, and orange juice. Suppose you accidentally spill orange or lemon juice on the travertine tiles. In that case, you risk having a permanent stain because the acidic solvent will react with the calcium carbonate of the stone.

So, be careful while using these tiles, especially if you have small kids around. Also, give it a second thought before using travertine tile to decorate your restaurant and kitchen countertops.

Travertine Tiles Tend to be Heavier

If you’re looking for an easy and quick installation process, travertine tiles might not be the right option for you. These tiles naturally tend to be heavy. Therefore, it would be difficult and time-consuming to install them. You should also be concerned about the transportation of these tiles from the store you buy them to your house. Their transportation cost might be a bit more expensive than other flooring materials.

Travertine Requires Maintenance and Care

This tile might be considered durable and resilient but doesn’t mean that it doesn’t require extensive maintenance. Unlike how you mob your flooring options such as granite, ceramic tile, porcelain tile, and vinyl, travertine requires much attention. This attention is what gives it the beauty and everlasting sense of elegance.

If unsealed and unpolished, this material is susceptible to damage because of the fear of its porous structure that absorbs spills in its holes and pits. That’s why it’s important to seal your tile to prolong its life. It’s recommended to use a penetrating sealer, especially when pets are active around food preparation surfaces.

Travertine is Only Available in Neutral Tones

Travertine is a type of limestone, and limestone is naturally white. That means that you cannot find travertine in bright or funky colors. Its tones and shades are limited to beige, white, cream, and tans. It’s also light in color because of the white calcium carbonate. 

You can’t find travertine in any colors and shades apart from the neutral and earthy tones. If you’re looking for brighter colors, opt for other materials such as marble, granite, and slate.

Travertine Tile Finishes

Polished Travertine Tile

Polished stone is commonly available in a polished finish. Polished travertine tiles make the stone look shiny and glossy, like a mirror. A surface of polished tiles traps small particles of dirt, making it difficult for you to clean.

Polished Travertine Tile
Image credit: https://cdn.shopify.com/

Honed Travertine Tile

This travertine tile is matte polished tile and is used mostly in flooring. It looks like classic travertine tile, but it’s not shiny or glossy.

Tumbled Travertine Tile

Tumbled travertine tiles have a textured and matte look. Tumbled travertine has a more antiqued appearance, making it a darling to indoor decorations. Tumbled tiles are also used in bathrooms and near pool decks because of the non-slippery surface.

Brushed Travertine Tile

This is a finish travertine tile shared with engineered and hardwood flooring. While it’s not hand-scraped, these tiles are finished in a fashion that leaves the surface rougher than other finishes.

Travertine vs. Porcelain Tiles

Many porcelain tiles today do a good job of mimicking natural stone, including travertine. The appearance of travertine-porcelain is not exactly like natural stone, but it’s close to the look of polished and honed travertine. Stone-look porcelain is less expensive as the average can cost $7 to $10 per square foot for professional installation, but it can be half price if you install it yourself.

Travertine Flooring Installation

Like other natural stones, you can install travertine tile the same way as ceramic tile. Apply a layer of cement board underlayment on the subfloor, then lay the stone tiles with a thin-set adhesive. And lastly, fill the joints with grout, and you’re done.

Travertine Flooring Installation
Image credit: https://cdn.msisurfaces.com/

FAQs on Travertine Flooring Review

Is travertine a good choice for flooring?

Yes, travertine is a good choice for flooring because it’s durable and luxurious compared to other floor materials such as marble and granite.

re travertine floors outdated?

The travertine floor is not outdated, even though many people believe so. These flooring materials are increasingly used in construction projects, thanks to their durability and long-lasting beauty.

Final Thought on Travertine Flooring Review: Pros and Cons

That’s all! If you’re looking for a natural stone that can add some coziness and beauty to your floors, then travertine tile is the ideal choice. But if you want a low-maintenance floor surface, then try other materials, especially if you have small kids and pets around.


The post Travertine Flooring Review: Pros and Cons appeared first on Kitchen Infinity.

Did you miss our previous article…
https://www.thelavkitchen.com/?p=283

How to Bend Wood

Bending wood is a delicate process that requires special tools, time, and patience to complete. Although bending wood around corners or joints is difficult because it weakens the board’s structural integrity, this doesn’t mean you can’t bend wood in these areas.

Woodworking projects often require boards bent into different shapes such as curves and angles. This can be accomplished by using simple bending techniques with basic hand tools. Follow these steps for how to bend wood around corners and at joints correctly, so your project stays strong and beautiful without any damage to the material or structure of your piece.

With a few simple steps, you’ll learn how to properly bend wooden boards without damaging their shape or strength during construction on most carpentry projects, including furniture, wine bottle holders, and more.

Bending wood is a two-step process. These processes include softening the wood through steaming and creating several cuts on the back of the wood through kerf cutting.

Bending Wood with Steam

The first step in the process of how to bend wood is steaming. You can either do this using a commercial steam box or use a large pot with a lid, properly ventilated for airflow. You first soak the wood in water to make sure that it is moist. You then place the three in the steam box or pot and close with a lid to trap heat in.


Image caption: https://cdn.shopify.com/

In order to keep your wooden bent part in the desired shape, you should apply clamps. You can make clamps out of other materials, but it is recommended that you use steel or other metals as they will not compress the wood over time.

Now it’s time to steam your wood. Make sure you take care of the heat source and your steam production. Test the temperature by sprinkling water onto your heated surface; it should produce enough steam to make the wood damp but not wet.

Bending should be done in the direction of the wood grain. Wood grain is the direction of wood fibers in the trunk of a tree. Wood is often cut along the grain in furniture making; this reduces splitting when force is applied to it by screws or nails.

So, if you have solid wood in front of you and notice a horizontal line and not the diagonal line, then that’s the direction of the wood grain.

Best Types of Wood Steam Bending

Steam bending works well with thin and small types of wood. Sheet materials are not suitable for steam bending because of their size. Types of wood that you can steam bend include red oak, white oak, and hackberry. Wood varieties such as soft maple, yellow poplar, and hard maple are even contraindicated for bending because they are too hard.

How to Bend Wood With Steam

What You’ll Need

Steam sourceScrewdriverWoodSpring clampsUtility knifeHeavy glovesEye protectionCordless drillFour-inch rubber gasketTwo-inch hoseFour-inch PVC sewer pipeFour-inch sewer pipe solid cap

Step 1: Build Your Steam Box

Your steam box can be a wooden box, or it can be a piece of PVC pipe. The important factor is that both pieces of pipe should fit tightly inside the box or other steam chamber and should not rattle when you shake the box. If they do rattle, add rubber spacers between them at their point of contact with one another.

Build Your Steam Box
Image caption: https://i.pinimg.com/

Once your wooden box is together, drill a hole in the lid large enough for the spout of your rubber gasket. For the best result, set up your exit hole so that it is very close to the edge of the box when you hang the lid.

Step 2: Prepare Your Steam Box

Remove the rubber gasket and place the steam box in areas such as your garage or outdoors. This will prevent your flooring from being damaged by excess moisture. Put your boards bent in a sawhorse-type construction at a height allowing you to easily work on them. Get some wood clamps and place them across the boards. The more planks you have in your stack, the slower they will bend due to their moistures expanding at varying rates.

Step 3: Build the Frame

As your wood dries, create a frame for it using some 2 x 4’s. Keep them about an inch or two apart from each other, and attach them on all sides of your wood planks with metal screws. This will help the boards retain their new shape once they are dry. You can use plywood, lumber, and clamps on a woodworking bench to create the frame.

Step 4: Prepare to Steam

Place a bowl in the bottom of your steam box, add water to it. For every inch of wood, you’ll need about one gallon of water. Add a cup of vinegar to the mix-this will help your boards absorb more moisture and ensure they bend easily. Use a drill to punch some holes in the sidewalls before adding your wet planks to them.

Step 5: Bend Your Wood

Turn on your heat source and bring it to the maximum. You can test that it’s hot enough by placing your hand a few inches above the bottom of the steam box. If you cannot keep your hand there for more than five seconds, it is ready. On average, you should steam wood for about one hour per inch of the desired thickness.

Step 6: Remove Your Wood and Let it Dry

Use thick gloves and plywood tongs to handle your boards as they come out of the steamer. Place them on some thick, dry pieces of wood and let them dry completely. Make sure you overbend them by five percent because they’ll tend to bend back to their original shape as they dry.

Bending Wood by Kerf Cutting

This wood bending method requires no soaking or steaming and no waiting time. You can create multiple incisions in the back of the wood by cutting thin strips which will not be seen. When the wood dries, it will bend easily even though it is very hard and dry.

Bending Wood by Kerf Cutting
Image caption: https://static.woodmagazine.com/

For kerf cutting, almost any type of wood can be used. You only need to bend the wood parallel to the kerfs. Be careful to bend your wood slowly to avoid cracking. However, the kerf cut method should never be considered for structural parts because the kerf cut can structurally weaken your wood, resulting in failure.

What You’ll Need

Kerf saw bladePencilWoodWood glueMiter saw table saw and radial sawEye and hearing protection

Instructions

Prepare Your Wood

Image credit:http://cdn.shopify.com/s/files/1/0561/8961/6313/articles/wood.jpg?v=1628573771

Measure and mark your wood 1/2 inch from the end. Then make a cut on the marks you’ve made and set it aside for later use. Using your miter saw, table saw, or radial arm saw, find the kerf blade that fits the tool you’re using and measure to see if it will fit.

To determine the angle of how much you need to cut, measure the width or thickness of your wood and divide it by two. Remember that the kerfs are located inside the curve you’re trying to fashion, so be very careful because deep kerfs can break the wood.

Mark the Range of Cuts

Use a pencil or painter’s tape to mark the span of the bend you’ll be creating. But you can as well skip using these tools if you’re going to bend the entire material.

Make Your First Cut

Turn on your saw and run and run the blade across your solid wood. Begin at one end of the bend span. Continue making additional cuts as you maintain a distance equaling the width of the saw blade. Continue cutting until you reach the end of the bend span.

Bend Your Wood

You can bend your kerf cut wood by installing it in its eventual installation. For example, you can install a bent wood in a bench leg, in a chair back, or maybe you can add a decorative touch to any furnishing.

You can also use your bending saw blade for this task if you have one installed in your machine. Fit the blade into your table slot and adjust it to fit comfortably in the kerf cut. Press down on the handle of the wood while drawing the wood towards you. Press against it while you push away for a more pronounced curve.

You can also fill the kerfs with wood glue by bending wood into a frame and leaving the glue to dry. This works best for outward wood curves and not inward curves. For inward curves, use a supporting frame to hold the curve in place while the glue dries.

The frame should be made of wood that matches your project, so it isn’t very noticeable. Cut a frame to fit inside your bend and secure it with nails or screws from the outside of your bend to keep everything together while the glue dries.

Fix the Bend

If you get a slight bend in your wood and it isn’t noticeable, leave it. However, if you get a large or very noticeable bend in your wood when there is no way to straighten it properly without breaking the board, try fixing the problem with screws. Drill holes through each piece of bent wood where they are touching each other.

You can also fix the bend by facing the front side of the wood by veneering or laminating. Apart from fixing, setting, or bending your wood, this process will also hide any cuts you make while fixing it. You can also use this when learning how to distress wood

FAQS on How Bend Wood

What is the best wood for bending?

The best wood for bending is the plastic ones, which are deciduous wood species. They include birch, oak, beech, hornbeam, maple, linden, and ash bend wood.

How long do you have to soak wood before bending it?

While most people like soaking their wood for about 2 hours, some soak it for up to 24 hours. You may not be able to bend the wood if you do not lengthen the time.

Is there any special tool needed when bending wood?

Yes, a jig is usually used in bending woods. A clamp can also be of help.

Final Thought on How to Bend Wood

As you can see, bending wood requires different techniques and working materials. So, you have to familiarize yourself with these materials and techniques before you start your woodworking outdoor project. Also, which wood bending method to use depends on the type of wood, the thickness of the wood, and the desired angle you are going for.

The post How to Bend Wood appeared first on Kitchen Infinity.

What Does a Steam Feature on a Washer Do?

Washing clothes and home upholstery is a chore. It’s even more challenging to do laundry on items with heavy stains, especially for those just learning how to do laundry. The good news is that you can always buy a washing machine with steam features that will clean, deodorize, and sanitize the laundered fabrics while you wash them. 

This feature makes the cleaning process easier for everyone who owns such washers. If you want to make your life easier when washing clothes and other materials, consider buying a washer with steam features. Steam helps remove dust, dirt, allergens, and other contaminants from your laundry items as they get washed during this process. 

Keep on reading to learn more about the work of a steam feature on a washer.

What Is a Steam Feature on a Washer?

A steam washer uses a combination of steam and water to clean your clothes and other fabrics. This feature provides you with the option to replace dry cleaning once in a while and revitalize certain types of clothes such as curtains and upholstery. 

Stain removal is made easy with steam washers because they eliminate the most common stains by using hot steam to loosen them up before washing. The steam also helps to remove wrinkles, make detergent work more efficiently and sanitize fabrics.

How a Steam Washer Works

Before the washing cycle begins, a steam cycle loosens wrinkles, stains, and dirt from your clothes. Steam is very effective in removing the dried-on gunk, so this process will likely improve the cleanliness of your clothing. The steam doesn’t stop there. 


Image credit: https://reviewed-com-res.cloudinary.com/

During the wash cycle, the steam continues to work with water to clean your fabrics. The steam helps to remove germs and dissolve detergent better than water while heating the cycle. When the detergent is mixed with water, the steam increases the temperature of the wash tub to improve the cleaning power.

If you opt for steam dryers, the steam during the dry cycle will get rid of wrinkles and sanitize your clothes. If you have pets at home or any of your family members have allergies, a steam washer and a steam dryer will be perfect for you.

If you want a steam washer and dryer, it can be hard to decide which one comes first in the household. The good news is that they both do a lot of similar functions. They both sanitize your clothes and remove odor-causing bacteria while freshening up your laundry with the help of steam. Both of them also have a cycle that lets you remove wrinkles from your clothes.

If you want to buy both a steam washer and dryer, the steam washer is usually placed first in the household because it has more functions than a dryer. A dryer needs a couple of minutes to remove small wrinkles from your clothes, while a steam washer uses the power of steam to freshen up your laundry and remove all bacteria that can cause bad odors.

How Washing Machines Apply Steam

Washing machines can apply steam in many different ways. Some may heat water in the tub directly to create steam, while others may utilize a steam generator that sends the steam into the tub. But it will still allow you to use water instead if you would like. 

The steam will permeate your clothes to remove dirt and bacteria that may be in your clothing. It also releases wrinkles to make sure that your clothes look great before you put them on. After converting the water to steam, the steam generator then heats the water back up and sends it to the tub for another cycle.

dvantages of a Steam Feature on a Washer

Reduce Ironing

Ironing can take a lot of time and effort, especially if you don’t know how to iron clothes properly. If you don’t like to iron your clothes, then this feature is perfect for you. It will eliminate the need to use an ironing board because it removes wrinkles and creases in clothing so that you can wear them without having to press them first. 

Reduce Ironing
Image credit: https://lh6.googleusercontent.com/

However, not all steam features are the same, they vary in intensity and temperature achieved. So, it’s important to check the type of steaming function your washing machine has.

Steam Wash Cleans Hygienically

How often do you wash your bedding, baby clothes, or do you have extra sensitive skin? If you’re facing these elements, consider a washing machine that washes hygienically in your laundry rooms. The washing machine adds steam during the cycle and removes bacteria and allergens.

The washing machine uses steam to sanitize fabrics of dust mites, pet dander, pet hair, and pollen. It can do this because the high temperatures of the steam break the allergens effectively.

Steam Washing Machines Saves Money

A steam washing machine uses less power and consumes less water than conventional models. A small amount of water can produce steam. When you consider the savings on water and power, a steam washing machine offers greater cost-effectiveness than other models. Steam washers don’t need as much energy to heat as many gallons as other models.

Steam Washing Machines Saves Time

A conventional washing machine can take an hour or more to complete its cycle. But with a steam washing machine, there are very rapid spin cycles that can reduce time in the dryer, making up for some lost energy savings. Many steam washing machines also offer a range of different wash cycles, which you can use to customize the process according to your specific needs.

Freshen up with Steam Washing Machine

If you have a smelly laundry room or your clothes stink, you can always add to the wash cycle from steam washing machines a detergent with a natural odor eliminator. This enables clothes in laundry rooms to maintain a fresh smell.

FAQs on the Function of a Steam Feature on a Washer

Is the steam function on a washer worth it?

The washing machine freshens up with steam without adding water. This can save you money on detergent and energy. Plus, your clothes will last longer and won’t wear quickly.

Is it better to have a steam washer or dryer?

Steam washers clean clothes that may be hard to clean by hand, machine-washable drapes and other delicate clothes. They also preserve the fabric, so there is less need for ironing.

Final Thought on Functions of a Steam Feature on a Washer

Finally, opt for a washer and a dryer that will give you more benefits in your laundry room. If having perfectly sanitized clothes is your concern, or you’re worried about allergies and skin sensitivity. In that case, a washing machine with a steam function is what you need to invest in.


The post What Does a Steam Feature on a Washer Do? appeared first on Kitchen Infinity.

Did you miss our previous article…
https://www.thelavkitchen.com/?p=275

Types of Leaf Arrangements

We all know that the arrangement of leaves in a stem is called phyllotaxy, but most people have no idea what this means. Most basic flowering plants have three basic types of arrangements which include alternate, opposite and whorled when it comes to leaf arrangements, but there are also other leaf arrangement types you should know about, but these are the basic ones.

Leaf arrangement is a key characteristic on which plant taxa are classified. Monocots, dicots and gymnosperms have different types of arrangements. This guide is an easy-to-understand explanation of the different types of leaf arrangements and how those affect plant taxonomy.

Structure of a Typical Leaf

Each leaf has a leaf blade called the lamina, which is also the widest part of the leaf. Some leaves are attached to the stem by petiole, while others do not have petiole and are directly attached to the plant are called the sessile leaves. Leaves also have stipules, which are small green appendages found at the base of the petiole. 


Image credit: https://cnx.org/

Most leaves also have a midrib that travels the leaf’s length and branches to each to produce veins of vascular tissue. The vascular tissue forms veins within each leaf. And the edge of the leaf is called the margin. The arrangement of veins in a leaf is called a venation pattern. Monocots and dicots differ in their venation pattern.

Monocots have parallel venation in which veins run in straight lines across the length of the leaf without converging. While the veins in dicots have a net-like appearance, forming a pattern called reticulate venation. One example of a plant with dichotomous venation is the ginkgo biloba tree.

lternate Leaf Arrangement

Alternately arranged leaves produce one leaf per node. The leaves alternate from side to side. For example, your houseplant may have two or three leaves in one spot on the stem, and then in another spot, there are two or three leaves, but they’re opposite each other. 

Alternate Leaf Arrangement
Image credit: https://www.thespruce.com/

In alternate leaf arrangement, there is one leaf per plant node. Examples of trees and plants with this leaf arrangement include blackberry, black walnut, sweetgum, smoke bush, ninebark, and Japanese zelkova. Note that plants with alternate and spiral leaf arrangements have only one leaf per node.

Opposite Leaf Arrangement

The opposite leaf arrangement is when a plant has two leaves growing out of the same node. The two leaves are on either side of each other, and there is no space in between the leaves. For example, your houseplant may have three or four leaves growing out of one spot on the stem and then another group of three or four leaves a little further down the stem. 

The leaves in this example would be opposite each other. Examples of plants with opposite leaf arrangements include maple leaves, Olive trees, fringe trees, ash trees, and viburnums.

Whorled Leaf Arrangement

A whorled or verticillate arrangement is a plant with three or more leaves growing out of each node. In this pattern, there are several leaves coming from one spot on the plant stem. In some cases, it may look like a circle of leaves growing from a single spot on the stem.

Whorled Leaf Arrangement
Image credit: https://qph.fs.quoracdn.net/

Examples of plants with whorled leaves include mountain laurel, Japanese clethra, blackboard trees, redvein enkianthus, panicle hydrangea, and lemonwood. Some can have both opposite and whorled leaves throughout the plant.

Rosette Leaf Arrangement

Rosettes are often referred to as basal rosettes because they are found at the base of the plant, around the stem. The basal leaf arrangement occurs when one central leaf emerges from the ground to form a circular shape. Examples of rosettes occur in acaulescent plants, such as common dandelions in the sunflower or aster family. 

These acaulescent plants have a stem, but the internodes are greatly contracted with spiral alternate arrangement leaves. Biennial plants such as carrots and poison hemlock in the carrot family produce a basal rosette in the first year of growth. It’s then followed by the production of the flowering stem with alternate leaves in the second year.

Other examples of rosette leaf arrangements include liverwort and hens and chicks. Rosette leaf arrangement is the most common type of leaf arrangement in monocots, with grasses being a prime example. This type of arrangement occurs when leaves are produced around the stem at the same point, thus creating what appears to be a single circular leaf structure below ground level.

Perfoliate Leaf Arrangement

In this arrangement, the stem is completely wrapped or buried around its support. Leaves of this type are arranged in a circle with their bases adhering to the petiole and the blade expanding away from the plant center. A good example of perfoliate leaf arrangement is found in Trillium grandiflorum, commonly known as white wake-robin. 

Silphium perfoliatum is also a good example of the basal connate fusion of leaves to achieve perfoliate condition. The upper cauline leaves of henbit in the mint family are called sessile leaves.

Distichous Leaf Arrangement

In this type, the leaves are arranged in two opposite rows on either side of a stem. In other words, they grow along two opposite sides of the shoot axis at right angles to each other. Distichous leaf arrangement is common in monocotyledons, especially grasses and sedges groups. 

The lower side is called adaxial, and the upper side is called abaxial. The adaxial surface of a leaf is the surface closest to the axis, and the abaxial surface of a leaf is furthest from it. This arrangement can also be seen in species such as Agave sisalana, where all leaves grow around the stem in vertical rows.

Basal Leaf Arrangement

All the leaves arise from the base of the plant. Perennial plants are trimmed back to new basal foliage once in a while, which leads them to grow new leaves that can be located at the base. Perennials with basal leaf arrangement include harebell, whorled stonecrop, yarrow, and oxeye daisy.

Coniferous Leaf Arrangement

Coniferous leaves thrive in cold environments. Their leaves are reduced in size and needle-like in appearance. The needle-like leaves have sunken stomata and a smaller surface area to conserve water. 

There are only two major types of coniferous leaf arrangements: Monocephalus (single head) leaves are arranged in spirals around the plant stem, while Flabella (leaf structure) leaves grow in spiral patterns with more than one head. Conifers that follow the monocephalous pattern include white pine, European larch, and Canadian hemlock.

Conifers that follow the flabella pattern include blue spruce, Norway pine, and Japanese red pine. Aquatic plants also have coniferous leaves with wide lamina that can float on the water surface, plus a thick waxy cuticle on the leaf surface to repel water.

FAQs on Types of Leaf Arrangements

What is the leaf arrangement?

This is the arrangement of leaves on an axis.

What are palmate leaves?

A palmately leaf compound has its leaflets radiating outwards from the end of the petiole like fingers off the palm of a hand. Examples of plants with palmately compound leaves include poison ivy, familiar house plant, and umbrella plant.

Final Thought on Types of Leaf Arrangements

As you can see, there are so many types of leaf species, and each species has a characteristic leaf arrangement. The leaf arrangements also vary from one plant to another of the same species. It is important for you to know the common types of leaf arrangements to easily identify and differentiate them without hassles.


The post Types of Leaf Arrangements appeared first on Kitchen Infinity.

Did you miss our previous article…
https://www.thelavkitchen.com/?p=272

How to Use Core Aeration

Maintaining a healthy lawn is hard, but there are a number of steps you can take to achieve this. You need to fertilize your grass, mow it at the right height, and water it regularly. But if nutrients don’t reach the soil underneath your turf, you’re going to have problems with thatch build-up and nutrient loss.

Lawn aeration helps improve drainage by removing plugs from the top layer of soil, allowing air and water in a while, helping reduce soil compaction below ground level. It also brings up minerals that were trapped beneath the soil surface into contact with roots for better absorption.

If you’re looking for ways to achieve and maintain a beautiful lawn, then this article will help you learn more about using core aeration. We’ll discuss why it’s needed and what it involves. Read on!

What is Core Aeration?

Core aeration is one of the best practices for lawn care because it improves overall health and appearance while reducing weed growth potential. The process involves using an aerator machine or core aerating tool which removes plugs from two inches deep or more depending on how long you run the machine over your lawn’s surface. This will help loosen compacted soil and allow water and air to reach the lawn’s roots better.


Image credit: https://www.fairwaygreeninc.com/

What is the Best Time for Core Aeration?

For cool season grasses, core aeration should be performed in early fall or early spring. For the warm season grasses, core aeration should be done in late spring to early summer. When aeration combines with growth, grasses recover quickly and fill in areas where aerator equipment exposes soil.

When Do Lawns Need Aeration?

All lawns can benefit from core aeration, especially when the soil is compacted. Lawns in heavy shade or with thatch build up are great candidates for core aeration. Any time grass has difficulty growing or staying healthy due to compaction or poor drainage, this indicates that core aeration might be needed. Soils high in clay also benefit from core aeration.

Also, note that dethatching and aerating are two different things, although they work in handy. Thatch is the layer of decomposing organic matter that forms at the lawn surface between soil and grass. The thatch works like compaction to block the passage of air, water, and fertilizer to the roots.

Dethatching removes some grass blades while aerating opens up channels in the soil to allow air, water, and nutrients to reach grasses’ root systems. Aggressive spreading grasses like Kentucky bluegrass in northern lawns and Bermuda grass down south form more than any other grass type.

If your grass looks stressed and your soil is hard to the touch, you may have compaction problems. You can confirm that by using a simple screwdriver test. Take your regular screwdriver and stick it into your lawn’s soil by hand.

Why Core Aeration Helps Lawn

Lawns get heavy use, such as acting as neighborhood playgrounds and racetracks. Kids and pets running around the yard can also lead to soil compaction. That said, your grass roots need air, water, and nutrients to grow thick, deep, and strong. When the soil becomes compacted, it will inhibit the flow of essentials that supports thicker, healthier tuff growth.

Excess lawn thatch and heavy organic matter buried under the grass surface can also starve the grass of essential elements. Therefore, the hollow tine core aeration will help alleviate additional compaction so air, water, and nutrients can reach grass roots.

If lawn grasses are deprived of their basic needs by compacted soil, they’ll struggle, especially in stressful situations such as heat and low rainfall, thus losing their healthy, rich color. The grasses will gradually thin and die out completely. If there’s no oxygen, water and nutrients will be inches away.

Other Methods of Aerating Your Lawn

Apart from plug aerators or core aeration, there are other methods of aerating available equipment. They include:

Spike Aeration

Spike aerators have hollow tines that penetrate the soil and remove small cores of soil. Spike aeration is quick, easy to install, and can be used on lawns with little maintenance. The spikes create holes for water and nutrients by pushing soil aside.

Spike Aeration
Image credit: https://cf-images.us-east-1.prod.boltdns.net/

Slicing Aerators

These are blades attached to a wheel, which slice through the lawn’s surface. This method is similar to the spike aerators in that it also removes cores of soil from your lawn. The slices will give rise to new shoots and roots, giving rise to thicker turf.

How to Aerate Your Yard

You can find lawn aerators, power rakes, and other power equipment at your local store, hardware stores, and some big-box retailers. You can also hire lawn service from equipment rental companies and lawn and garden stores. Here’s how to aerate your lawn:

Flag Utilities

Flag utilities or other pipes loosen the soil around those with a shovel. Remove plugs from holes, then drag the aerator behind you across your lawn. With space between each pass, turn over all of the soil that was brought to the surface. Replant grass seed or transplant seedlings as desired

Time Your Aeration Right

For best results, time your aeration to coincide with your lawn’s physiological stage of development. Late summer is the best time for quick relief from compacted soil, while late spring or early fall are ideal times for lawn restoration and strengthening. Aerate when the soil is soft, like after an irrigation cycle or a recent rainfall. 

This will allow the hollow tines to penetrate the soil easily, making it easier to do their job. Hollow and solid-core aerator tines will struggle to penetrate hard, dry soil, making the process less effective.

Be Thorough

Cover your entire lawn at least once and the second time at a cross angle. Pay attention to lawn surfaces with heavy foot traffic, driveways, and sidewalks because these sections will be more compacted. If your lawn is smaller, you may only need to do it once.

Forget the myth that if you apply a pre emergent herbicide on your lawn in the spring, it will destroy your herbicide barrier. This is not always true because aeration won’t affect crabgrass control or weed prevention.

What to Do After Aerating

After aerating, if possible, combine lawn aeration with other lawn care maintenance such as fertilizing, adding soil amendments, and overseeding. Water, fertilizer, and grass seed needs to get through the lawn surface into the soil where they can start growing grass roots. After aerating your lawn, let soil plugs or extra soil dry where they fall.

What to Do After Aerating
Image credit: https://peppershomeandgarden.com/

Core aerating will open the soil to allow water, fertilizer, and seed to move down in the soil for faster root growth. You can also help restore your lawn by application of fertilizer immediately after core aeration. Better yet, make your compost for this purpose.

FAQs on How to Use Core Aeration

When should you core aeration?

Core aeration can happen anytime, but the best time is usually in the spring and early summer or fall. It’s recommended to core aerate when there’s the most root growth.

Should you water before core aeration?

Yes, you should water one to three days before aerating. This is because the soils must be moist to help the machine penetrate through to remove soil plugs. Do not aerate overly soaked and completely dry soil because the aerator will pull out small soil cores from the lawn, which should be left to break down.

Final Thought on How to Use Core Aeration

As you can see, adding aeration to your annual task list will help you maintain your lawn and make it look more beautiful. Plus, you save money in the long run by having a healthy lawn.


The post How to Use Core Aeration appeared first on Kitchen Infinity.

Did you miss our previous article…
https://www.thelavkitchen.com/?p=261