What are Faucet Aerators and Why You Should Install Them

What are Faucet Aerators and Why You Should Install Them

As a homeowner, you should constantly look for ways to improve your home functions. Home renovation helps you conserve water and energy, improve user experience and help you save money in the long run. One thing that often gets overlooked is faucet aerators.

Faucet aerators reduce the pressure at which water comes out of a faucet by reducing the flow rate. This reduces the amount of water used per action and brings down your monthly water bill. The truth is that there are many reasons why installing an aerator can be beneficial to your home, regardless of whether you live alone or with family members. Keep reading.

What is a Faucet Aerator?

A faucet aerator is a round device installed on the ends of faucets that channel water into steady steam. But without a faucet aerator, your faucet will still deliver water, but the stream will splutter and splash. A faucet aerator helps to reduce splashing and spluttering because it uses a small channel to introduce water from the faucet into a larger channel, creating a steady stream.

The result is that your dishes and laundry will be cleaner, and you can also save water. In addition, an aerator is a small screen that breaks up the flow of water into multiple small streams, adding air in between. Today, a faucet aerator is very common in all kitchen and bathroom faucets.

By diluting the water stream with air, the aerator significantly reduces the volume of water flowing from your faucet. The aerator does this while maintaining the feeling of a high-pressure flow.  Aerators also reduce splashing in sinks.

Choosing Faucet Aerators

Daniel O’Brian, a technical specialist with SupplyHouse.com, says that different faucet aerators are designed to enforce different flow rates. Here are what you should consider before installing a faucet aerator

Consider the Flow Rate When Installing an Aerator

You might be tempted to choose an aerator with the lowest flow rate to maximize savings. You should also remember that you’ll rely on certain gallons per minute GPM minimums on activities such as washing the dishes. However, O’Brian suggests choosing an aerator with a flow rate between 1 and 1.5 gallons per minute GPM is a good compromise between conservation and practicality.

To wrap it up, there’s no rule here, so your personal preference and use cases will dictate what GPM you should choose. For the most part, it’s considered to install an aerator with a flow rate of 1.5 gallons per minute GPM if you want to conserve water while maintaining functionality.

erators Come in Different Sizes

Apart from knowing how many GPMs you require, you should also know the size of the aerator you’ll need. Faucets come in different shapes and sizes, and aerators come in three different varieties. These varieties include standard, junior and Tom thumb.


Image credit: https://upgradedhome.com/

Other than the diameter, you also have to know if your faucet has a male or female spout. You’ll be able to identify this by locating the sprout’s threads, which are grooves found at the end of the spout. If the threads are outside, then it has a male spout and requires a female aerator. If the threads are inside, then it’s a female spout and requires a male aerator.

erators Provide Different Water Streams

You’ll also want to consider what kind of water stream you would like your aerator to provide. There are three different stream designs to choose from. These include the aerated stream, which is the most common in households.

In the aerated stream, the air is introduced to the water flow, causing the water to come out in even. There is also a laminar stream where the air isn’t mixed with water. The laminar stream also differs from the aerated stream by offering more gallons per minute GPM. The last one is spray stream, where faucets require very few GPMs.

Benefits of Faucet Aerators

Decreased Faucet Noise

Also, by installing a faucet aerator, you will end up having a decreased flow rate without actually needing to cut your water pressure. The water stream that comes out of the faucet is frizzy and mist-like. This makes it much quieter than the concentrated streams.

Decreased Faucet Noise
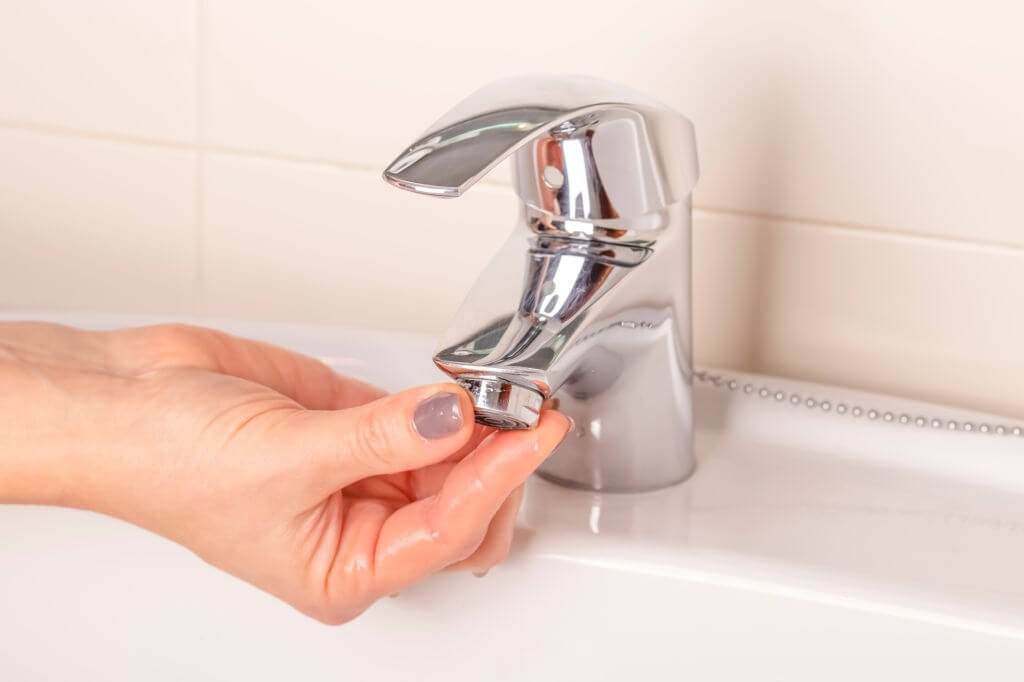
Image credit: https://kitcheneminence.com/

As mentioned above, water flow can be reduced by up to 35 percent. This is a great benefit as the faucet remains to deliver adequate water without causing any inconvenience or discomfort.

Lower Water Bills

As you save more water, your water bills will also get lowered. Though this might not be noticeable in the short term, it is great to note that the faucet aerator can help you lessen your water expenditure over time.

According to the Environmental Protection Agency, installing a faucet aerator is the single most effective water-saving plumbing change you can make. This is true because you’ll use less water when you use an aerator to accomplish the same task.

More Consistent Water Pressure

A mesh screen allows the water pressure to be more consistent. It also slows the flow of water, making it possible for you to use less water and still achieve the same task. Instead of experiencing pressure changes right away as they happen, the steam will stay steady due to water caught behind the aerator.

Reduced Overall Water Use

Reducing the flow rate of water may cause some people to feel like they need to use more water to get the job done. However, experts say that using an aerator will not cause you to increase your overall water usage.

They claim that it is possible for you to reduce your total amount of daily and total monthly water usage. Apart from reducing water consumption at home, installing an aerator means less water usage, thus, reducing your home’s impact on the local and global environment.

Increased Filtration

With a faucet aerator, drinking water is filtered as it comes out of the tap. By using a filter, you can ensure that water used for drinking is free from toxic chemicals and metals. This reduces the overall amount of money spent on bottled water which would have been required if no aerator was installed.

The small screens increase the particle filtration for an individual faucet. A high-quality aerator works with a filtration system to keep your water clean and clearer. Ensure that if you have dirt and debris problems, you deal with them by regularly cleaning your aerator to prevent buildup.

FAQs on Faucet Aerators

How do faucet aerators work?

Faucet aerators work by getting air mixed into the flow, reducing the amount of water passing through the tap.

Final Thought on Faucet Aerators

That’s all about faucet aerators! Make sure you clean your faucet regularly to keep it as clean as possible. Do not forget to use a filter if you need it to keep your water pure and clear.

The post What are Faucet Aerators and Why You Should Install Them appeared first on Kitchen Infinity.

Did you miss our previous article…
https://www.thelavkitchen.com/?p=448

How To Hang A Door

How To Hang A Door

You want to change the look of your home by a simple act such as replacing a door. But you don’t have time or money for a professional installation. Installing a new interior door can be simple once you know how to do it. The key is knowing what tools and materials are required and having the right safety gear on hand.

We’ll walk you through each step of the process so that hanging your doors will be easy as pie. No matter whether your project requires one or two doors, we’ve got all of the instructions, tips, and tricks it takes to get them hung safely and securely in no time at all.

Our guide includes everything from choosing hardware to cutting out holes for knobs and locks. And we even show you how to install decorative molding around your new door’s frame if desired. With our handy checklist at hand, there’s no reason why anyone should struggle with hanging doors ever again.

Required Tools and Materials

Sharp chiselScrewdriverUtility knifePencilHandsawTape measureDoor slabElectric or smoothing planeSpirit levelWooden Shims

Steps on How to Hang a door

Remove the Existing Door

If the old door has a transom, remove it from its hinges before you begin to hang your new door. If there’s an old lock in the way of your new slab, position the chisel where it meets the jamb and tap lightly with a hammer until you can knock out the plug by hand. Place wedges of wood underneath your old door to support the jamb while you work.


Image caption: https://www.wcmanet.org/

Then unscrew it from its hinges and remove it from the opening. If your hinge is still in good condition, you can set them aside for reuse. Be careful not to damage the hinge recesses in the jamb while you remove it. Also, don’t hang a new door in an old door frame, or you’ll end up fixing a sagging door in the future.

Measure the Space for Your New Door

Move on to measure the space for your new door. You can use a stud finder to locate the framing members to make sure that you can secure the hinges into place. Be sure that you center it evenly across the opening and between both jamb edges.

The old door can also guide you, as you can lay it on the new one and mark where you’ll cut the new door with a pencil. You can work with someone to help you position the door in the door frame and level it.

Get the Floor Level

Take your spirit level and check to see if the threshold on your new door is level with the floor. You can use a pencil and mark the high and low points where needed. If the floor is finished but not leveled, then you’ll need to trim one of the door jambs.

Use shims to position each door jamb evenly against the floor. Mark the shim at the point where the gap is big using a sharp pencil. Measure the thickness of the shim as that measurement is what you’ll need to cut off your door jamb from the opposite side. You can also learn how to level a floor so you avoid any such future problems when hagging a door.

Mark the Hinges

The hinges on a door are usually placed at 1/3 of the total height from the top. Mark the point around the edge of the door, as well as where you will want to hang your new hardware on both sides. Use a sharp pencil to mark clear lines on both the lining and the door.

Once you’ve marked all the hinge positions, remove your door from the lining, place it in the saddle, and wedge it. After that, hinge the side up, square all the pencil lines, and hinge it to the opposite side. Use a straight edge and level to ensure that your door is completely square and plumb. Use shims under either side of the hinges to adjust for deviations, then tack each hinge in place with nails only along the top line.

Place the hinge to mark its length on the door’s edge. Slide it up to the line and mark the first hole. Set your marking gauge up and scribe the width of the hinge into the door edge. Use a sharp Stanley knife to ensure your door won’t always close flush. You can repeat to ensure all hinges are positioned and set the gauge to the same thickness as the hinge between the door and the frame.

Chop the Hinges Out

Use a sharp chisel to chop your hinge horizontally from the top and bottom. Sand, the remaining pencil lines, then drill correct pilot holes for your screws. You can also use a mallet to cut around the perimeter of the hinge recesses you’ve marked. By placing your chisel at 45 degrees, make several cuts apart and to the depth you’ve marked across the wood grain. Put the flat side down, then use the chisel to pare away the wood as you position the hinges. Drill all the holes and ensure one screw gets into each hinge flap.

Trim the Bottom

This is where you’ll need an electric plane or circular saw. Only use them if you need to remove a lot of trims from the bottom. You can as well score your door with a sharp Stanley knife before cutting the bottom to the angle you have designed. This will prevent your door from tearing.

Hold the Door Steady

Now it’s time to attach your wooden blocks on the sides of your interior door to the wall. Place your door in the middle of the space and check the level. Use the spirit level to ensure that your door is even on both sides, then mark where you need to drill the wooden blocks into the wall. Make sure the jambs are resting on the blocks to maintain the correct height.

If the jambs aren’t in the correct position, cut or plane the door using a saw or a block plane. Check if the hinge side of the door is plumb by using the level. If the hinge side of the door is plumb, attach the blocks by hammering 2-inch, 15 nails through each block on the hinge side and into the wall. Check if the gap between the side of the door is even, then do the same for the blocks on the latch side.

Ensure Your New Door will Shut

Now that your door is held in place make sure it will close properly. All you need to do is take out the plug that holds the door slab, then open and close the door as you carefully watch the gaps. If the jambs aren’t in the correct position, cut or plane the door using a saw or a block plane.

If one part is hitting the door, stop first and make sure you adjust the door jamb before you proceed. Move the jamb from the top to the bottom until the problem is solved. If there’s no gap between top and bottom, use a belt sander or plane to create a small gap.

Place Shims Behind the Hinges

If the hinge is too close to the floor, you’ll have a hard time opening and closing them. To avoid this, put a shim behind each hinge. Your door may not stay open by itself because its hinges aren’t level with each other. You can solve this dilemma by popping out the cover on one of the hinges and moving it to a level that aligns with the other.

Place Shims Behind the Hinges
Image caption: https://www.wcmanet.org/wp-content

After unscrewing and removing the middle screw from each hinge, put a shim behind the hole. Then check your jamb door if it’s still level. If it’s not, add the shim until you get a level door. Check if your door jambs are level with the wall. Check the gap between the slab door and door jambs if they’re still even. Double-check to ensure the gap between the door stop and slab is also even. You don’t want to come back here to learn how to fix a misaligned door, right? That’s what will happen if you skip this step.

Screw the Hinges

Start with the hinge plate at the top of the door. Move to insert a screw into the hole nearest the bottom of the plate, then tighten it. Repeat the same way with the lowest hole on the hinge plate at the bottom of your door. Open and close your door to ensure it works properly. Once you’ve set the hinge at the top of the door, put a level on top of your slab door and make sure it is perfectly even. You may need to adjust the height of the hinge plates if one side doesn’t line up with the other.

Mount the Latch and Doorknob

If your door frames have a strike plate, then measure how far it’s from the floor and measure the corresponding position of the door. You can also prevent your interior doors from slamming in high winds by enforcing the latch plate. All you have to do is to drill a bit and countersink a hole in the top corner of the space for the latch plate.

Make sure you position your hole away from the edge of the frame. You need to drill a hole in your door that matches the size of your latch plate. Then, position both pieces of wood together while you’re sure they’re level and mark exactly where you need to drill holes.

Remove the Blocks and Hang Your Door

Now that your door can open and close smoothly, the next step is to remove the blocks you have used to prop the door up. Follow the instructions that came with your door for this part of the installation. Use the nails and filler to cover any holes that you made.

Now, find out how to hang a door. Hold your door open on the wedges, and then screw the screw to the hinge using only one screw at each stage. Lift your interior door out of the clamp to give it a frame at a slight angle, then begin by screwing the top hinge to the lining.

FAQs on How to Hang a Door

Can you hang a door without a door frame?

Yes, it’s possible as long the frame is in good condition and not warped or worn out. The door frame doesn’t come with hardware attached; instead, you can either reuse the old frame hardware or replace it with new hardware in the new slab. But a pre-hung door comes set in a frame.

What is a pre-hung door?

The pre-hung door is the package of a door with its frame attached to it. You can hang the new slab on your existing door frame using three basic tools: drill, screwdriver, and hammer.

Can you hang a door on drywall?

Yes, but interior doors should be installed after the drywall is installed. This is because the drywall needs to be secured by nails if you intend to hang door slabs. If not, the door will not hold its weight and may eventually come crashing down, which can cause damage to its hardware, like hinges and screws.

Hanging your door after installing the drywall will make your doors stay cleaner and prevent any scratches and dents on the door surface.

Final Thought on How to Hang a Door

Hanging a door by yourself is much easier, especially if you’re using wooden blocks to hold the door in position. You don’t need any additional support. So, it’s something you can do on your own. If you have any questions, don’t hesitate to leave a comment below, and we’ll get back to you as soon as possible.

The post How To Hang A Door appeared first on Kitchen Infinity.

Did you miss our previous article…
https://www.thelavkitchen.com/?p=445

12 Gorgeous Flower Garden Ideas To Add To Your Home

12 Gorgeous Flower Garden Ideas To Add To Your Home

Flower gardening is a fun and rewarding hobby, especially if you know how to do it right. You can use beautiful flower garden ideas to create an amazing backyard oasis that will impress everyone who sees it. These beautiful flowers help you express yourself in ways you never thought possible. All it takes is a little creativity to show your personality through these amazing flower garden ideas. Here are some ideas that can help you start this amazing hobby.

1. Consider Large Garden Areas

Many flower garden ideas are perfect for smaller spaces, but consider planting something other than flowers if you have a large backyard area. If you’re looking for an easy way to create an impressive look that’s also functional, go with ornamental grasses or evergreen trees. These plants are great year-round and require very little maintenance over time.


Image credit: https://www.gardeningknowhow.com/

Choose two contrasting colors and one color family, such as purple or pink. You can then add perennial flowering plants in groups of three to five, and you’ll have an eye-catching flower. Make sure you carry out regular weeding because today’s weed might be tomorrow’s weed patch.

2. Create an Edible Flower Garden

Create an Edible Flower Garden
Image credit: https://www.gardeningknowhow.com/

If your goal is to create a garden as an outdoor kitchen, consider making a dedicated flower bed for herbs and vegetables. If possible, flower gardens should be beautiful and delicious. Vegetables will get a huge boost in productivity with the flowers available when pollinators are drawn to nectar-rich planting beds.

Edible plants such as tomato, squash, and cucumber will blossom in such flower garden beds. In addition, the beneficial insects that rely on floral nectaries will help control vegetable pests, thus, reducing the use of pesticides.  You can get ideas on types of squash to grow here so you know which one can work for your flower garden.

3. Plant Flowering Plants on Trellis

Trellises and topiary create focal points in the garden, especially when consistent color and style. When creating an edible flower garden, place trellises along walkways and at the edges of beds to lead visitors through the garden and to help keep plants upright as they grow. Make sure you define borders against which to plant flowers of varying heights.

They provide support for climbing vines such as morning glory, cucumber, and sweet potato, and vertical growing flowers such as clematis. Trellises also provide structure for flowering vines that may not need support, like the passion vine. You may also trellis-filling vine in one season from seed with morning glory and moon vine.

The passion vine can climb up an arbor or trellis to create a lush canopy of green leaves. Passion flower blooms are attractive to bees, which adds to the benefit of an edible garden. Gloxinias, petunias, and their foliage can also bring beauty to your trellis.

4. Combination of Bogs and Rain Gardens

Brighten that soggy spot in your backyard with a rain garden or bog garden. And when planning a bog garden, consider plants that love both full sun and wet soil. Flowering plants that thrive in bog gardens include candelabra primrose, cardinal flower, and yellow iris and leopard plants.

You can also introduce fun and funky in your wet by including carnivorous pitcher plants. Make sure your garden rain never dries out. A natural bog garden will be replenished by rainfall, but a dry spell hits; ensure you help it out with a hose.

If you see frogs, salamanders and turtles, know that a bog environment is present, so use it to plant some rain garden plants. If you don’t have a natural depression that collects water, create your own by sinking a plastic kiddie into the ground. You can use pond liner to create a bog garden as long as you disguise the edges with rocks and fill the bottom with peat moss and sand.

5. Consider Flower Garden Paths

When you think of your garden, do you see only the flowers that need to be planted? A flower garden is perfect for an area where you can walk through and view the various blooms. If your current yard doesn’t have one existing place, design a path with bricks or stones, so everyone has easy access.

Consider Flower Garden Paths
Image credit: https://www.thespruce.com/

But keep in mind that you’ll need to choose flowers that can handle foot traffic. A flower garden path should comfortably accommodate a wheelbarrow and a cart with room to turn around. Make sure you mulch your plant beds as much as possible to keep them flourishing.

6. Butterfly Flower Garden Ideas

The butterfly garden works especially well near a porch or patio area. Butterflies love water, so add a small pond, and you’ll be treated to the sight of not only butterflies but frogs and lizards as well. However, some beautiful flowers may fall flat when it comes to attracting butterflies.

Butterfly Flower Garden Ideas
Image credit: https://www.loveyourlandscape.org/

Some butterflies are designed to extract nectar from particular flower shapes, meaning that some blooms sound like the dinner bell while others miss the mark. Even though butterflies love bright colors, it’s important to include flowers with rich nectar stores easily accessible in shallow flowers.

Butterflies and other pollinators will stay in your garden throughout summer as long as you include seasonal blooms in your garden. This is because their food sources are usually most plentiful when the weather is hottest, and most plants bloom during springtime or summer.

Butterflies will truly thrive with a combination of butterfly-friendly flowers, annuals, and perennials, which they can land on for rest periods between nectar-feeding sessions.

7. Combining Tulips with Annuals and Perennials

Create a harmonious arrangement with this amazing flower garden idea. Extend your garden blooms with tulips, annuals, and perennials that will come back each year with less maintenance. Make sure you space out your flowers so that tulips stand taller than your shorter, low-growing annuals and perennials.

When winters are cold, your tulips will return for several years but won’t survive when grown in warmer, moist climates. A flower garden bed with a blend of red and yellow tulips will make the whole bed look amazing.

Create that festive effect in a mixed flower bed by planting clear, primary tulips. Daylily, catnap, salvia, and bells of Ireland are some of the great tulip companions, and once you should reconsider when recreating a gorgeous full flower garden bed.

8. Pallet Flower Garden Ideas

Flowers that provide color with the way you want the artwork to appear are a good start for any design. For example, mixed white and yellow flowers will provide interest for your garden whether you want a spring or summer look. The tulips will be particularly appealing in beds where most flowers are filled with one particular shade.

If you have a lot of flowers of the same style, plants with distinctive features will draw attention. Choose something really small tulip for this circumstance. Chives will certainly give you an option to create a variety of patterns by simply including or eliminating plants from your flower bed.

9. Recycled Rubber Tires Flower Garden Ideas

You can never go wrong with turning your old tires into a garden ornament. Rubber tires are tough and long-lasting, making them fantastic materials for your yard or business’s landscape design. This reclaimed rubber tire flower garden idea is a great way to recycle old tires while beautifying the area at the same moment.

Recycled Rubber Tires Flower Garden Ideas
Image credit: https://morningchores.com/

If you have an old bike lying around, make use of its tire as well. If you have some scrap tires lying around, turn them into a flower garden. This will not only make your lawn look good but will also help you avoid worrying about tires taking your space or disposing of them.

10. Potted Flower Garden Ideas

There’s nothing more pleasant than a stunning potted flower garden in the backyard. So take your time and plan it well so you can enjoy it for many years to come. When it comes to convenience, nothing beats flowers planted in clay pots and half buried in a bed of gravel.

Potted Flower Garden Ideas 
Image credit: https://nextluxury.com/

It doesn’t have to be complicated – using a simple pot will also do the trick. You can also bring in some hanging baskets if you have a nice outdoor space for them. To achieve a harmonious and colorful look, choose a different flower for each pot. Round your flower bed with pots.

A circle of purple, white, red, and white striped Bizzy lizzies spread out from the pine ringed by stonecrop, moss, and pots of pink and white Bizzy lizzies. And if you want to enjoy the view from your home or balcony, consider adding some cascading plants, vines, or grasses, which will make it look like an entry from fairy tales. Add in some wooden trellis and little lights too to complete the look.

11. Formal Flower Garden Ideas

Of course, the clean lines and tidy layout of a formal garden will provide a respite from the stresses of modernity. Adding some flowers on top of that grass and well-cut boxwood shrubs will be the finishing touch to the garden’s look. You can stick one or two flower varieties in the formal garden.

Lavender, roses, tulips, hydrangeas, and salvia are a few things that you can use in your formal garden. You can mass the flowers around a central fountain, use them to edge paths, and fill in geometric hedge plantings with blooms.

12. Flowering Cottage Flower Garden Ideas

You can turn your cottage garden into plant beds with the help of perennials, ornamental grasses, and flowering shrubs. Roses, lavender, cosmos flowers, lilies, snapdragons, and hydrangeas are among some of the plants that you might use to make up your cottage flower garden.

Grasses like colorful ornamental rye can be used as a ground cover to fill in spaces between other flowering plants. Perennials like bleeding heart, lupines, black-eyed Susan, and daylilies are among the many types of flowering perennials that you could use for your cottage garden.

FAQs about Beautiful Flower Garden Ideas

How do you lay out a flower bed plant?

Arrange border plants with plants taller than 2 to 3 feet tall, then place them in the back with the mild-size plants from 10 inches to 2 to 3 feet tall in the middle. After that, layout shorter plants in the front of the bed. It’s also best to use groupings and drifts of plants for a natural feel.

How do you plant a flower garden for a beginner?

First, make sure you remove the weeds and amend the soil. If it’s a new bed, put down a layer of landscape fabric to block weeds and top with six inches or more garden soil and topsoil. If your area doesn’t receive much sun, you can consider growing shade-loving flowers as they blossom in such areas.

Final Thought on Beautiful Flower Garden Ideas

Build your corner of paradise by adding different types of flowers in your backyard. You can enjoy your backyard for gardening, spending time with your loved ones, or just relaxing.

The post 12 Gorgeous Flower Garden Ideas To Add To Your Home appeared first on Kitchen Infinity.

Did you miss our previous article…
https://www.thelavkitchen.com/?p=439

10 Best Wallpaper Removers of 2021

10 Best Wallpaper Removers of 2021

Removing wallpaper can be a difficult task, especially when you haven’t done so in the past. But with the right tool, removing old wallpaper becomes easy and fast. If you’re planning to remove old or outdated wallpaper from your walls, then we have got an easy solution for you. With the help of these best wallpaper removers, your home remodeling project will be very simple and fast.

So without wasting any more time, let’s begin with our reviews on Best Wallpaper Steamers in 2021.

1. Wagner Spraytech Multipurpose Wallpaper Remover

Among all the wallpaper removers available in the market, Wagner Spraytech is an ideal choice for you. It’s easy to use and very efficient at removing even wallpapers with glue left on it. It will save you valuable time instead of using other methods like scrapping it out, which can consume a lot of time.


Image credit: https://images.zentail.com/

If you’re looking for an affordable steam cleaner optimized to use as a wallpaper remover, this pick suits you perfectly well. For those tough jobs that call for stronger tools, consider using this wallpaper steamer from Wagner. It’s an efficient and effective wallpaper remover. The steam plate has an easy-grip handle to help you complete long steaming jobs.

With its large tank capable of producing up to 70 minutes of steam, you’ll get enough working time out of this budget-friendly steamer as you steam and soften wallpaper and its adhesive backing. The steam plate also attaches to an 11-foot long hose, stretching to those hard-to-reach areas.

2. WP Chomp World’s Best Wallpaper Stripper

WP chomp citrus solvent is a darling to many people, thanks to its ability to transform the tedious task into a quick spray bottle. This ready-to-use wallpaper stripper is effective on all types of wallpaper, including vinyl, grass, strippable and temporary wallpaper. Its commercial strength formula is designed to penetrate quickly, making wallpaper adhesive and leftover residue easier to remove.

WP Chomp World's Best Wallpaper Stripper
Image credit: https://cdn11.bigcommerce.com/

This strip wallpaper remover has a mild citrus scent that won’t leave a strong chemical smell behind. However, WP chomp recommends using this spray with a wallpaper scoring tool, especially when it is tough to remove water-resistant wallpapers.

3. HomeRight Steam Wallpaper Remover Review

The HomeRight Steam Wallpaper Remover is a steam cleaner that can take wallpaper off your walls. The powerful handheld steamer features touch-free technology, which enables you to remove old wallpaper without touching it with your hands. Whether you want to remove double or triple-layered wallpaper, this steam wallpaper remover is equipped to separate paper glued with the toughest adhesive.

HomeRight Steam Wallpaper Remover Review
Image credit: https://cdn.wallpapersafari.com/

It’s powered by 120 volts of electricity, a 40 ounces water tank, heating element, jet nozzle, and a steam plate. These elements enable it to discharge pressurized steam as the only mode of effective wallpaper removal for fast and effective cleaning.

With different furnished nozzle attachments, this versatile cleaner isn’t only capable of wallpaper removal and works in showers, kitchen stovetops, bathtubs, and grills. This device is also equipped with a pistol-lock mechanism to promote continuous and intermittent steam discharge operation.

4. WP Chomp Wallpaper Scraping Tool

Apart from wallpaper removal, this device is also capable of scraping paint and rust. It’s an effective one-stop solution for various surfaces’ decontamination without the need to use a mop or brush. Vinyl is one of the harder wall coverings to remove due to its thicker construction and two-layer application. This makes it very hard to remove.

Fortunately, you can remove such stubborn wallpaper with WP wallpaper Chomp’s scorer. This wallpaper remover includes dual cutting wheels that are made of tempered steel for added strength and durability. It’s also easy to get into tighter areas, thanks to its compact size, plus the ergonomic design helps reduce fatigue.

5. Zinsser DIF Wallpaper Stripper

This wallpaper stripper from the house of Zinsser is a staple for any DIY enthusiast who wants to remove old wallpaper from their walls. It provides excellent adhesion and durability, giving you an easy time while removing stubborn wallpaper.

Zinsser DIF Wallpaper Stripper
Image credit: https://images.thdstatic.com/

This best solvent from Zinsser is a basic wallpaper stripper that will dissolve adhesive and soften paper, paving the way for a smooth transition to bare walls. You’ll need to dilute it before application with each 22-ounce bottle yielding two gallons of stripping solution.

You’ll also need to put in some work when using this budget-friendly wallpaper remover solvent. You can pair it with the best scoring tool and a scraping tool to supplement your efforts.

6. Bates Choice Scraper

If you’re planning to tackle a range of wall renovation jobs, consider this set of multi purpose scrapers from Bates Choice. This inexpensive dual pack comes with two metal scrapers to remove paint and wallpaper. The tool comes with a compact design, making it easy to work in tight spots like behind the toilet and underneath cabinets.

Bates Choice Scraper
Image credit: http://bateschoice.com/

The scrapers can also scrape windows and remove old adhesive leftover from decals or bumper stickers. Each scraper comes with a thick stainless steel blade and wooden handle. The dual edge blade is sharp and rust-resistant, making it ideal for sliding beneath wallpaper, even in damp and steamy conditions. The comfortable and sharp handle provides a soft grip to tackle long jobs with ease.

This wallpaper remover is made for multi-purpose use with a pointed end and a cut-out design to function as a go-to tool for home renovations. It’s also helpful in spackling drywall and removing crown molding to get walls back to tip-top shape.

7. Zinsser Paper Tiger Free-Floating Wallpaper Remover

With its three scoring heads, paper tiger free-floating wallpaper remover can perforate an entire room of wallpaper with ease. It has self-aligning heads that cover greater surface area than single head tools to finish the job in less time and with less effort. Paper tiger also has an ergonomic handle that can fit in the palm of your hand, making it easy to zip across the wallpaper surface.

While it can be a bit challenging to use paper tiger in corners, it still does a great job of quickly perforating large areas of wallpaper. You apply pressure and glide the wheels across the wall for a trail of tiny holes for effective wallpaper removal.

8. Spraytech 915 on-Demand Steamer

The Wagner 915 on-demand steamer is a handheld device that works as a steamer and a wallpaper remover. It’s called on-demand because it heats up instantly when you pull the trigger, producing steam immediately to remove wallpaper.

Once the trigger is released, the device cools down quickly to save energy and help preserve your wallpaper. With warm air and steam cleaner, this steamer can loosen the adhesive and lift the wallpaper without using any chemicals. This steamer cleaner is an essential household tool that you can easily adapt to remove wallpaper from plaster and drywall.

While it includes various attachments for different household cleaning tasks, you’ll be more interested in the wallpaper steam plate. You’ll then press the plate directly against the walls to loosen the paper. Making a few rounds with the steamer for wallpaper removal will take you some time, but it’s worth waiting for a chemical-free experience.

9. Husk Soft Grip Wallpaper Stripper

Wallpaper removal is a tough task, so householders need to have a powerful tool. This wallpaper stripper from Husk does the job effectively. The most impressive thing about this design is its top-loading boiler tank which ensures constant steam pressure for ease of use.

You can easily remove multiple layers of paper with this steamer within a short time. It features a replaceable blade securely held in a patented blade lock system with added tool-free blade changes.

With a 4-inch soft-grip handle, this wallpaper scraper is comfortable to hold and offers a safe, secure way to use the razor-sharp blade to peel back wallpaper. Its long handle provides additional leverage and proves useful when you’re working on hard-to-reach areas like ceilings and behind a radiator.

10. Roman’s Piranha Liquid Wallpaper Remover

When removing old wallpaper, you have to deal with both the paper and the adhesive. Some processes might help you bring down the paper quickly and leave behind an adhesive glue. In that case, try to use Roman’s Piranha Liquid Wallpaper remover.

This wallpaper remover is capable of dissolving wallpaper adhesives to give you a clean, smooth wall surface. Its spray bottle helps you quickly apply it to the wall without wasting too much of its contents.

FAQs about Best Wallpaper Removers of 2021

Do wallpaper steamers work?

Yes, wallpaper steamers use hot steam to soften the adhesive attaching the wallpaper to the wall. This makes it easy to peel and scrape away the old wallpaper.

What is the easiest way of removing old wallpaper?

This depends on the type of wallpaper you have. So, the ideal way to go about this is to know your wallpaper type; then, you’ll be able to use the tools of removing the old wallpaper.

Final Thought on Best Wallpaper Removers of 2021

Removing an old wallpaper doesn’t have to be an uphill task. Having the right tools and the required technology will help you do the job right and have a fresh new wall.

The post 10 Best Wallpaper Removers of 2021 appeared first on Kitchen Infinity.

13 Best Aqua Paint Colors for Your Home

13 Best Aqua Paint Colors for Your Home

We all know that interior design is a crucial part of home decor, but it can be hard to decide on the right paint colors. There are so many options out there, and you might find yourself overwhelmed with choice. You may also lack inspiration when trying to pick the perfect color for your walls or furniture.

Try out these bright, cheerful, muted, and relaxing aqua paint colors. Aqua paint colors are a hot choice right now and work perfectly in homes with modern, contemporary, or even rustic decor. Aquatic paint colors provide fresh feelings and look incredibly stylish.

This blog post will help you choose from the best aqua paint colors for your home. Each option has its personality and style, which makes it unique in its way. Read on!

1. Sherwin Williams Sea Salt

This shade of aqua is the most popular option right now, with its freshness and brightness. It can be used on walls or furniture to provide a contemporary feel to your interior design. It looks great paired with browns, blacks, greys, and whites.

If you’re looking for the best light aqua paint, Sherwin Williams sea salt is the right choice. With its rich colored accents, the green undertones in this light aqua paint shine through. Sea salt aqua paint color is perfect for any room, including bedroom, living spaces, and kitchens.

2. Benjamin Moore Jamaican Aqua

Jamaican Aqua paint color is one of the most popular aqua colors right now. With rich, bright blue undertones, this green aqua color will brighten up your living space instantly. Jamaican Aqua looks great when paired with white accent pieces and fabrics. This is a truly saturated color.


Image credit: https://st.hzcdn.com/

This shade of greenish aqua is the best choice for painting kitchen cabinets hardware, furniture, and the front door. Jamaican aqua is balanced perfectly between blue and green. Despite being vibrant and striking, Benjamin Moore Jamaican aqua is also relaxing and tranquil. It’s a good choice for bathrooms and cheery laundry. Plus, it’s the perfect blend of green and blue.

3. Sherwin Williams Comfort Gray

Comfort gray paint is one of the best aquamarine colors. This aqua paint color is made up of a gray undertone, making it the perfect shade for any room in your home. This aqua color is not too dark or heavy but also not too bright and vibrant. What makes this shade so unique are its warm gray undertones that make the aqua pop.

4. Behr Marina Isle

If you’re looking for the best dusty aqua paint colors, you’ve just found it. This color is perfect for a bathroom or laundry room to create a relaxing and restorative atmosphere. The best part about this shade is its ability to make the entire room feel more spacious, thanks to its blue-green undertones.

Behr Marina Isle
Image credit: https://www.behr.com/

This aqua paint pairs well with other muted tones such as beige and olive green. It works well in both large and small living rooms. Make sure you pick the bolder green accents to make this aqua hue pop.

5. Sherwin Williams Aquatint

A soft, light blue aqua paint color that makes your home feel clean and calm. This shade is perfect for a powder room, mudrooms, or even an accent wall behind the bed. This sea foam green shade would be beautiful in a guest room or master bedroom where you want to create a relaxing retreat space.

Pair it with white woodwork and a white tile shower for a crisp feeling. Sherwin Williams Aquatint is a versatile blue-based aqua suited for nurseries because of its cheerful nature. Light wood and crisp white trim would be perfect with aquatint for a contemporary bathroom and master bedroom.

6. Glidden Deepest Aqua

If you’re not afraid of trying deep bold colors, glidden deepest aqua is the right choice. This color is an excellent choice for almost every room. This rich, mermaid-inspired aqua is perfect for a playroom and an accent wall. Plus, it can pair well with other bright colors such as coral and pink.

7. Sherwin Williams Waterscape

Sherwin Williams’s waterscape is a soothing gray-aqua that is perfect for any living space. This color would be great in the bedroom or bath, because of its calm and serene nature. Adding watery blue curtains or an aqua rug could enhance this shade to tie the room together.

This refreshing aqua paint color works perfectly well in the home office and a kid’s bedroom. It is a great color for any room you want to add some youthful energy and calming feeling to it at the same time.

8. Benjamin Moore Palladian Blue

Palladian blue is a soft, muted aqua with blue undertones that works beautifully in airy, sunny living spaces and bathrooms. If you’re looking for a perfect blend of gray and blue with a calming effect, Palladian blue is your perfect combination.

Benjamin Moore Palladian Blue
Image credit: https://i.pinimg.com/

Add some little pigment to that small space using these aqua paint colors from Benjamin Moore. This soft aqua can add a little personality without becoming too intense.

9. Sherwin Williams Interesting Aqua

Sherwin Williams Interesting Aqua is bright with a little green in it. It’s like a bright teal and can be the perfect paint color for your kid’s room. It gives an impression of water, which makes it calm and soothing.

With its gray and green undertones, this unique aqua shade is a great choice of color for entryways, kitchen cabinets, and bedrooms. Interesting aqua adds the perfect dose of color without feeling juvenile and outdated.

10. Valspar Beach Blanket

Valspar Beach Blanket has gray and blue undertones, which means it is soothing like water and calming like the ocean. It’s probably not the best choice for your kid’s rooms, although you might want to try it, it can be great in bathrooms since they are usually small spaces that need something light and calm.

If you love green and beach-inspired vibe that much, then this aqua hue is a great choice. It’s a warmer aqua than others, making it a great paint to pair with neutral beiges and yellows.

11. Sherwin Williams Tame Teal

Sherwin Williams Tame Teal is one of the many sophisticated hues that come in this shade family. It has brownish undertones, which means it’s calming and cozy like the ocean at sunset. When paired with lighter tones, painting your bedroom and office space makes your room feel modern and updated.

Sherwin Williams Tame Teal
Image credit: https://i.pinimg.com/

Make a modern, contemporary girls’ room with a feature wall painted in tame teal and decorated with golden circles. This beautiful green, blue aqua paint looks excellent in the front door, kitchen cabinets, and tray ceiling as well.

12. Benjamin Moore Quiet Moments

Quiet moments from Benjamin Moore is an aqua paint color that leans more toward the green side of things with a good bit of gray undertone to it. If you’re looking for aqua paint colors to incorporate in your kitchen and dining room, Benjamin Moore quiet moment is one of those aqua paint colors you should never let go of.

13. Benjamin Moore Caribbean Breeze

Benjamin Moore Caribbean Breeze is a cool aqua hue. It’s a romantic color paired with warm colors like oranges and yellows to create a fun girls’ room painting. This soft aqua is also a wonderful choice for a space that has less than ample natural light. With its inner glow, the Caribbean breeze can light up a room regardless of its size.

FAQs on Ten Best Aqua Paint Colors for Your Home

Is aqua warm or cool?

Aqua is a color that lies somewhere in the middle of the spectrum. It’s best to think of aqua as its category and not associate it with any particular warm or cool family.

Is aqua paint easy to work with?

Yes, aqua paint is easy to work with as long as you know how to pick the right paint for your space. It’s important to realize that just because a trending color doesn’t mean it will work in every room. Aqua requires a cool or neutral backdrop so it can shine as its statement.

Final Thought on Best Aqua Paint Colors for Your Home

As you can see, aqua paint colors are trending big time. And their popularity is well deserved. Aqua paints are lively, calming, and refreshing all at the same time. Plus, they go with just about any color palette you can think of, so there’s no shortage of options when it comes to decorating with aqua hues. So, if you’re struggling to choose paint colors, aqua paint is for you.

The post 13 Best Aqua Paint Colors for Your Home appeared first on Kitchen Infinity.

Did you miss our previous article…
https://www.thelavkitchen.com/?p=429

Types of Flat Roof Material Options

Types of Flat Roof Material Options

Flat roofs are the most economical type of roofing. They offer great protection to your home or commercial building against weather elements while keeping the building’s interior dry and warm. Although flat roofs provide you with a lot of benefits, they also have their disadvantages.

Therefore, knowing what type of flat roofing material you’re going to use when building your own house is very important. This will help you make better decisions about maintenance and replacing an old flat roof system. It will also help you communicate and relate better to potential roofing contractors as you’re looking for the best roofing company for your project.

Here are the most common types of flat roofs:

Build Up Roofs or BUR

Build-up roofs or BUR type of flat roofs consist of a series of layers applied over the substrate. These layers, usually asphalt and felts, are necessary for getting watertight protection from your roofing system. Like other types of roofs, these systems will last you a long time if you do regular maintenance on them and get rid of any moisture build-up.


Image credit: https://www.homeadvisor.com/

Bur flat roofs are often referred to as tar and gravel roofs. They’re made of layers of materials bonded together by asphalt tar and hot tar to a liquid state and then mixed with gravel to ensure the mixture maintains its strength and durability.

This flat roof material option has solved the low-pitch roof problem for ages, a challenge that asphalt shingles could never handle. If you’re also concerned about fire safety in your building, then built-up roofings can meet higher fire ratings.

Pros of Built-Up Roof

Safety Against Fire

Built up roofings are known to be more rugged than other flat roof material options. They provide greater protection against heavy snow loads and high winds. Since they can handle these weather conditions, you don’t need to worry about damages, leaks, or breakage.

Most of all, built-up roofs are very safe against fires because their layers are made of non-combustible materials. They won’t increase the risk of fire or suffocate it completely.

Longevity

Built up roofings last longer because of the thick layers and the waterproofing materials used. This means you will spend less on maintenance and repairs for your roof.

Multiple layers also prevent leaks and tears, thanks to their heavy-duty construction. It won’t turn into a major problem that requires replacement or extensive repairs when a leak arises since you can spot it easily.

Cons of Built-Up Roof

Weight

The main downside to a built-up roof is its weight. It’ll be difficult for you to install one yourself because it will require a lot of time and effort to lift all those layers, particularly if you need to reach high altitudes. The materials used are also heavy, such as the gravel that’s designed to protect against fire.

Modified Bitumen Roofs

Modified bitumen roofing looks similar to built-up roofing, only that they use a single layer of adhesive roofing material, making it feasible for DIY installations.

Modified Bitumen Roofs
Image credit: https://coxroofing.com/

Modified bitumen roofs are only made of two layers and piles. These include a base sheet and a cap sheet. Both base waterproofing layer and a surface layer bonds to a material that resembles regular asphalt shingles.

dvantages of Modified Bitumen Roof

esthetics

You can find a number of modified bitumen roofing designs that mimic the traditional asphalt shingle roofs. This means that you can easily select a variety of materials to match your building exterior, which may have parts covered by asphalt shingles.

Easy to Install

The installation process of modified bitumen roofing is relatively the same as traditional asphalt shingles. This also means you can easily find a contractor for this project.

Insulation and Energy Efficiency

Because of its dark color or black, modified bitumen roofings absorb heat from sunlight. This makes it more energy-efficient than traditional roofing materials such as metal roofs that reflect this heat to the environment.

Cons of Modified Bitumen Roofs

Torch Down Systems

The torch-down systems can be a fire hazard. That’s why it’s not recommendable to install torch-down modified bitumen roofs on occupied buildings.

Durability

Another downside of modified bitumen roofing is that it’s not as durable and resistant to foot traffic and blown debris as other flat roofing materials. They also last about 10 to 20 years before they need to be replaced.

Fragility

These flat roofing materials are very fragile compared to other roof types, which are more resistant to hail and falling branches. When installers try to walk on your roof to put it in, it’s more fragile to break down.

EPDM Rubber Roofing

EPDM rubber roofing is an affordable solution for flat roofs. It’s also designed to last many years without the need for repairs or replacement, but it can get damaged by severe weather conditions like strong winds and hail. EPDM is a very durable synthetic rubber roofing membrane.

Rubber roofs are easy to recognize and are installed in two basic ways: ballasted or weighted down with a smooth river stone and adhered or glued down. The adhered rubber roofs are easy to spot since they’re black and are stretched over an insulation board or fiberboard.

Pros of Rubber Membrane Roofs

Easy Maintenance

Leaks in the rubber membrane roof can be easily repaired at a very cheaper price. Finding these leaks is also easy and straightforward.

Easy Installation

The rubber membrane material comes in a large single-layer roll, making it easy for the roofing contractor to work with. Thanks to its elastic and flexible nature, you also don’t have to use blowtorches to seal the seams together.

Resistance to Elements

The rubber is elastic, meaning it will naturally expand in the summer and contract in the winter. It can also withstand extreme temperatures without wear. Plus, rubber is fire retardant and naturally impact resistant.

It’s Affordable

The average installation price per square foot is around $2.50, making it more affordable than flat roofing systems.

Cons of Rubber Membrane Roofs

Shrinkage

While expandable, the rubber does shrink through time. This may lead to insufficient sealing and leaks, which will cost you additional money for repairs and maintenance. If left untreated, it could also cause damage to your other roofing systems, such as the flashing and insulation. It’s also harder to patch up compared to other materials like TPO or PVC.

Thermoplastic Membranes PVC or TPO

A thermoplastic roofing membrane is a more durable roofing system compared to rubber membrane roofs. It will be white or grey, but it can also come in other colors. There are two types of thermoplastic membrane roofing. These include polyvinyl chloride PVC and thermoplastic olefin TPO.

Thermoplastic Membranes PVC or TPO
Image credit: https://www.chaffeeroofing.com/

PVC roofing is the third most-produced synthetic plastic polymer. It’s also easy to install, thanks to its flexibility. If you’re looking for the sturdiest membrane among the two, then PVC is the right choice. On the other hand, TPO roofing is considered a more eco-friendly variation of the thermoplastic membrane roof. It’s best at UV absorption and flame resistance.

Pros of TPO Roofing

Cost-Effective

Like PVC roofs, TPO roofs come in at a more budget-friendly installed cost of about$3.50 per square foot.

Energy Saving

White coatings can reflect heat and keep the surface temperature lower than that of a dark roof.

Easy Maintenance

You don’t have to pressure wash this roofing material because the single-ply roof membrane’s surface is laminated. It’s very difficult for algae and fungus to grip in.

Lightweight Material

With its single-ply nature, this lightweight material can perform well over low slopes. It weighs an average of half a pound per square foot, making it an excellent choice for older structures that cannot withstand the pressure and load of a built-up roof.

Cons of TPO Roofing

Takes Longer to Install

You will need to order new tools for this product, but don’t worry, it is still a far less expensive material to install than metal roofs.

Spray Polyurethane Foam Roof

A spray foam roof begins with a layer of high-density polyurethane foam sprayed from a wand or sprayer. After that, the contractor will spray a layer of waterproof elastomeric topcoat. This roofing type will often have a grey or white finish.

Spray Polyurethane Foam Roof
Image credit: https://www.americanweatherstar.com/

Pros of Spray Polyurethane Foam Roof

Easy to Install

This type of roof is very easy to install. You can expect to pay about $1.15 per square foot for this type of foam roofing material without topcoats.

Cons of Spray Polyurethane Foam Roof

Expensive Top Coat

The downside to this type of roof is that it is the most expensive to install. Some homeowners have also reported having problems with bubbles after installation.

Metal Flat Roof

This type of roof is a great option if you want a long-lasting solution. The metal roofs come in many different colors and styles so that they can blend in with your home’s exterior design. Metal roofing thrives in dry, warm climates.

Metal Flat Roof
Image credit: https://roof-experts.ca/

The most used material is always aluminum because of its malleability. You can also choose other metals such as tin, copper, steel, and zinc.

FAQs on Different Types of Flat Roof Material Options

What is the best material to use for flat roofs?

This will depend on your budget and style, but PVC roofing is considered the best flat roof material.

What type of roof is a flat roof?

A flat roof is a roof that is almost level with many types of sloped roofs.

Final Thought on Different Types of Flat Roof Material Option

As you can see, there are several types of flat roof material options available. These flat roofing offer a few perks that even commercial building owners can enjoy. Before making any purchase decision, make sure you consult with a reputable flat roofing contractor so you can make the best choice for your house.

The post Types of Flat Roof Material Options appeared first on Kitchen Infinity.

Did you miss our previous article…
https://www.thelavkitchen.com/?p=423

17 Best Christmas Decorations

17 Best Christmas Decorations

Christmas is one of the most wonderful times of the year, but it can also be stressful for many people. It’s a time of year when it’s not always easy to get into the holiday spirit. The stress of getting everything ready for the big day can get in the way, and you might even miss out on some family fun along the way.

Finding the best Christmas decorations doesn’t have to be difficult or expensive. There are loads of great ways that we can help you enjoy your Christmas festivities this year. We’ve put together a list of the best Christmas decorations to ensure your home looks stunningly festive all through December. Read on!

1. Ceramic Christmas Tree Decorations

Finding the best Christmas decorations doesn’t have to be difficult or expensive.   You can opt for a green tree or bring a modern twist on the trend with a rose gold tree. The tree boasts removable and rearrangeable Christmas lights and tree toppers.


Image credit: https://i.pinimg.com/

Inside the ceramic structure, you’ll find a light bulb to provide a Christmassy glow. Kids love this Christmas decoration, and it’s sure to add a soft, warm light to any corner of your house.

2. Kurt Adler Christmas Decoration

The Kurt Adler Christmas decoration provides a bit of glitz and glam without being too over the top. This Christmas tree will become the most festive item in your house, and the perfect tree topper makes all the difference.

This best Christmas decoration won’t break the bank but will provide all the gold glitter needed to shine all season. The intricate die-cut pattern will let the light from your LED lights shine through for an impressive glow that fills the whole room.

3. Inflatable National Lampoon’s Christmas Vacation

This is a great decoration for those of us who work hard all year to enjoy a good time at Christmas. The inflatable presents and the large Griswold family all make this themed decoration one worth having. If you’re looking for interior Christmas decor, then this is the right choice.

4. Plush Christmas Gnome

These plush Christmas gnomes are perfect for kids. With the soft fabrics and cuddly characters, this is an interior decorating set that will make your child happy all season long. The plush isn’t just cozy; it’s also detailed with festive colors and patterns to keep them in a holiday mood from morning until night.

Plush Christmas Gnome
Image credit: https://m.media-amazon.com/

5. Pottery Barn Nottingham Faux Fur Plaid Throw

This is Pottery Barn’s best-selling plaid throw. It’s warm, luxurious, and the design with reindeers will fit in perfectly with your holiday decorating scheme. This faux fur rug can be used during all four seasons of the year to create a cozy atmosphere inside your home.

It’s made of 100 percent polyester, and Oeko-tex certified with faux fur on the other side. It doesn’t have any harmful chemicals and dyes. You can easily clean this festive throw pillow in your washing machine, and the product’s high yarn will retain its color after washing.

6. Advent Calendar

This wooden advent calendar is of notable quality, and it’s also very fun to build. Christmas countdown has never been so exciting before. This product features 24 pieces that you will have to put together to get the final product.

Once you’re done building this ultimate festive decoration, your home will feel like Santa’s workshop with its numerous hanging bells and baubles hanging everywhere. It’s simply not Christmas without an advent calendar counting down the days until Santa’s arrival.

7. Sea Team Christmas Ball Ornament Set

Preserve your holiday memories year after year with this set of 24 round decorations. It features a variety of designs, including reindeer, Santa hats, and snowflakes. Very festive and charming, the Ornament set is a versatile and affordable collection that will make your holiday feel infinitely more special.

Ornaments come in 86 sets, and each ornament set is crafted from eco-friendly shatterproof plastic. The sets come in 10 different colors, and each contains a similar pattern from glitter coated to mirror to design with small snowflakes. They’re great for a completely monochrome tree, and you can also buy a few packs to switch up your color scheme.

If you’re looking for a non-traditional feel, opt for pink or purple instead of the classic, red and green. But if you’re looking to mix up your ornamental bulbs and brighten up your tree, then this is the best Christmas decoration you should consider.

8. West Elm LED Light Bulbs

The best Christmas decoration of the year doesn’t necessarily have to be on top of your tree. If you want something more subtle that can provide some low-level lighting, then West Elm’s LED Light Bulbs is an economical and easy option to do this. They also come in a four-pack, so you can have some on the string or spread out around your house.

West Elm LED Light Bulbs
Image credit: https://christiannkoepke.com/

This Boxwood wreath from West Elm offers the perfect base for ribbons, ornaments, and lights. It’s made from real boxwood leaves and artificially preserved, and it comes in either 16 or 20 inches and should be used indoors to maintain the vibrancy of the green. The charming wreath can add rustic flavor to any home.

If you’re looking for that joyful country feel during the festive season, then place this beautiful Christmas decoration on the brick wall or a window and enjoy the view.

9. Mina Victory Van Holiday Square Throw Pillow

Add a touch of holiday cheer to your home by placing this festive pillow on your couch or chair. Featuring a vintage map design and hand-drawn illustrations of cities, countries, and continents across the globe by New York artist Mina Victory, this throw pillow brings an interesting touch to any space.

It’s a great piece, especially if you’re working on a tight budget. It features a carefully stitched scene of a bright green Christmas tree and cherry red Volkswagen against a cream-colored backdrop. Plus, it’s a hand-hooked throw pillow that will spark joy and holiday cheer in your home.

10. Kunyida Unique Burgundy and Ivory White Knit Christmas Stockings

A set of three handmade knit stockings with burgundy, ivory, and white coloring. This is the perfect addition to your holiday decor this season because it can be used throughout the year to hold odds and ends around the house or even as a delightful accessory for an outfit.

If you’re looking for something stylish to leave for Santa and Christmas Eve, these stockings are the way to go. With the cable pattern and rich colors, these stockings are both affordable and high quality.

11. LTD Commodities Set of 6 Reindeer Tea Light Holders

A set of six reindeer tea light holders. These adorable animal candle holders will be a hit at your next holiday party, and they’ll make any occasion special. Each reindeer is made with care and precision to provide years of quality use. The antlers are removable, so you can easily pull them off for cleaning purposes, although we don’t recommend letting them get too dirty.

These woodland reindeer tea light holders are great for buffet tables, side tables, bookcases, and any place that could use a touch of ambient candlelight. If you’re worried about having an open flame around kids, they can hold any standard tea light, including LED tea lights. Their simplistic design will also fit any aesthetic.

12. Hanging Snowflake Decorations

Try to turn your living space into a winter wonderland with these hanging home decorations. The snowflakes are made of high-grade pearl paper, giving them an enticing shimmer, and are sturdy enough to pack up for next year. You can hang them on a window, entryway, and across the dining room table to create a wintery holiday backdrop.

Hanging Snowflake Decorations
Image credit: https://i5.walmartimages.com/

13. Hashtag Home Snowman Globe with Penguins Inflatable

Add some holiday spirit to your front yard with this inflatable snowman from Hashtag. The large inflatable measures 8 feet tall, making it a great central character for an outdoor holiday scene. The snowman features an unusual but fun snow globe base. At night, switch on the LED light to illuminate the snow globe feature.

14. Outdoor Waterproof Flameless Candles with Timer

These flameless candles feature a realistic flickering flame and come in an elegant jar that can be used to decorate your fireplace for the holidays. With its waterproof exterior, this candle is great for outdoor use as well. Just put it on your covered patio or porch or by the poolside. It also comes with timers so you won’t have to worry about turning it off after the holidays.

These candles are an excellent choice to place on the dining table, credenza, windowsill, and outdoors. For more convenience, they come with a remote control to enable you to light up your Christmas display from across the room.

15. Roman Store Winter Scene Glitterdome

If you’re looking for a high-quality resin that you can use for several years, this is the one for you. With its LED lights, it can last up to 2000 hours without burning out. What’s more, the cardstock it comes on is fade-resistant and waterproof, so you don’t have to worry about inclement weather damaging your Christmas scene.

16. National Tree Company Pre Lit Artificial Mini Christmas Tree

If you’re in a tight space, then a mini Christmas tree can get you in the holiday mood without taking too much of your room. This pre-lit artificial mini Christmas tree from National Tree Company is ideal for bedrooms, dorm rooms, and apartments. This small tree comes ready and features built-in warm LED lighting to add to the holiday charm.

17. Pre Lit Frosted Berry Garland

The best way to add some holiday cheer. This pre-lit Christmas garland is an attractive choice for lining doorways, windowsills, and mantels. This realistic-looking Christmas decor is made from thick faux branches, pine cones, and red berry details to ensure your decor remains sturdy throughout the holiday season. Warm white lights also add a seasonal glow, making it a great addition indoors or outdoors-covered locations.

FAQs on the Best Christmas Decorations

Where should you buy Christmas decorations?

You can buy Christmas decorations from many market sites such as Amazon, Wayfair, and Walmart. Also, during colder months, you can never run short of these Christmas decorations, as many small shops will unveil their inventory once the fall rolls.

Can you make Christmas decorations?

Yes. Homemade Christmas decorations are simply adorable! Many people prefer to go the homemade route to save money and make their designs which is much more than you can ask for.

How long should you keep Christmas decorations up?

This differs just like any other decoration that hangs around your house for many days or weeks. However, it is best to follow your heart. If you do not like having the decorations up, then take them down.

Final Thought on the Best Christmas Decorations

As you can see, there are many best Christmas decorations that can please anyone. It just depends on your taste and your budget. Spice up your festive season with these creative ideas, and have a wonderful time.

The post 17 Best Christmas Decorations appeared first on Kitchen Infinity.

Did you miss our previous article…
https://www.thelavkitchen.com/?p=418

Carpet vs Hardwood Flooring Comparison

Carpet vs Hardwood Flooring Comparison

When it comes to home interior design, there are many options available. However, you’ll need to make the right choice to get the best results.  There are several types of flooring that can be used for your house interior design, but carpeting and hardwood are the most popular ones.

We’ve created this guide on carpeting vs hardwood flooring so that you can learn what factors may affect your decision when choosing between these types of flooring for your home interiors. So, if you’re replacing your floors and wondering how to choose between carpeting vs hardwood flooring, don’t worry. This article is for you.

Sustainability

Carpets

Modern carpets are created by threading closely spaced loops of synthetic fibers through large sheets of backing material. There are also some natural fiber carpets made out of cotton and wool. Most carpets come in synthetic materials, and they’re manufactured in huge rolls where they can be bought in any quantity.


Image credit: https://modernize.com/

Hardwood Floor

Modern hardwood flooring comes in one of two forms. There is solid hardwood flooring, which boasts of solid wood that is milled from rough lumber from felled hardwood trees. The boards are smoothly sanded on the top surface and are left slightly rough at the bottom.

Another hardwood flooring form is known as engineered hardwood flooring. This is the most economical type of modern wood flooring. Engineered wood flooring has the same tongue and groove construction and can be installed the same way as solid hardwood floors.

ppearance

Carpet

Appearance is another big difference between hardwood flooring and carpet. Both hardwood and carpet flooring comes in several styles that can meet any interior design, but carpet offers variety in color, texture, and feel. While there’s a substantial difference between hardwood and carpeted floors, carpets are more available in wood-like, making them more decorative.

The great thing about carpet is that you can choose any color, making it a very versatile flooring choice as you can mix and match colors and shades based on other design choices in your room.

Hardwood

The look of hardwood flooring is easily recognizable, and its main appeal is natural wood tone colors and the appealing pattern of wood’s grain. Hardwood flooring creates a bold statement, and that’s why it’s called the prestige in flooring. When it comes to appearance, your style and the style of your house will determine the best flooring option.

Cleanliness and Care

Hardwood Flooring

Hardwood flooring is easy to care for and maintain with regular cleanups. This flooring type doesn’t require deep cleaning too often. While cleaning hardwood floors, it’s advisable not to use liquid cleaning products as these can warp and damage the natural fibers that make up the floorboards.

Hardwood Flooring
Image credit: https://res.feednews.com/

It’s also easier to spot dirt on hardwood floors than carpet floors, making it easier to notice when your floors need a wipe and a good cleaning. Hardwood floor cleanings include sweeping and vacuuming with a hardwood vac to maintain its appearance and condition. Periodic damp mopping with the wood cleaner will also remove deeper dirt and most stains.

Carpet

Cleaning carpet flooring seems daunting because stains can soak and settle permanently on the surface. To prevent stains, turn your rug over once a week to let the other side be exposed to sunlight and air for a day. Not doing so can create a musty smell forming on dark spots in your carpet, especially if you have pets at home.

Carpet
Image credit: https://2avk1yzaj801re7g11oaur7q-wpengine.netdna-ssl.com/

Wipe spills immediately using a clean cloth with warm water or a commercially available solution. Regular vacuuming can also help get rid of dust, dirt, pollen, and other allergens. If left without vacuuming, these elements can get stuck in the carpet fibers causing unpleasant odors.

Durability and Maintenance

When considering the durability of your hardwood flooring vs carpet, there are different things that you must consider. Don’t only concentrate on the lifespan of the flooring type, but consider the impact of your daily life on it. Factors such as foot traffic, your habits, visitors, and pets will greatly influence the durability of your flooring.

Hardwood Floors

Hardwood is a durable material that can last 50 to 60 years if properly maintained. But they’re also more expensive in most cases. When evaluating cost, consider the initial price of the wood flooring and its installation and maintenance costs over time. Think about how much it costs to refinish hardwood flooring

Hardwood flooring will also last longer if you care for it properly, both by taking good care of it and making sure that you clean up spills quickly. Hardwood floors can also warp when exposed to too much liquid and can dent and scratch from furniture movement and shoe traffic.

Carpet Flooring

Carpet is a more forgiving floor type. As long as you deal with spills immediately and frequent vacuuming, you won’t have to worry about dents and scratches. However, carpeting still does need occasional professional upkeep, such as cleaning and re-stretching. Occasional professional cleaning service can also extend the life of your carpet.

The best flooring type for durability and maintenance is hardwood flooring because it is made to last and does not need any professional upkeep. Even if you do manage to inflict some damage, hardwood flooring can be refinished or patched, unlike carpeting which has to be completely replaced when damage is done.

Cost and Installation of Carpet and Hardwood Flooring

Hardwood

Professionals usually do hardwood flooring installation because of its weight and intricacy. You will need to foot the bill for this aspect of the project, too, as well as for upkeep in general. A DIY installation can save you money and time, but it can cause you some additional cost if not properly installed.

Hardwood
Image credit: https://diy.sndimg.com/

Fortunately, solid hardwood flooring and engineered hardwood flooring products are pre-finished in the factory, but you’ll have to pay more to have them pre-finished. Solid hardwood floor costs start at around $4 per square foot and go up from there. And on average, hardwood floors cost about $8 per square installed.

Carpet

Installation of carpeting can be done yourself or by a professional at your request. Carpet padding is about an inch thick, and if you purchase high-quality padding, it will last the life of your carpet. It will cushion your feet from bumps in the floor and keep the carpet fibers uniform and neat-looking.

Carpet
Image credit: https://www.timberlinehouston.com/

The most convenient flooring for cost and installation is carpet flooring because it can be pulled back to install underlayment for hardwood flooring. It’s also cost-effective compared to hardwood flooring.

For example, perfectly acceptable carpeting may be available for less than $1 per square foot installed. The cost can also run as high as $20 per square foot.On average, most carpets purchased at home centers cost about $3 per square foot, while solid hardwood flooring starts at around $4 to $8 per square foot installed. Also, the cost of professional installation is higher on hardwood floors.

Resale Value

Hardwood

Most homeowners prefer having hard flooring surfaces such as hardwood and ceramic tiles because they’re easy to clean and tend to hide flaws the best. Even estate agents agree that when it comes to carpet or hardwood flooring, hardwood is likely to increase the resale value of your home. Hardwood is a natural material and is much longer-lasting than carpet.

Carpet

Carpeting tends to wear down over time and may show signs such as wrinkles, spots and footprints after a few years of use. All these tend to lower the resale value of the property which you’re trying to sell. Also, new carpet can also lead to home improvement than an old carpet.

They could also be a turn-off for potential homebuyers who’d rather have hardwood that’s clean and in good condition. Therefore, the flooring type with the best resale value is hardwood flooring. Hardwood resale value wins even when you ask real estate agents in the market.

Radiant Flooring

Both carpets and hardwood floors can be installed with radiant heating. And because of the insulating properties, you must be careful when choosing both carpet and radiant heat systems that can work together. In some cases, you may need to set the radiant heat system higher for the carpet to warm sufficiently.

On the other hand, hardwoods work with many radiant heat systems because they transmit heat with little loss. But it’s not recommended to use radiant floor heating under a plank wider than three inches.

Environmental Impact

Carpet

Some natural carpets such as wool have less impact on the environment than synthetic carpeting. Wool and other natural fibers are renewable and biodegradable. Furthermore, most synthetic carpets are made from petroleum which is not renewable and is a non-biodegradable material.

They can break down unevenly, releasing volatile organic compounds as they age. The downside of natural fibers is that they cannot be recycled, and when disposed of in landfills, they will take a very long time to decompose.

Hardwood Flooring

If you’re concerned about the environment and want renewable flooring, then hardwood flooring is your best option. Hardwood is a renewable material, especially if you ensure responsible harvesting and planting of trees.

Homeowners who are looking for more sustainable flooring material can look to hardwood flooring as their best option. Most hardwoods are also recyclable, which means they won’t sit in landfills for decades.

Water and Heat Resistance

Carpet

The synthetic fiber materials used in most modern carpets make them highly resistant to water damage. It’s also important to prevent water from seeping down into carpet padding, which can cause mold and mildew growth. This is especially important with groundwater damage from flooding or leaky roofs.

Additionally, tile carpets can be damaged by heat, such as burning cigarettes and hot pans. Some carpet materials can also emit toxic gases if a serious home fire ignites.

Hardwood Flooring

Wood flooring is not recommended in any location with constant water and moisture. It’s also not recommended for below-grade installation against a concrete slab because contact with concrete can cause swelling. Wood flooring materials also emit formaldehyde gas over time. However, engineered wood flooring may be stable to water and moisture.

Engineered hardwood flooring has a moisture barrier to stop water from seeping into the subfloor before it ever reaches your main joists below. You can also install engineered hardwood flooring directly against concrete slabs that are dry and free of cracks or joints where water could infiltrate.

Comfort and Sound

Carpet

With its soft fibers and insulating pad, carpeting is more comfortable to walk on than hardwood floors. High-pile carpeting is soft and thick underfoot, while lower-pile carpeting feels more like an even surface. Carpet can be made from various materials, including nylon, wool, cotton or synthetic fibers.

The sound absorption of carpet comes from the insulating pad underneath the carpet fibers, but that means the carpet is better at trapping sound inside the house.

Hardwood Flooring

Hardwood floors are loud compared to carpet, especially when installed on the upper levels; the people below will hear footsteps and other sounds from above. The hardwood floors amplify the sound of children running on the upper levels because it’s a harder surface with no insulation capabilities.

Hardwood floors are less comfortable underfoot, but they have a timeless elegance that carpeting can’t match. Also, since hardwood floors are laid in strips, any surface imperfections can be covered up with a strip of wood over the problem area or damp mopped to free the particles.

FAQs on Carpet and Hardwood Flooring Comparison

Which type of flooring is suitable in an active environment?

High-quality carpets can sustain high foot traffic if you keep them level and smooth to avoid irregular wear.

Which one is the warmer flooring type?

Carpeting is warmer than wood flooring, but only when the carpet is not glued directly onto concrete. Wood floors, on the other hand, allow cold air to move through between individual boards.

Final Thoughts on Carpet vs Hardwood Flooring Comparison

As you can see, there’re many factors you need to consider when choosing between carpet and hardwood flooring. The answer on which one is better depends heavily on your particular situation, budget, and taste.

The post Carpet vs Hardwood Flooring Comparison appeared first on Kitchen Infinity.

How To Care And Control Lambs Ear

How To Care And Control Lambs Ear

Lamb’s ear is a very common plant that can be easily found in most nurseries. It grows well in most soil types and prefers partial shade. The problem with the lamb’s ear is its invasive nature. It’s used for covering large areas or filling in the ground between other plants.

This perennial plant spreads quickly, taking over the garden without you even noticing it until it’s too late. If left to grow on its own, this spreading perennial plant will take over your flower beds and lawns, turning them into an unsightly mess of tall weeds that are impossible to get rid of by hand weeding alone.

To prevent the spread of lamb’s ear, you need to be vigilant with your maintenance routine for your garden area. You’ll want to keep up on regular mowing habits so that there is no room for new seeds from previous seasons’ plants. If you have no experience in caring for this plant then this guide is for you.

Tips for Caring and Controlling Lamb’s Ear

Sunlight

First of all, you should understand that these particular plants do best in full sun. As long as it gets full sunlight and not too much water, it will spread quickly. They may also benefit partially in the shaded area when planted in more desert-like zones.


Image caption: https://www.thespruce.com/

It also does well in poor soil as long as there’s well-draining in the soil and a slightly acidic pH balance. Although it’s a drought-tolerant plant, some leaves may dry up and shrivel over extreme heat, but the plant will survive. Just remove dead leaves to avoid any rotting.

Lamb’s ear is a perennial that spreads very quickly, creating masses of leaves in all directions. This plant has tall stalks that will rise about 2 feet tall and form fluffy, rounded leaves. The entire plant is covered with fibrous hairs growing many inches long. These hairs are soft if you touch them.

Watering

Lamb’s ear plant likes well-draining soil and needs water regularly to keep the soil moist. They will drop their leaves if they don’t get enough water, but this doesn’t mean death.

But too much water will lead to root rot. This drought-tolerant plant will lose older leaves during the dry spell, but that doesn’t mean that you should remove the entire plant leaves. Instead, remove the brown and those unsightly leaves. After all, the plant will survive. Do not water the plant’s overhead as the leaves will rot. Only water lamb’s ear when the entire plant is dying.

The leaves will also develop fungal spots or powdery mildew if they get wet. Be careful with the leaves that are close to the ground as they’re susceptible to rotting and leaf diseases. You can use a fungicide to prevent this from happening. It’s also sensitive to humid conditions, so fungicide will be of great help.

Soil

Lamb’s ear Stachys byzantina thrives in well-drained soil and full sun. Therefore, it is recommended that lamb’s ear planting should be done in a bed with sandy soil and full sun exposure. Providing the ideal conditions will encourage the growth of healthy leaves and allow the new plants to reproduce at a rapid rate. You should also ensure you test the soil pH and ensure it’s slightly acidic because that’s what’s perfect for lamb’s ear growth.

Treat this perennial flower with any care that you would give to other herbs. If you want your lamb’s ears to grow well, water them consistently and make sure they get enough sunlight. Improve the drainage before planting by adding organic matter or sand. If your area is prone to winter weather, plant lamb’s ear in a protected area or provides a thick mulch layer to protect from the cold. Grow lamb’s ear in an area with enough sunlight or part shade.

The Leaves

You’ll fall in love with the texture of the leaves of this plant, which are velvety soft and fuzzy to the touch. The leaves also have a woolly texture and are silver-gray to pale green. The name lamb’s ear originates from its shape as it resembles the ear of a lamb.

The Leaves
Image caption: https://hgtvhome.sndimg.com/

It always tends to be evergreen, but it can be deciduous in some colder climates. It can look ragged down during dormant months but will do well during the spring. Avoid exposing this plant to humid conditions as it’s susceptible to leaf diseases.

The Flowers

This plant flowers in the late spring and summer months. The flowers are woolly and tiny with a yellowish cast; they also bloom in clusters. Make sure you cut back the creeping stems that are close to the ground level after they flower to make way for new stems and leaves.

The Flowers
Image caption: https://www.nature-and-garden.com/

The flowers will start as pale green when they are in bud form but turn slightly pink when they are in full bloom.

Propagating Lamb’s Ear

If you want to start a new patch of stachys byzantina, you can dig a new plant created by self-seeding or grow your patches in divisions. Make sure you divide the plant every three to four years in the early spring as the new growth appears. Using a sharp garden shovel, dig the area around the plant until you get enough roots free. Separate the plant into two or three sections and replant it in other areas of the flower bed or lawn.

Give the plant a good pruning close to the crown during the spring to remove dead leaves. Pruning will help the plants to bush out and remain more compact. Add some organic matter to the soil after division to retain moisture and control weed. This plant also grows easily from seed and is self-seeding.

Cold Hardiness

Stachys byzantina is cold hardy in zones four to eight. Growing it in intense heat in the warmer zones can be uphill unless you have afternoon shade in your garden. This plant can withstand a range of temperatures but as a ground cover. Lamb’s ear also comes in several varieties, such as big ears, silver carpets, and cotton boll.

The big ear’s variety is quite popular because of its fuzzy foliage. They’re also good disease resistant as they can go for long without blooming. The silver carpet doesn’t flower quite often, which makes it suitable to use as ground cover.

In cotton bolls, flowers don’t emerge as they should be, leaving most gardeners wondering if it’s alive or dead. Gardeners remove it while thinking it’s dead.

Benefits of Lamb’s Ears Plants

Lamb’s ear is a plant that requires little care and is easy to maintain in the garden. The grey-green hairy leaves and silky white flowers make it appropriate for landscaping in shady areas with poor soil. It has low water requirements, and its lamb’s ears form a boundary between dried-out lawns or walkways and other plants.

Many garden visitors find it attractive. Insects such as butterflies, hummingbirds, hawks, and moths are attracted to the flowers for nectar. However, it’s not popular with rabbits, bees, and squirrels. It’s classified as a herb, hence providing medicinal properties.

FAQs on How to Care and Control Lambs Ear

How do you keep lamb’s ears healthy?

Make sure your plants are in an open sunny spot where they can dry out between watering, and ensure your plant gets at least 6 hours of sun per day. You can also feed your plant with the right manure or fertilizer. Your work will be much easier by learning how to make a composter and coming up with your own manure.

Where can you plant lamb’s ear?

Plant lambs near the base of a tree or near an entryway where people will brush against it and release the fragrance. Make sure it doesn’t get in the way though.

Final Thought on How to Care for and Control Lambs Ear

To get the best of your lamb’s ear, plant it in a sunny location and prune flowers. If you do this you’ll have a fragrant garden border that will bring a touch of light and warmth to your evening strolls.

The post How To Care And Control Lambs Ear appeared first on Kitchen Infinity.

Did you miss our previous article…
https://www.thelavkitchen.com/?p=411

Reasons Why Orchids Won’t Bloom and How to Fix Them

Reasons Why Orchids Won’t Bloom and How to Fix Them

Orchids are beautiful and exotic, but they can also be frustrating if you’re trying to grow them.  One of the most common problems people have with orchid growing is that their plants won’t bloom. It’s very disappointing when your plant doesn’t produce flowers because it’s such a rare event.

If you love orchids, this guide will help you get the most out of your investment in these stunning plants.  Even if it hasn’t flowered for years, there are still things that can be done to encourage blooming. Orchids are one of those flowers that require very specific care, so they don’t wilt and die on you before they even get a chance to bloom. Below are reasons orchids won’t bloom.

Insufficient Light

If you want your orchid to rebloom, try moving it near a brighter location. Orchids need at least 12 hours of bright light so they can survive and grow. You should learn how to care for your orchids indoors so they can grow well and bloom.


Image credit: https://i1.wp.com/

To ensure they get enough sun, there are different places to put them in the house, but the ideal place is by a window to get good sunlight exposure. It will also help if you rotate them once in a while so that all sides get enough light. Move your orchid to a place where it gets a few hours of direct morning and afternoon sun.

This will ensure the plant gets enough energy to make a spike with lots of flower buds. Dendrobium orchids and cymbidium orchids are also orchid varieties that require bright light and not direct sun. Lack of sufficient light is one of the reasons why orchids fail to bloom, so if you plant indoor orchids, you may try to grow light to achieve flowers.

Getting Too Much Light

If you’re trying to grow your orchid in direct sunlight, it may die. However, too much shade can also be a cause of failure orchid bloom. Indirect light or morning sun is best for most orchids, and if the light is bright where you live, go ahead and put your plant in direct sunlight. Avoid excess sunlight for the best-blooming orchids.

If you also place your orchid in full sun, you’ll see severe symptoms such as sunburned leaves, and an overabundance of artificial light can also suppress blooming. In addition to cooler nighttime temperatures, the shortening days of autumn can signal an orchid to form buds.

If you’re keeping an orchid indoors, in a room where the light stays 24 hours a day, then your orchid is missing an important natural cue. If you’re using artificial light, then use a timer to simulate the cycle of natural daylight and darkness.

Overwatering

Overwatering is most often the cause of orchids’ failure to bloom. Just like humans, orchids need oxygen to survive. Excess water displaces oxygen in the potting media, starving roots and suppressing blooms. Most orchids need to dry out between watering, and you should allow them to have wet feet by allowing water to saturate in the root zone.

Overwatering
Image credit: https://imagesvc.meredithcorp.io/

Orchids growing in the right kind of potting mix will rarely suffer from overwatering. Signs of overwatering include roots turning brown, while wrinkled leaves can be a sign of too little water or too much water. Don’t wait to see a pot of muddy mix and a dying orchid; instead, give your orchid adequate care while it’s in bloom and out of orchid bloom.

Varying Temperature

Orchids like to be warm and relatively dry during the day, but they require a drop in temperature at night. Orchid flowers need bud building overnight temperatures (under 10 degrees Celsius). For example, Paphiopedilum orchids need temperatures of 70 to 80 degrees during the day and 50 to 60 degrees at night. Warm temperatures between 20 and 25 degrees Celsius will encourage buds to form on your orchid flower spikes.

Cooler conditions can prevent your plant from forming buds. It is possible to have too much of a good thing if the temperature stays above 25 degrees Celsius during the day and night, as your plant will stop flowering. Try to expose your orchids to nighttime temperatures 10 degrees cooler than daytime temperatures for two weeks at the start of the orchid’s growing season.

Orchids Need Proper Nutrition

If you fertilize your plant too much, the excess nutrients can build up in the potting media and cause your orchid to bloom. You also need to feed your orchid well during its flowering season. Give it a regular fertilizer that has trace elements, which will help promote bud formation. But also be careful because too much fertilizer can stop your plant from blooming.

Of course, orchids are not heavy feeders, but an orchid living in the sterile inorganic potting mix may need a nutrient boost for its best performance. The best fertilizer to use is a urea-free fertilizer that provides nitrogen even in the absence of microorganism activity common in rich garden soils.

Moth orchids, in particular, initiate blooming spikes in response to a month and cool nighttime temperatures. At home, you have two options to encourage blooming. These options include keeping your orchid near a bright window at night in the early fall, keeping air-conditioning low during the day, and turning it up at night.

Roots Need Attention

Most orchid growers find it tricky when it comes to repotting orchids. When your orchid media begins to break down, the orchid roots can suffocate from lack of oxygen. In addition, some orchids will resent having their root zone disturbed, and they’ll refuse to bloom for six months to a year after repotting.

Roots Need Attention
Image credit: https://i2.wp.com/

In order to determine whether your orchid needs to be repotted, evaluate the root system and not foliage. If you see the orchid roots turning brown and the planting material resembling garden soil in its density.

Also, if you see more than two roots creeping over the edge of the pot, it may be time to repot. You can also divide your orchid plant to maintain blooming vigor.

Know Each Season of Your Orchid Variety

Each orchid type has a time of the year when it will naturally bloom. It may not be the same season that the orchid was blooming when purchased since nurseries can force orchids to bloom off-cycle. Many orchids bloom in the fall, winter, and spring.

Knowing the season that your orchid bloom will save you the frustrations of waiting for it to bloom. For example, Phalaenopsis orchid grows new leaves in the summer and early fall and sets a bloom spike in the late fall. Most Phalaenopsis orchids are known for blooming off-season for many reasons, but many will follow this pattern.

After you’ve identified your orchid, make sure you learn about its blooming cycle. Vanda orchids, for example, bloom two to three times a year, with each bloom cycle lasting up to six weeks. On the other hand, popular cattleya and cymbidium orchids only bloom once a year, but they’re very easy to maintain, making them popular choices for novice growers.

Underwatering

Underwatering is one of the most common reasons orchid plants won’t bloom. The best way to avoid this problem is to water your orchid regularly, but don’t over-water it. Water generously during spring and summer season but taper off as fall starts to set in. Stop watering altogether when winter begins because this will help your orchid properly rest.

You can test the moisture of your orchid’s medium by pushing your finger into it. If you feel any moisture, hold off on watering until the surface is dry. Remember not to water again until the top layer is dry because this will cause overwatering and root rot.

To prevent underwatering, mix water with some water-soluble fertilizer at the same strength you’d normally use when feeding your orchid. Water generously, but ensure that excess water drains away from the plant’s roots before drying up.

Cut Spent Flower Spikes for a Stronger lant

After your moth orchid has finished blooming, snip off the flower spike. An orchid needs to rest after flowering to build up its energy, so don’t fertilize your orchid for at least a month after it blooms.

Cut Spent Flower Spikes for a Stronger plant
Image credit: https://images.saymedia-content.com/

After this waiting period, you can feed your orchid with a balanced 20-20-20 fertilizer once every three weeks to keep it happy and healthy. Note that some orchid species and hybrids rebloom on old spikes. You can also contact the American orchid society or contact your seller to get a replacement or refund.

FAQS on Reasons Why Orchids Won’t Bloom and How to Fix Them

How long does it take an orchid to rebloom?

Phalaenopsis orchids take a month or several months to rebloom, while most varieties bloom annually.

Why is the orchid not flowering?

If your orchid is not flowering, improper light exposure, incorrect potting media, and overwatering are the most common reasons.

Why did my Phalaenopsis stop blooming?

Phalaenopsis stopped blooming because of root rot which can be caused by too much water or cold conditions.

Final Thought on Reasons on Why Orchids Won’t Bloom and How to Fix Them

If you perform all these steps religiously, your orchid might begin blooming again in no time and you’ll love your gardening skills. Orchids are blooming plants, and as such, they require a lot of attention. However, by following the basic care tips above, you should have no trouble keeping your orchid blooming.

The post Reasons Why Orchids Won’t Bloom and How to Fix Them appeared first on Kitchen Infinity.

Did you miss our previous article…
https://www.thelavkitchen.com/?p=407