Standard Drywall Sizes and Thicknesses

When doing a drywall repair, it’s important to consider your drywall’s right size and thickness. Drywall comes in different sizes and thicknesses. Also, most manufacturers carry standard sizes, making it easier to get the right drywall.

However, many people consider buying thin drywall to save money on material costs, but that can lead to problems later when you’re trying to install cabinets or hang shelves. Thin cheap drywall won’t hold screws very well. Consider this: a stud is 1-1/2″ thick by itself, so if you want something thicker than that for strength in your wall, you’ll need even more material, which will significantly increase the cost of your project.

The best solution would be to use quality Drywall Sheets with enough thickness, so they don’t bend under pressure from nails or screws. This way, your home improvement project will be completed faster and easier while still being sturdy and durable enough for years of enjoyment.

The following is the listing of all drywall sizes, thicknesses, and weights for common types of drywall. Check it out, so you can determine the best solution for your next drywall repair project.

Drywall Sizes

Determining drywall sizes is an important thing that you need to consider before purchasing. You need to know what sizes are available so you can buy the right piece for your next home improvement project. Drywall comes in various sizes, and it is important to use the correct size when applying it to a surface.

When using drywall for your home improvement projects, you want to make sure that there isn’t an odd size of drywall leftover once the job is finished. If you have a small drywall repair project, there is nothing wrong with using the leftover pieces from a larger job to finish your home improvement projects. Here are different drywall sizes.

Four Feet by Eight Feet Drywall

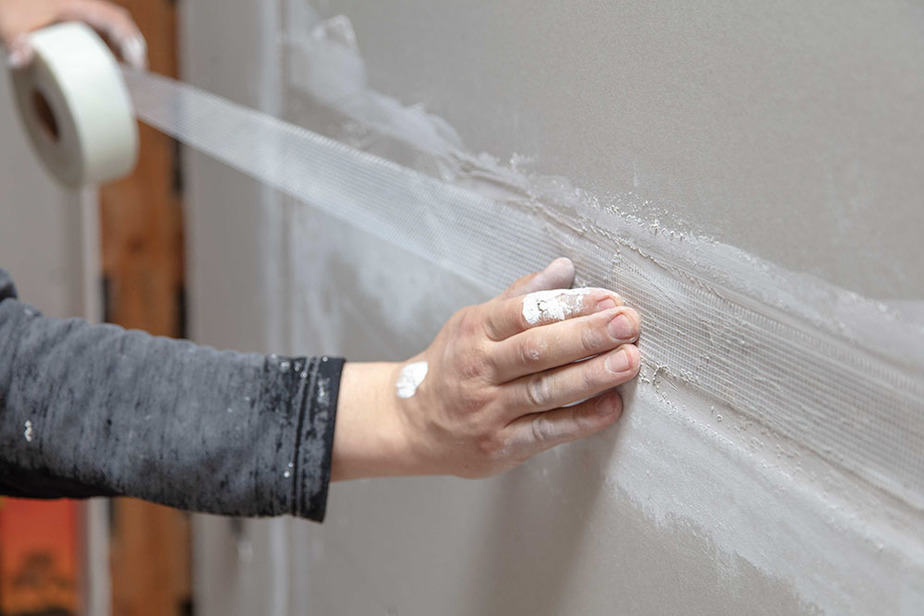
This is the standard size of drywall. It measures four feet wide and eight feet long. It’s commonly used in many residential construction and remodeling projects because of its standard size. This standard size is suitable for DIY projects because you can easily carry and fit the drywall in your place. Consider using it when building your own house

Image caption: https://hw.menardc.com/

It also allows for either vertical or horizontal installation. Four by eight panels come attached, making it easy for one person to carry.

Four Feet by Twelve Drywall

These are larger sheets that you can find in big box hardware and home improvement stores. It measures 4×12 feet and is used for big home renovation projects like basement finishing, garage finishing, and second-story additions.

In addition, they can create a smooth vertical surface to meet higher ceilings, hence creating a smooth surface that is completely streamlined.

However, the four-by twelve drywall panels are only available in either plain or joint compound finish. Plus, it is very heavy and has to be carried by several people at once because of its size.

Two Feet by Two Feet Drywall

This is not stock-size drywall. However, you can find cut-down pieces of drywall at most home centers, especially smaller local hardware stores. These smaller sheets are useful for building small repairs inside the home, such as patching a hole in a wall or ceiling or fitting a new electrical box.

It’s important to use big sheet sizes when determining how much drywall you’ll need for your project. When wall panels come in width and lengths instead of multiple four feet, then they’re not drywall. They’re cement board or drywall alternatives. They’re hard to work with, need more than one person, and are very heavy.

Drywall Thicknesses

It’s crucial to consider the existing drywall thickness because the thicker the drywall, the stronger it is. And this is very important, especially in horizontal applications such as ceilings.

1/4 Inch Thick Drywall

This is the most economical drywall option. It’s the thinnest drywall, so it’s lightweight and easy to handle. You can install it yourself, but stronger tools are required because the weight of the drywall is too light. The best way to solve a drywall repair problem is by laminating a 1/4 drywall over damaged areas.

3/8 Inch Thick Drywall

This is the most popular type of drywall in homes today. It’s easy to install, lightweight, and strong enough to handle many different wall repairs. This is the best option if you’re looking for a solution that will last for many years. It’s used because of its standard thickness.

1/2 Inch Thick Drywall

This is the most durable option, so it’s the best choice if you plan to cover a wall with heavy furniture or you plan to install picture molding on your drywall. This drywall is also strong enough to handle larger repairs, and it’s more difficult for kids and pets to damage. They’re the standard thickness for interior walls and ceilings. It also comes in regular, moisture-resistant, and fire-resistant varieties.

5/8 Inch Thick Drywall

This is the most popular standard drywall thickness for ceilings from most manufacturers. So, it’s perfect if you plan to do concrete ceiling repairs. It’s also ideal for an entire home remodeling project because it is very difficult to damage, and it’s the lightest option available.

It’s made in a fire-resistant form thanks to its extra fiber that help to resist fire. It’s mostly used in commercial buildings and not residential homes. It’s also called firewall drywall, and its thickness also makes it ideal for soundproofing in noisy buildings.

To summarize, thicker drywall has better insulation properties, fire-resistant value, water-resistant values, and soundproofing benefits, and last but not least, they are better in aesthetic terms. Water-resistant is ideal for kitchens, utility rooms, basements, laundry rooms, and other rooms that can be affected by water damage. So, when determining existing drywall thickness, make sure you consider these properties.

Types of Drywall

Drywall also comes in different types, and each type has a different purpose. Here are the different types of drywall available:

Regular Drywall

This is the most common type of drywall that you’ll use in your interior walls and ceilings. It’s very easy to cut as compared to other types of drywall.

Glass Mat Drywall

This type of drywall has a thicker core and is ideal for high moisture areas. It can withstand continuous exposure to water, making it a good choice if you’re looking for drywall that can resist humidity or if your home is near lakes or rivers.

With the prevalence of mold issues, this type of drywall is a variation of moisture-resistant and was developed to get rid of mold growth. It’s not made of paper; instead, it’s made of fiberglass, and mold cannot grow on it because it’s waterproof. Therefore, it’s ideal for installation in bathrooms, basements, and kitchens where mold often occurs.

Cement Board

A cement board isn’t considered drywall because it’s not made of gypsum. Instead, it’s made by combining cement, sand, and two layers of fiberglass mat. It’s the hardest of all types of drywall, and that’s why it’s mostly used in ceramic tile and marble in high moisture areas.
Cement Board
Image caption: https://peppershomeandgarden.com/

Moisture Resistant Drywall

It’s sometimes called a green board. It’s used in areas where there’s high humidity, like bathrooms. But since the green board is more expensive than standard drywall, it’s not used everywhere. The only downside is that it’s a bit pricey.

Fire Code Drywall

Firecode drywall is thicker than the half-inch material. This is because it has a heavier fibrous core, making it resistant to heat and providing fire protection. Cutting it requires special tools.

Fire Code Drywall
Image caption: https://www.thespruce.com/

FAQs on Standard Drywall Sizes and Thicknesses

How thick is modern drywall?

Most modern homes come with 1/2 thickness drywall sheets. This is suitable for wood and steel frames.

What is the best backer board for a shower?

The best backer board for a shower is a cement board because it is waterproof. It also works well on both floors and walls.

How thick is drywall installed on the exterior wall?

It’s best to use 5/8″ or thicker for exterior walls, as this works best with insulation and allows air to circulate the outside of the framing. However, it must be properly sheathed, so moisture doesn’t seep through from the outside.

Final Thought on Standard Drywall Sizes and Thicknesses

Now that you know different sizes, thicknesses, and types of drywall, you will get more informed on the drywall process. There are many jobs that require different types of drywall, so you should know the differences between them when people ask you.


The post Standard Drywall Sizes and Thicknesses appeared first on Kitchen Infinity.

Did you miss our previous article…
https://www.thelavkitchen.com/?p=143
How To Grow Sweet Potato Plants In Pots

Many people are now becoming aware of the benefits of growing vegetables in containers and pots. Growing sweet potatoes and other vegetables in pots is one way to save money on your grocery bill. But it can be difficult to know where to start. A guide for growing sweet potatoes in pots would be extremely useful, especially during winter when fresh vegetables are scarce. 

This article will teach you everything you need to know about growing sweet potatoes in pots, from choosing a pot and soil type to planting and maintenance tips. We’ll even show you how easy it is with our step-by-step tutorial. Read on if you want to learn all about this fun gardening project that’s perfect for beginners.

What You’ll Need

Sweet potato tubersPotting soil or compostWaterSlow-release fertilizerThin nailToothpicksShallow dish

Steps

Select the Right Spot

Pick a location that gets full sun and has good drainage. Sweet potatoes are ideal for growing in hot weather because they love heat and don’t like cold weather. They need more heat than regular potatoes to grow, so if you live in a colder area, you may want to consider growing something else instead. So, after the frost has gone, choose a spot for your pot of sweet potatoes. Sweet potatoes love warm days and nights, so make sure you place your pot where it can get plenty of sunlight throughout the day and night.

Create Drainage Holes

When potting soil or compost, create small drainage holes to ensure good drainage. You can do this by poking several holes in the bottom of your container with a thin nail before filling it with soil mix. Otherwise, you can fill the container with gravel or rocks to help drainage.

Prepare the Tubers

Look for firm sweet potatoes without any cuts or bruises. Wash the potatoes off and let them dry out for a day or two before you start planting. After that, cut the tubers into pieces slightly smaller than the opening on your pot using a sharp knife.

Locate the middle of each tuber and insert three or four toothpicks to form a square shape. Make sure you insert the toothpicks at a slight angle, so they stand up and don’t touch the tuber’s center. This will allow you to attach the vines later on. Once that is done, soak your sweet potatoes in water for 24 hours until you plant them.

Fill the Pot with Soil

The next step in growing sweet potatoes is to fill your pot with moist soil. Loosen the soil with a trowel so that it’s nice and loose. Potted sweet potatoes thrive well in well-drained, sandy soil added with compost. You can learn how to make a compost bin and use your own manure for planting sweet potatoes. Remember that the pot is your slip nursery because it acts as an intermediate step between your grocery store and your garden plot.

You can also use a fertilizer high in potash, then place about four inches of soil in your pot. After that, place potato slips on top and add more inches of soil to cover them. It’s important that you use a fertilizer with low nitrogen because too much nitrogen will only encourage leaves, not roots. The soil should remain moist but not drenched for a couple weeks before transplanting them in your backyard.

Position the Tubers in Water

Place each tuber to allow toothpicks to rest on the edge of the planter. The end of the tuber should face down. Fill your pot with enough water to cover the bottom half of the tuber. Then, place your pot in a sunny area and change the water every day to avoid getting too dirty.

Make sure the bottom of the tuber is submerged in water at all times. It will take a few weeks or even months to see green growth sprouting from the tuber. Once that happens, you’re ready to plant your sweet potatoes in the ground. The rooted sprouts from the tuber are called slips. These slips will be what you’ll use to create new sweet potatoes.

Separate the Slips

Once you’ve seen your sweet potato tuber sprouting, you’ll want to separate the slips from the mother plant. You can use a sharp knife or simply your hands to do this. Removing the smaller shoots from the main tuber will allow you to have more sweet potatoes later on.

Also, there might be a rudimentary root structure attached to the slip that you shouldn’t disturb. Lay each slip in a shallow dish with the bottom half of the tuber in the dish. Keep it in a warm, bright spot away from direct sunlight, but not so hot that it wilts.

Once the new roots are about one inch long, you can move the slips to the potting soil. Remove any wilted slip and the one without roots since they won’t be viable.

Plant the Slips in Containers

If you’re planning to grow your sweet potato vines as decorative plants, then look for a pot about 4 to 8 inches deep and with good drainage. It can be a terracotta pot, plastic planter, or even a decorative ceramic pot. Once the slip has grown roots one inch long, you can transfer it into a container with rich organic matter, so they have a nice growing medium.


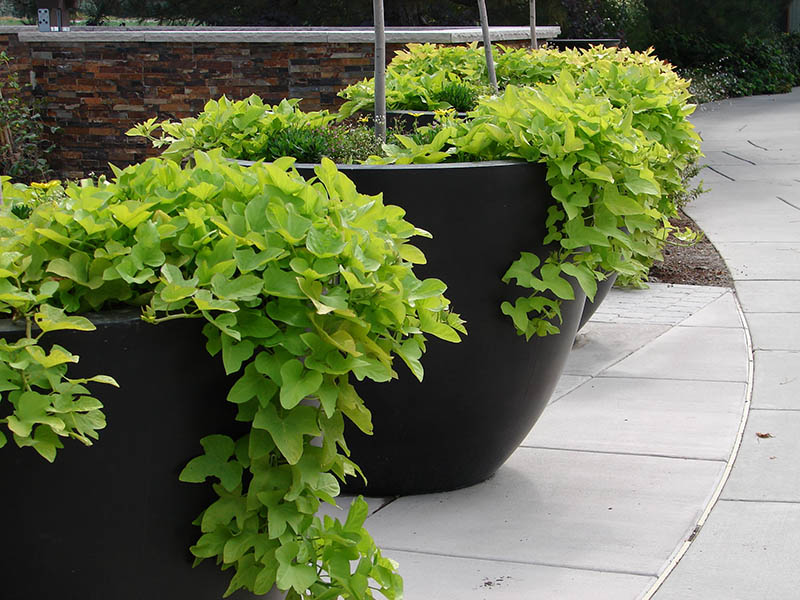
Image caption: https://i.pinimg.com/originals

You can also transfer your sweet potatoes to a large container and mix them with other plants if you wish. But if you’re growing edible sweet potatoes, then you’ll need to transfer the slips to a larger container. You can still plant your edible sweet potatoes in containers if you don’t have large enough garden space for them, but they won’t produce fruits in just one growing season.

Fill your container with high-quality potting soil until the soil reaches one inch below the rim. Don’t firmly compress the soil because tubers need to breathe to grow larger. If your potting soil doesn’t contain fertilizer, mix one tablespoon of 5-10-10 fertilizer with an equal amount of potting soil. Once your soil is mixed, place the seeds on top of the soil and cover them with a thin layer of dry dirt or sand.

Spread the sweet potato slips across the container, but don’t plant them too close together. Leave enough space to ensure that each slip has enough room to grow into a full plant.

Water your containers every other day to keep the soil moist but not drenched. Once your seeds sprout, increase watering frequency daily so that your slips don’t dry out. Don’t forget to water the soil below where you planted your sweet potato slips because these underground vines are very susceptible to dry soil.

You will notice that some of your sweet potato slips have roots growing from the stems, while others don’t. Discard any plants that grow without roots since they won’t yield any potatoes. The only plant slips with roots coming out of them. Test the moisture levels by sticking your hand into the soil. If it’s dry an inch down, it’s time to water again.

Move Your Plants Outdoors

Sweet potatoes do well in warm weather, so make sure you keep them in an area with partial shade. The soil should be damp but not soggy, so you’ll have to check the moisture levels every day.  If you’re growing your sweet potato vines indoors on a balcony, make sure your pots don’t tip over too easily by placing them inside something like a big plastic container that won’t tip over when you water.

Move Your Plants Outdoors
https://www.trees.com/

Start Harvesting Your Sweet Potatoes

Harvest sweet potatoes when the vine dies; that’s when the harvest is ready. Cut up your vines into sections about an inch in diameter, and then let them dry for at least a few days. After they’ve had time to air-dry, make sure there’s no dew on them and cut them up into sections about 2-3 inches thick, so you’ve got something to hold on to while digging. 

Start Harvesting Your Sweet Potatoes
Image caption: https://www.gardeningknowhow.com/

Also, harvest sweet potatoes only after four months. In most cases, sweet potatoes should be harvested before the first fall for their edibility. Harvesting sweet potatoes is much easier than harvesting regular potatoes because sweet potato tubers are more closely to the stem.

FAQS on How to Grow Sweet Potatoes in Pots

How many sweet potatoes can you get from one plant?

You can get three to five slips from one sweet potato.

What is the best month for planting sweet potatoes?

It is best to plant in the fall, although you can plant any time after the vines have died.

What should I do if my sweet potato slips are yellowing?

If they’re looking a little sickly, give them a quick spray with water and perk up. If your slip still looks like it’s struggling, cut off the yellow leaves.

Final Thought on How to Grow Sweet Potatoes in Pot

There you have it! Growing sweet potato plants in pots is a fun and easy way to get your veggies to fix out on the patio all summer long. As you can see, you only need sweet potato tubers, some good soil, water, and a pot, then wait for the next growing season to grow your own sweet potatoes.


The post How To Grow Sweet Potato Plants In Pots appeared first on Kitchen Infinity.

Did you miss our previous article…
https://www.thelavkitchen.com/?p=139

How to Maximize Your Space in a Studio Apartment

When it comes to studio apartments, there are some challenges that come with the territory. One of those challenges is finding ways to maximize your space and keep things as organized as possible without sacrificing too much comfort.

Fortunately, we’ve put together some tips for making life easier when it comes to studio apartment living so that you can enjoy all the benefits of having such a small home while also keeping everything looking neat and tidy.  Here are some tips for maximizing your small apartment to give it a more spacious look and feel:

Define Each Functional Area

One of the biggest obstacles in a studio apartment is how to define each functional area.  This includes areas such as the living room, bedroom, kitchenette, and bathroom. When defining these areas, it can be helpful to use visual barriers to enclose certain areas while also giving them their own space.

Consider Double-Duty Furniture

Maximizing your studio apartment with furniture that plays the role of double duty can save you a lot of space. For example, a dining table combo, a chest that serves as both a coffee table and storage, or even a bookshelf can play the role of double duty depending on what your specific needs are. If you choose wisely, these pieces add function to your space and add extra storage solutions that you can use.

This strategy makes the most out of every square inch of your living space, allowing you to save money. With this, you can stay within your budget without compromising on either function or style. The double-duty furniture also leaves you with plenty of surface space that you can use for your decor, allowing you to create a more inviting look. But this can only work well for you if you also know how to arrange furniture in your house

dd Built-In Structural Furniture

Create more space and efficiency in your small apartment by maximizing the structural part of your furniture. Built-in furniture offers more storage space and frees up floor space that you can use for other things.

Built-in storage works best in large open areas where extra space is needed, such as an entryway or a living room area. You can maximize wall space by adding structural furniture. With the floating shelves and structural furniture, you’ll have more space to roam without worrying about the clutter taking up your counter space and floor space.

Utilize Your Entryway  

You need to focus on your entryway since this can take up a lot of room. Display furniture that serves multiple purposes, such as open shelving and bench. You’ll be able to store shoes, coats, jackets, and other accessories in an orderly fashion.


Image caption: https://www.lifestorage.com/

For the bench, you can build one that’s long enough to act as an extra table. It can be used to sit while putting on your shoes, take off your jacket, or hang up coats and jackets. Double up your side table as a bookshelf.

Make Your Room Feel Taller

Bring high curtains to your room to give it a sense of grandeur. Even if your square footage is on the smaller side, making your room feel taller will enhance the space’s visual appeal.

Opt for a bright white bed that doesn’t take up too much of your floor. You can get away with a twin or full-sized bed, which you won’t need if you sleep alone. A smaller room is well-suited to store boxes underneath your bed for additional storage.

Keep Your Room Clean and Organized

Clean lines, smooth surfaces, and space between your items give your apartment a more airy, open vibe. Learn how to declutter your room, especially in your kitchen area, because it feels cramped when dirty dishes and pans are left in your sink. Choose furniture with clean, smooth lines to avoid adding to the clutter in your room.

Ensure there’s enough space between your pieces to allow for airflow so you won’t get stuffy while spending time inside. Opt for semi-open furniture to bring in natural light. Avoid dense, bulky furniture that can block natural light and movement. Bookshelf, nightstand, and other partially open objects can create expansiveness in your studio apartment by leaving room for white space. 

Also, opt for transparent, clear furniture. This won’t only make your room feel larger, but it’s also a fun and trendy way that will bring versatility to your favorite color scheme.

Create Visual Height

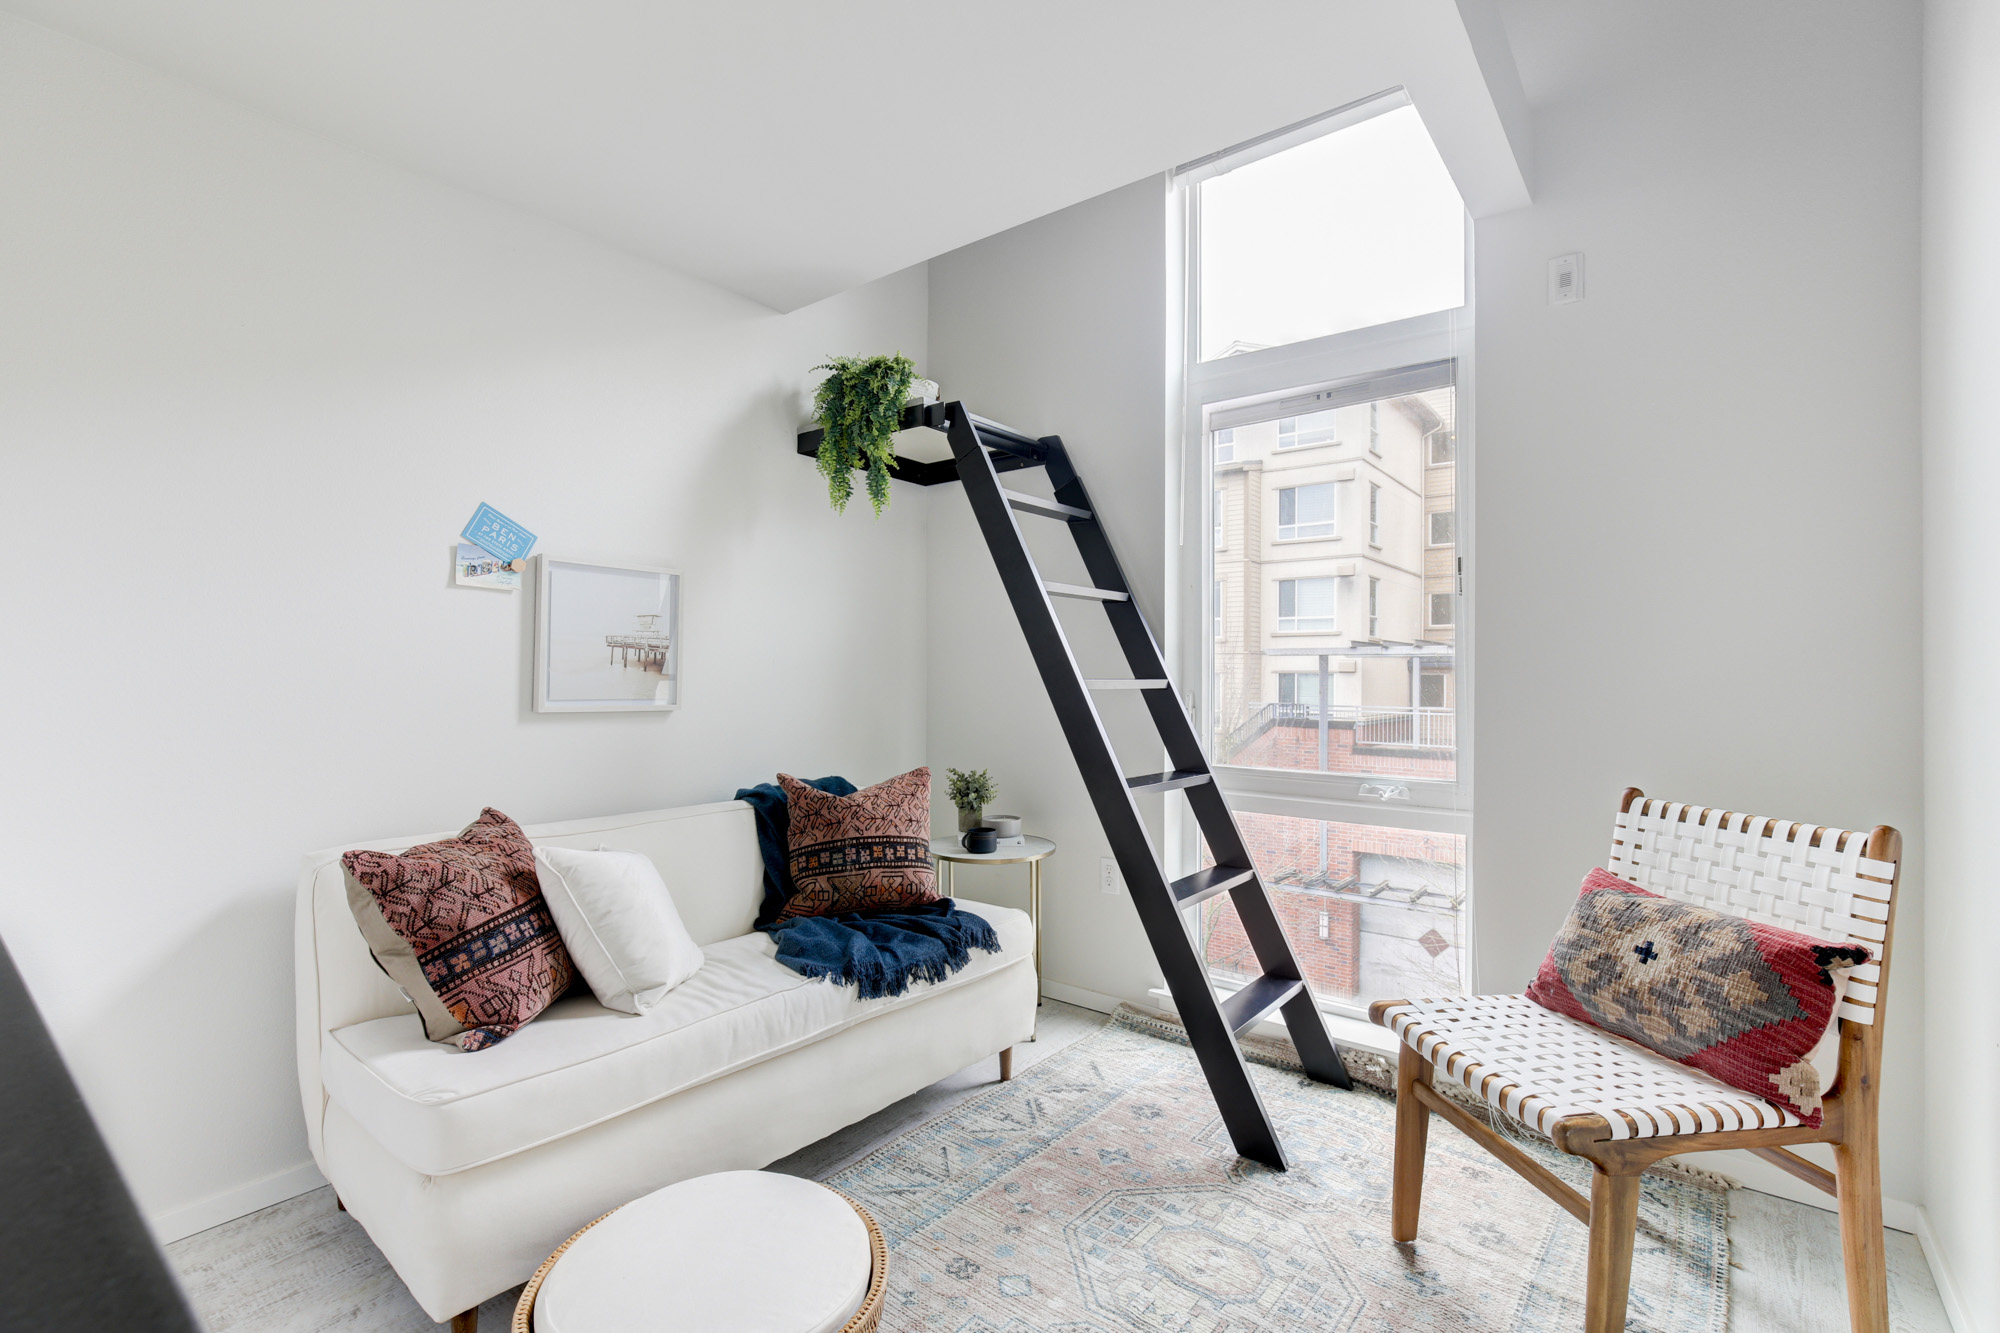
Studio apartments with low ceilings can still create a sense of height by using tall pieces of furniture. In an apartment rather than a loft, you can maximize the vertical space with chairs or couches that have legs. If this isn’t possible, opt for chairs or sofas with high backs and legs to create a more expansive look.

Create Visual Height
Image caption: https://blog.common.com/

You can also hang your curtain high above a short window to create a feeling of height. You can also draw attention upward by adding hanging home decor on the walls and ceilings. If you can’t fit a bed in your apartment, raise it. By doing so, you can have a space for a small coffee table, while thin shelves can create extra surface space for storage without extending into your room.

Go for a Smaller Bed Size

If you can’t fit a twin, queen-sized bed, or king bed into your studio apartment, consider going for the next best thing — a full. A full-size mattress is smaller than both the twin and queen-sized bed, but by making this simple change, it’ll take up less space in your room without compromising on comfort.

Pair your full mattress with furniture like a small nightstand, a dresser, or an armoire to maximize your bedroom’s storage space. This will help you save space in your small bedroom and make the room feel bigger.

If you have more than one person living in the apartment, buying bunk beds for children is another way to save up some space. If you are not using this option just yet, consider throwing a bed skirt over the top bunk, so it doesn’t look like you have a bed on top of your bed.

Consider Your Closet Space

Your closet space has the full potential to reinvent your small bedroom. Homeowners have managed to create walk-in closets by adding a second closet door, so this will give you some room to breathe. If the front of your closet is not being utilized well enough, think about getting mirrored sliding doors which will reflect light and make the room feel bigger.

Move your worn-out and wrinkle-free clothes to storage containers under your bed to reinvent your closet. Add a small desk inside your closet with a few shelves. If you use a corner of your room for a desk, consider repurposing the door to make room for a wardrobe or dresser instead.

Maximize Your Light

Natural light makes a small studio apartment look bigger. So, change your blinds for curtains to give yourself some extra room. Instead of hanging them from the ceiling, hold up a large piece of fabric on your window with clothespins.

If you have no natural light in your studio apartment, consider using lamps or wall sconces for lighting instead of overhead lights. They will make the room feel warmer and bigger. Brighten up your small space by adding lighting in the dark corners of your apartment.

Maximize Space with Large Mirrors

Putting up mirrors in your small studio apartment will make it look bigger by tricking the eye into believing the room goes on. You can put one behind your bed to expand the space or hang them on different walls of your home. Hang large pieces of fabric over each mirror for an added effect. Placing your mirrors in areas with no windows will also create the illusion of a larger space.

Maximize Space with Large Mirrors
Image caption: https://i.pinimg.com/

Reflective surfaces also create the illusion of a taller and wider room. Whether you’re looking to expand or open a cramped studio apartment, mirrors will do just that. 

Consider the Hanger Light Together with Sofa Bed

The hanger light is a kind of lighting that hangs from the ceiling. You can find these lights in most hardware or homecare stores. They are good for small rooms because they will not take up floor space, and you can suspend them anywhere you need an extra glow.

After installing the hanger light, bring in the sofa bed so that you have that extra space for your coffee table and TV stand. With a hanger light together with a sofa bed, you’ll get most of your space without feeling cramped.

Invest in Day Bed

If your studio lacks the square footage for a bed and a sofa, consider designing your bed as a day bed. Day beds are smaller than standard twin-sized mattresses, and they don’t have to be a permanent fixture in the room. You can keep them under your sofa during the daytime and then bring them out at night when you’re going to sleep.

A day bed can help you save floor space for a dining table for your meals and a working table for your office space at home. Finally, make your bedroom stand out in your studio apartment by creating the appearance of separate rooms by adding levels.

FAQs on How to Maximize Your Space in a Studio Apartment

Where do you place a TV in a studio apartment?

You can use the TV as a room divider or hang it on the wall for a cleaner, more modern look. Just be sure to measure your space. TV stands are good options if you need room for DVDs or other entertainment appliances.

Where do you put bookshelves in a studio apartment?

Beside the bed is one of the best places to put a bookcase in the studio apartment because it’s the most spacious area and will give you easy access to your books. If there isn’t space, put them beside the TV for more decorative purposes.

Final Thought on How to Maximize Your Space in a Studio Apartment

As you can see, maximizing space in your studio apartment is possible. It just takes a little creativity and patience. So, embrace your small living area as an opportunity to develop a new lifestyle with a fresh perspective on life.


The post How to Maximize Your Space in a Studio Apartment appeared first on Kitchen Infinity.

Did you miss our previous article…
https://www.thelavkitchen.com/?p=135

Best Rocking Chairs

A rocking chair is not just a piece of furniture with four legs and a backrest; it can soothe your baby to sleep anytime, anywhere. When the kids were busy with their activities during the daytime, tired mothers used to rock them in a rocking chair before putting them to sleep at night.

It is one of the essential pieces of furniture that every home should have, especially when they are expecting babies or toddlers. You will never regret buying this product because it has been tested by many users already, and they all agree that it works. Here are some of the favorite rocking chair options available:

1. Soto Rocking Chair

If you’re looking for the best rocking chair, you have to start with the Soto Rocking Chair. This is one of the best value rocking chairs you can find, so it’s great for people on a tight budget yet still want nothing but the best quality. Soto Rocking Chair has a curvaceous design that will add elegance to your home.


Image credit: https://cgmood.com/

The rocker is made of wood, and it comes with a firm, comfortable cushion free of charge. It also has a strong and sturdy rope that easily lets you move around your seat smoothly. You can use the rocker indoors or outdoors, which makes it one of the best rocking chairs out there, too.

2. Babyletto Kiwi Power Recliner and Swivel Glider

This type of rocking chair offers both the traditional rocking motion and swivel mechanism. Its control panel is hidden in the armrest to maintain a streamlined look. The swivel allows for 270-degrees rotation while the gliding motion moves the chair forward and back. 

The control panel also comes with an in-built USB port for added convenience. It’s a linen and polyester blend and is a free chemical retardant. A lumbar cushion also adds to its comfort. This is among the best nursery gliders and rocking chairs available.

3. CB2 Saic Quantam Rocking Chair

This was a creation by a student from the School of Art Institute of Chicago. It’s an elegant, eye-catching rocking chair that was designed to deliver peak comfort. Its frame is made from larch plywood, while the rocking base is made from catalpa wood. 

The form seat is made from a fabric and wool blend. It’s available in different colors and textures making it perfect for you if you’re looking for ways to decorate your room. You’ll find that this rocking chair is incredibly comfortable and cozy while still offering a stunning design.

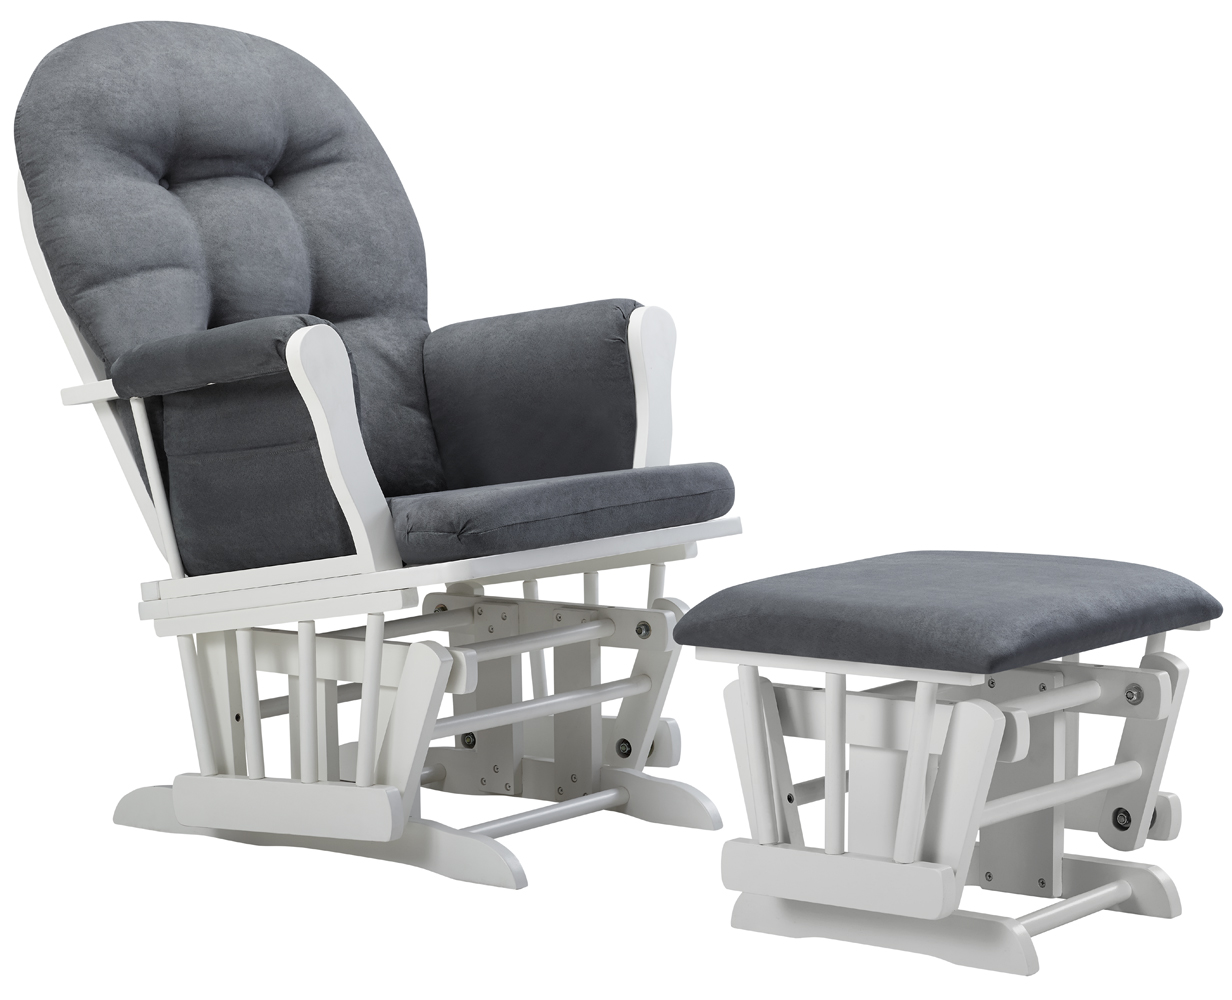
4. Angel Line Windsor Glider and Ottoman

If you’re looking to soothe your baby to go to sleep, then a Window glider together with a spacious Ottoman is the best choice. If you’re also looking for comfort and generous padding that extends from the seat to the arms, don’t let go of the gliding ottoman. It lulls babies to sleep with its smooth rocking motion while the ottoman gives mothers a place to rest their feet.

Angel Line Windsor Glider and Ottoman
Image credit: https://i5.walmartimages.com/

5. Storkcraft Chevron Hoop Glider and Ottoman

This chair has a smooth gliding and rocking motion plus a matching ottoman that features a pull-out nursing stool. You can choose a range of modern upholstery options that’ll fit right with your baby’s bedroom decor. It’s one of the best nursing chairs out there.

6. Monte Luca Glider with Walnut Frame

This is one of the best nursery glider chairs available. It’s super-comfortable, thanks to its ergonomic arm height, high back, and built-in headrest. This chair offers serious comfort and support and has removable seat cushions that are machine washable. It’s certainly not cheap, but the smart design and exceptionally smooth gliding motion make it totally worth it.

7. Mack and Milo Aisley Reclining Glider

This is a multifunction glider with a rotating swivel function, a smooth gliding motion, and a reclining mechanism. It offers a soft spring core interior for a cushioned surface. The square silhouette suits both modern and traditional spaces. When using the reclining feature, it automatically locks for safety. Its sturdy frame has a maximum weight capacity of 250 pounds.

8. Baby Relax Mikayla Swivel Gliding Recliner

This is the best glider out there. As you know, a glider chair glides back and forth on its track. Baby relax Mikayla does more than gliding. This rocker swivels reclines and comes with leg rest. It’s a comfortable chair for everyone, especially the taller people who will appreciate this design that accommodates their height.

9. Upholstered Rocker with Ottoman in Cream

If you’re looking for a chair high enough for you and your partner to lean your head back on, this one’s for you. A pair of these chairs in front of a fireplace or with its conversation pit is just what you need to relax and enjoy your life with the people you love most. 

This upholstered chair features a smooth 360 swivel and comes with a bonus lumbar pillow. It is comfortable and neutral enough to find space in your home even after your kids have grown up. It’s also Greenguard Certified and comes with an Ottoman matching to enable you to rest your feet.

10. Cinthia Rocking Chair

If you have limited space at home, this rocker is the best option for you. Its compact shape will easily fit into any environment, especially in bedrooms or nurseries. Cinthia has a sturdy wooden frame and durable polyester fabric that will last for years to come. Its clean lines make it suitable for eclectic or modern style decorating schemes.

Cinthia Rocking Chair
Image credit: https://secure.img1-fg.wfcdn.com/

11. Braiden Studio Saulsberry Fabric Rocking Chair

If you’re looking for a budget-friendly rocking chair, then here you go!  You can find cheap rockers, but be careful not to fall for the lower-priced ones because they won’t interest you. Saulsberry rocker offers a modern style at a cheaper price. 

If you want a rocker with less outdoorsy and slightly more sophisticated, then this is the right choice. It’s made from birch wood and uses polyester for the cushions and fabric armrests. It’s a greater choice for people on the shorter side but not comfortable with taller people.

12. Arcadia Grey Wood Outdoor Rocking Chair

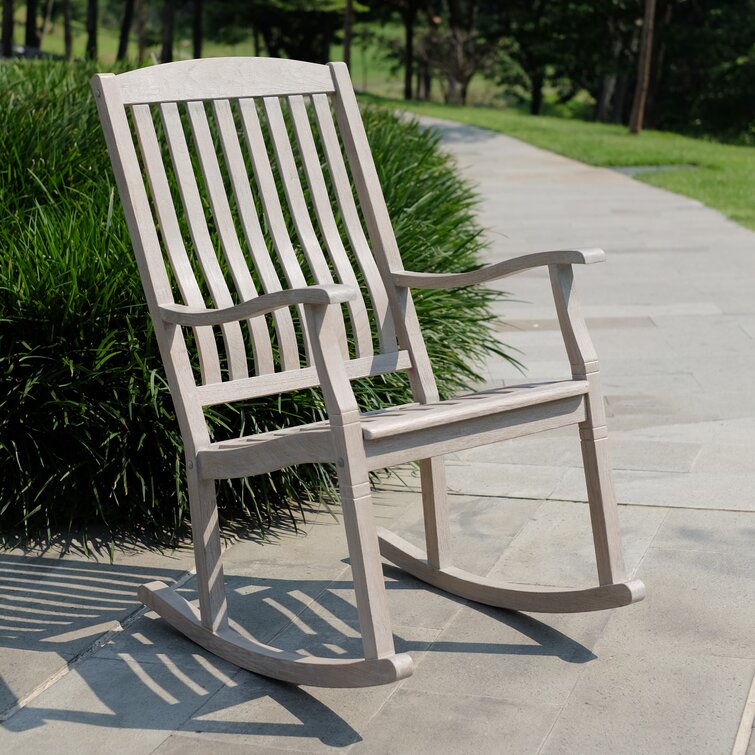
Bring your relaxation outside to your deck and porch with this relaxation rocking chair. It is made from acacia which is not only durable but also sustainable. This piece has a classic, elegant design and is available in different finishes. It’s not complete; therefore, you’ll have to assemble it to put it together.

13. Yashiya Retro Rocking Chair

Don’t be afraid to use this chair if you have an aching back. It has a modern design that harkens back to the original design. Its plush fabric provides updated comfort that looks great in your home. With its solid wooden base, it delivers a steady rocking motion that can make you fall asleep within a short time. It’s also a great place where you can relax while watching your favorite movie.

14. Loon Peak Greenwood Rocking Chair

This is the best bet for those who are seeking the antique and cottage look with modern craftsmanship. It’s made from rubberwood, a medium-density tropical hardwood. The chair also features a rich brown color with an oak finish. Its traditional arched legs allow for a gentle rocking motion.  This chair can rock adults and their infants indoors and on a covered porch.

15. Gracie Oaks Rajesh Rocking Chair

This wooden rocking chair is made with mahogany and has a weather-resistant finish. Therefore, you can use it outdoors despite being elegant and comfortable indoors. This comfortable rocking chair is also available in several colors.

16. Delta Children Blair Nursery Rocker Chair

Kids’ furniture has improved, and that’s something that many adults should acknowledge. For example, delta children have fashioned a comfortable and trendy glider chair with amazing features. Such features include 360 degrees swivel, padded arms, and non-toxic material easy to clean with mild soap and water. It’s one of the best pieces of furniture you can add to your home.

17. Pottery Barn Kids Minna Small Spaces Rocker and Ottoman

One of the best rocker chairs comes from a company called Pottery Barn Kids. This chair has all the features to make it one of the top rocking chairs for kids and adults, especially if you have a small home or room. Its excellent features include wood legs, satin walnut veneer, a wide seat base, and a comfortable cushioned seat and fabric easy to clean with a damp cloth and mild soap.

This chair is perfect for nursery and Greenguard gold certification, so it meets chemical emissions standards. Once the kids get old, this chic rocker can work in the living room and an adult bedroom.

18. Nursery Works Sleepytime Rocker

This is for people who love the benefits of a baby rocking chair but don’t love the look. At first, you might think that this is just a sleek, chic armchair. That’s not the case. This rocking chair is available in nine upholstery options.

Nursery Works Sleepytime Rocker
Image credit: https://cdn.shopify.com/

The only problem you can have with it is whether to put it in the nursery or living room. But it’s one of the best rocking chairs for a nursery, although it’s made in limited quantities.

19. Crate&Kids Bakersfield Rocking Chair

Rockers are not old-fashioned and uncomfortable as portrayed. And this is one of the best baby rocking chairs for the nursery. The sleek design, striped fabric, and leather piping give it a modern feel. It’s a good choice if you don’t have to assemble the nursery chair. The padded seat and reversible lumbar pillow make this chair more comfortable.

FAQs About Your Best Rocking Chair

How does a rocking chair work?

Traditional rocking chairs work by allowing you to use your legs and feet to rhythmically move back and forth while gliders move back and forth on a straight plane for a forward and backward motion. 

What is a rocking chair used for?

A rocking chair’s soothing motion makes it suitable for relaxation both outdoors and indoors. It makes one of the top things to buy for your new house

Final Thought on Best Rocking Chairs

There you have it! There are so many varieties of rocking chairs in the market. Whether you’re expecting a kid or want to relax outside, these nursery seating will ensure that you get what you’ve paid for and go for the one with durable materials.


The post Best Rocking Chairs appeared first on Kitchen Infinity.

Outdoor Kitchen Plans

Building your own outdoor kitchen can be rewarding. But you must know how to plan it and build it correctly, or else you might end up with a disaster on your hands.

DIY Outdoor Kitchen Plans provides detailed instructions on how to build an outdoor kitchen. It also offers many suggestions for planning the space and choosing the right materials for construction.

If you’re looking to build an outdoor kitchen yourself, then this is the product for you. This guide will show you how to choose the right location and design elements that will make sure that everyone loves spending time in your new backyard oasis. These outdoor kitchen plans will also give you space for your grill, refrigerator, sink, and pizza oven. Here we go!

DIY Outdoor Deck Kitchen

With the right tools and budget, you can build this DIY outdoor kitchen yourself. The included design and construction plans show you how to build a kitchen with a built-in grill, refrigerator, sink, cooktop, and storage. And if you don’t have a deck to build it on, you can always attach the kitchen to your deck or patio.


Image caption: https://placeofmytaste.com/

DIY Stone Covered Grill Island

DIY grill island is the best outdoor kitchen, especially if you have a very small outdoor space to work with. You can easily build it on a weekend when you have friends around to help you out with the construction. After finishing, you can cover it with stones to give it a fancier look.

DIY Outdoor BBQ Island

This project is a lot easier than it looks because the island is built from prefabricated modules designed for maximum structural integrity and ease of assembly. The modules lock together to form a customized grill island that can be tailored to your needs. This particular project uses a stainless steel countertop and a backsplash.

Patio Grill Islands with Fireplace

If you have any space left on your patio, you should consider including an outdoor fireplace in it. Three of the most popular designs for outdoor fireplaces are fireplace inserts, lava rock fireplaces, and stainless steel designs.

Patio Grill Islands with Fireplace
Image caption: https://st.hzcdn.com/

Outdoor Kitchen Bar with Pergola

An outdoor kitchen with a pergola overhead looks gorgeous and offers you shade during summer days. There are many different types of pergolas, but the most popular ones are the wavy style and the grapevines arbor design. However, it may take you days or even a week to complete this project. The pergola gives your kitchen a Caribbean look. You can place it at the end of your deck or build it as a freestanding kitchen.

Outdoor Kitchen with Concrete Countertops

The concrete countertops add a touch of sophistication and modernity to your outdoor kitchen. Crafting these countertops is quite easy when you know the right steps to take. All you need is self-leveling cement, wood planks for support, and a few tools that you probably already have in your home. With this outdoor kitchen plan, you don’t have to worry about elements causing your countertops to crack.

Outdoor Kitchen with Tiled Backsplash

This simple outdoor kitchen plan has a tiled backsplash that resembles the tile work of an indoor kitchen. If you’re skilled in masonry, then crafting this backsplash is easy and affordable. However, if you’re not familiar with laying tiles, hiring a professional will cost you less. And a professional will ensure you get what you want.

Outdoor Kitchen Build

Create an awesome entertaining space by turning your concrete patio into an outdoor kitchen plan. You can also bring a pergola to protect your kitchen against elements and add cabinets to store all your entertaining essentials.

Backyard Wood Fired Pizza Oven

A wood-fired pizza oven is a very popular item in outdoor kitchens. It will give your patio or backyard a unique rustic look that no one else in the neighborhood has. Pre-made kits are available for you to either buy and assemble on your own or have a contractor build them for you from scratch.

Backyard Wood Fired Pizza Oven
Image caption: https://i.pinimg.com/

Outdoor Serving Cart

If you’re working on a budget and not looking for a big outdoor kitchen project, then an outdoor serving cart may be the right item for you. It’s a pre-built or pre-made serving center that can either sit on your patio or be placed in a corner for more space. You can set it beside your grill to give you an extra prep space, serving area, and some much-needed storage.

Patio Storage Cabinets

If you’re serious about your outdoor grilling, then you know how important it is to have adequate storage space in your backyard. These garden cabinets fit the bill because not only do they store all of your barbecuing tools and plates, but they also add a decorative touch to your yard.

Outdoor Kitchen

DIY outdoor kitchen plan consists of custom wood cabinets, a unique counter, and a grill island. The outdoor kitchen designs take advantage of the outdoors and creates a unique place where people can gather to cook. The unique counter is designed so that it serves as both functional workspaces and integrates two table legs.

Sewing Cabinet Outdoor Bar

A bar plays a very important role in an outdoor kitchen. That said, you can turn your sewing cabinet into an outdoor bar that has a certain rustic touch. With this, there’s a big basin that you can use as a sink and fill with ice to keep your drinks cold. Other features of the outdoor sewing cabinet are a storage area for your food, extra counter space, and two drawers to store utensils.

DIY Portable Outdoor Kitchen

If you don’t have space in your backyard for an outdoor kitchen, don’t worry. DIY portable outdoor kitchens can serve as a solution for this. It’s about building a compact kitchen that has the same features as a stand-alone outdoor kitchen.

All you have to do is find a mobile workbench and add an aluminum countertop on top of it along with other needed utensils. With its portability, you can easily move it in and out of storage. And since the countertop is aluminum, it’s rust-resistant and looks good at the same time.

Rustic Farmhouse Outdoor Kitchen

You have to love the rustic farmhouse style. This outdoor kitchen is the perfect example of this kind of design. It’s quite roomy, and it has many countertops for storage purposes. The sink looks neat with its drainpipe installation, while the refrigerator is placed below it. You shouldn’t miss this in your home, especially if your home is done in farmhouse style.

Rustic Farmhouse Outdoor Kitchen
Image caption: https://hips.hearstapps.com/

Repurposed Cabinet Outdoor Kitchen

So many people love this outdoor kitchen design. And we can see why – it’s rustic and beautiful at the same time. The cabinet used as a countertop has the shape of an arch, which creates that gorgeous visual effect you can observe in the corner of this kitchen. The best thing about this project is that it doesn’t require that many resources. The whole thing is made of wood and recycled materials.

DIY Outdoor Kitchen Using Wood and Shipping Pallets

Isn’t this idea cool? It’s taking recycling to a whole new level – we love the idea of using old shipping pallets and turning them into a nice and functional outdoor kitchen. Wood pallets can also create simple counters and food prep stations. With its rustic built-ins, light wood gives your space airiness. It’s casual and fun, plus offering plenty of storage below.

Outdoor Kitchen with Built-in Grill and Sink

Stone is a classic outdoor kitchen staple, and this simple design adds modern elegance with its rounded edges and unique countertop shape. The sink is situated at one end, while the grill takes up most of the space underneath. In-between them, there’s a shelf for storage and a pot rack that also serves as home décor. This is a great way to add style to your outdoor kitchen as well as function.

Outdoor Kitchen with Grill and Island

An outdoor kitchen is incomplete without a grill, and this one is decked out with an island, bar stools, and a stainless steel sink that adds to its practicality. The island gives you extra counter space to work with, while the curved design helps it fit in seamlessly.

Food Prep Station with Crate Shelving

If you already have a grill in place but lack a prep and staging area, then this one’s for you. It provides a counter and a crate-style shelf that can be used for storage or as a serving dish. The rustic wooden top adds to its visual appeal. These crates can hold plates and dishware to get the party started.

Outdoor Kitchen with Bar, Sink, and Mini-Fridge

This combination is a full-scale dining space. It gives you enough room to spread out and enjoy your food with family and friends. The mini-fridge is a great place to store drinks, while the sink lets you clean up after dinner.

DIY Reclaimed Wood Outdoor Bar

Incorporating reclaimed wood in your kitchen countertop and base cabinets makes them look rustic. The idea works perfectly for an outdoor kitchen because it’s durable and won’t be damaged by weather elements like rain, snow, or wind.

FAQs on Outdoor Kitchen Plans

How does an outdoor kitchen add value to your home?

With their popularity, outdoor kitchens greatly improve the value of homes in the market. An outdoor kitchen is one of the most popular additions to a home when it comes to resale value.

How does an outdoor kitchen add square footage?

Typically, outdoor kitchens are custom-designed with either a grill or a stovetop and a sink. Installing this type of kitchen in your backyard adds extra square footage to the home.

What types of kitchen materials are used for outdoor kitchens?

Several different materials can be used for outdoor kitchens, including stone, brick, and metals. And some homeowners even opt for wood material to get a rustic feel.

Final Thought on Outdoor Kitchen Plans

As you can see, there are plenty of outdoor kitchen ideas. Some are simple and more budget-friendly, while others are more complex and expensive. So, get started on building your DIY outdoors so that you can have a place you can relax and enjoy together with your family.

The post Outdoor Kitchen Plans appeared first on Kitchen Infinity.

Did you miss our previous article…
https://www.thelavkitchen.com/?p=125

How To Refinish The Tub

A bathtub is one of the most important fixtures in your bathroom. It’s where you relax and unwind at the end of a long day, so it’s natural that you want to keep your tub looking its best. Unfortunately, a bathtub can become chipped and scratched or even corroded by hard water stains over time. This can make it look old and unattractive.

Refinishing your tub is an easy way to restore it to its original condition without having to spend thousands on replacing it with a new one. The process can be done relatively quickly depending on how large your tub is and won’t cost too much either. Most importantly, when you’re finished refinishing, your tub will look new again. 

There are several ways to refinish an old or damaged tub, including painting the surface with acrylic paint or applying the vinyl film directly over the existing surface. Here we go!

Tools and Materials

Painter’s tapePutty knifeRoller traySpongeTack clothDrop clothBreathing protectionAbrasive padRubber glovesBleachChemical caulk removerTub and tile caulkPaint rollersPaintbrushesEpoxy puttyPaper towelsAbrasive cleanersBathtub refinishing kitSafety goggles

Remove Old Caulk and Tub’s Hardware

Use a putty knife to remove old caulk and tub hardware. Remove anything that may block your work. Cover the faucets with paper towels and mask them off using painter’s tape. Scrape off soap scum with a razor blade and make sure you clean any dirt from your bathtub openings.

Clean Your Tub Thoroughly with Diluted Bleach and Water

Pour a pail of diluted bleach and warm water into your bathtub and let it sit for 10 minutes. Then, scrub the inner and outer surfaces with a sponge or an old rag to remove dirt and stains. Rinse the tub thoroughly afterward using clean water. Allow it to dry completely before you continue with your work.

Sanding

Use a coarse 36-grit paper to sand the bathtub—sand in the direction of the grain to avoid gouging or scratching your bathtub surface. Use a vacuum cleaner to remove dust particles as you sand. After that, fill any marks in the dried fiberglass with putty and sand it. 


Image caption: https://www.topkote.com/

Mask off the areas around your bathtub with paper or plastic before you proceed to the next step. You can rough up sanding by brushing the tub’s surface with a stainless steel brush. Make sure you neutralize the acid before applying the paint.

Wipe and Prime

Wipe the surface with a tack cloth and prime it with an acrylic urethane enamel primer. Give it enough time to dry before you apply your top coat. Follow the instructions on the can as to how much drying time is needed after priming. After wiping with a tack cloth, clean it with a rag to enable your acrylic urethane enamel to adhere to the surface of the porcelain.

Depending on room temperature and humidity conditions, you can apply several coats per day. Make sure you apply a bonding agent over the tub’s surface to ensure your new finish won’t peel off the old porcelain.

Mask off the Tub and any Remaining Fixtures

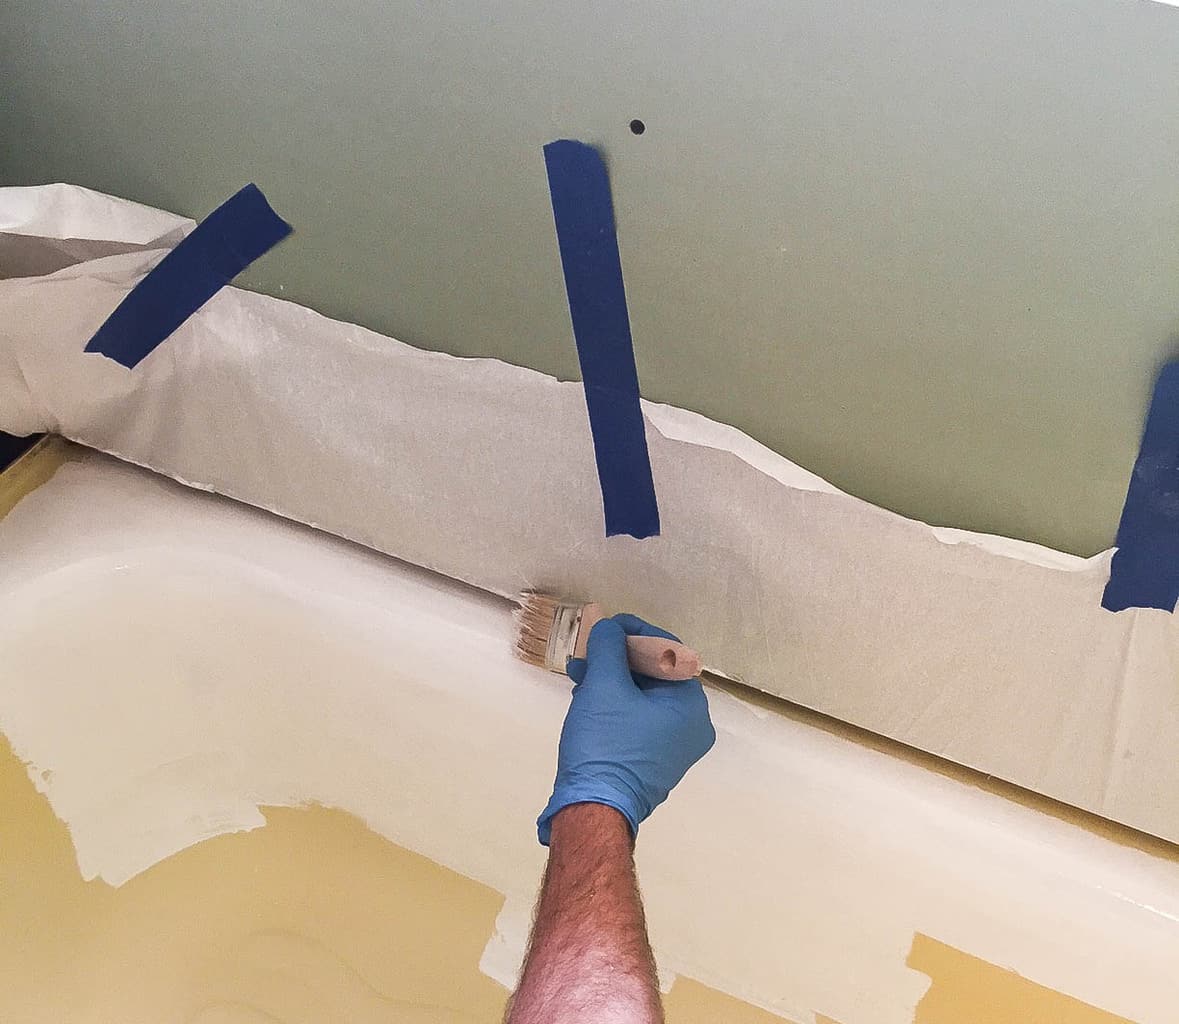
You’ll want to mask off the remaining fixtures, including the drain stopper and any faucets. Mask off floors and walls using drop cloths and painter’s tape. Remember that epoxy paint will be hard to remove, so make sure to guard your tub against drops and spills. Protect the tile at tub level and any fixture or faucet hardware with painter’s tape or paper.

Ventilate Your Working Space

The whole project of etching, sanding, and coating will create dust and fumes. In addition to the epoxy paint fumes, sanding can create fiberglass dust that can irritate your lungs and sinuses. Always work in a well-ventilated space, preferably outside or near an open window. Also, wear breathing protection or any respiratory equipment as recommended by the manufacturer.

Then, prep your paint included in the refinishing kit according to the manufacturer’s instructions. Many DIY refinishing kits use a two-part epoxy paint that needs to be mixed before use, so read the label carefully. 

Mixing faces is very important, so don’t play fast and loose with the directions. Then, transfer half of that mixture to a second container to save the second coat and cover it to keep it from drying out.

Etch the Tub Surfaces

If the refinishing kit includes etching powder, apply it to your tub’s surface with water and scrub the surface with an abrasive pad. The etching will help the refinishing sealer adhere to the surface, which will prolong the life of your newly refinished tub. Then, rinse the tub thoroughly with clear water.

Etch the Tub Surfaces
Image caption: https://bathrenovationhq.com/

Sand and Wipe Down the Bathtub

Skip this step if you’re refinishing an acrylic or fiberglass tub with no substantial grout lines. But you can learn how to clean fiberglass showers here and keep the material in good shape. An older bathtub with built-up gunk is likely to have crevices and ridges that need to be sanded down to provide a smooth surface for the sealer. Use a power sander if it’s available. Ensure you roughen up the corners and edges of your tub.

Sanding is very important because it ensures the epoxy coating adheres to the surface area properly without showing any crack or peel. After that, wipe the tub with paper towels to ensure it’s completely dry. Then, remove any excess dust or paper residue using a tack cloth.

Mix the Epoxy Coating

The key to success is in how you mix your epoxy coating. Make sure it’s well blended before applying it to your tub. You’ll have 30 minutes to work with the product, so following the manufacturer’s instructions is important. 

Paint the Tub

If you know how to paint bathrooms and other surfaces like tile and drywall, then you’ll have no problem with this step. The epoxy forms an ultra-thick, high gloss finish that’s completely waterproof. Finish the edges as required with the sponge brush, then apply a second coat of coatings as directed by the manufacturer. Before applying the second coating, you may recoat immediately or wait for one to two hours of drying time.

Paint the Tub
Image caption: https://www.sunrisespecialty.com/

Let the Coating Dry Completely

This could take 3 to 6 hours depending on climate conditions – warmer climates mean shorter drying times. You can speed up the process by using an exhaust fan. Let the tub dry and cure as indicated on the label. Make sure your working site is well ventilated to prevent inhalation of vapors.

pply the Second Coat

Sponge on another coat as required by the manufacturer’s instructions. You can do this after 3 to 6 hours, depending on climate conditions. If you wait too long, it could affect adhesion, so consider the drying time before applying your second coating. Let this dry completely and apply a third coating if required by the label.

Caulk and Reinstall the Hardware

Seal your tub’s joints with fresh silicone caulk and let it cure overnight. Then, reinstall your faucet hardware. Your refinished tub is now ready to use, so run yourself a nice, warm bath.

After bathtub refinishing, it’s best to avoid abrasive cleaners to protect your surface. Instead, go for non-abrasive and bleach-free cleaners such as cast iron and porcelain cleaners. 

Call Professional Bathtub Refinishing Company

If you want to avoid the trouble of doing this job yourself, consider professional refinishing since their years of experience in bathtub reglazing can help get your old tub looking new. Professional tub refinishers market their process as reglazing. Their standard will look similar to DIY refinishing kits, but they’ll spend more time and money repairing chips and cracks.

FAQs on How to Refinish the Tub

How long does bathtub reglazing take?

Professional refinishers will complete the job within a day and can seal your tub before you head to bed.

When is the best time to reglaze your bathtub?

You can reglaze your bathtub anytime, but if you’re looking for the least messy option, do it on or before the winter months because it’s usually cold outside, and tile grout dries quickly.

Final Thought on How to Refinish the Tub

As you can see, refinishing the tub is a great option for anyone looking to update their bathroom’s refurbishing. Just ensure that you are aware of the steps involved, so you have enough time to prepare for it.

The post How To Refinish The Tub appeared first on Kitchen Infinity.

Did you miss our previous article…
https://www.thelavkitchen.com/?p=121

What Is Electrical Grounding?

Electrical grounding is one of the most important elements in electrical systems. However, many people do not know what it does or how it works. Many people are still not aware that they need to ground their electrical system properly. 

Some even believe that a grounded system can be dangerous for them and their family members. This article will discuss the importance of grounding an electrical system and how it works with your home’s wiring. We’ll also tell you why you should have a grounded circuit breaker panel at home, read on.

What Is Electrical Grounding?

Grounding an electrical system is a procedure where the electrical current transitions from its use to a ground source below the electrical system. It is also known as a grounding circuit or a grounding wire.


Image credit: https://safetyskills.com/

A properly grounded electrical system ensures that your home’s wiring is safe and gives you a reliable path to ground in case of any current overloads or short circuits.

How It Works

The electrical code and many other electrical codes require a grounding system for both the electrical service that enters your home and the components of the circuit inside your home. This ensures that each wire in your house is bonded to a ground source either at the point where they leave the power meter, at their point of entry into your house or as close as possible to those points.

The ground connection provides a path for electric current to flow. For example, from an electric circuit breaker and electrical box, the electrical service wire goes to the power meter, where it attaches to a set of three grounding bars, all tied together with ground wires. These are connected to your underground water pipe by another set of barbed rods driven into the soil or secured in low resistance plastic buckets filled with the sand-gravel mix.

There’s an active wire in an electric circuit that supplies the power and a neutral wire that returns the current back to the breaker panel. A grounding wire connects all-metal structures to have a common reference point for electrical potential. Grounding wire ensures the electrical current returns safely to the ground without harming anyone in the event of a short circuit.

A copper conductor is connected from the metal rod of the wiring system into the ground. The grounding rod is connected to an electrical circuit that conducts electricity safely to the earth. If the wiring systems use electrical cables covered in the metal sheathing, they are considered grounded. The metal will serve as the ground conductor between the wall outlets and the service panel. 

But if the wiring systems use plastic-sheathed cable, the system is typically considered to be ungrounded. In this case, grounding rods must be installed as the sole method of grounding the circuit wiring.

Grounding systems should remain grounded even when no electrical current flows through them. If a ground wire were to disconnect from the system and there was no current flowing through it, any metallic materials that could become energized could cause the electric current to flow through them.

For example, if the electrical system inside an ungrounded building became flooded and power was turned off, any grounded metal objects such as hand tools or appliances would remain electrically charged even when not in use.

Importance of Electrical Grounding

Protects Against Electrical Overloads

One of the main benefits of electrical grounding is to protect your appliances, home, and everyone in the event of power surges. The surges normally happen when lightning strikes during extreme weather conditions. These events can produce high voltages of electricity which can damage your appliances.

However, by grounding your electrical system, you’ll protect against these electrical surges. This will help to ensure that even when your appliances are turned off, they won’t receive an electrical shock if there’s a sudden surge through the wiring in your home.

Help to Stabilize Voltage Levels

When you ground an electrical system, you can easily distribute the right voltage to every appliance. This helps the appliances run more efficiently, and it can prevent them from overloading your electrical system. The earth provides the common reference point for voltage sources in an electrical system.

Prevention of Serious Damage, Injury, and Death

When you do not ground your electrical system, both your appliances and your life are at risk. In the worst cases, you can suffer serious or fatal injuries from a power surge or electrical fire if your appliances are not grounded.

Earth is a Great Conductor

One of the main reasons you should ground your appliances is that the earth is a great conductor. This means that the excess electricity will always take the path of least resistance. When the appliance is not grounded, it can send a current of electricity through any person who comes in contact with it. If that electricity is high enough, then you will suffer from serious injuries or even death.

Help to Direct Electricity

Another reason why grounding your appliances is beneficial is that it helps the excess electricity to go where you want it. For example, if that current of excess electricity were to strike an object, then there would be a chance for that object to become electrified. This means that every time you touch it, you’re at risk of being shocked.

How to Determine if Current is Grounded or Not

You can check if an electrical appliance is currently grounded simply by putting your hands on it. If you’re feeling a tingling sensation coming from the appliance, then this means that it is not currently grounded. This shouldn’t be added to water, either.

If the appliance is equipped with a three-wire cord and a three-pronged plug, the third wire, and the prong provide a ground link. However, appliances are not always equipped with this three-wire cord, sometimes they only have two wires.

How to Test Electrical Grounding

Your outlet is the first sign of proper electrical grounding. If it’s a three-prong outlet with a U-shaped slot, then this means that the outlet is grounded.

How to Test Electrical Grounding
Image credit: https://www.thespruce.com/

Inspect your appliances. If you have an electrical appliance with a three-wire cord, you are safe because these machines come equipped with grounding plugs. This is designed to minimize the chance of electric shock by providing a proper ground for any appliance equipped with it. 

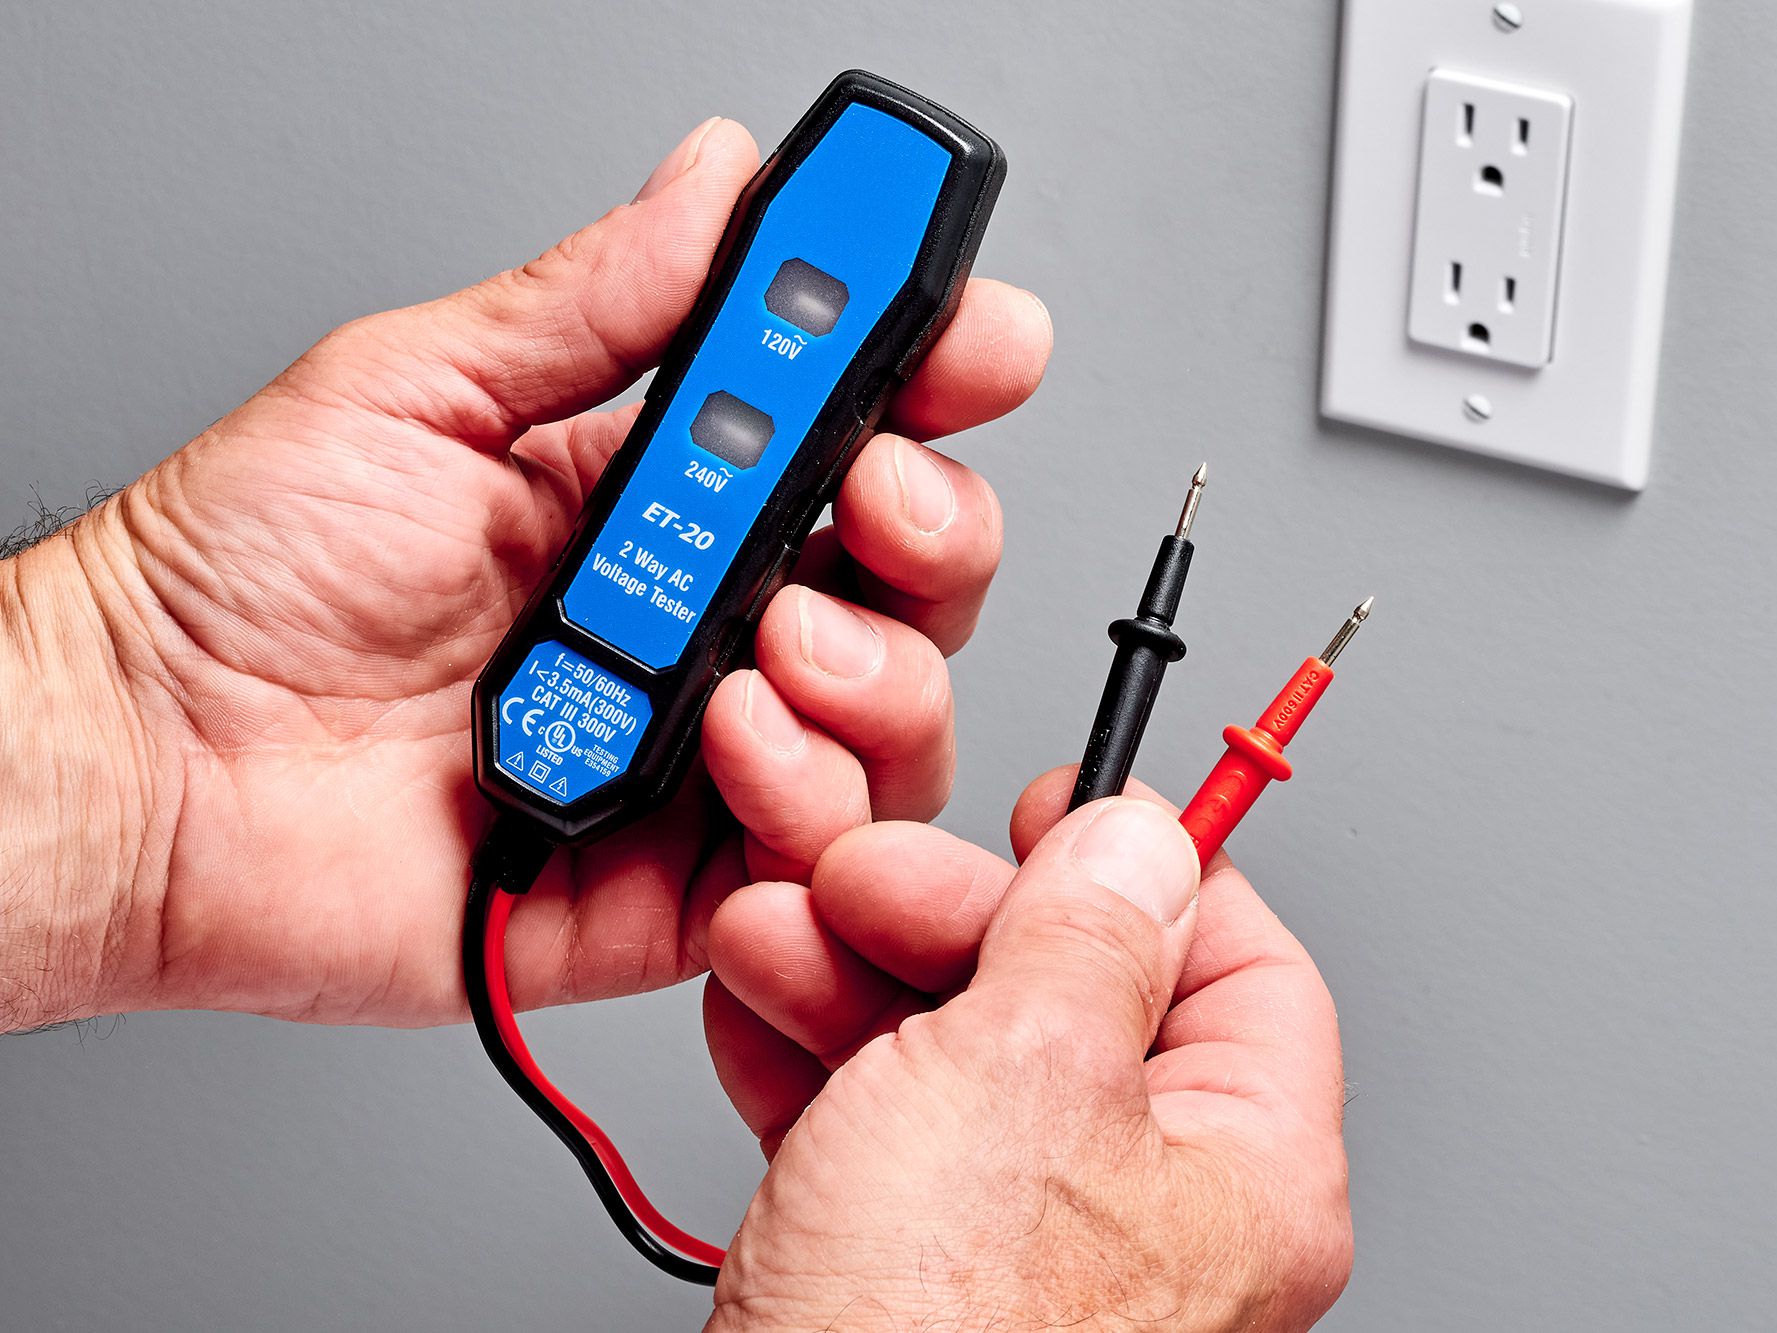
These devices also reduce the potential for electrocution. Insert the red probe of your circuit tester into the smaller slot of the outlet. This outlet is a hot wire that carries the electrical current. Insert the black probe wire into one of the two larger slots, neutral wires that return electricity to the circuit breaker or main power source.

Test all of your outlets to ensure no faulty ones with high resistance and allow a small amount of current to pass through them. Check the indicator, it should light if your outlet is grounded. If it doesn’t light up, reverse red and black probes. If the indicator doesn’t show up in the electrical grounding test, your outlet is not grounded and is not safe for use.

FAQs on Electrical Grounding

What happens if you don’t connect the ground wire?

The simple act of not connecting the ground wire does not make your electrical system safer. Without grounding, appliances might hum or buzz annoyingly when you turn them on, but they’re unlikely to cause serious problems. However, in some cases, ungrounded outlets can be dangerous.

What is grounding in electrical terms?

The term grounding gives electricity the most effective way to return to the ground via an electrical panel.

Final Thought on Electrical Grounding

As you can see, electrical grounding is very important. You have to raise electrical safety levels in your home to keep yourself and your family safe. Be sure to follow all grounding safety tips so that you can remain grounded throughout any electrical work. Also, take your time to understand simple electrical project costs so you don’t end up with surprises.


The post What Is Electrical Grounding? appeared first on Kitchen Infinity.

Beautiful Blue Kitchen Cabinet Ideas

You can never go wrong with the color blue for your kitchen cabinets. This color has a way of bringing some calm to every home and every room they touch. Blue color can be used in kitchen cabinets, bathrooms, and guest bedrooms because of its tranquilizer feature that will put you into a state of peace.

If you’re a tastemaker who loves bold things, then you’ll appreciate layers of floor-to-ceiling color. But if you’re hesitant when it comes to adding a splash of cornflower blue, try working it into just your island pop won’t be a big deal.

Here are some of the gorgeous blue kitchen cabinet ideas that will inspire you to adopt them at home:

Mix Black and Blue

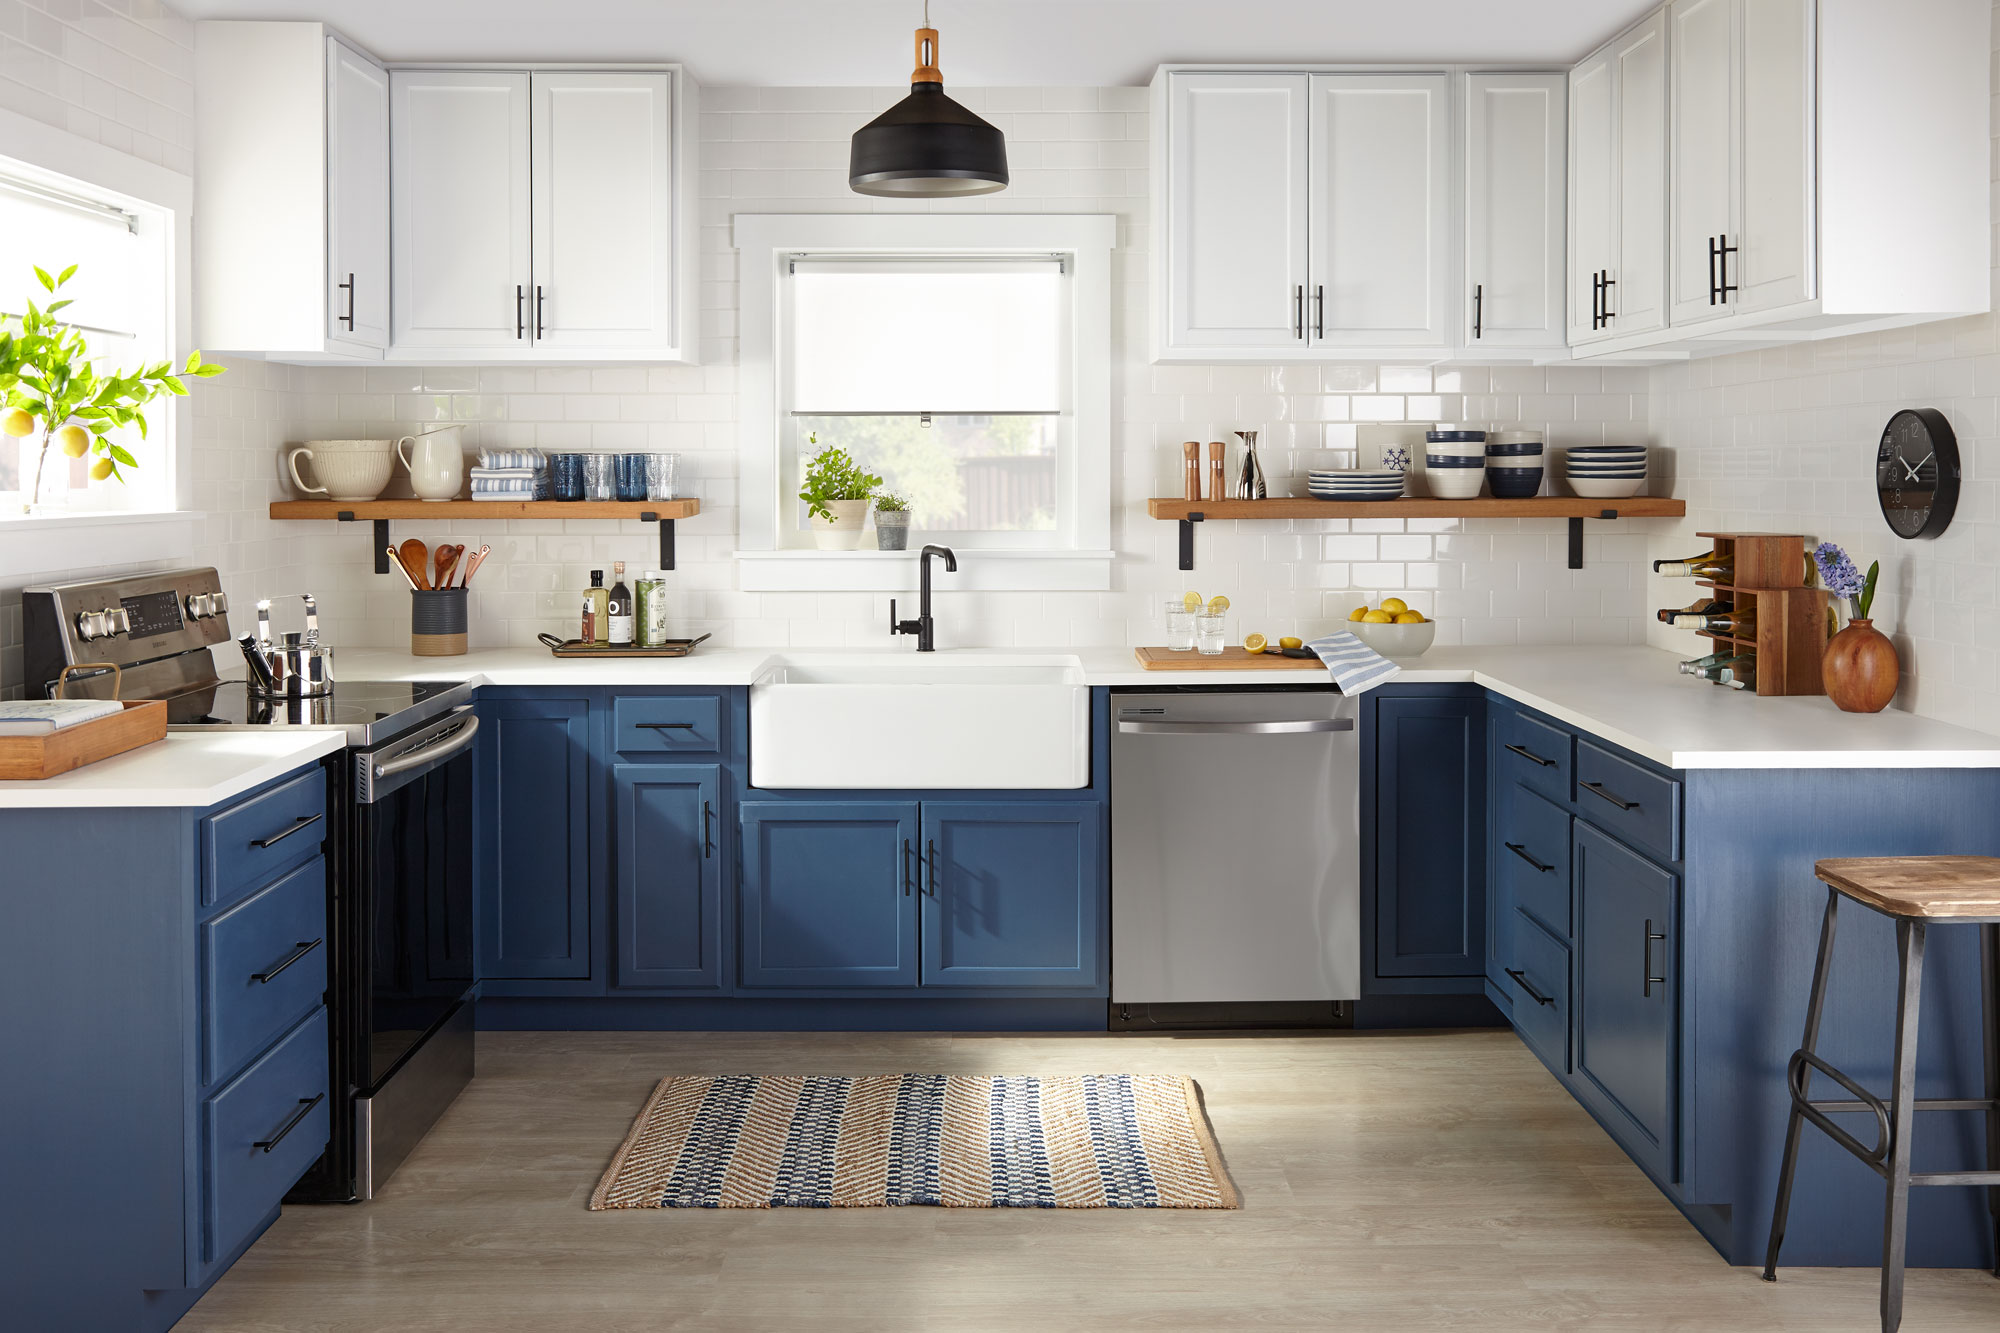
If you want a more modern twist on the classic blue kitchen cabinets, why not give them a shot of black? It’s also an idea for those that want to add contrast to their new design. With enough white ceiling to lift the colors, it will never let you down. Items like clear pendants, white ceilings, and marble countertops will help your cooking space feel continuous and lifted. 


Image credit: https://www.mydomaine.com/

Consider Playing with Blue and Brown

If you want colors that go together well, we suggest exploring the shades of blue and brown. If you go for darker shades, then it’s going to look casual and inviting. If you choose lighter tones,  your kitchen could feel more formal and stylish at the same time.

Display Modern Rustic Kitchen

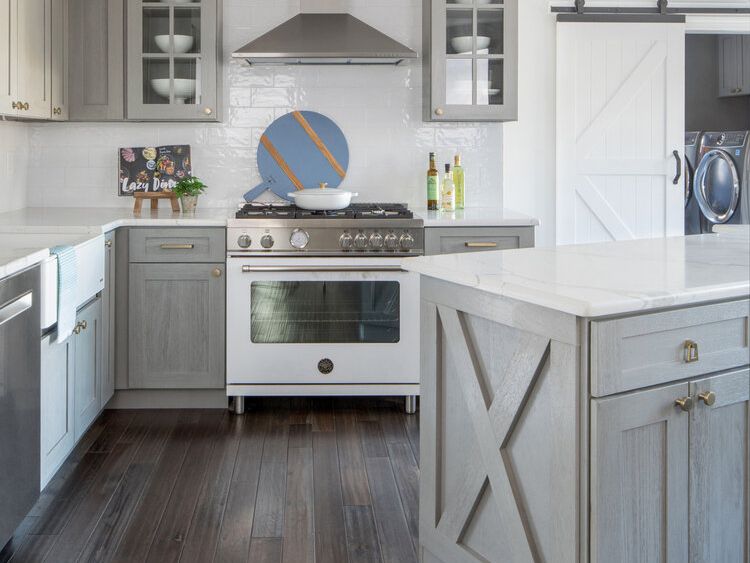
The sleek backsplash and countertop of this blue kitchen idea will give you an impression of modern rustic style. The dark gray cabinets will provide the necessary storage space, while the black appliances will perfectly fit your kitchen idea. 

Display Modern Rustic Kitchen
Image credit: https://www.mydomaine.com/

The deep blue color emphasizes that feeling of spaciousness in this kitchen so if you are creative enough, try out this kitchen remodel idea, which can do wonders for your kitchen.

dd a Matching Breakfast Nook

Your cooking space should not be hanging in the color department; instead, keep the paint coming into breakfast nooks. A gorgeous deep blue kitchen idea brings real magic into your breakfast nook. An elegant round table looks awesome in this kitchen; however, it can easily be replaced with a square one if you are more of a classic person.

Try Out Fiestaware Kitchen

This is another vintage-inspired cooking space that comes with colorful fiestaware kitchen ideas. If you are tired of eating dinner in a gray and white space, having a pop of color might be the breath of fresh air your kitchen needs. 

The collection is displayed on the open shelving above the blue cabinetry. Marble counters and white subway tile in the backsplash are a perfect backdrop for all of these fun colors.

Consider Modern Farmhouse Kitchen

If you’re looking for a modern, bright kitchen that’s echoed with rural landscape, then you’ll find it in this space. The room is defined by the open shelves made entirely of white-washed wood, which also provide a hutch for displaying plates and serving trays. 

Consider Modern Farmhouse Kitchen
Image credit: https://www.kilz.com/

Color blue cabinets complement the gray stone countertops while popping pink pantry doors giving off an airy vibe. The lower cabinets are painted with a soft shade to set the rustic tone.

Modern Blue Cabinets

Bring out that beauty of timber countertop and redwood-wrapped vent into your kitchen by using an electric shade of blue. The reclaimed redwood is locally sourced wooden water tanks, which gives it an organic balance to an otherwise sleek and modern design.

Showcase a Metallic Highlight

Make your space feel more industrial and feel live-in by showing off a kick of denim blue. This will make your space pop out against all of the white walls. The silvery grays, chrome appliances, black paint, and brassy fixtures won’t feel steely, thanks to this blue infusion in the form of an island.

The white countertops, sink, and trim will help to give your room a definition. Metallic accents and appliances will also add sparkle to your elegant cooking space.

Retro Painted Cabinets

Spruce up your old wood with a few coats of paint. For example, you can treat your cupboards with a shade called Hague blue to achieve that retro flair. A handcrafted ceramic tile can also bring brightness and texture to your room. This will leave you with the charming kitchen that you’ve been looking for.

Glossy Blue Kitchen Cabinetry

Reflect the light with some sleek blue-tinted cabinets. The beauty of high gloss is that it reflects light, brightening up your space against all odds. Make these panels pop against white walls by adding a few colorful water glasses to the mix.

To use dark blue successfully in your small kitchen, limit the color to one element like a single bank of cabinets and the kitchen island. A high gloss sheen paint can help you lighten up dark blue cabinets by naturally brightening the space.

Sky Blue Kitchen Cabinetry

Think of the sky on a clear blue day. Isn’t it beautiful? Well, now you can enjoy some of that color indoors with this tall paint job. Hang some tall cabinets against the wall to create more space for your kitchen stuff, freeing up floor-to-ceiling space below. For a sky blue with a little more presence, pick one of the midrange tones on the swatch and not the lighter shades.

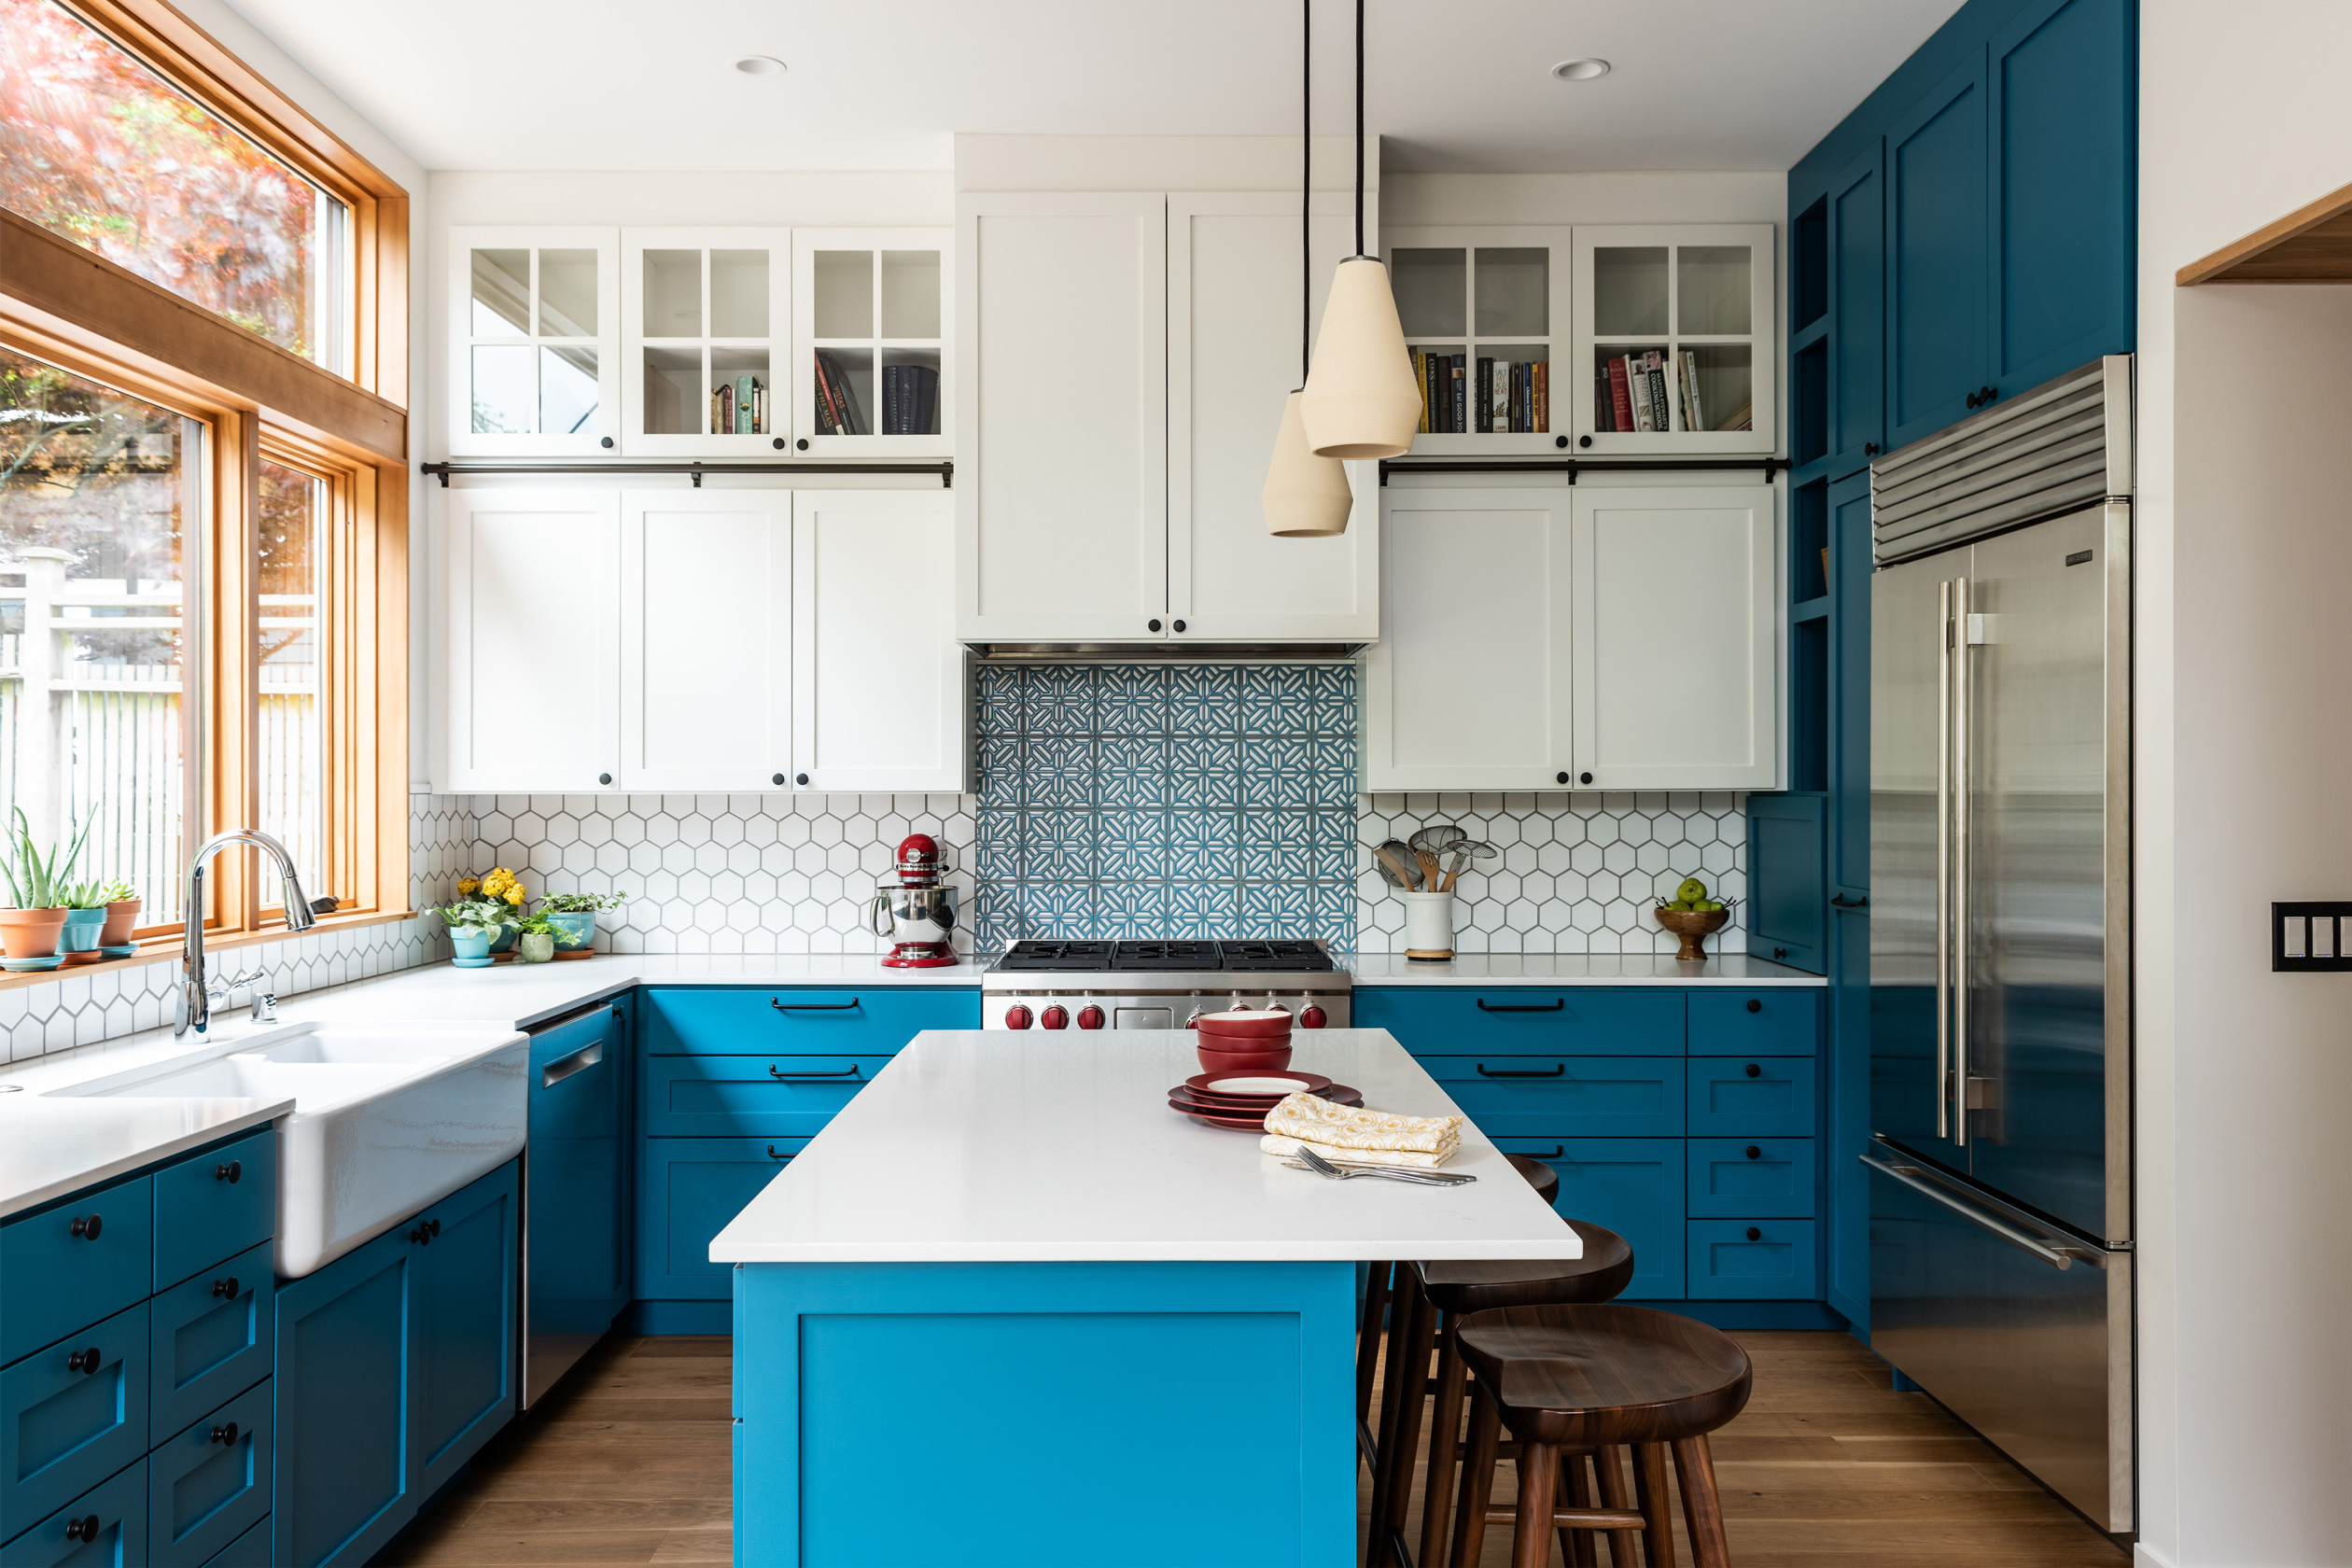
Turquoise Kitchen Cabinets

Dark turquoise cabinets seem to float within a kitchen designed for entertaining. The right shade of blue can instantly impact the mood of your kitchen. A sunny yellow backsplash helps to brighten up this classic combination of white cabinets and dark green walls. It’s an easy update that works just as well with casual modern home decor as it would for country charm.

Go with Groovy Wooden Cabinets

Do not only focus on paint. Instead, consider things like tints, stains, and thinner coats of lacquer to let wood grains and other materials shine through. For example, you can use a blue wooden cabinet base to inject the space with a groovy near 70s vibe. You can proceed to perpetuate your vibe with the patterned wall and pendant lights.

Blue Cottage Kitchen

Blue is the color of peace and tranquility. This calming hue would perfectly bring out your sweet side while making you more productive at work since blue also stimulates creative thinking. Blue cottage kitchen opens outdoors, offering you a space to prepare and enjoy meals in relaxing comfort. The white cabinets, countertops, and woodworks set their pretty pastels with crisp detailing.

The subtle tones and organic shapes of the flagstone flooring would perfectly complement the sleek contemporary design. The cabinets are smartly designed, making them more functional than usual with open shelves and added hardware for easy access to your cooking tools.

Coordinating Cabinets

A blend of blue and wood tones will serve as a high color palette without resorting to eternal classics. The room features blue cabinets that are painted over with white for elegance and cleanliness. The clean lines and rounding edges give a softer impression. While the cream-colored appliances offer a nice contrast to all of this.

Try ColorBlocking

White, wood and blue makeup make your kitchen look gorgeous by a color-blocked appearance, thanks to the wood paneling on a white waterfall island and blue cabinetry behind it. The colors and materials stay front and center, making an inimitable statement. 

Try ColorBlocking
Image credit: https://www.boardandvellum.com/

dd a Bit of Leather

Blue itself makes a major statement, but you can take it up a notch by incorporating leather pulls. Apart from this material being gorgeous, they can amplify the space further by picking up the colors in the wood countertops, giving your space more warmth.

FAQs on Beautiful Blue Kitchen Cabinets

Is a blue kitchen too trendy?

Yes, navy cabinets are very fashionable, but they also work well in modern kitchens. The navy is always stylish because it goes with everything and looks great in small or large doses. You can mix navy cabinets with white walls, marble countertops, and black appliances to create a sophisticated space.

Is the blue kitchen cabinet color hard to maintain?

It doesn’t matter if the color is more subtle or vibrant; all shades of blue are easy to maintain. All you need is a general-purpose cleaner and a few microfiber towels. But you can take your time to learn how to clean inside your kitchen cabinets with ease.

Final Thought on Beautiful Blue Kitchen Cabinet Ideas

As you can see, there’re so many blue kitchen cabinets out there. Make your cooking space feel bigger and brighter by choosing blue cabinets. You can add pops of color with accessories or leave everything neutral for a sophisticated look.


The post Beautiful Blue Kitchen Cabinet Ideas appeared first on Kitchen Infinity.

Did you miss our previous article…
https://www.thelavkitchen.com/?p=113

How To Replace Toilet Fill Valve

If your toilet is losing water or making a loud noise when you flush it, this probably means that it’s time for a new fill valve.

Replacing a fill valve can be done in under an hour and will save you money on your monthly water bill. You’ll also avoid the hassle of having to call a plumber every time something goes wrong with your toilet. It’s easy to do, and we’re here to show you how. 

A fill valve opens and closes every time you flush your toilet, exposing it to wear and tear. Therefore, you need to replace it. Also, if you have an old fill valve model with a float ball, you have to consider that new model and replace the dependable fill valve with its integrated float cup. 

Here are step-by-step instructions on how to replace your fill valve so that you can get back up and running as quickly as possible without breaking the bank.

What You’ll Need

Sponge and bucketNew fill valveTape measureAdjustable wrench

Turn Off the Water Supply

First, turn off the water supply for the toilet fill valve at the wall tank by turning the shutoff valve clockwise with a wrench. Make sure you turn off the water from outside of your toilet before doing any repair. The valve should be below your tank, and it should be located where the water pipes enter the tank from the wall.

Make sure you turn off the shutoff valve until it stops moving. After that, move around your home and turn on all the fixtures to confirm if they’re off. This will also drain off the residual water pressure from your home’s plumbing system. This will help you avoid water damage due to floods.

Drain Your Toilet Tank

Once you’ve turned off the water, drain your tank before disconnecting the toilet fill valve. Begin by flushing your toilet by holding the flushing handle down to remove as much water as possible from your tank. After that,  use a bucket to remove the rest of the water in your tank. You can use an old towel or sponge to remove the excess water. Once you’ve drained all the water, unhook the old flapper. Then, buy a new flapper of the same type.


Image caption: https://viphomelink.com/

The flapper is simply a rubber valve that fills with water when you flush the toilet, blocking the overflow tube for your tank. After you have the new flapper in hand, place it on top of the fill valve’s overflow pipe to see if it fits over without any issues.

Check the Fill Valve for a Leak

Flush your valve, then look for a valve leak. Lift your toilet float arm to let all the water out of your tank. Check under the rim for any water that has leaked from the tank after it is empty. Use a wrench to adjust the toilet float arm so that the tank stops filling when the water level is half-inch to one inch below the top of the overflow pipe. If your valve still leaks, then you need to replace it.

Remove the Old Fill Valve

Turn off your water supply, then flush the toilet and sponge the remaining water from your tank. Disconnect the water supply line, unscrew your fill valve lock nut and remove the old fill valve. Try to remove the lock nut with your bare hand before using the adjustable wrench; if you can’t, then use your wrench to hold the nut and turn it one-quarter turn at a time.

Remove the Old Fill Valve
Image caption; https://diy.sndimg.com/

Disconnect the refill tube from your overflow tube, then lift off the fill valve. You can also take this moment to clean the inside of your tank, especially if the flush valve is leaking. You can also learn how to replace the flush valve of your toilet.

Prepare Your New Valve

Make sure you buy a new flapper of the same type as the one you removed from your local store. Slide the rubber washer included in your kit onto the bottom flange on the fill valve tailpiece. The washer is very important as it provides a watertight seal. You can also adjust the height of the fill valve if necessary.

Different fill valves have different methods of adjusting the height. But it’s simple as you only need to screw the stem piece shorter or longer to accommodate the height you want. In most cases, the top of your fill valve should be slightly taller than the height of your overflow pipe but not so tall to prevent the tank lid from closing.

Installing the New Fill Valve

Remove your new fill valve from the packaging and read the directions it comes with. Don’t forget to clip your new refill tube to the overflow tube. Take the threaded nut in your kit and screw it onto the bottom flange on the fill valve tailpiece, but do not tighten it yet. Take out measuring tape and measure the distance between the top cap of the valve and the top of the overflow tube.

Remove your fill valve and adjust the height. Hold the valve body using one hand and using the other hand to tighten the nut. If using a clawfoot model, tighten at least two inches beyond the overflow tube. If your fill valve is at its maximum height, but the overflow pipe is still higher than the critical level mark, you will need to install a new overflow tube.

If the shutoff valve is higher than necessary, use a wrench to carefully loosen the nut on top of the fill valve and raise or lower it so that it meets the height requirement. Tighten all nuts and fittings with your wrench. Turn the water back on through the wall stop.

When you’ve properly adjusted the height, pull your fill valve back in position and screw in the lock nut from underneath your toilet tank to hold your new fill valve firmly. Make sure you tighten the mounting nut, so it’s hand tight. 

After that, connect the water supply line back to the new valve and hand tighten it to secure it to the valve. Do not overtighten it, or you might risk cracking your fixture’s tank. Turn on the water again and check for leaks.

Connect the Fill Tube to the Fill Valve

The fill tube that’s attached to your new toilet is fairly long. You’ll need to connect it to the fill valve at the bottom of the tank. The end that fits into the valve should be cut squarely, so you get an easy fit. If this isn’t done, you get leaks or other problems, so make sure you check this before moving on to the next step. 

Attach one end of your new valve to the fill valve nipple and the other to the enclosed angle adapter. Clip your angle adapter onto the overflow pipe, then finish your installation by attaching your flapper chain to the overflow pipe.

Reconnect the Water Lines

Open the shut-off valve and let the water fill your toilet tank. Check if your new fill valve is filling your tank faster, quieter and the water level is below half-inch below the overflow tube. Confirm if no water is running from the tank to the toilet bowl. Flush the toilet a couple of times to double-check if your new valve is performing optimally. If everything is working correctly, but the toilet tank lid back and enjoy your toilet. You can also consider learning how to stop a toilet from running as these are plumbing skills you might need more often than you think.

FAQS on How to Replace Toilet Fill Valve

How do you know a bad fill valve?

You can identify a bad fill valve if you see the bottom of the washer deteriorating and causing a leak. If you see your fill valve not filling, then you may need to replace your valve.

Why do toilet valves fail?

Fill valves provide water to the toilet bowl, and when they break, the water stops flowing. Such is why you need to replace them with new ones.

re toilet valves universal?

Most toilet fill valves are interchangeable and can fit standard tank openings in any toilet. But it’s important to consider the sizes, especially the length of the valve stem.

Final Thought on How to Replace Toilet Fill Valve

As you can see, replacing your toilet fill valve is quite simple and easy. With a few tools and materials, you can replace your valve fill within a few minutes, and you’re done. And if your toilet is still running after replacing the fill valve, consider looking at the toilet flapper or another cause of a running toilet.


The post How To Replace Toilet Fill Valve appeared first on Kitchen Infinity.

Why Does My Kitchen Sink Smell Like Sewage

Because your kitchen is the heart of your home, it’s important to keep it clean and to smell fresh. But sometimes you might still notice the foul smell despite your kitchen being sparkling clean. 

Rotten food and kitchen plumbing issues are some of the causes of an unpleasant sewer smell in your kitchen sink. Well, if you’re really not sure about what’s causing that disgusting odor from your kitchen sink then this article is for you. Below are some of the reasons why your kitchen sink smells like sewage.

Reasons Why Your Kitchen Sink Smell Like Sewage

Food Debris in the Drainpipe

When you go to the kitchen sink and flip the switch, do not be surprised to find that there’s no water coming out. Cleaning and disposing of your food waste in the disposal garbage doesn’t completely clean your drain pipes. Food waste can get stuck and cause blockage.

You should remove food debris from the drainpipe using a vacuum cleaner or similar tool to avoid such a situation. Grease buildup can also accumulate and cause a clog which prevents water from flowing properly into the drain. You need to learn how to unclog the kitchen sink before anything else. Regularly using a plunger or plumber snake will help you deal with the problem.

Greasy Drain

This is also another cause of foul sewer smell in your kitchen sink. The accumulation of grease and oil in the drains can also cause a blockage, so it must be removed to restore the flow. If left unattended, fat and oil can harden in the drainpipe and rot gradually, leading to a rotten odor in your kitchen and the entire house.

You can also remedy this by not pouring oil and grease down the drain. Other than causing an unpleasant smell, it can lead to pipe blockage. Try to run a baking soda and vinegar solution in the drain and wash it down with boiling water.

Clogged Vent

If there’s a sewer smell coming from your sink and a greasy drain or trap is not the problem, a clogged vent might be letting sewer gas into your kitchen. Clogged vents prevent the flow of sewer gas out through the drain, so they are retained in your home, giving it an unpleasant odor.

It’s always difficult to identify and remove a blockage in a plumbing vent, so it’s best to call a professional plumber to clean your vent line and check the drain pipes. This can also be remedied by cleaning the drain vent. Use a ladder to climb the top and clear any debris that is clogging your drain vent.

Dirty Garbage Disposal

There’s a certain type of smell that comes from the garbage disposal. It’s formed as a result of some types of food that are kept in it for too long, especially those containing fat, oil, and grease. This is because bacteria form on these foods and emit a noxious odor when they decay.

Inadequate running water in the garbage disposal and food particles can rot and get stuck in the bottom of the unit. This leads to an over-accumulation of food particles which rot and produce a bad smell inside it. Dumping too much food at once and worn-out garbage disposal parts can also cause dirty garbage disposal.

Sewer Smells

Another common type of smell coming from the garbage disposal is a sewer smell. This happens when the drain between the sink and the sewer becomes clogged. Your house plumbing is designed to contain harmful gas, flush away sewage and provide you with clean and potable water.

If the sewer gas is smelling in your kitchen, the smell can be leaking from the sink trap or plumbing vent. The sink trap is located underneath your sink. This can bring some irritation, plus health hazards. Pour baking soda once a week into your sink to remedy this. If you try this and still smell sewer gas, it’s time to call the help of a professional.

P-Trap Malfunction

If you hear some gurgling noises in your drain, then there is a high possibility of the P-trap malfunction. The sound of water draining into the sink should be smooth and quiet. If it sounds bubbly or smelly, these are warning signs that something might have gone wrong with the trap.

The p-trap isolates the drain line from the fixture, blocking the irritating smells. It holds water at the bottom of the curve. So, if it becomes dry, it would cause a sewer smell to come from the sink.

How to Deal with Sewer Smell in Your Kitchen Sink

Hot Water and Dish Soap

A simple remedy to this problem is filling the sink with hot water and adding a few drops of dish soap. Let it sit for a while and see if the gurgling goes away. If not, then you might have to get your trap replaced or repaired.


Image credit: https://imagesvc.meredithcorp.io/

Baking Soda and Vinegar

Pour one cup of baking soda into the drain, followed by the same amount of vinegar, and let it sit for 10 minutes. While waiting, boil a pot of water, then pour that boiling water down the drain to flush the baking soda and vinegar. This will help eliminate the sewer gas that caused the gurgling sound in your kitchen sink drain.

Baking Soda and Vinegar
Image credit: https://images.saymedia-content.com/

Citrus Peels, Ice Cubes and Salt

Remedy your kitchen sink smell by throwing some ice cubes, kosher salt, and coarse salt into it. Once you have done that, fill the kitchen sink with boiling water for 10 minutes, then run the cold water to check if the smell is gone. Add lemon juice to give your sink basin a fresh smell.

Place a couple of citrus peels in the disposal, then grind them up with the disposal running. Make sure you run water while grinding so that you don’t end up with stuck-on food debris in your garbage disposal. If your drain is clean, but the smell persists, you might be having a plumbing issue.

Bio-Enzyme Drain Cleaner

Bio-enzyme drain cleaners are environmentally friendly because they do not emit toxic fumes like some chemical drain cleaners. They’re also safer for kids and pets since they are non-toxic, biodegradable, and do not emit fumes.

Bio-enzyme drain cleaner is mixed with water to form a powerful cleaning solution that can cut through grease, grime, and any other rotting food smell.

FAQS on Why Your Kitchen Sink Smell Like Sewage

Why does my kitchen sink smell like rotten eggs?

The reason why your kitchen smells like this is that there’s too much accumulation of grease and fat in your drains. You can wash it away by running baking soda and vinegar in the boiling water.

How do you get rid of the sewer smell in the kitchen sink?

Dump a cup of baking soda into the drain, let it sit for 15 minutes, pour half a cup of vinegar, and leave it to work for a few minutes. What you need to do next is run the hot water for a few minutes.

Final Thought on Why Does Your Kitchen Sink Smell Like Sewage

As you can see, the kitchen sink is the most used area in your kitchen, which makes it emit foul odors over time. It’s usually because of the food particles or grease that are stuck in the kitchen sink drain. As you’ve seen above, getting rid of the sewage smell is not a difficult thing after all. For rotting food smells, chemical cleaning methods are the best, but for sewer gas smells, try to check and fix your systems.


The post Why Does My Kitchen Sink Smell Like Sewage appeared first on Kitchen Infinity.

Did you miss our previous article…
https://www.thelavkitchen.com/?p=108