You want to add some color and interest to your garden, but you’re not sure how. Consider planting evergreen flowering plants. Evergreen flower plants represent an important category in the garden, as they provide color and interest all year long when many other plants are dormant.
The good news is that there are many great options for evergreen flowers that will thrive in a variety of climates. This article will explore some of the best evergreen flowering plants that you can grow in your garden with less hassle.
1. Rhododendrons
Rhododendron flowers are an ideal choice when looking to add some color, as they come in a wide range of colors. They are typically blooming from April through July, with different varieties sending out flowers at slightly different times throughout the season. New varieties are cold tolerant but ensure they get dappled shade.

Image credit: https://static.onecms.io/
Rhododendrons take a little time to establish themselves but, once established, can be expected to grow about 8 to 12 feet tall and wide. They come in many colors, including lavender, pink, a reddish hue, and white pop against glossy green foliage. They also have rose-pink flowers, thrive in full sun to partial shade, and prefer USDA hardiness zones 5 to 9.
2. Ninebark
Ninebark is a popular ground cover that provides gorgeous blooms in the spring and stunning foliage all season long. This native plant has elegant arching branches dotted with clusters of creamy white flowers in late spring. This hardy plant grows in USDA zones 2 to 9. This plant is fast-growing and can become quite large, so give it plenty of room or opt for dwarf varieties if you have a tight space.
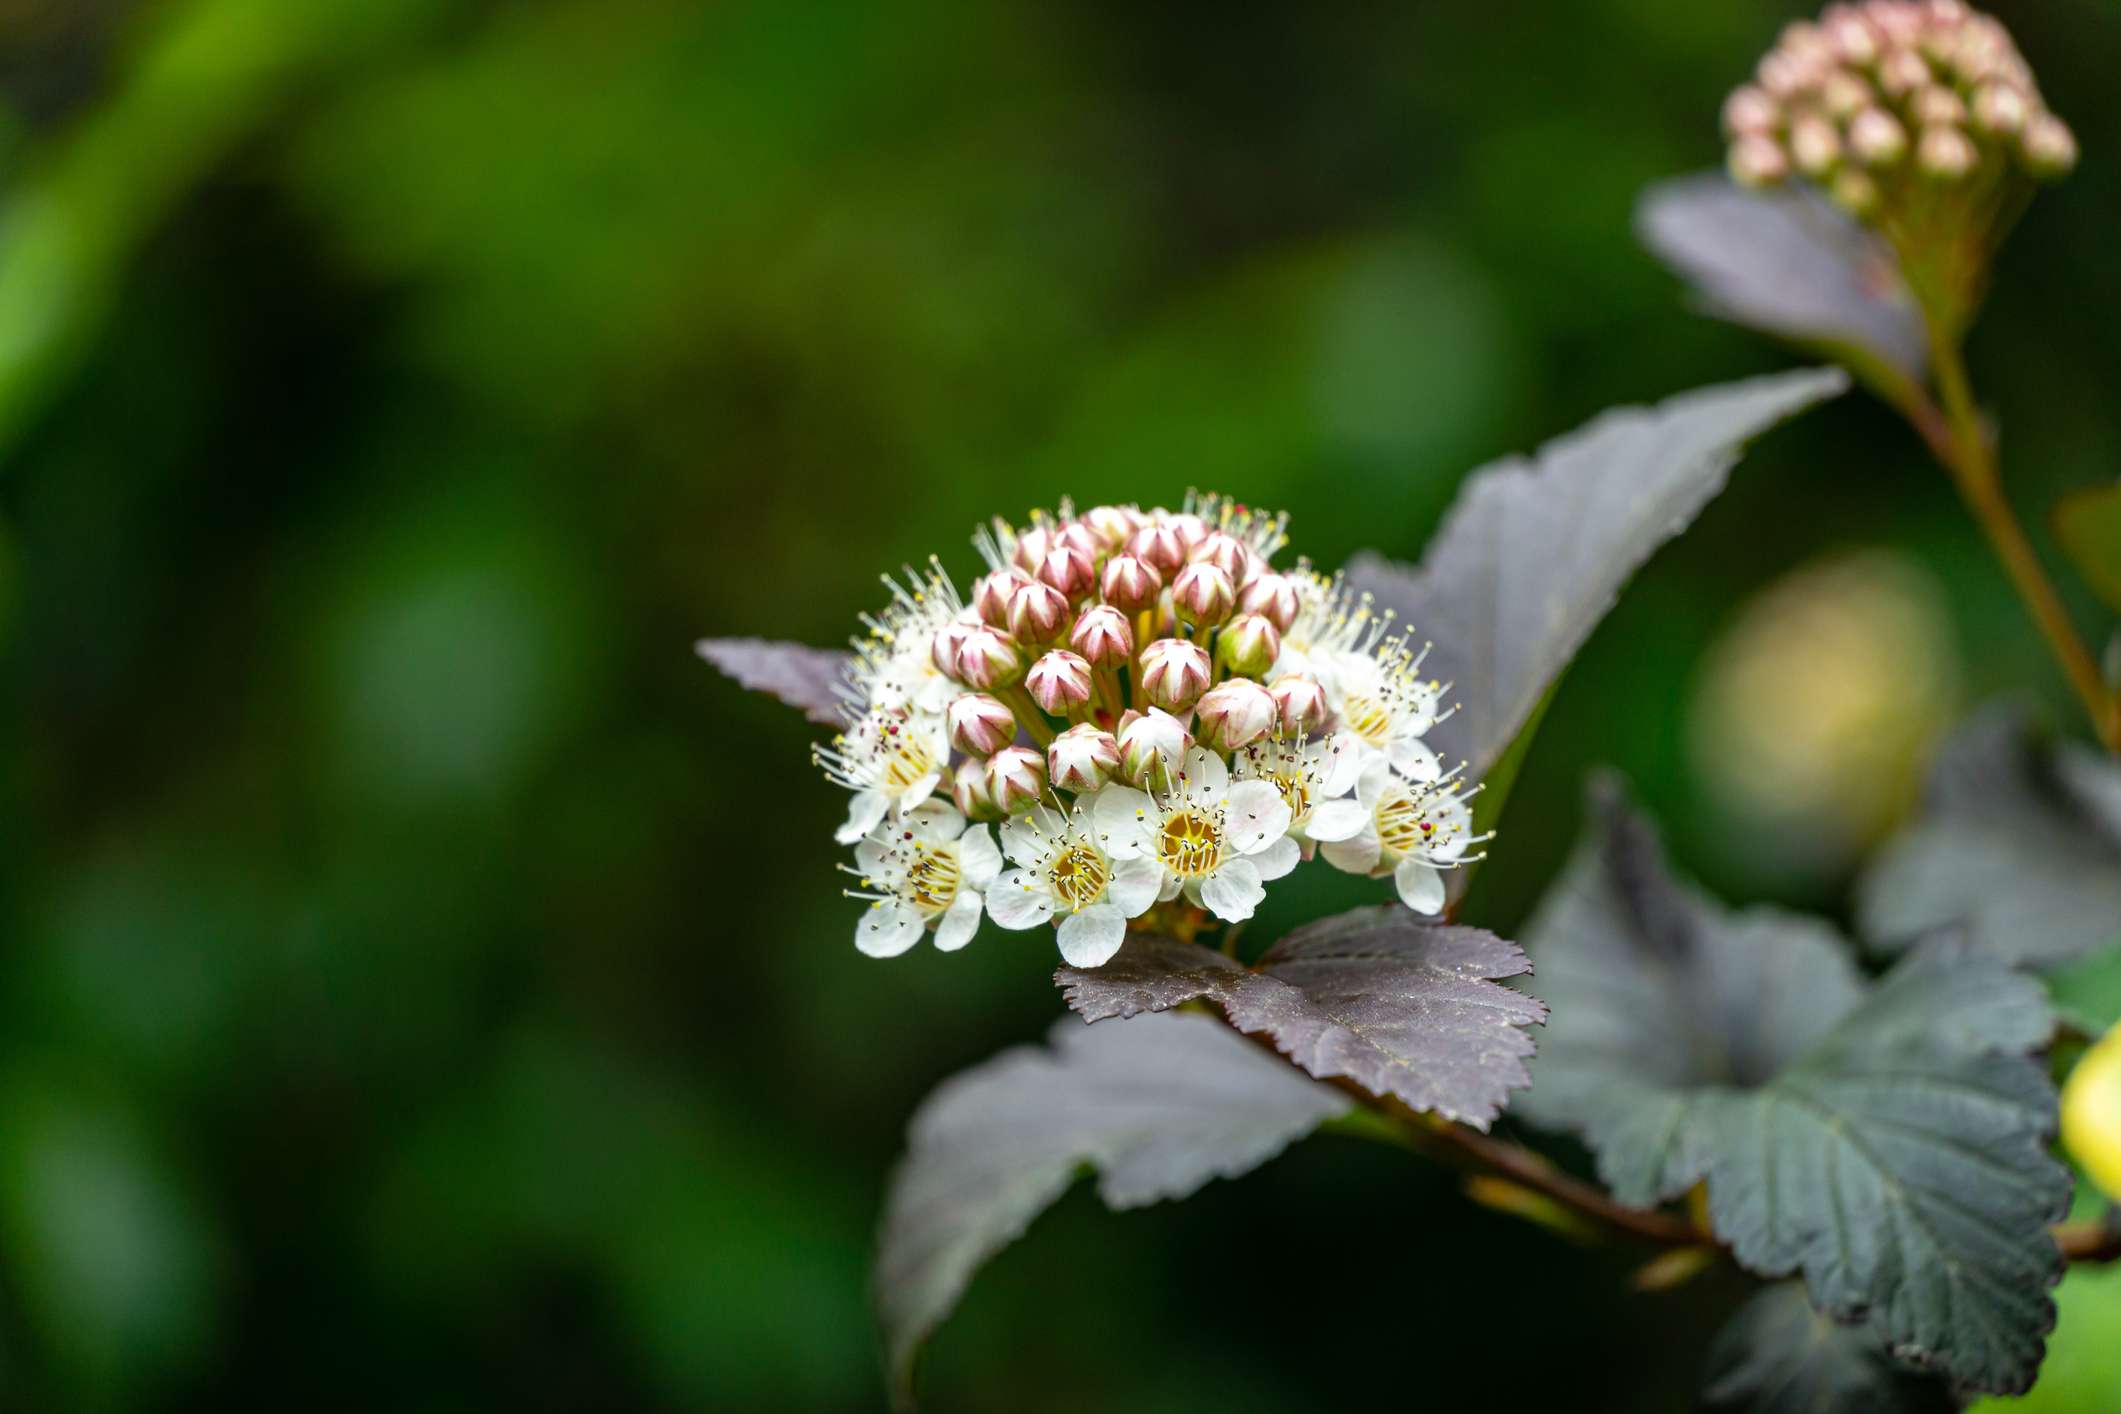
Image credit: https://www.thespruce.com/
3. Choisya Flowering Shrub
Known for its intensely fragrant blooms, Choisya is a beautiful evergreen flowering shrub. This tough plant can handle hot, dry conditions and grows in zones 7 to 11. The showy white flowers of Choisya add a touch of elegance to any garden and are sure to catch the eye of passers-by.

Image credit: https://upload.wikimedia.org/
Its glossy green leaves look good all year round, and the white, star-shaped flowers in late spring and early summer smell deliciously of orange blossom. It prefers a sunny, sheltered spot.
4. Deutzia Flowering Shrub
Deutzia is a popular flowering shrub for a good reason. It’s hardy, tolerant of poor soils and drought, and looks great all year round. The small white flowers appear in spring and are followed by a showy display of red berries in autumn.
It has mounded form with gracefully arching branches. Some types are low-growing and work well as a beautiful ground cover. Varieties to try to include Yuki Cherry Blossom and Nikko Blush. These are among the best early spring flowers to add to your garden.
5. Evergreen Abelia
Evergreen abelia is deer resistant and drought tolerant, and it puts up with pollution and thrives in windy or sloped sites. Its dark green leaves are so glossy that you can think that they’re coated with polyurethane. The early summer panicles of hot pink blossoms cover evergreen abelia, attracting hummingbirds and butterflies from two towns away.
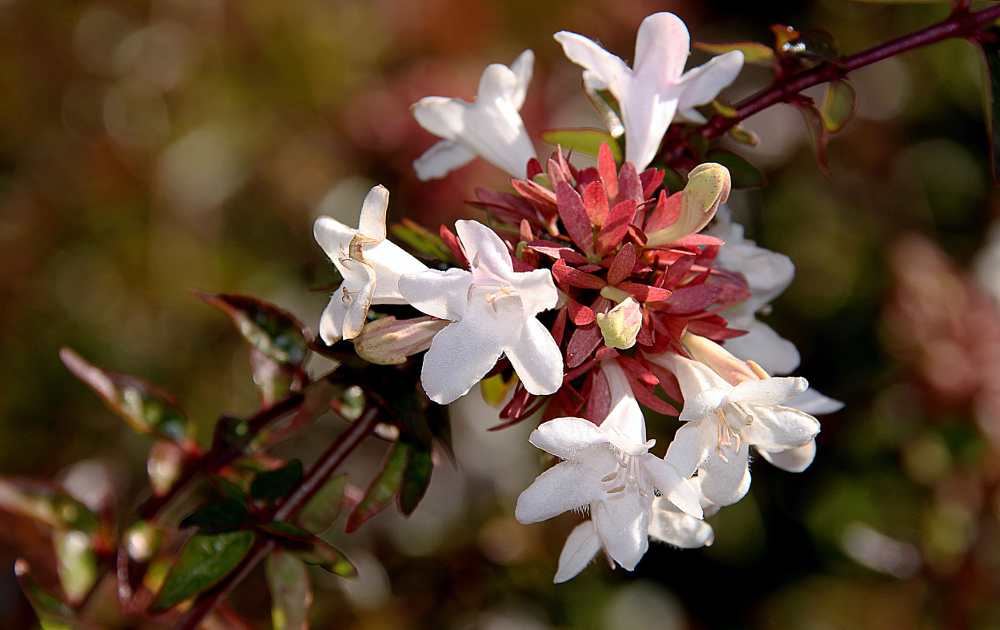
Image credit: https://www.nature-and-garden.com/
This plant can handle full sun to part shade, thrive in fertile, well-drained soil, and grow in USDA hardiness zones 8 to 11. The new types of this easy-to-grow shrub are more cold-hardy. Plant it alongside perennials, and the varieties to try include Sweet Emotion and pinky Bells.
6. Spirea
Spirea is a genus of around 25 deciduous and evergreen shrubs, most of which are native to Asia and North America. Many spireas make good hedge plants. This is a reliable bloomer that requires low maintenance. The new types maintain their mounded shape without pruning.
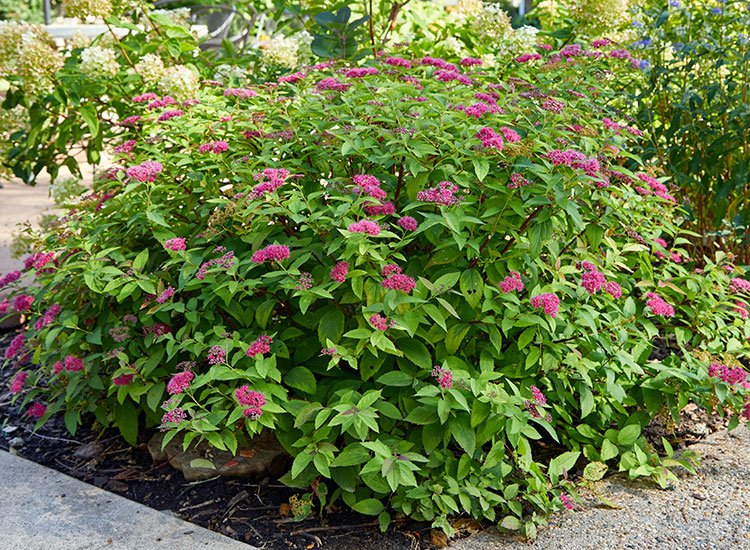
Image credit: https://images.ctfassets.net/
The long-lasting clusters of red, white, and pink flowers offer beautiful contrast against lime green, deep green, or gold foliage. It’s equally at home in mass plantings, as a low hedge or alongside perennials. It grows in USDA hardiness zones 3 to 8. The varieties you should try include Double Play, Candy Corn and Neon Flash.
7. Japanese Pittosporum
This beautiful evergreen shrub has glossy, dark green leaves with a bronze tint in winter. Late spring through early fall is covered in tiny white flowers that give way to purple-black berries. It’s easily pruned to any height and prefers full sun to part shade, medium moisture, and well-drained soil.
It grows in USDA hardiness zones 9 to 10. Japanese Pittosporum is one of the best blooming evergreen shrubs for milder climates and coastal locations. This is a low-maintenance option for hedges, foundation plantings, and privacy screens. The plants sport eye-catching dark green or green and white foliage plus small, intensely fragrant white flowers in the spring.
8. Lenten Rose
Lenten rose is one of the best-known and loved evergreen flowering plants. It’s a favorite for cottage gardens, naturalized areas, and woodland gardens. The blooms emerge late winter to early spring, before the leaves unfurl, and last for about six weeks. The plant grows 18 to 24 inches tall and wide with light green leaves. It prefers partial to full shade and grows in zones 4 to 9.
9. Creeping Phlox
Creeping phlox is a favorite evergreen flowering plant for ground cover as well as one of the best rock garden plants. The flowers emerge late winter/early spring, before the foliage unfurls, and last about six weeks. The plant grows 8 to 12 inches tall and spreads indefinitely by underground stems. It prefers full sun to partial shade and tolerates a wide range of soil conditions but grows best in zones 3 to 9 and bears tiny, needle-like leaves.
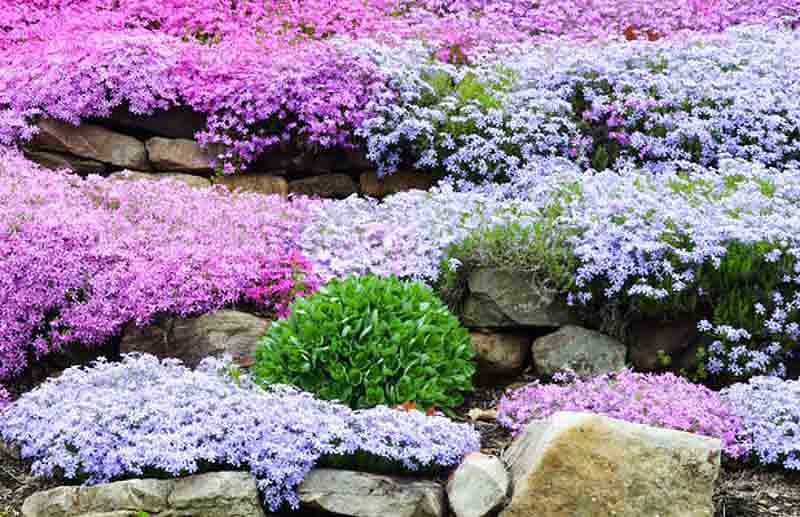
Image credit: https://www.gardenia.net/
10. Laurustinus
Laurustinus is a favorite evergreen flowering plant for screens and hedges. It grows 8 to 12 feet tall and wide, with clusters of purple flowers in early summer; the fall foliage is golden yellow. It prefers full sun to partial shade and tolerates moist, well-drained soil size, and grows best in zones 8 to 10.
Apart from poor soils, it can also thrive under extreme conditions, such as coastal areas and roadside plantings. Its glossy leaves are the perfect backdrop for large, fragrant white flower clusters. It produces blue fruit, much to the delight of local wildlife.
11. Charity Oregon Grape
This is a truly evergreen shrub with bright green foliage and produces masses of yellow trumpet-like flowers in springtime. It is perfect for hedges, screens, or foundation plantings; it prefers well-drained soils and grows best in zones 4 to 9. The flowers are followed by blue-black fruits that birds enjoy.
This plant prefers shade spots and looks good with contrasting foliage plants that thrive in the shade, such as elephant’s ear and epimedium. If you’re looking for a shrub border or exotic planting scheme, you’ve found it.
12. Rosemary
One of the most popular herbs in the world, rosemary, is a woody evergreen shrub that produces needle-like leaves and clusters of blue or white flowers. It is drought tolerant and prefers well-drained soils; it grows best in zones 8 to 10. Many varieties have small but colorful blue, purple or white blooms that attract pollinators.
Rosemary makes an excellent addition to herb gardens but can also be used in borders or rock gardens. You can even use rosemary as a tea to help calm the nervous system and help with mild memory problems, depression, headaches, and high blood pressure.
13. Evergreen Lavender
Evergreen lavender is a popular ground cover with a wonderful aroma producing gray-green foliage, which holds its scent until it flowers in late spring. This drought-tolerant plant grows in zones 5 to 9 and blooms with purple flowers. Lavender is a great addition to any garden, as it attracts pollinators, repels pests, and is deer resistant. It can be used in borders, containers, or rock gardens. Lavender also makes a great tea for relaxation.
14. Azalea
Azalea is a flowering shrub that grows in hardiness zones 5 to 8 and blooms with pink, purple or white flowers. It likes acidic soil and partial shade but grows in direct sunlight and drier conditions. New hybrids such as the fragrant Mt. Fuji’s increase hardiness, making them cold-tolerant than older varieties.
15. Crape Myrtle
Crape myrtle is a flowering shrub that grows in zones 7 to 9 and blooms with brightly colored flowers during the summer. It likes full sun but can also tolerate some shade. Crape myrtles need well-drained soil and like regular watering, especially during periods of drought.
Some types become small trees, while others are dwarf varieties that remain three to four feet tall and wide. The dwarf varieties include Berry Dazzle Dwarf and Midnight Magic.
16. Daphne
Daphne is a flowering plant that grows in zones 4 to 8 and can be used as ground cover or planted in containers. They require shade or partial shade and moist, well-drained soil. The fragrant flower blooms in winter and spring have colors that range from white to pink.
17. Hydrangea
Hydrangeas are a popular choice for both shade and sun gardens. They grow in zones 3 to 10, with some hardy varieties in zone 2. The flowers come in shades of white, pink, blue, and purple, with the color of the flower depending on the pH level of the soil. Sometimes it has bright flowers in summer, faded tones in fall, and papery dried blooms linger on the plant in winter.
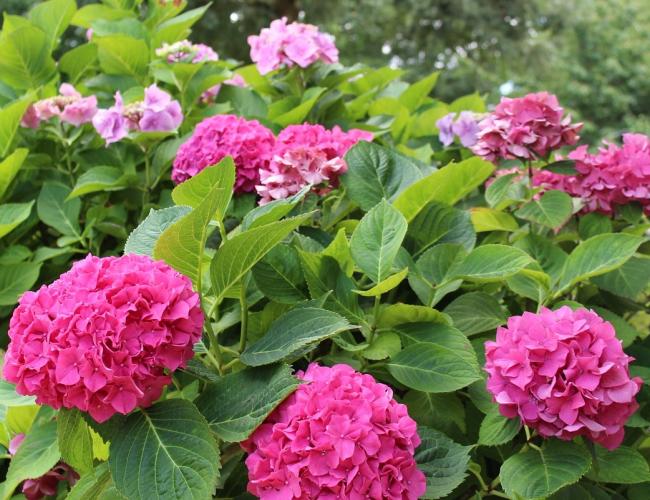
Image credit: https://www.almanac.com/
These shrubs are categorized into panicle, smooth, oakleaf, bigleaf, and mountain, with different needs. So read the plant description before buying. The varieties you should try out include Little Lime, Incrediball, Ruby Slippers, Cherry Explosion, and Tiny Tuff Stuff.
18. Candytuft
This low-growing perennial flowering plant is a great addition to rock gardens and borders, with mounds of bright white flowers in spring. Prune it to keep new evergreen leaves coming as these look better than old leaves. Grow it in zones 4 to 8 in full to partial sun.
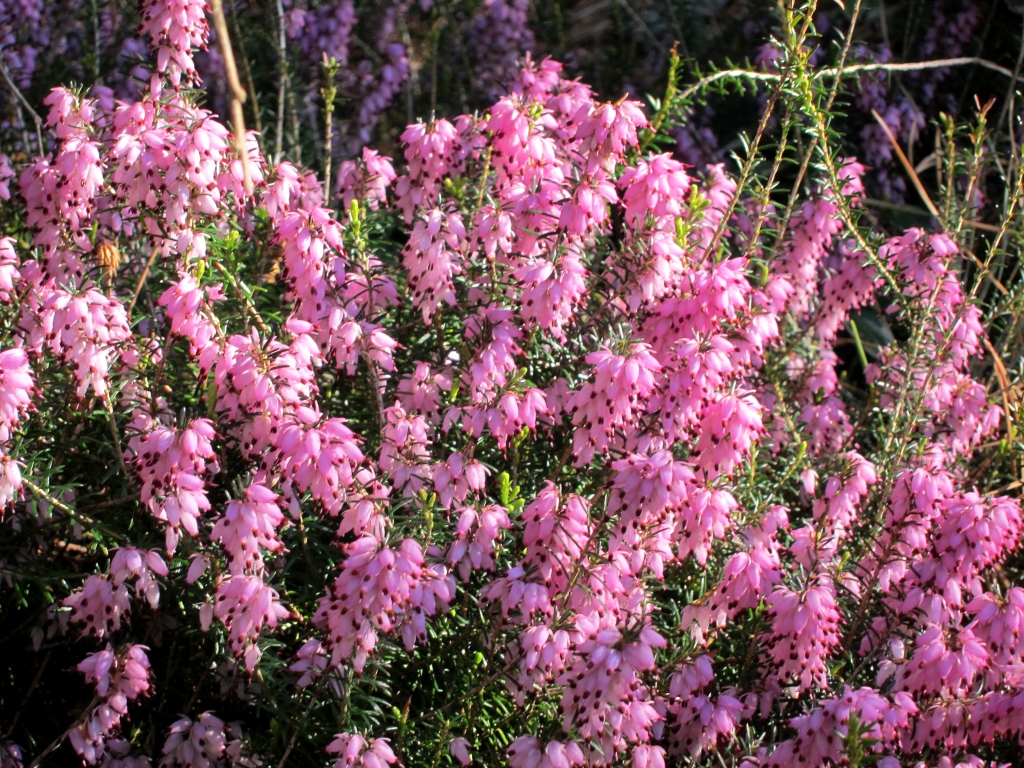
19. Winter Heath
This is a spreading evergreen shrub with tiny pink flowers in late winter. It’s deer-resistant, making it a good choice for gardens where they are a problem. Grow it in zones 5 to 9 in full sun or partial shade. The flowers are made up of long-lasting sepals instead of short-lived petals. Their leaves are needle-like, and the heath family loves acidic soil.
FAQs about Best Evergreen Flowering Plants to Grow
What are some of the importance of these evergreen flowering plants?
They provide a great source of nectar for bees and other pollinating insects They can help stabilize soil, such as when planted around tree roots.
Final Thought on Best Evergreen Flowering Plants
As you can see, there are several evergreen flowering plants to add to your garden. You need to find the ones that will work best in your area and your gardening style.
The post 19 Best Evergreen Flowering Plants to Grow appeared first on Kitchen Infinity.