Pros And Cons Of Gravel Driveway

Pros And Cons Of Gravel Driveway

A gravel driveway can be attractive, inexpensive to install, and easy to maintain. But it also has some downsides that you should consider before installing one in your yard.

The best type of driveway for you will depend on a variety of factors including needs and budget. This article will explore these factors along with the pros and cons of a gravel driveway. This will help you make an informed decision about whether or not this is the right choice for you. Let’s dive deep into this topic.

What is a gravel driveway?

A gravel driveway is a driveway that is built with a base of gravel. Gravel may be mixed with other materials to create a strong, durable surface capable of bearing vehicles. Also, gravel driveways are more aesthetically pleasing than asphalt. This is because they have a more natural appearance and can be customized to match the style of your home.

Image Credit: http://merrillpaving.com

Pros of a gravel driveway

Inexpensive: Gravel driveways are one of the most affordable types of driveways to install. The materials needed for this type of driveway are readily available and easy to work with. This makes for a quick and easy installation process, which can save you money on labor costs.Easy Maintenance: A gravel driveway is one of the easiest types of driveways to maintain. All you need is a rake or shovel to keep it clear of debris and ensure that water can flow freely. This saves you time and effort when it comes to upkeep.Durable: Gravel driveways are one of the most durable types of driveways on the market. Once your gravel driveway is installed, it will not require a lot of maintenance or repair work for a very long time.Aesthetically Pleasing: Gravel driveways have a natural look that makes them aesthetically pleasing to have in front of your home. This can increase its curb appeal, which may boost its resale value as well as your enjoyment of it over time.Customizable: You can customize your gravel driveway by using different types and sizes of gravel to create an attractive design that reflects the style of your home and complements the existing landscape in surrounding areas. Plus, you can add rocks, stones, pebbles, logs, and more to give your gravel driveway a one-of-a-kind appearance.

Cons of a gravel driveway

Drainage Issues: Gravel driveways are susceptible to drainage issues. This is because gravel holds water in its gaps, which can cause puddles to form when it rains or snows. The only way to prevent this would be to install an asphalt or concrete driveway instead. Another option when you have a gravel driveway is to spread grass seed over the surface so that when you do get standing water on your driveway, it will absorb some of it and allow the rest to drain through the small spaces between stones and other materials used for the bedding. But if you choose this method, be prepared to water the driveway regularly to get the grass seed to germinate and take root. Theplumbing on a home should also be checked yearly to ensure that water is draining away from the house and not pooling up against it because of the gravel driveway.Unpaved: A gravel driveway is an unpaved surface, which can be a concern if you have small children or pets who like to run around outside. This is because a gravel driveway can be rough on their feet and paws and may cause them to get injured if they fall or walk on it without shoes or boots.Difficulty Driving On Gravel: Gravel driveways are not as smooth as asphalt or concrete driveways, so they can be difficult for some vehicles to drive on. This may include sports cars, motorcycles, and other high-end vehicles.Dust: When a vehicle drives over gravel, it creates dust. This can be a nuisance for homeowners who live close to their gravel driveway and can also cause health problems for those who are sensitive to it.

As you can see, there are both pros and cons to having a gravel driveway in front of your home. It is important to weigh the positives and negatives of each before deciding which type of driveway is right for you.

If you decide that a gravel driveway is not the best option for your needs, consider asphalt or concrete instead. These types of driveways are more expensive to install, but they offer many benefits that gravel driveways do not, such as better drainage and a longer lifespan.

Gravel Driveway — Johnson's Hauling & Excavating, LLC

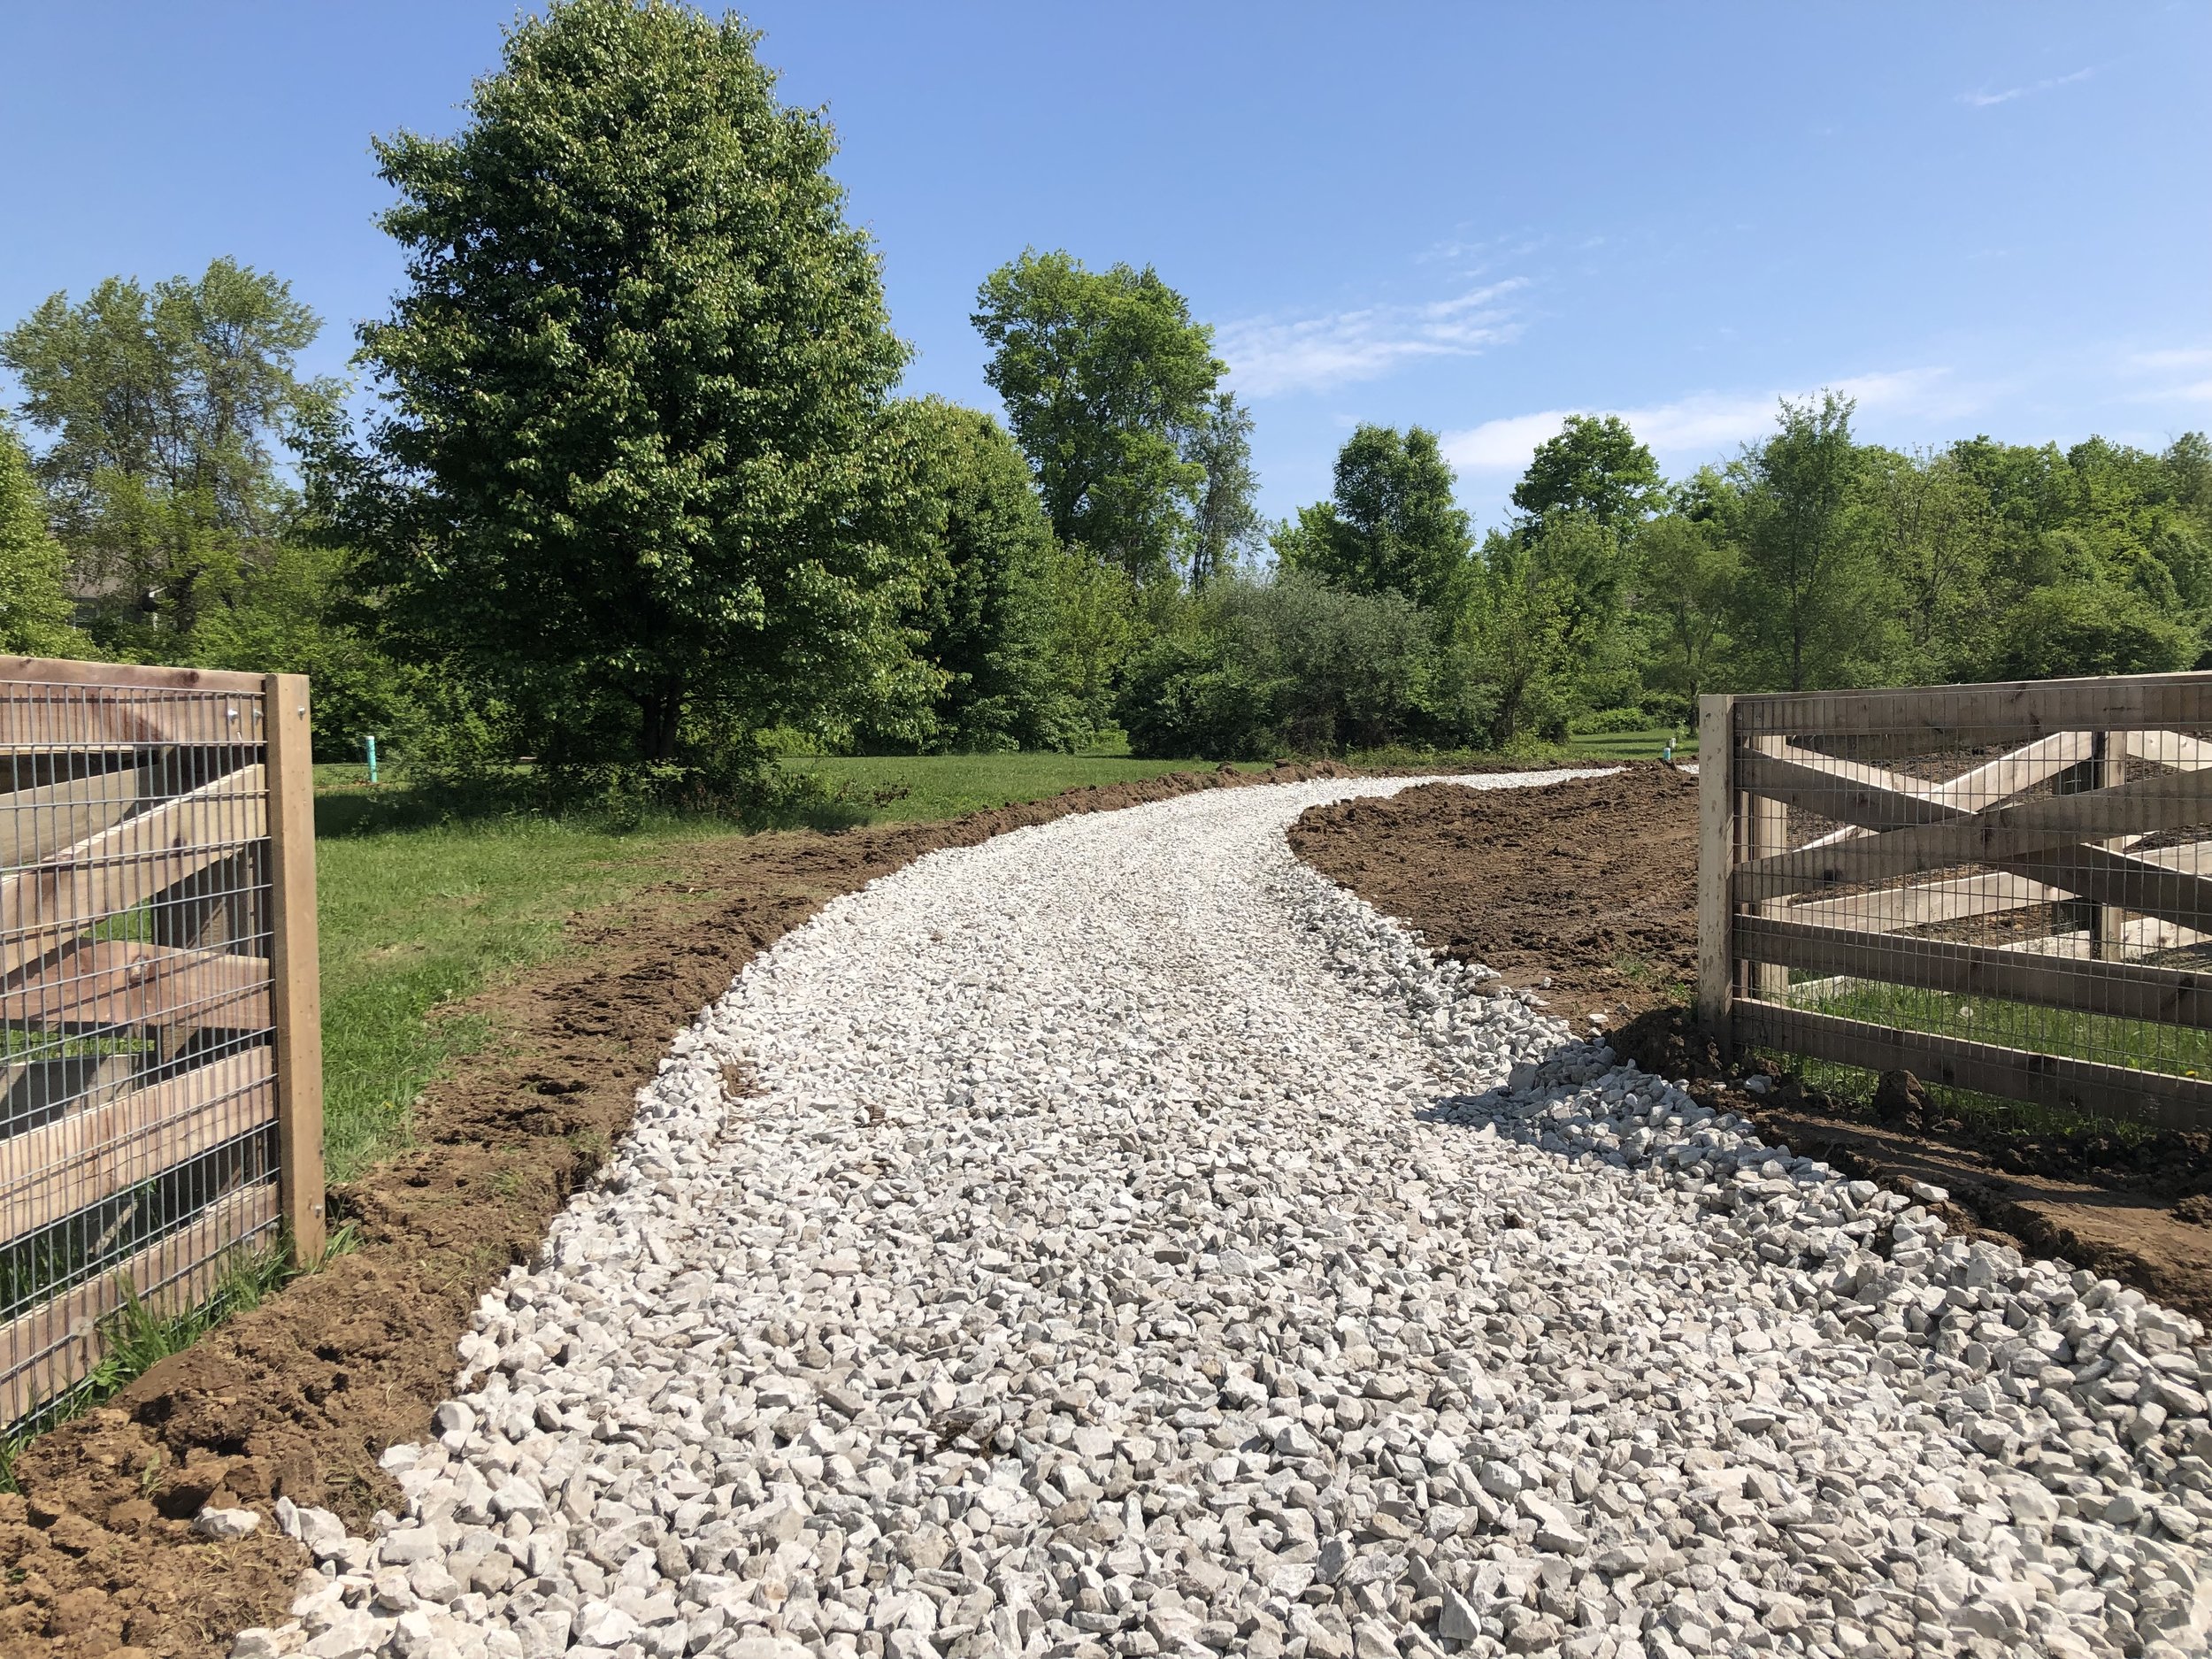
Image Credit: http://johnsonsexcavating.com

Other factors to consider

Here are some other factors to keep in mind before making up your mind about the type of driveway you’ll have.

Cost: Installing a gravel driveway is less expensive than installing an asphalt or concrete driveway, but it may require more regular maintenance to keep it looking its best.Weather: Gravel driveways are more susceptible to damage from bad weather conditions than asphalt or concrete driveways. This is because they do not have the same level of protection against rain, snow, and ice.Homeowner Association (HOA) Regulations: If you live in a neighborhood with an HOA, there may be regulations in place that restrict or prohibit the installation of a gravel driveway. Be sure to check with your HOA before deciding on a type of driveway for your home.Slope: If your home is located on a sloped lot, a gravel driveway may not be the best option, as it can be difficult to maintain and can result in drainage issues.Effect on the Landscape: Gravel driveways are not environmentally friendly because they can disrupt the surrounding landscape, which is also something to consider when deciding if it’s right for your home.Appearance: A gravel driveway will never be as smooth and flat as an asphalt or concrete one; however, you can choose different bedding materials that give it a unique look.Resale Value Asphalt and concrete driveways often add resale value to homes, while gravel driveways do not typically increase resale value unless they are professionally installed with high-quality materials.Safety: Gravel driveways are more susceptible to potholes than other types of driveways due to weathering over time, since water can seep into the cracks and freeze, causing the gravel to expand and crack.

When considering all of these factors, it is important to think about what is most important to you and your family. If a gravel driveway meets your needs, be sure to take the time to select quality materials and have it installed by a professional contractor. By doing so, you can ensure that your driveway will last for many years without requiring much maintenance.

Final thoughts on pros and cons of gravel driveway

In conclusion, the pros and cons of a gravel driveway are different for each individual. If you arebuilding your own house, building a gravel driveway at the same time might be a good option, but if you’re not, consider the landscape and how easy it will be to keep clean before making a final decision.

Moreover, if you have pets who to roll on the ground, it’s along something to consider before choosing gravel as the material for your driveway.

The post Pros And Cons Of Gravel Driveway appeared first on Kitchen Infinity.

Did you miss our previous article…
https://www.thelavkitchen.com/?p=811

Acidic Soil: What It Is, How You Can Change It

Acidic Soil: What It Is, How You Can Change It

Finding the right soil pH is important for the health of your plants. A proper pH balance helps plants develop strong root systems and uptake vital nutrients. While many gardeners focus on adding organic matter to their soil, testing soil pH levels is equally important.

Once you find your soil’s pH level, you can add things like limestone or elemental sulfur to balance it out. Acidic soil can be a real problem for your plants. It can stunt their growth and prevent them from absorbing basic nutrients needed for healthy plant development.

In this article, we’ll explain all about the importance of pH levels in your soil and how you can adjust them to help keep the plants happy and thriving. Let;’s get started.

What is Acidic Soil?

Acidic soil is soil that has a pH level of less than 7.0. This means that the soil is more acidic than neutral and can challenge plants to grow. The most common causes of acidic soil are high levels of rainfall, pollutants, and chemical fertilizers. The soil pH scale ranges from 0 to 14 with 7 as neutral.


Image credit: https://blog.zoysiafarms.com/

Acidic soil can have a harmful effect on plant growth by inhibiting nutrient uptake, damaging root systems, and causing leaf discoloration. It can also be a haven for pests and diseases.

Evaluating Soil

Identify Your Soil Type

Before testing your soil or adding anything to it, it is important to know what type of soil you have. Understanding the ecology of your land will help you determine if acidic soil is a result of natural conditions or something that you can fix.

For instance, well-drained soil and loose soil will be easily altered, while compacted soil with lots of clay in it will be difficult to change.

Understand Your Soil pH

Soil pH is a measure of how acidic or alkaline your soil is. A pH of 7 is neutral, below 7 is acidic, and above 7 is alkaline. The lower the pH, the more acidic the soil. Soil pH value can be affected by many things such as rainfall, organic matter, minerals in the soil, and the types of plants growing there.

Consider What You’re Planting

Some plants prefer more acidic soil than others. For example, blueberries and azaleas thrive in acidic soil, while rhododendrons and dogwoods prefer more alkaline soil. If you’re trying to grow a plant that prefers a different pH than your current soil, you’ll need to adjust the pH.

Test the soil’s pH

Testing the soil’s pH is as simple as buying a kit at your local nursery, or you can ask your county extension agent for a soil sample and testing instructions. Once you’ve tested the pH, make plans to raise or lower it depending on what kind of plants you want to grow and their preferred pH level. The good news is that there are simple DIY soil tests that you can do.

Have Your Water Tested

Your water supply might be what is affecting the soil’s pH level, so have a sample of your well or tap water tested to see what its pH is. If you don’t test the soil and the water, you’re not going to know whether your problem is with your soil or your water supply.

How to Change Soil pH

Make sure you check your soil’s pH every year by sending a soil sample to your local extension office to have them perform the test for you.

Increasing Soil pH

To make soils less acidic, the common practice is to apply a material that contains some form of lime. Ground agricultural limestone is also frequently used. Here are other ways of increasing the pH level of your soil:

Increasing Soil pH
Image credit: https://deepgreenpermaculture.files.wordpress.com/

Pick a Liming Material

There are many liming materials on the market, and they come in different forms. These ground limestone products include pulverized, granular, pelletized, and hydrated. Depending on your soil type and the amount of moisture in the ground, one of these products might be a good option.

Pulverized lime is finely ground and easily absorbed by the soil. However, it’s more difficult to spread because it can clog the applicator. Granular and pelletized lime is less likely to clog when spread with a fertilizer spread over turf areas.

However, it’s not as effective at altering the soil pH. Hydrated lime should be used with extremely acidic soils because it’s more water soluble and can quickly increase the soil’s pH. Some lime sources contain micronutrients like dolomite, a mixture of calcium and magnesium carbonates.

However, you should only use dolomite lime if your soil is magnesium deficient. Do not add more magnesium to soils that are already high in it.

Consider Adding Wood Ashes

Wood ashes can also be used to increase the pH of acidic soils. The potassium, calcium, phosphate, and boron in wood ashes help to make the soil more alkaline and provide some nutrients to plants.

When using wood ashes, it’s important to take into consideration the amount of sodium present. However, wood ash is not as effective as lime, but it can dramatically increase a soil’s pH over time.

Due to this, you should closely monitor your soil as you apply wood ash. Keep the ash from contact with any plant roots or germinating seedlings because it may damage them.

pply the Liming Source

Once you’ve determined that your soil is acidic, the next step is to add a liming source. A liming source is an agent that helps raise the pH of acidic soils. There are many different liming sources available, but the most common are limestone and lime.

Water the Soil Regularly

Putting a liming source into your soil is not enough. You must water it to help it move through the soil to where you want it. Lime moves through the soil very slowly, so be patient; wait at least one growing season before testing your soil again.

Decreasing the Soil pH

Some types of fertilizers can also help acidify the soil and most of them are safe to apply. These acidifying fertilizers include monoammonium phosphate, ammonium sulfate, diammonium phosphate, urea, and ammonium nitrate. Make sure you read the label on the fertilizer bag to determine if it’s acidifying fertilizer.

Use Organic Materials

Over time, organic matter such as pine needles, compost, or composted manure can acidify the soil. If you have added organic mulches to your soil in the past, test your pH annually. Organic matter is also good in improving soil drainage and aeration.

Consider Applying Sulfur to Lower Soil pH

Sulfur can help adjust the soil’s pH to desired levels. It is especially helpful for high-pH soils. However, sulfur does not last as long as lime, so you may have to reapply every few years. You should use elemental sulfur rather than sulfate or sulfite forms of sulfur that can be harmful to plants.

An excellent way to lower the pH value of small beds or garden areas is the addition of sphagnum peat. Sphagnum peat is also a good source of organic matter. Granular sulfur is also the safest, least expensive, but the slowest acting product to use when lowering your soil pH. The addition of sphagnum peat to large areas would also be cost-effective.

pply Aluminum Sulfate if Soil pH Is too Low

If the soil pH value is too low, you can apply aluminum sulfate to increase the acidity. This compound makes the soil more acidic due to a chemical reaction involving aluminum. Be sure to read the product label to ensure that the aluminum sulfate you are using is specifically for agricultural use. Also, avoid applying aluminum sulfate if the soil is already too acidic.

Apply Aluminum Sulfate if Soil pH is too Low
Image credit: https://blog.lawneq.com/

Till the Materials into the Soil and Water Well

When applying lime, sulfur, or aluminum sulfate to the soil, be sure to till them into the soil and water well. This will help the materials to dissolve and move through the soil so that plants can absorb them. If you do not water your fertilizer well, plants may not receive all of its benefits.

Rinse Your Plant After Application

If you are applying any fertilizer to your plants, be sure to rinse them off with water after application. This will help to remove any residue that may remain on the foliage and prevent any damage from occurring.

If sulfur or aluminum sulfate gets on the leaves of your plants, you’ll need to rinse it off with a hose. Failure to rinse them off can result in burns to the leaves and damage to your plants. Watering your plants will also help the compounds.

FAQs on Acidic Soil: What it is and How You Can Change it

What happens when the soil is acidic?

Soil acidity decreases the availability of plant nutrients such as phosphorus and molybdenum. It also increases the availability of some toxic levels, such as manganese and aluminum.

Is acidic soil good for plants?

No, it’s not. Acidity can stunt a plant’s growth and make it more susceptible to pests and disease. However, most plants thrive in slightly acidic soils because that pH affords them good access to all nutrients.

Why is it important to control the pH of the soil?

A soil’s pH is one of its most important characteristics because it influences the availability of essential nutrients for plants. By managing the pH, you can ensure your plants have what they need to thrive, increasing yields and decreasing inputs.

Final Thought on Acidic Soil: What it is and How to Change it

There you have. Taking your soil acidity into account is an important part of gardening, whether you’re trying to grow acid-loving plants or not. Luckily, it’s not difficult to manage the pH of your soil, and most soils can be brought into a desirable range with a little effort.

The post Acidic Soil: What It Is, How You Can Change It appeared first on Kitchen Infinity.

Did you miss our previous article…
https://www.thelavkitchen.com/?p=807

How to Remove Gasoline Stains and Odors

How to Remove Gasoline Stains and Odors

Gasoline is one of the most difficult stains to remove from clothing or carpeting. The stain will not only be hard to remove, but it can also cause an unpleasant odor. Since gasoline evaporates quickly, you have a short time frame to clean up and treat the stain before it becomes permanent.

Luckily, there are several ways that you can go about removing gasoline stains and odors from your clothes and carpets. Below, we’ll cover some of the more popular removal methods.

Before You Begin

Before you start, make sure you test any detergents or cleaning solutions in an inconspicuous area to avoid damaging the fabric. Cleaning chemicals and the dryer’s high heat can interact with the gasoline, so it’s not safe to use a home dry cleaning kit for these stains.

If it’s dry clean only, immediately take the garment to a professional dry cleaner. Do not dry the clothes in a clothes dryer until the stain is entirely gone. This is because if gasoline is still present in the garment, it can ignite your dryer and cause a fire.

Tools and Materials

Paper towelsSoaking basinWashing machineScrub brushBaking sodaWaterStain remover stick, spray, or gelAmmoniaVinegarOrange cleanerDish soap

Instructions

Remove Excess Gasoline

If the gasoline splashes on your clothing and has begun to soak into the fibers, you need to remove it as much as possible immediately. Place a couple of paper towels over the stained area’s top, press down, and then pat dry with another clean paper towel until no more gasoline transfers from the garment.


Image credit: https://www.thespruce.com/

You can also use baking soda to absorb gasoline from a wet spot on your clothing. Make sure you prevent the flammable towels or cloths used for blotting from starting a fire by setting out the cloth or towel to air dry. Flammable gas fumes will dissipate in the open air.

Once your item is dry, find a sealable metal tin, put the towel or cloth in it, and wet the material until it’s damp. Seal the container and discard it with your trash.

Pre Treat with Stain Remover

Before you treat the stain with a stain remover, test the product on an inconspicuous area of the garment to ensure that it does not cause any discoloration or damage to the fabric. Apply a liberal amount of the stain remover to the clothing.

Pre Treat with Stain Remover
Image credit: https://www.thespruce.com/

Stain removers can be found at most local grocery stores in either an aerosol can or a liquid form. Wash the clothing at the hottest setting appropriate for the fabric. Hot water is necessary to remove the gas fully from the clothing.

Use Liquid Dish Soap or Heavy-Duty Laundry Detergent

Dish soap has powerful enzymes that can help it break down oil and grease left behind by food, and it can work very well for other stains such as gasoline. You can also use enzyme-based heavy-duty liquid detergent.

Apply two tablespoons of dish soap or liquid detergent with a soft-bristled brush. Allow your clothing to sit for up to five minutes before soaking it in hot water for 30 minutes. Make sure you use the hottest water safe for the fabric type. Remember not to use DIY laundry detergent as it won’t be effective enough.

Treat with Baking Soda Paste

Another great way to remove gasoline stains and odors is to make a baking soda paste. Mix two parts baking soda to one part water in a bowl. Apply it to the stain, then use a scrub brush to rub it into the fabric. Leave your clothing out to air dry to absorb the paste, then brush off the excess baking soda.

If the stain and odor remain, repeat the step or soak the stained clothes overnight submerged in water with one cup of baking soda added. Wash, rinse, and check for odor. Repeat the baking soda paste application or baking soda soak until the odor is gone.

Soak Lingering Odors White Vinegar

If you still have a gasoline smell after trying baking soda, you can try using white vinegar. Pour white vinegar into a spray bottle and spritz the area where the gasoline odor is present. Let the vinegar sit for about 30 minutes, then blot it up with a cloth.

The vinegar smell will dissipate over time. If you want to get rid of the gas smell in your car, soak the gas with old towels or clean rags as quickly as possible. Then use a mixture of equal parts baking soda, white vinegar, and hot water to neutralize the odor.

Rub and wipe it away with a clean rug. If the smell lingers, use a few sprays of Febreze to get rid of the smell.

Soak Heavily Soiled Items in Ammonia Solution

Another way to remove gas stains and odors is by using ammonia. Soak the clothing in the washer full of warm water and one cup of non-sudsing household ammonia. This will smell, so make sure you shut the lid. Let them soak for several hours overnight, then drain and wash as usual.

The ammonia will neutralize the gasoline odor. Never use chlorine bleach or detergent containing chlorine with ammonia. This mixture can make a dangerous chlorine gas that produces toxic fumes.

Remove Gasoline Stain with Coca Cola

Another household remedy for gasoline odor and stains is Coke. Soak the stained clothing in a bucket of Coca-Cola and let sit overnight before washing as usual. This will also remove any grease, oil, or tar stains from items such as motor oil and grease stains on clothes, driveway spills, and grass trimmings stuck to your clothes after cutting the lawn.

You can also add two cans of Coke and one box of baking soda to a sink filled with cold water. The Coke will break down the stain while baking soda absorbs the odor.

Fast Orange Laundry Detergent

If you have a severe gasoline odor, Fast Orange is a laundry detergent that can help. This detergent is formulated to remove stains and odors on clothes caused by gasoline, oil, and other mechanical fluids. Add one cup to your washing machine and let it run through the entire cycle.

You can also use this detergent for hand washing by pouring a little of it into the water, stirring it up, and letting the fabric soak for about 30 minutes. Then rinse the clothing, and the gasoline stain and odor will be removed.

FAQs on How to Remove Gasoline Stains and Odors

Can you put gasoline-stained clothes in the dryer?

It’s not good to put gasoline stained clothes in the dryer because the heat will set the stain and make it harder to remove. The best way to dry clothing that has been stained with gasoline is to line dry or air dry the clothing outside. This will help to dissolve the fumes and reduce the risk of fire.

Can you use bleach on gasoline stains?

You should never use bleach on gasoline stains because it will make them worse. Gasoline stains are oil-based, and bleach will only set the stain, making it more difficult to remove.

Final Thought on How to Remove Gasoline Stains and Odors

Gasoline can be a tough stain to remove. But if you follow the above tips carefully, removing gasoline stains and odors won’t be a problem. Also, consider pre-heating the clothing with the right products to break down the stain and odor before washing to effectively remove these types of stains.

The post How to Remove Gasoline Stains and Odors appeared first on Kitchen Infinity.

Did you miss our previous article…
https://www.thelavkitchen.com/?p=804

10 Houseplants You Can Grow in Water

10 Houseplants You Can Grow in Water

Growing plants in water is not a common practice. Houseplants that grow in water are beautiful and easy to care for. You don’t need any green thumb or special equipment to start growing these plants. All you need is a jar, fill it up halfway with clay pebbles at the bottom, add soil on top of the pebbles. You can then plant your seeds or seedlings and wait until they bloom.

The best part about houseplants that grow in water is that they will last forever without replacing them every year like other types of plants do. These are low maintenance indoor plants which means there’s no need for watering them very often or fertilizing them.

What which ones are those plants? This article outlines 10 houseplants that grow in water and would be perfect for your home.

1. Spider Plant

This is a very decorative and popular houseplant with many small white flowers, perfect for decorating your home. Spider plant also makes one of the best plants for the bedroom, thanks to its beauty and air purification. It’s great because the leaves on the Spider Plant are so big and add contrast if you place them in a group with other smaller plants or flowers around them.

To grow this plant, take a few cuttings from the parent plant and place them in a glass jar or any container filled with water. You can leave them there or move them into a pot with soil after they root. If you plan on moving them to a pot, let the roots grow until they seem strong enough to support the plant.

2. Lucky Bamboo

Lucky bamboo is one of the easiest plants to grow in water without much sunlight or maintenance. It’s a popular type of houseplant because it’s believed to bring good luck and fortune to the owner. The hardy stalks of lucky bamboo can become a living centerpiece, no soil required.

The indoor plants grow in water, and a narrow vase is a perfect fit for them. You can purchase these plants online, and their basic versions are inexpensive. The lucky bamboo tends to become top-heavy and will topple in smaller containers, so look for a container that’s sturdy enough.

Plant them in a wider container and surround them with colorful gravel or pebbles, which will add to the ornamental value and provide some support.

3. The Chinese Evergreen

The Chinese evergreen plant is also known as the claw or peace lily plant. The dark green leaves of this houseplant are shaped like claws, and they can grow to be four feet tall. This lush greenery is the perfect indoor plant for beginners because it’s hardy and doesn’t require too much attention.

Chinese evergreen plants are also carefree indoor plants tolerant of low light conditions and general neglect. These features make it a popular indoor plant for those looking for no-fuss greenery. This plant also makes an excellent office or dorm room plant. To grow it in water, clip six-inch-long stems, placing them in a bright room and indirect sunlight as too much light can cause algae growth.

4. Heartleaf Philodendron

Heart leaf philodendron is an easy-to-grow houseplant that thrives even in low light. To grow heartleaf philodendrons in water, cut off any stems hanging over the edge of a container and place them in indirect light until new leaves appear. These vining plants are harder to kill than to keep alive.


Image credit: https://www.thespruce.com/

It has glossy, heart-shaped leaves with stems that can cascade down four feet or more. If you want a more compact plant, occasional pinching back leggy stems will help maintain a bushy growth habit. To grow this tropical plant in water, take a four to eight-inch long stem cutting, remove the bottom leaves, and place them in water.

Keep the container in a site with bright light but away from direct sun. Also, avoid keeping the plant in a cold room as it grows best in temperatures above 70 degrees Fahrenheit. Feed philodendron plants occasionally by adding a drop of liquid organic fertilizer to the water.

5. Sweet Potato Vine

Although the sweet potato vine is a tender tropical, it can be grown in water indoors. Cuttings should be made from green stems and allowed to heal for at least 24 hours before planting them in containers filled with peat-based potting mix or a mixture of perlite or gravel and sand. This trailing plant can grow four to five feet long.

It has lime green, heart-shaped leaves, but many cultivars offer unique and eye-catching foliage. Leaf colors range from burgundy to purple to bronze, and foliage is also varied for layers of interest. You can clip pieces of the stems in autumn to grow indoors over winter, then take six to eight-inch long cuttings, clipping just below a leaf node.

6. Coleus

Coleus plants are easy to propagate and grow by rooting stem cuttings in water, allowing you to create a colony of handsome coleus houseplants. They make a lovely counterpiece in a mason jar filled with water.

Coleus
Image credit: https://www.chatelaine.com/

To grow coleus, take a six-inch cutting and remove the leaves from the bottom four inches, then immerse it in a jar filled with water and watch it grow for several weeks. Adding a bit of compost tea to the water during monthly changes will help your coleus plants thrive. This plant also requires indirect sunlight, making it a great choice to grow indoors all year round.

7. Peace Lily

The peace lily is a lovely tropical plant with showy white flowers, which enjoys the humidity of the bathroom. It will grow in water as long as you provide it with indirect light and room to spread. In order for your peace lily plants to thrive, you should rinse them carefully before putting them into their jar of water.

This will help remove any built-up fertilizer salts. If you buy peace lilies, examine their roots carefully for damage before planting them. Fill a container with distilled water and not chlorinated water, which will damage the plant. Cut a hole on the top of a plastic stopper and use this to keep the plant in place by placing it at the top of the container.

Insert your lilies in the container and ensure the roots are completely submerged. You can add a few drops of liquid fertilizers or a small quantity of water soluble fertilizer. However, be careful with a peace lily in the house as it’s among the plants that are toxic to pets

8. Wandering Jew

Wandering Jew is one of the easiest houseplants to grow using this method. The plant should be well watered before you place it in its container. You don’t have to worry about fertilizer because it has no nutritional needs.

To grow a wandering Jew in water, submerge the cuttings from the mature wandering Jew plant in a jar of water, submerging only the stem and not the leaves as the latter submerged in water will rot the cutting. Leave in an area with plenty of sunlight and watch it root in just a few weeks.

9. Impatiens

The key to successfully growing impatiens in water is to select the right kind of stem cuttings. Take young, soft shoots that are just pink in color with no flowers or buds. Cut off about 1 inch of these shoots under running water.

Impatiens
Image credit: https://www.chatelaine.com/

Impatiens can also grow as marginal pond plants, and that’s how much they adore water. Snip off a few stems at the end of the growing season and overwinter them in a vase where they’ll root and grow as clones of the parent plant.

10. Pothos Plant

Pothos plants are some of the easiest houseplants to grow in water. Cut off a stem or two from an existing pothos plant and place them in a vase or jar of water. Plant the stems in the soil as soon as they root (usually within 2-3 weeks). Make sure the potting soil is damp but not wet.

Pothos Plant
Image credit: https://empire-s3-production.bobvila.com/

FAQs on Houseplants You Can Grow in Water

What are growing plants in water called?

The technique of growing plants in water without soil is called hydroponics.

What are the benefits of houseplants grown in water?

Houseplants grown in water generally have more vigorous growth and lush foliage than those grown in soil. They’re also easier to care for because you don’t have to worry about watering them regularly or fertilizing them.

Final Thought on Houseplants that You Can Grow in Water

Are you looking to add some green cover but lack space and time in your home? Well, with these house plants that need only water to grow, it’s easy to have some plants around that don’t require much attention. In addition, these indoor plants add life to an otherwise dull dorm or living room. So, what are you waiting for? Plant these house plants and enjoy the beauty they bring.

The post 10 Houseplants You Can Grow in Water appeared first on Kitchen Infinity.

Did you miss our previous article…
https://www.thelavkitchen.com/?p=799

Quilt Comforter Duvet Or Bedspread

Quilt Comforter Duvet Or Bedspread

If you’re a person who likes to bundle up in bed, it’s important to know the difference between a comforter, duvet, and bedspread.

In this article, we’ll take a look at each of these items and discuss the differences, how to care for them, where to purchase them from, and why you’d go for one over the others. Let’s get started.

Comforter Vs Duvet Vs Bedspread

First, it’s important to know what these items actually are so you have an idea of which one would be the best choice for you.

A comforter is a thick, quilted blanket that is filled with down, feathers, wool, or cotton. It can be used on top of your bedspread or duvet as an extra layer of warmth or used as a bed cover in the summertime. They come in many different sizes and colors and are usually machine-washable.

Image Credit: http://homestratosphere.com

A duvet is a soft, down, or cotton blanket that you put inside of a duvet cover and it is used in place of your top sheet and comforter to keep you warm at night. Duvets can come with or without filling and do not need to be washed as often as a comforter because they have a protective covering.

A bedspread is used instead of your top sheet and duvet when you want extra warmth in your bed. A bedspread usually comes with matching pillow shams and may not fit in your washing machine so it’s important to take special care when washing one. It’s also typically larger than other quilts making them perfect for bigger beds but bulky if you share your bed with a partner.

Which is Better?

It depends on what you prefer. Each coverlet has its pros and cons but a lot of it also comes down to personal preference.

For example, if you like a duvet because it’s easy to make your bed in the morning, you want one specifically for cold weather or maybe you just prefer the look of a duvet, then that’s great. If that’s not what you need however then all three options might be right for you.

Comforters are perfect for those who live somewhere warm all year round and don’t want something as heavy as their duvets. However they can be bulky and difficult to wash so if you don’t have a large machine at your house, the comforter might not be best for someone who likes to do laundry on their own. Bedspreads are perfect for those who live somewhere cold all year round or maybe you just prefer the look of the bedspread. They’re also easy to wash because they come with removable covers which allows you to wash them as often as needed without taking up too much space in your washing machine.

Typical Sizes For Quilts, Comforters, Duvets, Or Bedspreads

Comforters are typically big enough that they can be used for all bed sizes. Queen, king, twin, and full-size comforters are readily available in stores while smaller sizes like twin-xl may have to be ordered online.

Duvets come in queen, king, and full sizes which makes them great replacements for your current top sheet or duvet cover but if you prefer the look of a quilt on your bed then it might not meet your needs. There are however duvet covers that look like quilts; that’s why it’s super important to double-check before making a purchase. Bedspreads are usually only available in queen, king, and California King Sizes because they’re meant to fit much larger beds.

Bed comforter sizes and dimensions are important to know before you buy. You don’t want to purchase a comforter that’s too small for your bed or one that will take up the entire bed when you’re trying to snuggle up with your partner. Duvets come in many different sizes and so do bedspreads so make sure to measure your bed before heading out to purchase one of these coverlets.

How To Care For Each Coverlet

Comforters are usually made from cotton so it’s important to clean your comforter every three months if you want it to last.Washing a down comforter can be difficult if you don’t have a large machine so if that’s the case, consider taking it to a professional cleaner.

Duvets are also typically made from cotton or down but they come with protective covers which helps keep the duvet clean for longer periods. Because of this, duvets only need to be cleaned every 6-12 months making them a great option for those who don’t like to do laundry often.

Bedspreads are typically made from cotton and can be machine-washed but it’s important to take care not to overload your washing machine because bedspreads can be quite bulky. If you have a queen or king-size bedspread, it’s best to wash in two different loads or take them to a laundromat. All three of these coverlets can be dry-cleaned but it’s important to check the tag on your specific product to see if that’s the best way to clean it.

No matter which type of coverlet you choose, make sure to read the care instructions carefully before attempting to clean it. Each one of these quilts requires a different method of cleaning so you don’t want to end up ruining your investment. Quilts, comforters, duvets, and bedspreads all have their unique benefits so take some time to decide which one is right for you before making a purchase.

Duvet, Coverlet, Duvet Cover, Quilt...What's the Difference?

Image Credit: http://brooklinen.com

Quilt Comforter Duvet Or Bedspread – FAQ

What should I use as my winter bedding?

If you live in a colder climate, you will likely need to use a comforter or other type of bedding that is thicker to accommodate your needs. Quilts, duvets, and comforters all come in different thicknesses depending on the size of the quilt or comforter. If you are looking for something that will hold in more heat, opt for a warmer quilt or comforter with a higher thread count.

What should I use as my summer bedding?

If you live in a warmer climate, it may be best to use lighter-weight bedding products. You can find lightweight quilts and blankets made from cotton to help keep you cool throughout the night. A lightweight quilt or comforter can also help to keep you from getting too hot during the summer months.

Final Thoughts On Quilt Comforter Duvet Or Bedspread

In conclusion, it’s important to decide which type of bedding is best for your needs and climate. Quilts, comforters, duvets, and bedspreads all have their unique benefits so take some time to decide which one is right for you before making a purchase. With the right quilt or comforter, you’ll be able to snuggle up in comfort all year long.

The post Quilt Comforter Duvet Or Bedspread appeared first on Kitchen Infinity.

Did you miss our previous article…
https://www.thelavkitchen.com/?p=796

Why Window Air Conditioners Freeze-Up

Why Window Air Conditioners Freeze-Up

Window air conditioners are not designed to be in super cold climates, which means that if you live in a climate that gets below freezing, your window AC will freeze up. This can happen when the unit is running or not being used correctly – it’s just part of how they work.

In this article, we’ll explain how to prevent your window AC from freezing up, as well as give you some tips on how to keep your energy bills down. Keep reading to find out more.

Solutions To Try When Your Window Air Conditioners Freeze-Up

To keep this from happening, you should either turn off the unit when it’s not being used or install an insulation kit to help protect it from the cold. If you do have any problems with frozen windows, it’s best to call in a professional to help you out.

Insulation kits are fairly inexpensive and easy to install, so this is a great solution for anyone who wants to make sure their window AC stays functional all winter long. For more information about the kits, contact your HVAC contractor for advice. They’ll be able to help you find a good insulation kit that will keep your room as cold as possible without having to worry about it freezing up.

Another solution is to shut off the AC entirely when it’s not being used. You can do this by removing the front grille and locating the switch, then moving it into the off position. This will stop it from recirculating warm air back into your room, which should help prevent freezing up while also saving energy costs.

Image Credit: http://storables.com

Even if your window AC does freeze over, you shouldn’t let that stop you from using it – just remove some of the ice before turning on the power again (never use hot water or open flames like hair dryers for this). You should be safe to run it normally again, but keep an eye on the ice levels to make sure they don’t get too high.

Other Solutions To Try

While there are manytypes of air conditioning systems, all with their own ways of working, the following solutions might also be worthwhile trying if the above tips do not work.

If you’re not comfortable installing an insulation kit or turning your AC completely off when it’s not in use, there are a few other things you can do to try and prevent freezing.

One is to keep your windows open while the AC is running; this will help to circulate the cold air and keep it from building up. You can also try using a space heater to keep the room warm while the AC is on, as this will help to prevent the unit from freezing over. While it may not be the best idea to use a space heater if you have small children or pets, it can help a great deal.

Most importantly, it’s a good idea to make sure that any air bubbles in the window seal are eliminated before turning on your window AC. These can build up from condensation and cause issues, so poke each one with a long needle until you don’t see them leaking out anymore. If they’re blown out completely, there will be no pressure buildup to cause ice problems – just make sure your windows are as tight as possible before using the unit again.

Window AC’s should not be left running while unattended for safety concerns and also since doing this could prevent the unit from working properly due to over freezing. Shutting the window AC unit off when not in use is a good way to prevent this. The insulation kit is also an easy and effective solution to try. If these solutions do not work, then freezing may be unavoidable in colder climates.

In this case, just monitor the ice levels and remove any ice before turning the unit back on. Following these instructions should keep your room cool all winter long without having to worry about your window AC freezing up.

The Importance Of Not Having Dirty Filters

Make sure that you’re cleaning the filter regularly. This will help improve airflow and stop the unit from working harder than it needs to, which can also lead to freezing.

When the filter becomes clogged with dust, debris, and pet dander, it is not able to do its job properly. This can cause your window AC unit to work much harder than it needs to by making it run longer for the room to become cool again after shutting it off (this is known as short-cycling).

If you notice that your filters are dirty or clogged up regularly then you will want to replace them more frequently if possible.

Why Window Air Conditioners Freeze Up – FAQ

Can an AC electronic board be responsible for freezing units?

When window air conditioners freeze up, many people wonder if they need to replace the entire unit. In some cases, the electronic board may be at fault and need to be replaced. However, several other factors can cause an air conditioner to freeze up as well.

How do I know if the electronic board is bad?

The best way to determine if the electronic board is bad is to have it tested by a professional. If you are experienced in electrical work, you may be able to test the board yourself. The most common symptom of a bad electronic board is that the AC will not turn on at all.

You can usually test the board by checking for power at the connector. There should be power at all of the connectors, each connector should have 12 volts. The voltage may not be exact depending on your model, so you may need to check the manual for the correct reading.

How do I test an electronic board?

You can test an electronic board by removing it from the unit and testing it with a multimeter for a continuity test. If you are not comfortable removing wiring or working with electricity, then you should take your AC to a licensed repair shop to have this done for you. If there is no power at any of the connections when attempting to start up the window air conditioner, then the board is likely bad.

What causes my AC to freeze up during use?

A window air conditioner freezes up for a variety of reasons. The most common reason is a temperature that the unit can’t deal with. However, there are several other possible causes. One common cause is a dirty filter. When the filter is clogged with dirt and dust, it can prevent air from flowing through the unit properly.

Another common cause is a blockage in the condenser coil. If the coil becomes clogged with debris or lint, it will prevent the unit from cooling properly and can cause it to freeze up. Finally, if the refrigerant levels become too low, it can also cause the AC to freeze up.

How do I fix my window air conditioner that has frozen?

There are several other possible causes, so it is important to determine the root of the problem before attempting to fix it. If the filter is dirty, you can clean or replace it. If the coil is clogged, you can clean it with a vacuum cleaner. If the refrigerant levels are low, you can add more refrigerants. However, if none of these solutions work, then you may need to replace the entire unit.

Final Thoughts On Why Window Air Conditioners Freeze-Up

4 Reasons Your Air Conditioner Is Frozen & How to Fix It | Blair's Air

Image Credit: http://blairsair.com

In conclusion, there are several reasons why a window air conditioner may freeze up. By knowing the most common causes, you can usually fix the issue yourself. If you are not comfortable working with electricity, then it may be wise to seek professional help if your AC freezes up.

Finally, if you want to know what the best air conditioners are, ones that function correctly in different types of weather, you can check out our best air conditioners buying guide

The post Why Window Air Conditioners Freeze-Up appeared first on Kitchen Infinity.

Did you miss our previous article…
https://www.thelavkitchen.com/?p=793

How to Design a Nursery

How to Design a Nursery

Are you looking for ways to design a nursery for your newborn baby? Well, there are so many beautiful baby items out there you can use to create a lovely place for your little one. You want to create a beautiful nursery for your newborn baby, but you don’t know where to start.

We’ve created this guide with all the tips and tricks you need in order to design a lovely place for your little one. Let’s get started!

Plant a Seed

Naomi Alon Coe who is an interior designer of Little Con Interiors, specializing in nursery and child design, says that many clients come to her with a single item that inspires the overall design. It can be a wallpaper pattern or just a crib or another piece of furniture they fall in love with.

Decorate the Walls with Decals

Your baby’s nursery is one of the most important rooms you will design. It contains everything your child needs for napping, feeding, and playing. Take some time to think carefully about how you want it to look.

Wall decals are inexpensive, easy to install yourself, and can be removed without causing damage if you change your mind about the decoration you want. You can find a wide range of shapes and colors in the local shops near you or online.

dd Relevant Furniture to Your Baby Nursery

When it comes time to start furnishing your nursery, you’ll likely spend lots of time looking at different cribs, dressers, and changing tables. It can be difficult to know what to buy when your child is still very small, and their needs may change rapidly. One piece of furniture that will come in handy is a rocking chair.


Image credit: https://momlovesbest.com/

Not only does it provide a comfortable place for you to rock your baby to sleep, but it can also be used as a feeding chair. If you’re looking for a dresser to match your nursery decor, make sure you select one that has storage for diapers and other baby items. Every nursery also needs a glider to get the baby back to sleep and for late-night feedings.

Doing so will allow you to keep everything neatly organized in one place. Storkcraft Portofino 4 in 1 convertible crib or changing table will convert from a crib to a toddler bed then a full-sized bed. It also features plenty of shelving and drawer space. The changing table also detaches to act as a nightstand when your baby is past the diaper stage.

Maximize Your Small Space

According to interior designers and decorators, if your baby’s nursery is small, you’ll want to consider the feature wall color. You can easily and inexpensively paint the room a light color to make it look bigger.

Maximize Your Small Space
Image credit: https://www.thespruce.com/

Also, add a mirror to open up the appearance of the room. In addition, consider buying a baby a rounded crib as opposed to a traditional one. The round crib isn’t always cheap, but it’s a gorgeous family heirloom that you can pass down from generation to generation.

Round cribs can go into different areas of the room more than rectangular ones. You can also put a round crib center of the room if needed.

Consider Upholstered Nailhead Double Chaise

If you have a little more space, consider adding an accent chair to the room. The chair can be used as a place for your child to sit or nap, or it can simply serve as decoration. You could even put this beautiful West Elm upholstered chaise in the room.

From there, furnish the rest of the room with a mix of storage and display pieces. Look for pieces that will grow with your child. A changing table that can later be used as a desk or a low dresser that can function as a bookshelf are great options.

Don’t Go Overboard with a Theme

It can be tempting to settle on a theme for the nursery right away, but it’s best to wait until your baby’s arrival. Some babies are born with dark hair and olive complexions, while others are born blonde and fair-skinned. Babies also come out looking like either their mom or dad, meaning that they might already look like they fit into a certain theme.

If you’re not sure what theme to choose, it’s best to go with a gender-neutral design that can grow with your child. For example, interior designer Cathie Hong of Cathie Hong interiors cautions against overdoing the modern trend of having a nursery theme.

Even if your nursery has a specific theme, try to keep the color palette soft and minimal to create a calm and non-stimulating environment for both the mom and the baby.

Design a Room the Will Grow with Your Baby

While you might want to create a beautiful room for your baby’s arrival, it’s important to keep in mind that the room will have to grow with your baby.

An interior designer called Bean recommends choosing elements in draperies, wall coverings, and lighting so that with a few changes in furnishings, art, and accessories, the room can still work for tweens and teens.

Consider the Lighting

When lighting your nursery, use dimmer switches because they create a calming atmosphere. You’ll also want to have plenty of task lighting so that you can see what you’re doing when you’re caring for your baby at night.

Also, consider a ceiling fan or overhead light combo because they’re an excellent accessory in a nursery to keep it cool, comfortable, and ventilated. After some diaper changes, you’ll be thankful for having a well-ventilated room.

Test your bulbs for overheating and ensure you’re using the appropriate bulb wattage for your lamp, especially table lamps. Avoid floor lamps; even if they look nice next to a reading chair or a dim corner, they’re not the best choice ever for a nursery.

Make a Nursing Nest

A nursing nest is a great addition to your nursery if you’re planning to breastfeed. It’s a comfortable place for you and your baby to relax together and can be helpful in getting your newborn to latch on correctly. You can make your own nursing nest out of a soft blanket or buy one that’s already made. You can also keep a small end table with drawers or shelving for cubbies next to your cozy nursing chair for your stuff.

You can stock a few things, including baby food, nursing pads, burp cloths, extra blankets for spit-up incidents, and wipes. You can also store a water bottle, maybe a good book or magazine, and a feeding log if you’re early in the game.

Changing Area

You’re going to want a changing area in your nursery. This can be as simple as a changing pad on top of your vintage dresser, a changing tray, or an actual changing table. If you have the space, go for the changing table – it’ll make diaper changes easier. You’ll want to have plenty of stores nearby for diapers, wipes, ointments, powder, and other essentials.

Keep a good stock of diapers in the nursery to make late-night changes easier on you and your baby. If you have a big enough budget, it might be worth getting a pack n’ play bassinet to keep in the room for speedy diaper changes during the first few months.

Install Black Out Shades or Drapes

Your baby will likely sleep best in a dark room. Install blackout shades or drapes to ensure the room is as dark as possible when your little one is trying to get some shut-eye. This will not only help your baby sleep better but will also keep the room cooler in the summertime. It’s great for comfort but, most importantly, for safety.

Get Organized

No one likes a messy room. Learn how to declutter your room to clear off surfaces. Make sure to put away any loose or potentially dangerous items before your baby arrives. If you store everything in the closet, you’ll have easy access to all clothes for middle-of-the-night changes. You can use cubbies, baskets and toy boxes to throw stuff in and locate it easily later on.

Get Organized
Image credit: https://media.front.xoedge.com/

At least one wall should be reserved for changing diapers, dressing, bathing, and so on. You’ll want to have easy access to a sink, toilet, and storage for diapers, wipes, and other necessities. When choosing nursery furniture, it’s important to think about both form and function.

You’ll need a place for your little one to sleep, play, and store all of their necessities. Few of us can afford to buy a changing table, so you’ll want to look for items that can double as both a play area and diaper station. A dresser with ample storage space and a mirror provides room for clothes, toys, diapers, and other baby essentials.

Keep Colors in Nursery Simple and Practical

When it comes to color, it’s best to keep things simple in the nursery. Bright colors can be stimulating and overstimulating for a newborn baby. Stick to neutrals like grays, greens, and blues, or go with soft pastels. Knowing your child’s gender ahead of time is also essential as it can help you determine the color palette.

For example, if your kid is a baby girl, you can paint walls in lavender and white, with a carpet in the same colors. For your son’s nursery, consider other neutral colors that are colors of boys. Make sure you redesign and tweak the room to reflect your child’s personal tastes.

These colors will be soothing for your little one and won’t clash with their eventual room décor. If you’re looking for more helpful tips on nursery design, check out the Pinterest board.

FAQs on How to Design a Nursery

What are the most important factors to consider when designing a nursery?

The most important factors to consider when designing a nursery include the qualification of the staff, getting ready for school, and health and safety.

When should you prepare a nursery?

It’s best to put together a nursery before your baby is on the way so you won’t feel rushed when the time comes.

What color should I paint my baby’s room?

While it’s tempting to go bold, painting your little one’s bedroom in bright colors could restrict their vision and sense of security. Stick to neutrals like yellow, blue, and white.

What should I put on the walls?

Artwork can be a great decoration for your little angel’s room. It helps them express their personality while teaching them about shapes, patterns, and color recognition. Don’t forget to include pictures of your family members too.

Final Thought on How to Design a Nursery

As you can see, answering how to design a nursery is not as difficult as it seems. Just keep in mind your child’s needs and wants, and make sure to have a lot of fun with the process.

The post How to Design a Nursery appeared first on Kitchen Infinity.

Did you miss our previous article…
https://www.thelavkitchen.com/?p=790

Ceramic Tile Flooring Review: Pros and Cons

Ceramic Tile Flooring Review: Pros and Cons

Are you looking for flooring material that can be used in the living room, kitchen, and bathroom? Ceramic tile is a great flooring material, but it comes with some advantages and disadvantages that you should consider before installing them in your home.

Also, deciding whether ceramic tiles are best for your new floors depends on your style preference and budget. Let’s have a comprehensive review of ceramic tiles to see if they can be a great option for your home.

What is Ceramic Tile Flooring?

Ceramic tile flooring is a type of hard tile made from clay. It is then kiln fired, making it a durable and long-lasting material. Ceramic tiles are available in a variety of colors, sizes, and shapes. They can be used in both residential and commercial spaces.


Image credit: https://www.westsidetile.com/

Ceramic tile is also known as porcelain tile or non-porcelain tile. Porcelain tiles are more durable and dense than non-porcelain tiles. Ceramic tiles come in many varieties depending on the production process. Natural stone tiles are a well-known type of tile flooring, while other types of quarried stone include granite, marble, and slate.

Each of these tile flooring types has its specific characteristics and appearance. Natural stone tiles are more expensive than ceramic tiles.

Pros of Ceramic Tile Floors

Ceramic tiles are known for their versatility, low maintenance requirements, and moisture resistance. They have a hard surface that doesn’t hold onto or attract dust, dirt, or pollen. Learn some of the pros of ceramic tiles below:

Easy to Maintain

Ceramic tiles are relatively easy to maintain, requiring only a basic mopping every so often. If any stains, dirt, or liquids get on it, they will all rest on top and won’t get absorbed. You can also keep them clean frequently by using a vacuum with a soft brush attachment or a broom to get any loose debris and dirt off the floor.

If any stains happen, you can use any cleaner, just like how to clean tile floors of different kinds. In addition to being easy to clean, germs won’t harbor on the floor, making it a great advantage when running a business that serves the public, such as a restaurant.

They’re Affordable on Any Budget

One of the biggest pros of ceramic tile flooring is that it is one of the most affordable types of flooring that you can buy. It ranges in price, so no matter what your budget is, you will be able to find a style and color that fits your needs. Most tiles will cost around $5 to $10 per square foot.

Tile is also more cost-effective than hardwood flooring but expensive than carpet. You can also find low-end ceramic tiles for as little as $0.50 per square foot and high-end tiles for as much as $15 per square foot.

When finalizing your budget, ensure you account for additional installation costs such as labor, tools, and supplies. This is because as you look into the better-looking tile and professional installation, tile flooring can cost more than quality hardwood flooring.

They Can Withstand High Traffic Areas

One of the benefits that ceramic tiles offer is that they can support heavy foot traffic. This means you can walk on them every day without wearing them down or having to worry about creaking noises while you walk over them. However, keep in mind the quality will yield more wear and tear than higher-end tile.

The intense firing process makes ceramic harder to crack than porcelain or stone tiles. A quality tile flooring installation should last 20 years, which could add long-term value to your property if properly maintained.

Water Resistance

Another benefit of ceramic tiles is that they are extremely water resistant. This will be perfect for areas with high humidity or the possibility of spilling liquids, giving you peace of mind knowing your floors will remain safe. There is a protective layer on top of the material, making it stain and water resistant.

This is very important in bathrooms and kitchens as the ceramic tile will last longer than other materials. If you buy unglazed tile such as traditional Saltillo tile, you’ll need to seal it to protect the surface from any liquids it might encounter. It must be properly sealed because the grout lines between the tiles can be susceptible to moisture.

Otherwise, water can get down deep into the lines, weakening their installation and putting them at risk for mold growth. This can lead to costly problems down the road.

Ceramic Tiles are Durable

Another element to consider is the durability of ceramic tiles. These floors are extremely sturdy and can stand up to heavy foot traffic very well. They won’t crack or break like other materials would, so you don’t have to worry about any unnecessary replacements that might affect the aesthetic value of your home.

And when one tile ends up breaking due to severe impact, you can easily replace the tile without redoing the entire floor. This allows you to keep your overall costs down because you don’t need to replace your tiles regularly.

They’re Allergen Resistant

Due to their hard, solid surface, ceramic tiles have a lot less porous area than other materials. This, in turn, makes them resistant to allergens and bacteria that might affect the overall health of the people living inside a house.

Allergen particles are easy to spot and remove, making them a great choice for family members who suffer from allergies and asthma. Ceramic tiles are a great option for people looking to keep the environment of their house free from harmful allergens or irritating materials floating in the air.

Ceramic Tiles Come in a Variety of Designs

The ceramic tiles currently on the market come in various colors, patterns, finishes, and designs, from subtle neutrals to bold mosaics. This makes it easy for homeowners to find the perfect tiles to match their home’s interior design scheme.

Ceramic Tiles Come in a Variety of Designs
Image credit: https://www.homestratosphere.com/

Modern printing technology has also led to styles that mimic concrete, wood, and marble. This means that you can create a truly custom look by cutting your tile into planks or larger squares to make your space feel more open. You can also learn how to paint ceramic tiles and give them a perfect look.

Cons of Ceramic Tiles

The durability and moisture resistant feature of ceramic tile comes at a cost. So, it’s important to understand the drawbacks of this flooring option before heading to the home improvement center to make the purchase:

They’re Not Very Comfortable to Walk On

One of the biggest complaints about ceramic tile is that it’s not very comfortable to walk on. This is because it’s a hard surface, leading to joint pain and leg fatigue over time. Tile’s hardness can also be uncomfortable in areas where people stand for long periods, like in front of the kitchen sink or stovetop.

However, a few strategically placed area rugs and cushioned mats can help absorb some of that discomfort. As an advantage, the tile floor will feel great to step on the cold floor during the hot summer months.

It’s Slippery When Wet

Another drawback is that ceramic floor tile, like other hard surfaces, can be very slippery when it gets wet. This can pose a safety hazard if you have young children or older adults in your home. It’s especially dangerous to walk on tiles with water or ice because it can cause people to slip and fall.

It's Slippery When Wet
Image credit: https://www.covertecproducts.com/

This floor option is quite slippery, and if you’re installing them in highly trafficked areas, you want to prevent accidents as much as possible. In that case, avoid installing them in spots where liquid or water is spilled often on the floor, leading to injuries. For example, avoid using them in public bathrooms as you don’t want a lawsuit on your hands from a customer slipping on the wet tile flooring.

They Require Maintenance to Prevent Moisture Damage

Another thing to consider before picking ceramic tile flooring is that it requires a lot of maintenance. If you’re not careful, the tiles could get damaged from water and moisture, making them a breeding ground for bacteria and germs. With the grout lines acting as a pathway for liquid, this can be especially dangerous if anyone slips or trips.

A grout sealer is highly recommended on ceramic tile flooring to keep the moisture out and prevent damage like tiles’ watermarks. This also ensures that moisture doesn’t damage the underlying subfloor causing it to warp or crack. On top of this, having perfect subfloor conditions will ensure your tiles stay in place for years to come.

They’re Heavy

Tile flooring is heavy, making it a bad choice for upper-story installations. If it’s necessary to put tile flooring on the top level of a business establishment, then a professional should first check out the framing and building structure to ensure it can support the weight of tiles.

Ceramic Tile is Hard

Tile flooring is made out of ceramic, which is naturally hard. If you’ve ever stepped barefoot on a tile floor and felt the pain or heard your mother telling you not to run around on it, then you know how tough ceramic tiles are. Resilient floors can be softened with padded underlayment, but tile cannot.

Therefore, it doesn’t make for the best material for those who need to stand for hours at a time. You can use area rugs or throw rugs in the places where people stand most, like in front of the kitchen sink or behind the counter at the cash register.

High Installation Cost

Ceramic tile installation is not a do-it-yourself project. It’s also a time-consuming job that needs professionals. And, because of all the labor involved in the process, it is one of the most expensive flooring options you can choose.

Homeowners who want to install their tile should be careful of products that are easy to install and avoid tricky tiles such as large rectified tile, polished stone tile, and natural clay or Saltillo tile, which should be left for professionals.

FAQs on Ceramic Tile Flooring Review

Is ceramic tile good for flooring?

Ceramic tile is a good choice for flooring because it is durable, easy to clean, and can be installed in many different patterns and different rooms at home.

How can you tell porcelain tile from ceramic tile?

Ceramic tile is usually made in pottery or kiln, while porcelain tile comes from the same conditions but undergoes further refinement. The clay used in porcelain tiles tends to be purer and refined than ceramic tiles. Ceramic is designed for indoor use, while porcelain can be used indoors and outdoors.

Final Thought on Ceramic Tile Flooring Review

There you have it. The pros and cons of using ceramic tile on your floors. So, before you make the final decision on what to put down, make sure you weigh all your options.

The post Ceramic Tile Flooring Review: Pros and Cons appeared first on Kitchen Infinity.

Did you miss our previous article…
https://www.thelavkitchen.com/?p=787

20 DIY Couch Cover Ideas

20 DIY Couch Cover Ideas

You have a couch that’s past its prime time, and you’re on a tight budget. There are plenty of ways to update your couch, but most of them require spending money or taking up too much time. When you turn to these DIY couch cover ideas, then you won’t have to buy new furniture for your house.

Whether you want a new couch and chair or you want to redo your bedroom, there’s always a slipcover for your headboard. These slipcovers are easy to do and will instantly transform your home. Plus, you can give your old couch and chair a new look by spending only a fraction of what it would cost to replace them.

Here are DIY couch cover ideas for making your custom slipcovers in no time at all.

DIY Sofa Slipcover

This sofa slipcover is perfect for those who want to update their furniture on a budget. You’ll need some basic supplies, including a sewing machine and fabric. You’ll also have individual covers for the frame and cushions. This way, you won’t have to worry about constantly adjusting your cover every time someone sits on it.

DIY Drop Cloth Slipcovers

Repurpose old drop cloths to make your slipcovers. Depending on the look you want to achieve, you can make them patchwork-style or one solid piece. If you plan on painting your walls, this style is great because you can remove it at any time without damaging the underlying fabric.


Image credit: https://i.pinimg.com/

You can find drop cloths at almost any departmental or home improvement store at a relatively low cost. The covers will extend the life of your couch by a number of years and give your home a look you’ve always wanted.

Easy Sectional Cover

Do you have a sectional sofa but no cover for it? This easy DIY project is perfect for you. All you need is a piece of fabric that’s at least two feet wider and four feet longer than your sectionals.

Easy Sectional Cover
Image credit: https://m.media-amazon.com/

This is a great way of covering your sectionals and ensuring you get the slipcover that fits perfectly. You can get a brand new look and create any pattern and design you like. These DIY slipcovers are very important.

Patio Furniture Covers

If you have patio furniture, it’s important to keep it covered when not in use. Not only will this protect the furniture from the elements, but it will also help to keep it looking new for years to come.

Patio Furniture Covers
Image credit: https://www.patioproductions.com/

A simple patio furniture cover can be made out of a fabric that’s at least six feet wide and ten feet long. These DIY outdoor cushion covers can help transform your outdoor space.

No Sew Bench Cushion

If you have an old bench that could use a little bit of TLC, why not try this no-sew bench cushion? This project is easy and only takes a few supplies. You’ll need some batting, fabric, scissors, and a needle and thread but no sewing machine. Bench seats always make any area feel cozy and relaxing. So, you can DIY your bench cushion and customize it to your liking.

Easy Sofa Slipcover

If your sofa looks a little worse for wear, don’t worry. With this easy DIY slipcover, you can easily give it a new lease on life. This project will take you just a few hours to complete and only requires a few supplies.

All you need is some fabric, scissors, and a sewing machine if you have sewing skills. This simple and quick fix is a great-looking temporary fix that will transform your couch from a drab to fab.

IKEA Couch Makeover

Don’t worry if you have an old IKEA couch that you’re not quite sure what to do with. With this easy DIY makeover, you can easily give it a new lease on life. This project will take you just a few hours to complete and only requires a few supplies.

All you need is some fabric, scissors, and a sewing machine. You’ll sew through the buttons and add extra stuffing to your couch cushions. This DIY slipcover is budget-friendly, and the results will look amazing.

Dyed Sofa Slipcover

This is a great way to renew your old furniture in your living room. All you’ll need for this project is fabric dye and rubber gloves. You can also use a stencil if you prefer the look of that instead. The results will not only look fantastic but will cost you next to nothing.

If you’re looking to give your living room a bold new look, you’re going to want to take a look at this project. Plus, dying your couch cover can help cover up any old stains and signs of wear.

DIY Outdoor Cushion Covers

If you’re like most people, you probably spend a lot of time on your deck or patio during the summer. One way to make these spaces even more comfortable is to add some new cushions. But, buying new cushions can be expensive. Instead, why not try making your own?

This project is easy and can be completed in a few hours. Plus, the results will be fantastic. You’ll need cushion covers, Paint or fabric dye, Paintbrush or sponge, Masking tape, and Scissors.

DIY Tufted Cushions

Tufted cushions are chic, but they’re also very expensive. Luckily, you can make them yourself without spending too much money or time. For this project, you’ll need cushion covers, Scissors, Measuring tape or ruler, a Pencil or pen, and Thread.

This easy-to-follow tutorial will allow you to transform a budget-friendly sofa into a stylish anchor piece for your living room. In just 20 minutes, you can transform this couch’s entire look.

DIY Slipcovers with Piping

Piping can add a nice touch to any home décor project, and these slipcovers are no exception. For this lovely design, you’ll need cushion covers (fabric or foam), Scissors, Pencil/Pen, Measuring tape or ruler, and a Piping foot if your sewing machine doesn’t come with one already.

Whether you make your piping or purchase it at the store, this DIY couch cover keeps costs low without compromising on looks.

DIY Armchair Slipcover

Why not include your favorite armchair for fun as you’re making over your living room or sitting area? Here, learn how to make a DIY slipcover for an armchair.

This project is a little more complicated than others, but it’s still doable for almost anyone with basic sewing skills. To make it even cheaper, use drop cloths because they’re cheap, but that doesn’t mean they’re uncomfortable.

Couch Pet Protector DIY

Simplicity is key when working with slipcovers, and this DIY couch cover follows that rule. Use an old blanket or even a foam cushion to create a removable accent for your sofa that looks great but provides the perfect place for pets to snuggle up too.

These pets can cause havoc on couches, especially if they have sharp nails. They love to climb all over sofas, causing some serious damage. Thankfully, this DIY tutorial can provide you with a durable couch cover that will run along the back and arm of your sofa to protect it from pets.

Easy DIY Ruffled Sofa Slipcover

This easy DIY sofa slipcover doesn’t require much sewing, and it’s the perfect way to refresh your room without spending a lot of time or money. Plus, this is a great option for those who don’t have the necessary sewing skills to pull off something more complicated.

This idea couldn’t be simpler: measure your couch and head to the fabric store to pick up some coordinating fabric. You’ll also need a few basic supplies, like a sewing machine, needle, thread, pins, and scissors. The ruffles give your sofa and chair a comfortable and welcoming look.

This makes it go along with your DIY farmhouse furniture. These are much easier to make than they look, and you can cover your entire living with ruffles in just a couple of days.

DIY Ottoman Slipcover

You can cover those ottomans and make them look new again. If you’re making slipcovers from your couch and chairs, why not make one for your ottomans, so your entire living room set looks new? This DIY slipcover is easy to make, and you don’t even have to sew it.

You can also opt for one with pom-poms that can be easily removed so you can wash the DIY slipcover. If you don’t like poms, you can add a pleated skirt to your ottoman slipcover instead.

DIY Sheet Sofa Slipcover

You don’t have to buy expensive slipcovers from department stores to get that new furniture look. Instead, try to repurpose old sheets and make your DIY slipcover.

DIY Sheet Sofa Slipcover
Image credit: https://photos.demandstudios.com/

You can buy inexpensive sheets if you don’t have a set that you can use, and they’ll look like a real thing. You can use them to cover the entire sofa, even the cushions. You can also remove and wash them regularly.

DIY Reclining Couch Slipcovers

Are you looking to give your old couch a new look? You can always use a slipcover to cover it. You have to buy the slipcovers that fit your reclining couches, and they should perfectly match your sofas’ size and shape.

After that, make modifications to your regular couch slipcover to make it fit over the reclining sections and cover those sections so that they stay put when the couch is reclined.

Striped Slipcover for Kid’s Sofa

If you have kids, they might want to have a couch of their own. You can surely buy them one, but it’s also possible to upcycle an old sofa into something that both adults and kids can use. Just remove the back cushions and cut out pockets for toy storage.

Striped Slipcover for Kid’s Sofa
Image credit: https://cdn.decoratorist.com/

Then you can remove the seat cushions and sew some thick fabric or batting onto the bottom to make it a bit more comfortable. Finally, add a striped slipcover for an extra touch of fun.

Slipcover for Sofas with Attached Cushions

If your couch has attached cushions, you can still add a slipcover by measuring the width of the couch and adding an inch or two for seam allowances. Cut out a piece of fabric that’s at least two inches longer than the width of the couch, and sew the edges together.

Whether your cushions are attached to the back or the arms, you can customize a slipcover pattern to fit perfectly. Make sure your measurements are accurate and leave enough room to tuck the slipcover around your cushions when you put it on.

DIY Settee Slipcover

Measure the width and depth of your settee. Draw these measurements on paper, adding about two inches at each end for seam allowances. Cut out the pattern you’ve drawn and use it to cut a piece of fabric that’s wider than the settee but not so wide that it will hang over onto the floor. The settee tutorial will instantly brighten up any room, and it’s so simple to make.

FAQs about DIY Couch Cover Ideas

re slipcovers worth it?

Yes, they’re worth it because they can change up the look of your house in minutes. Plus, they’re easy to wash and can protect your furniture from spills and dirt.

Do I need a pattern?

No, you don’t need a pattern. You can measure the width and depth of your couch and then cut out a piece of fabric that’s the right size.

Final Thought about DIY Couch Cover Ideas

As you can see, these couch cover ideas are super easy to make. Just pick the one that you like best and get started. These DIY couch cover ideas can instantly change the look of your home.

The post 20 DIY Couch Cover Ideas appeared first on Kitchen Infinity.

Midcentury Modern Bedroom Ideas

Midcentury Modern Bedroom Ideas

One of the best things about mid century modern bedrooms is that there are many different options to choose from. Whether you want your room to be simple and elegant or bold and in-your-face, there’s something out there for everyone. The trick is finding it.

In this article, we will discuss some of the most popular mid century modern bedroom designs that people use when they want to make their bedrooms look stylish and luxurious without breaking the bank.

dd a Mid Century Modern Nightstand

One of the easiest ways to add a touch of mid century modern style to your bedroom is by adding a nightstand. Nightstands are a great way to add extra storage space to your bedroom, and they can also be used to add extra visual interest to the room.

If you’re looking for a simple, elegant nightstand that will help you create a midcentury design, then try this one-piece mid century modern furniture to give your bedroom a shot of style. Nightstands are easy to find, and many of them are inexpensive.

Splash of Boho with Midcentury Modern Bedding

If you’d like to add a touch of bohemian style but don’t have the budget for new bedding, you can always choose to change out your duvet cover. This will help transform your room’s look while also being an economical option that doesn’t require extra money on accessories or furniture.

Incorporate Mid Century Modern Lighting

One of the easiest and most effective ways to add a touch of mid century modern style to your bedroom is by incorporating some mid century modern lighting into the design. Pendant light, for example, is a perfect way to introduce this look and can be found in a variety of price points.

If you’re looking for a sophisticated bedroom, then mid century modern decor pendant lights in matching finishes and some classic molded plastic chairs would be ideal.

Use Natural Materials

Instead of using modern materials, opt for natural wood and natural finishes. This will reduce the coldness found in many mid century modern designs. When using natural materials, consider combining wooden furniture as this will combine lots of sunlight and some plants to round out the colors.


Image credit: https://blog.modsy.com/

Focus on Earth Tones and Colors

For a classic mid century modern style, you’ll want to focus on color palettes such as neutrals and earth tones. Try to play with different shades of brown, rust, mustard, yellow, and green with a touch of gray and white. If you’re using a dark wall color, make sure you have enough natural light coming in so your room doesn’t look too gloomy. You can also learn other ways to brighten a dark room and make it livelier.

Skip the Classic Color Scheme

If you’re looking for something a little more unique, then you can try playing with different color schemes. If you also love clean lines, geometric shapes, and the overall clean feel of the mid century modern style but you’re not thrilled about the muted tones, then keep the style and ditch the colors.

Look for Tapered Legs

The mid century modern style is typically associated with furniture pieces with tapered legs, which gives the table, the dresser, and a bed frame a distinct look. If you choose between two otherwise identical tables, one of them has tapered legs, and the other doesn’t go for the more interesting design. Their sleek, round frames make for a roomier and more spacious look.

Look for Tapered Legs
Image credit: https://blog.modsy.com/

Consider Bold Accent Wall

Do you want to give a simple mid century modern bedroom a powerful shot of style? Well, create a boldly patterned accent wall. A busy wallpaper with a strong geometric pattern or a solid color in a deep hue can make a big impact. It will also draw the eye and create a focal point in the room.

Consider Bold Accent Wall
Image credit: https://cdn.shopify.com/

Keep it Neutral

When decorating a mid century modern bedroom, you’ll want to stick to neutral colors as much as possible. That doesn’t mean you have to go for a beige or gray overall color palette, though. Use a soft white in the walls, with off-white trim and accessories. For dark brown furniture, consider painting it a lighter shade of tan instead.

Keep it Neutral
Image credit: https://www.mydomaine.com/

Go With Eames Chair

When it comes to furniture, the key is simplicity and functionality. A great way to achieve this look is with an Eames chair. These iconic chairs come in a variety of colors and styles so that you can find the perfect one for your room. Plus, they’re comfortable and stylish, making them perfect for mid century modern design.

Look for Natural Wood Furniture

Mid century rooms are all about natural materials, so feel free to go a little more rustic with your furniture choices. Look for pieces made from natural wood, such as maple, walnut, or oak. Also, consider clean lines and muted tones to bring mid century modern into your bedroom. These woods will add a warm and cozy feeling to your room while keeping with the mid century modern aesthetic.

Change Things Up with a Platform Bed

Don’t hesitate to change your bed frame for a more glamorous platform bed. The straight lines of a platform bed work well with mid century decor. So, opt for a nice platform bed, and then stack it with books and throw pillows to give your room extra personality.

Change Things Up with a Platform Bed
Image credit: https://cdn.shopify.com/

Create a Gallery Wall to Act as a Focal Point

A gallery wall is a great idea for a mid century modern bedroom because it can be a focal point for the room. Choose a few of your favorite pieces of art and hang them up on one wall. This will add some interest to the room and help pull the design together.

Use Geometric Patterns

Geometric patterns are a huge part of mid century modern bedrooms, so use them in your room. Bring in a nightstand, a dresser, organic shapes of lamps, and clean, straight lines of furniture in the room. Choose clean and modern patterns to work well with your decor.

Incorporate Colorful, Fun Mid Century Modern Bedroom Furniture

One great way to add some fun to your bedroom is incorporating colorful furniture. This can be done with a bed frame, dresser, or even just with accent pieces. Add a pop of color with a bright pillow or blanket, and you’ll have a stylish and fun mid century modern bedroom.

Bright Accents in the Mid Century Modern Bedroom

If you prefer to keep your bedroom decor simple, then the use of bright colors is a great way to liven your space. You can incorporate these with wall art, patterned textiles, or even just with small pieces of decor placed on top of furniture. Adding a few shots of accent color will help liven up neutral bedroom space.

Glamorous Mid Century Modern Style

If you are looking to add a touch of glamor to your mid century modern bedroom, there are a few things you can do. You can start by adding metallic finishes to your furniture or accessories. You can also add plush fabrics such as velvet, faux fur, or silk since they also make the best ideas for those looking for how to decorate the bedroom

This will give the room a more luxurious feel. As demonstrated beautifully in this bedroom by an interior designer, the use of bold abstract paintings, luxurious fur throw, mustard armchair, and elegant furniture adds to a sophisticated and glamorous bedroom.

Built-In Bookcases in the Mid Century Modern Bedroom

If you are looking to build-in storage into your mid century modern bedroom, the best option is to install built-in bookshelves. This gives the room a more polished feel, but at the same time, it is functional. Shelves do not clutter up space and can be decorated with ornamental bookends or vases of flowers.

White Mid Century Modern Bedroom

A room with a white tone is always modern and chic. This bedroom oozes elegance and luxury through white silk curtains and plush white carpeting. The bed follows the line of symmetry and leaves plenty of space for the window. The bedside lamps give a warm glow that sets the mood for romance.

White Mid Century Modern Bedroom
Image credit: https://www.thespruce.com/

FAQs on Mid Century Modern Bedroom Ideas

What is a mid-century bedroom?

Mid-century modern refers to the decorating style that rose to popularity in the 1950s and 1960s.

What are modern bedrooms?

Today, a modern bedroom is typically one that is minimalist in design, with clean lines and little ornamentation.

What is the difference between mid-century and contemporary?

Mid-century refers to the period around the 1950s, while contemporary usually means designs from the past 10 to 15 years.

Final Thought on Mid Century Modern Bedroom Ideas

Well, there you have it. You don’t have to be overwhelmed by all these modern bedroom ideas. Start with one thing at a time and move on from there while keeping in mind the key elements of mid-century design, including functionality, simplicity, and modernity.

The post Midcentury Modern Bedroom Ideas appeared first on Kitchen Infinity.

Did you miss our previous article…
https://www.thelavkitchen.com/?p=774