Want To Broaden Your Arts And Crafts Skills? Try These Tips!

Arts and crafts are taught to children in school starting at a very early age. There’s a reason for this. Arts and crafts inspire the soul and sharpen the mind. They are never boring and always rewarding. Keep reading for some great arts and crafts advice that will have you feeling like a kid again.


Always be mindful of the fact that any arts and crafts projects involving children is going to get messy. If that bothers you, be sure to cover surfaces with newspaper or butcher paper to avoid messes made by paper, glue and glitter. Washable adhesives and markers are some other options.


Get organized. There are many different ways you can store your supplies, but find a way that works for you. By having your supplies organized, you can quickly find every item you might need. This will also allow you to easily see exactly what is available to you.


Don’t throw away any wire hangers! That wire can come in mighty handy with lots of different arts and crafts projects. Keep those hangers to the side. You can stretch them in all sorts of angles to create all sorts of fun shapes. Or you can use it as a way to bind pieces of a project together.


To make a mosaic mirror that is stable without being too heavy, consider plywood as a backing material. Hardy board is waterproof, but unless you’re hanging the mirror near the shower, you don’t need a background with that much heft. A mirror of any size will need a colossal hook with a hardy board backing.


Now that you’ve been reminded about how much fun arts and crafts are, you should be excited. You’re ready to create something that begins in the corners of your mind. When it comes to fruition, it will be that much more rewarding. Get started today, and make something only you can make.


You can also visit our other websites and post your article.

Love Sarah Belle,  The Lav Kitchen,  Bonsai Disc World,  Friends In Bellwoods,  Salis Bury FlorilegiumReclaimed Hardwood Flooring, Upstate-SEOFully Covered AgentFox Glove Accessories , Just Challenge-Virtual  , Search Engine Marketing Company Services , Business In Sights Consulting ,   Direct v Deals  , Labs Quare Online Wyatl Taylor , TCOF America , mjglobalsupplies.com , CIO 2 CMO , JNII USA Bharat , Rally Edeasturias , SOS BC Get Better Freight , www.porch-essentials.info   Masexualitenestpa Sun Handicap , Boston Choice Properties   Breck PortThe Computer Box , Business Data IntlRGCI Son Fest Chapel , Website Concept Design , Help At Home Tamp A Bay , Social Profit Strategies3680 Express Drive Cedar Park Concrete , Tag Yacht Sales , Colorado Springs Auto Accident Attorney , Minds At Work Embroidery Extravaganza , Upper Valley Score

How to Save Money on a Kitchen Remodelling Project

How to Save Money on a Kitchen Remodelling Project

When you decide to redo your kitchen, you’ll have many options. Among those options are adding new appliances and fixtures, changing the layout, and improving the functionality of the space. The good news is that there are plenty of ways to save money on your kitchen remodeling project. Once you’ve determined your budget, you can get to work planning your kitchen remodeling project. Read on for some tips you can follow.

kitchen remodelling
First, turn off the water before you start. Make sure you have a plan for getting rid of debris. Depending on what type of countertop you plan to install, you may need to hire a contractor. Once the cabinets have been installed, you can take measurements for your new countertop. Countertop fabrication can take a few weeks or even a month. After the cabinets have been installed, you’ll have to schedule a final inspection during business hours.
Getting a professional to do the work for you can be costly. Most people hire contractors, design-build firms, or a combination of all three. But it’s possible to do the majority of the work yourself if you know what you’re doing. Then you can plan your daily activities around the new kitchen. But keep in mind that hiring a professional can take weeks or even months. Make sure you have the time and the skill set to complete the remodeling project.
A kitchen remodeling project may require a wide range of services. From removing an exterior wall to extending space into a yard, a kitchen remodeling project involves many elements of a house renovation. In addition to cabinetry, a kitchen renovation project can involve painting and flooring, replastering, and electrical and lighting upgrades. If you’re planning to sell your property, remodeling can make it more appealing to buyers.
When remodeling your kitchen, you’ll need to apply for permits. Different agencies administer permits. You can check with your city or county government or with the water company to make sure you have everything in order. Your general contractor will apply for these permits on your behalf. Make sure to hire someone who’s qualified and experienced to make your remodeling a seamless process. When hiring a contractor, always ask for references and check their credentials. You’ll be happier with the result.
Getting a kitchen makeover done is a great way to upgrade your space, but beware of overspending. New appliances and space-saving accessories can quickly add up to a significant amount of money. That’s why it’s so important to set a budget before you start the renovation process. Be sure to include essentials and leave some extra money for value-adds. And remember to make sure you get a great deal on your renovation!
Plumbing and wiring are not skills you can learn overnight. Your kitchen is likely to require new plumbing and several new circuits. These can be complicated and dangerous, so you’re probably best off subcontracting these tasks to the pros. If you are a do-it-yourselfer, you can do some of the construction yourself, but if you’re not comfortable with working around heavy equipment, it’s better to hire someone who knows what they’re doing.
When you’re planning your kitchen remodeling project, you can visit showrooms and home shops to get a feel for what you want. Take a look at your neighbor’s kitchen to get an idea of what they have. Remember to always opt for high-quality materials that are easy to care for and last for a long time. This way, you’ll have the best quality materials in your kitchen for years to come. The same goes for your kitchen furniture, appliances, and countertops.
After figuring out which features you want to add, you can then begin shopping for a contractor. After narrowing down your list of requirements, you can compare price quotes and save the best ideas. Remember, a better design will lead to a more accurate budget. Make sure to look at a wide range of designs and consider how you will use your kitchen. You can also sketch out the basic floor plan to help contractors estimate their costs.
The cost of a kitchen remodeling depends on several factors, including the size of the project, where you live, the materials used, and your budget. Hiring a contractor will save you money on the materials. However, you will have to manage the workflow. The good news is that you’ll be saving money on the entire project. It will also allow you to do some of the work yourself, like demolition and installing cabinets.

Kitchen Remodeling

remodel

remodelDepending on your budget, you have two options: a small or an extensive Kitchen Remodeling Shreveport LA. The little remodel will preserve the existing footprint but improve the look and functionality of the space. Major changes include new flooring, cabinets, lighting, fixtures, and appliances. Many people choose energy-efficient appliances. Cabinetry is the most costly part of kitchen remodeling. You can save money by purchasing ready-to-assemble cabinets or refacing your existing cabinets.

Turn off your water and electricity before you begin any kitchen work. Plan for debris cleanup. Plan for debris removal and making sure that fixtures and pipes are not damaged in the remodeling process. You must also be able remove any rough-in work (plumbing and framing) that may be within the walls.

Keep in mind that the kitchen is the heart of your home. Remodeling your kitchen can help increase its value. Although your kitchen renovation will not cost you as much, it will add value to your house. You won’t regret hiring a kitchen remodeling company that is qualified. You can save money on remodeling by getting a loan that suits your needs.

Although hiring a contractor to remodel your kitchen is expensive, it may be possible to save money by doing it yourself. You should be aware that contractors will charge a percentage to complete the project. This can be done yourself or by hiring subcontractors. You should know that making mistakes can result in huge financial losses. You can save money and still have a modern kitchen.

You need to be clear about what you want and need before you begin the kitchen remodel process. Consider whether the investment you made in your kitchen renovation will be worthwhile and whether it will result in a sale of your home. For a large project such as a layout extension, it is worth hiring a professional. However, this can be expensive and may mean that you will have to wait for months before the work is completed. This will ensure that your kitchen remodel goes smoothly and you can enjoy the final results.

A kitchen that is outdated will not be attractive to buyers if you are looking to sell your house. A modern kitchen can be a great asset to your home, and will help you sell it faster. You can have the kitchen of your dreams by hiring a professional contractor for home remodeling. Kitchen remodels are a great way for you to control the layout of your appliances as well as your counter space. Remodeling a kitchen has the greatest advantage: it allows for flexibility.

Depending on how extensive the work is, a major kitchen remodel can take anywhere from four to eight weeks. A small remodel can be completed in a matter of days. However, larger renovations can take up to three months. Refacing existing cabinets can be a cost-effective and easy way to transform your kitchen. The results will be great and you’ll feel great. If you are patient and have enough time, this project can be very rewarding.

A kitchen renovation does not alter the original structure, but it can change the layout and other features. A kitchen remodel can make a cramped space into an open-concept, spacious kitchen. The process can increase lighting and make the space easier to use for cooking. A renovation may be cheaper depending on the extent of your project and your budget. A kitchen remodel can include an island, which will make it easier to cook and more efficient.

Consider the items you use every day when designing your kitchen. Breakfast foods, for example, should be kept near the breakfast table. Plaster containers should be kept close to the work area. Dishware and flatware should all be placed near the dishwasher. It will make it easier for them to locate them when they are needed. Your cabinets should be arranged according to how you use them. Take into account the swing direction of cabinets doors and appliances.

How To Sweep A Floor

How To Sweep A Floor

When it comes to home cleaning projects, sweeping floors is very important. Sweeping keeps your floors free from unsightly and unhygienic dust and debris. Sweeping a floor is an essential home task that many people do wrong.

Many people don’t realize that the way you sweep can make all the difference in keeping your floor clean. If you want to keep your home looking its best between mops or vacuums, consider these helpful hints when trying to effectively sweep a floor of any kind. Here’s how to sweep a floor.

Clear Away Obstructions and Messes

Start by decluttering a room you intend to sweep to remove any messy obstructions. Additionally, remove furniture, throw rugs, and many decorations that may get in your way while sweeping.

This is also a good opportunity to throw your rugs in the wash and dust any furniture. Doing this will prevent your throw rugs and furniture from getting your freshly cleaned floors dirty when you replace them.

Choose the Best Broom for Your Needs

There are a variety of brooms on the market these days, so it’s important to choose the right one for your specific needs. If you’re sweeping a hard floor, such as tile or linoleum, you’ll need a stiff broom that can effectively move dirt and debris. For smoother floors, opt for synthetic brooms.


Image credit: https://www.homestratosphere.com/

For rough texture floors, use natural fiber bristles. After deciding on the type of bristle you need, find a broom with angled bristles to get into corners and crevices. Lastly, pick a broom with a comfortable height handle that is not too heavy.

Also, don’t forget a dustpan and a hand broom. A hand broom will help you sweep your debris pile into the dustbin. Use a dustpan with a razor thin lip to help you sweep up all the dust.

Pick a Sweeping Method

When it comes to sweeping, there are several ways you can go about it. You may start sweeping on the outer edges of a room by pushing and building a dirt pile at the center of the broom.

Pick a Sweeping Method
Image credit: https://www.thespruce.com/

You can also start at one end of the room and keep the dirt pile close as you move about the floor or you can sweep a section at a time and put dirt piles in the trash can after completing each section. Make sure you choose a method and starting point that works best for you.

Start Sweeping in the Furthest Room

If you’re sweeping a floor for the first time, start in the furthest room from the entrance and work your way towards the front door. This will help keep all the dirt and dust in one area and make it easier to clean up.

Begin on a section of the floor that’s away from your body and gently drag the broom toward your body. You can use quick short motions or long sweeping motions to get the job done. Make sure you choose a sweeping style that fits your personal preference.

Clean Your Broom Periodically

It’s always best to take care of your tools, so make sure you clean your broom frequently. Dirt and dust will build upon the broom bristles over time so it’s important to remove buildup before it becomes a problem. You can wash or wipe off any loose dirt with water or use a brush to get at the harder-to-reach areas.

This is very important because as you sweep, your broom may accumulate dander, pet hair, and dust bunnies on the bristles. Turn your broom upside down and use your hand to remove the lint, pet hair, and other woozies from the bristles. If you’re still far from the collection point, take that fistful of fuzzy and dump it directly in your garbage can.

Dispose of the Dirt Pile

Now it’s time to get rid of that dirt pile. If you have a dustpan, this will be a breeze. Simply place the dust pan directly under the dirt pile, and using your other hand, flick the pile into the pan. If you don’t have a dustpan, no worries – just use your broom to push the pile over to a garbage can.

Wash Your Supplies and Put them Away

After sweeping your floors, the broom bristles will get dirty, especially if you have pet dander and human hair on your floor. Most of the time, your broom just needs a quick removal of build-up with your hand. As you clean your broom, don’t forget your brush and the dustpan.

Wash Your Supplies and Put them Away
Image credit: https://empire-s3-production.bobvila.com/

Use dish soap to wash things, and place them away in their rightful places. Don’t leave your broom standing up against the wall – this will cause it to lose its shape, weakening the bristles. Always store the broom with bristles upright and off the floor.

Use the Drawbridge Technique to Deal with Annoying Dustpan Lines

If you want to get crazy, you can use the drawbridge technique to deal with annoying dustpan lines. This is a two-person process that will make cleaning the floor much faster. One person sweeps the dirt and debris towards the dustpan while the other person uses their free hand to keep the pan open so nothing falls out. The person with the dustpan has to act like a drawbridge, keeping their hand on top of it while making sure nothing falls out.

This method is very important, especially if the dustpan you’re using has a lip that’s too thick to let dust and smaller pieces of debris pass over easily. You can also vacuum or wipe up dust lines that you’re having difficulty corralling with your broom.

FAQs about How to Sweep a Floor

Is it better to sweep or vacuum the floor?

Sweeping is a great way of cleaning floors of large debris. However, for hardwood floors, it’s better to vacuum to get rid of fine dust and particles that may miss, especially in the wood floor crevices.

What is the proper way of holding a broom?

When holding a broom, you should grip it about one-third of the way down from the top. This will give you the best balance and control when sweeping. Make sure you use both two hands to hold the broom.

Can I sweep up liquid spills?

No, sweeping liquid spills will only spread them around and make the mess bigger. Instead, use a mop or towel to soak up the liquid. Learn how to mop a floor to make cleaning spills easier.

How do you sweep without stirring up dust?

Use smaller, shorter strokes while holding the broom more parallel to the floor. This will help you avoid stirring up dust while sweeping.

Final Thought about how to Sweep a Floor

As you can see, sweeping the floor is not that difficult, but also not as easy as you thought. And by following these simple steps, your floor will be far cleaner than it would have been had you simply dragged the old broom across it.

The post How To Sweep A Floor appeared first on Kitchen Infinity.

Bird Bath Fountains and Why You Need One

Bird Bath Fountains and Why You Need One

Birds are a great addition to any yard, but how do you get them to come? You can’t just put out a birdbath and expect birds to flock. They need more than that; they need food, water, and shelter. To attract the most birds into your garden, it’s important to make sure all of their needs are met.

All it takes is one little bird bath fountain in your backyard or front yard. The sound of running water will attract many songbirds, including blue jays, woodpeckers, and sparrows. If you’re looking for something more traditional, like a stone basin with plants around it, we have those too! There are dozens of designs available so you can find the perfect one for your home.

Types of Bird Bath Fountains

Hanging Bird Bath Fountains

A hanging bird bath fountain is a great way to add motion and sound to your outdoor space. The sound of falling water refreshes and captivates. It can even contribute to the overall ambience of your yard or garden.


Image credit: https://cdn.shopify.com/

These bathroom fountains for birds are made from durable steel and other metals, making them long-lasting, low-maintenance additions to your garden. You can also use it as a bird feeder if you prefer.

Pedestal Bathroom Fountain for Birds

Built with you in mind, pedestal bird bath fountains add a touch of class to your yard while giving birds the perfect place to get clean and take a drink. Like other bathroom fountains for birds, this type is made from durable materials such as resin and metal.

This classic pedestal-style bath is popular with bird lovers. It can withstand all types of weather to attract birds year-round. The shallow bowl is also ideal for smaller birds.

Water Wiggler Bathroom Fountain for Birds

As the name suggests, this bathroom fountain also wiggles to attract birds. It moves water through an internal tube system that gets birds’ attention with movement and sound. The cup is ideal for tiny songbirds such as finches, flycatchers, wrens, thrushes, and more.

Water Wiggler Bathroom Fountain for Birds
Image credit: https://www.duncraft.com/

Birding experts also recommend the water wiggler to catch the attention of more bird species with moving water. You might also attract migrating birds like warblers that don’t visit bird feeders.

Ground Bird Bath Fountain

This fountain is a ground-mounted bathtub fountain with a very shallow dish. Its design allows water to change directions many times before it eventually falls into the shallow dish. The single tube emits a gentle bubbling noise that makes it readily available for birds in search of water.

It lessens the need for frequent cleaning because dirt and debris do not settle as quickly as they would on a static model. Ground dwelling birds like sparrows and juncos will appreciate the easy access to water. It holds four cups of water in the shallow basin.

Tree Stump Bird Bath Foundation

This fountain provides water for various types of birds in an instant. It is built around a tree stump foundation which offers the user several options in addition to holding water. You can place plants in the water or on top, you can feed the bird’s fruit that will attract them to your yard, and they can even rest inside it when weary.

Tree Stump Bird Bath Foundation
Image credit: https://images.squarespace-cdn.com/

The three-leg design prevents it from being knocked over by other birds or neighborhood kids. If you adore cardinals, then this is the right choice. The natural look will blend well in your backyard.

It’s made of durable resin to last for years. You can also use it as an indoor decorative piece. The realistic-looking tree stump is topped off by a bird’s nest, with faux green succulents growing on the wood.

Glass Koi Bath Fountain

Koi fish baths are remarkable pieces that add an aquatic feel to your home. The inclusion of glass makes it look like you’re gazing into the waters of a river or pond. It has a calming vibe and can add to the serenity in any room.  This glass bowl is bright and light, with a sturdy metal base included. The frame folds up easily to store it in your garden shade.

Sunflower Bird Bath Fountain

If you want a smaller fountain, this one is a great choice. It’s a hollowed-out sunflower complete with a birdbath and foliage around the base. The colors are bright and cheerful, and it gives an old-world feel to your garden or porch setting.

The pedestal birdbath can be used as a beautiful home accent, but it’s also functional. The water falls out of the bowl and into the pool below, which can be used to your pet’s or children’s delight. This is a great way to keep them cool in the summer months.

Mosaic Bird Bath Fountain

How beautiful and unique! This one is made from a mosaic of brightly colored tiles and has a little bird on top that sends water into the bowl below. You can set this in your front yard or backyard, and it will give off a strong sense of style and class. It’s perfect for pet owners who want to keep their animals cool during the warm months.

This handcrafted mosaic piece will also sparkle in direct sunlight and beautify the shade. It doesn’t come with a stand, so the seller recommends the dish on an inverted terra-cotta pot.

Stone Bird Bath Fountain

Here we have a very natural and rustic birdbath fountain. It’s made from mainly stone and is perfect for people who want to keep nature close by but still give their outdoor space a touch of class. It has an upper portion with a little opening that the water pours out of. You can either sit this on dry land or fill it up with water and let the birds drink from it.

This is another natural birdbath fountain that is gorgeous. It uses a large enough bowl to place plants inside of it if you wish to do so. This also has an inverted top portion, so it creates a nice gentle sound when the water starts to flow.

Ceramic Bird Bath Fountain

This is the perfect fountain for anyone who wants a little piece of art in their outdoor space. This has a small base and inverted top but with intricate designs that give it such an uplifting feeling when you look at it. Setup is quick and easy, you screw the bowl onto the pedestal stand.

Concrete Bird Bath Fountain

This is what I ended up getting for my backyard. It has a unique design, with the bowl perched atop the pedestal stand. However, there are no bells and whistles when it comes to this fountain. You can also create your unique design by painting it whatever color you like.

Cast Iron Bird Bath Fountain

This birdbath fountain has a classic look to it. But what makes this stand out from the rest is the little pump that pumps water up and runs down throughout the tiers of this fountain. It adds to its charm and loveliness. If you like an artistic touch to your backyard, then this is just for you.

Solar Bird Bath with Lights

If you want to go green and add some style, then this is the fountain for you. All you have to do is leave it out in the sun and watch your fountain light up your backyard. The solar power powers the pump, so there are no messy wires running all over the place. Just make sure that this birdbath faces south to receive direct sunlight to turn on at night.

Solar Bird Bath with Lights
Image credit: https://wildbirdsunlimited.typepad.com/

Solar Water Fountain with LED Lights

This is the most colorful of the three fountains. You have a simple fountain with some solar panels in front by day. But by night, watch lights light up within the solar panels and reflect off the water for an enchanting glow. Since the lights are solar-powered, you don’t have to worry about hauling extension cords around or even changing batteries.

The three different shine modes allow these lights to turn on at dusk and off at dawn. Just make sure that this fountain is facing south to get enough sunlight to charge during the day.

Plastic Bird Bath and Feeder Fountain

This is the cheapest and simplest of bird bath fountains. It has a little basin for birds to drink from, along with a feeding ring above it, so you can also feed them as they drink. The entire fountain is made out of plastic, so no need to worry about rust or metal pieces that might fall apart.

They included a plastic water tray that holds water, so remove it, and you have a bird feeder. The base is crafted of durable Eastern red cedar wood.

FAQs on Bird Bath Fountains and Why You Need Them

What is the importance of bird bath fountain?

Birds need bird baths in the winter, just as they need the rest of the year. In the very cold months, water can be very hard to find, and they do appreciate a bird bath with accessible water in it. If your backyard has a heated bird bath, then you can expect some activity all year, even in the winter. They give you an opportunity to interact with different bird species and identify baby birds as well.

How often should you change the water in the bird bath?

You should change the water every two to four days then clean up the bird bath. Remember, taking care of birds coming to your yard involves providing them with clean water in the fountains.

Final Thought on Bird Bath Fountains

Birds need a full and clean bird bath. So if you build it, they will come. Make sure you clean your bird bath with a garden hose every couple of days. If you see dead bugs floating in it or algae starting to form, that’s a clear indication that it’s time to clean. You can also learn different ways to attract birds to your compound such as putting our hummingbird feeders

The post Bird Bath Fountains and Why You Need One appeared first on Kitchen Infinity.

Did you miss our previous article…
https://www.thelavkitchen.com/?p=875

How to Style the Perfect Guest Bedroom

How to Style the Perfect Guest Bedroom

When decorating a bedroom, you want everything to be as comfortable and welcoming for your guests as possible. The problem is that most people don’t know how to do this effectively. They end up overdoing the decorations in an effort to make the room look homier and inviting. Other people end up turning their space into a cluttered mess with no clear purpose or theme.

The best guest bedroom should be clutter-free, comfortable, and feel a little like home. Here are smart guest bedroom style ideas that will help you to style the perfect room.

Use the Right Lighting in the Guest Bedroom

When it comes to the lighting in your guest bedroom, you want to think about both tasks and ambient lighting. Ambient lighting is important for creating a relaxing atmosphere in the room, while task lighting is necessary for reading or getting dressed.

You can create ambient lighting in your guest bedroom with things like floor lamps, table lamps, and wall-mounted lamps. Task lighting can be provided by task lamps, which you can also use for accenting the room.

Make Your Guests Feel Welcome

Before your guests arrive, ensure they feel welcome on arrival by providing a clean room, lighting a candle, or using a diffuser, leaving out clean towels and other toiletries. You can also have fresh flowers to make your visitors feel welcomed and comfortable.

You’re creating a guest room feel, which is always a nice treat. Make sure there’s a plug point for chargers and hairdryers. It’s all about welcome and small details, as stated by Nicky, an interior designer. It’s the only chance you have to make sure your guests feel instantly relaxed at home.

Give Your Guest Bedroom a Dual-Purpose Storage

A spare room can easily become a dumping room if guests do not frequent your home. So, try not to let this happen by having good storage. Good storage is a starting point if you’re learning how to declutter your room. Look for clever bedroom ideas and solutions such as under-bed boxes, wall-hung cabinets, baskets, and hooks.

All these are great ways of containing clutter in the guest bedroom. If you’re designing the room from scratch, opt for a bed with drawers and a traditional blanket box if your space allows.
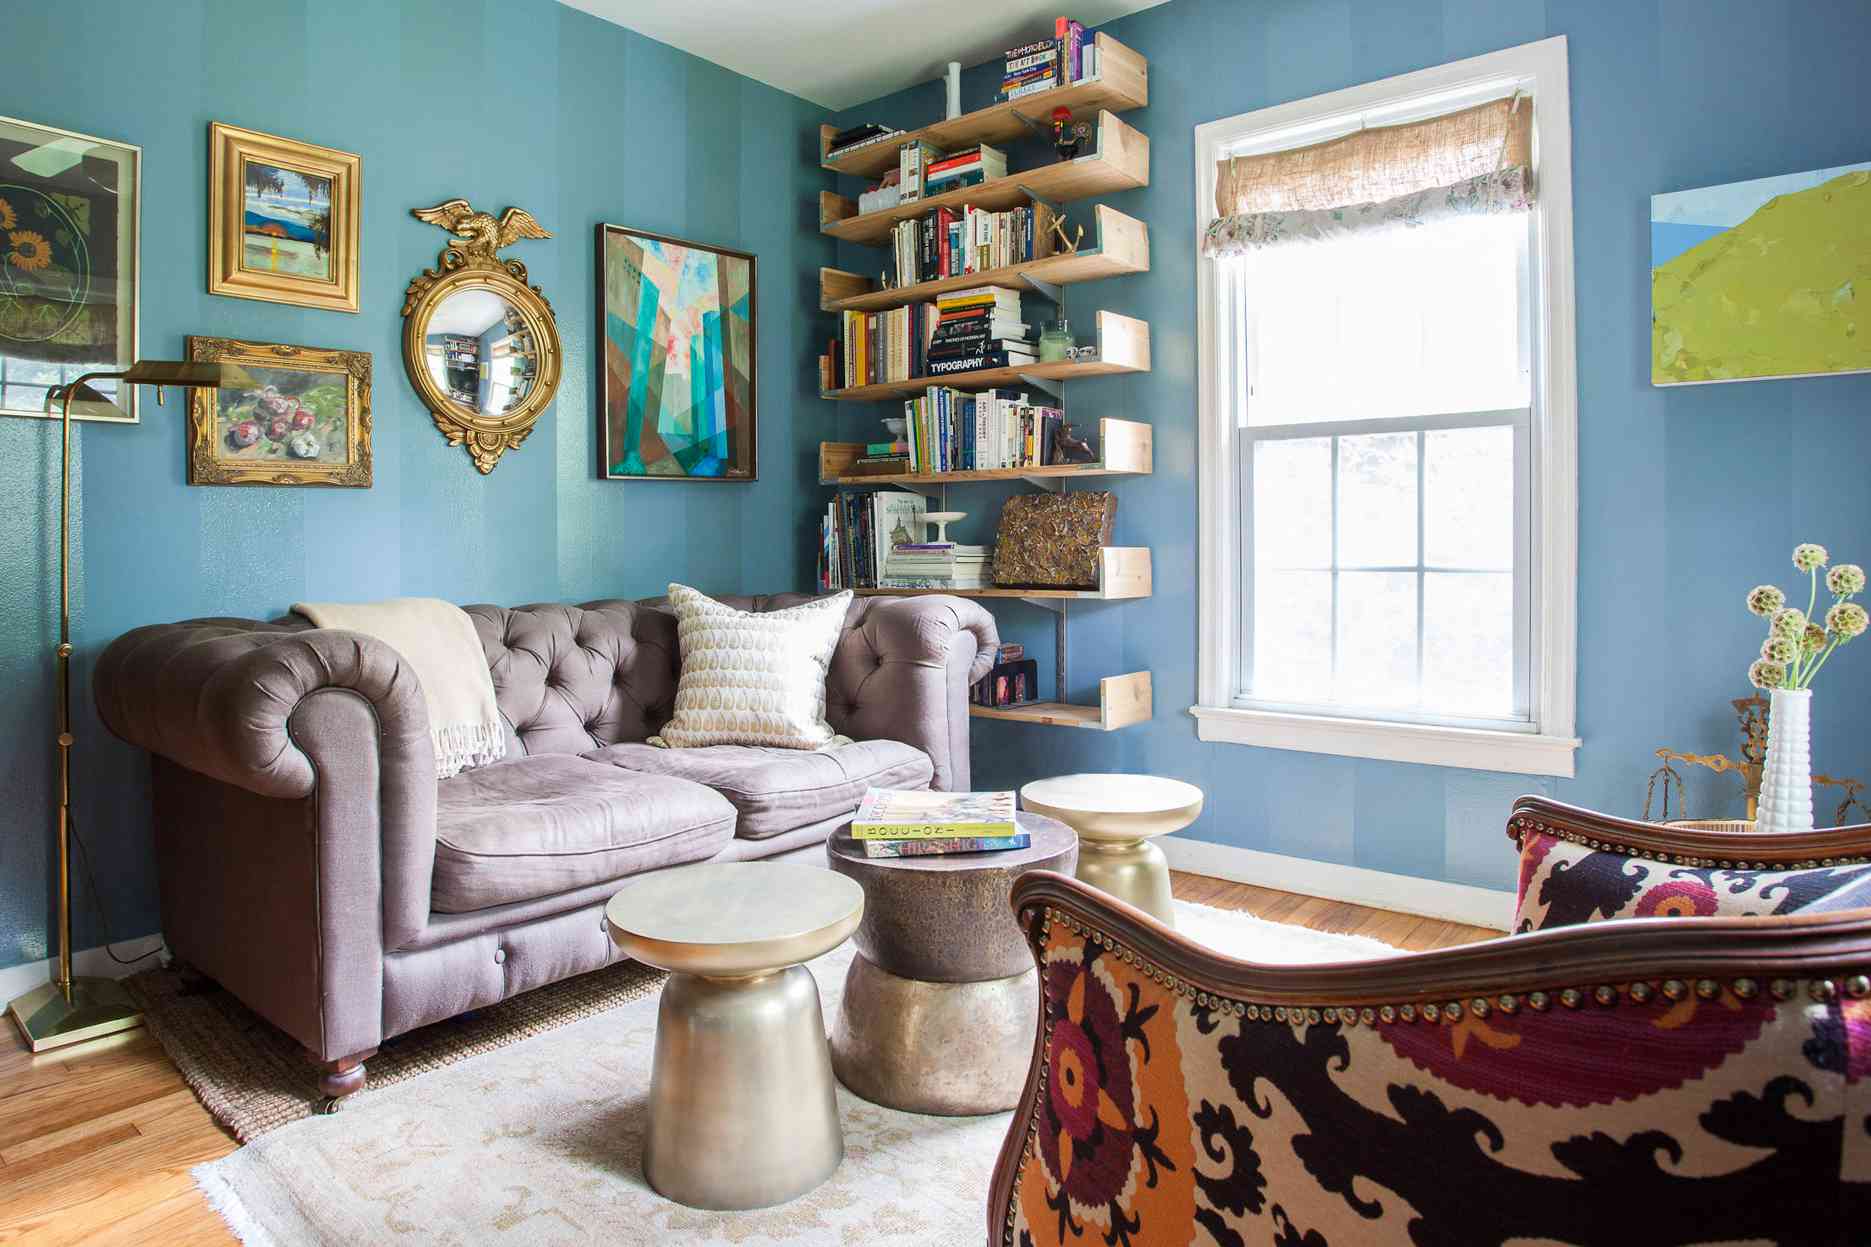
Make it Cozy

Guests love to feel comfortable and relaxed. This is where comfort matters most, so make sure your guest bedroom has a cozy feel that invites guests to relax and stay awhile. For this reason, it’s important that you keep the room’s color scheme soft and neutral – beige or browns with striking accent colors can do wonders.


Image credit: https://hips.hearstapps.com/

Adding a bunch of throw pillows will also leave your guests with a cozy space. When decorating your guest bedroom, use more of your hands than your eyes. Add a cozy organic sheet, toss a knit blanket on an armchair, and a stack of high-quality towels for your guests.

dd Toiletries

Keep your guests feeling welcomed by adding travel-size toiletries for them to use. You can purchase these at any local supermarket or drugstore, and they are great to have on hand when you’re traveling. Also, keep an initial supply of shampoos, conditioners, and soaps in the bathroom, so guests don’t need to search high and low for them.

Choose a Theme

If you want to go the extra mile, choose a theme for your guest bedroom. This could be anything from a coastal theme with light blues and whites to a traditional style with floral prints and lots of pillows. By having a specific theme in mind, you can make it easier to choose furniture, bedding, and accessories that will match.

The best way to decorate a guest bedroom is to decide on your decor theme and scheme and stick with it throughout the space. Keep towels and blankets in the same color palette and add little objects around the room that can fit with the theme.

Consider a Bedside Table

If you’re using the room as a guest bedroom, it’s important to have a side table beside the sofa bed for your guests. This is a place where they can put their glasses, books, and other nighttime essentials. You can either choose a traditional bedside table or go with something more unique.

Consider a Bedside Table
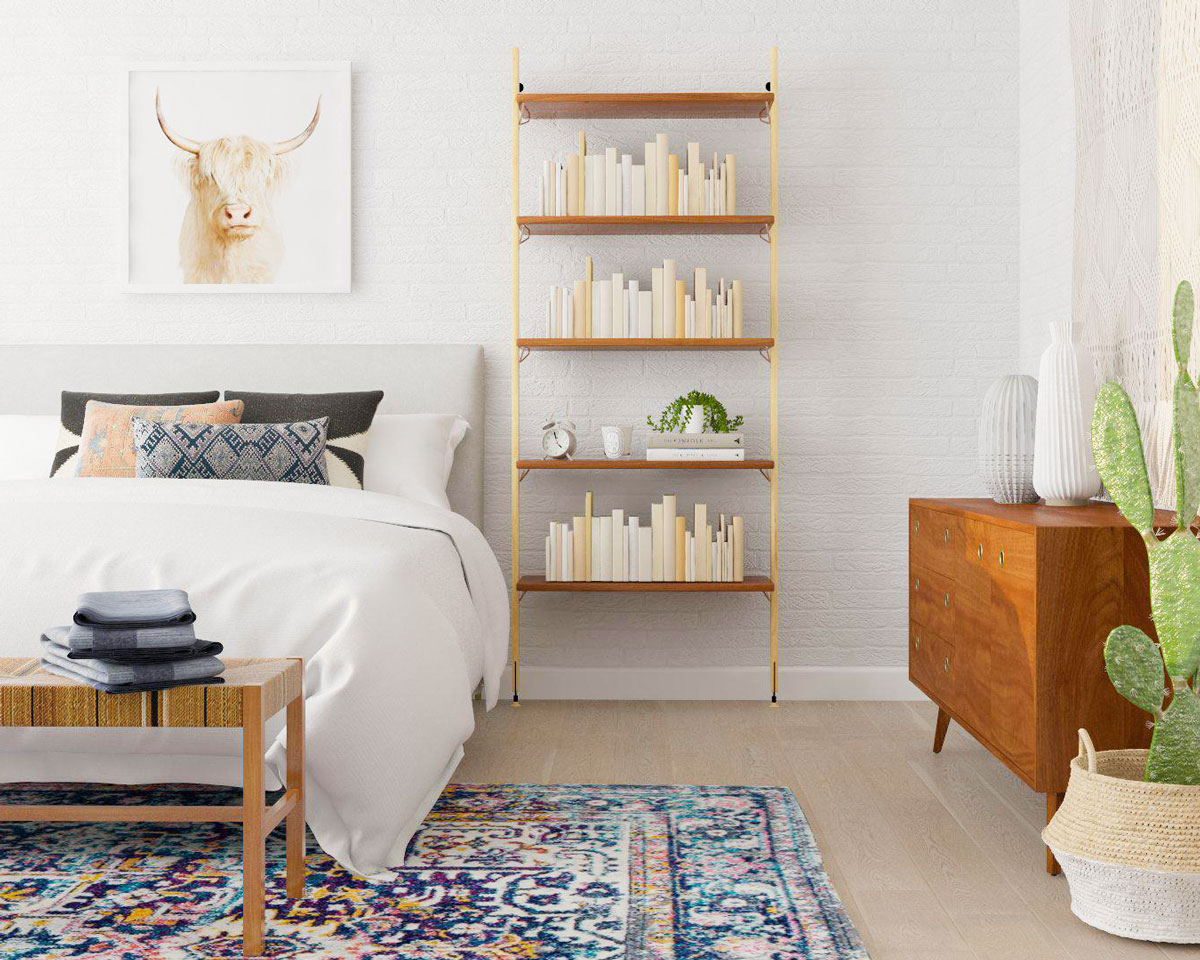
Image credit: https://www.homecrux.com/

Choose Between Bed and Sofa Bed

When you’re decorating a small guest bedroom, this is a consideration that will make the layout of the room easier. This will also depend on how much space you have at home. If you have a larger house with ample rooms, then you’ll have dedicated rooms for guests with beds.

But smaller homes might have a guest bedroom that doubles as a study, ironing rooms, and other purposes. If you’re using it as a sofa bed, consider including space for a small table or stand to accommodate your guests’ nighttime necessities.

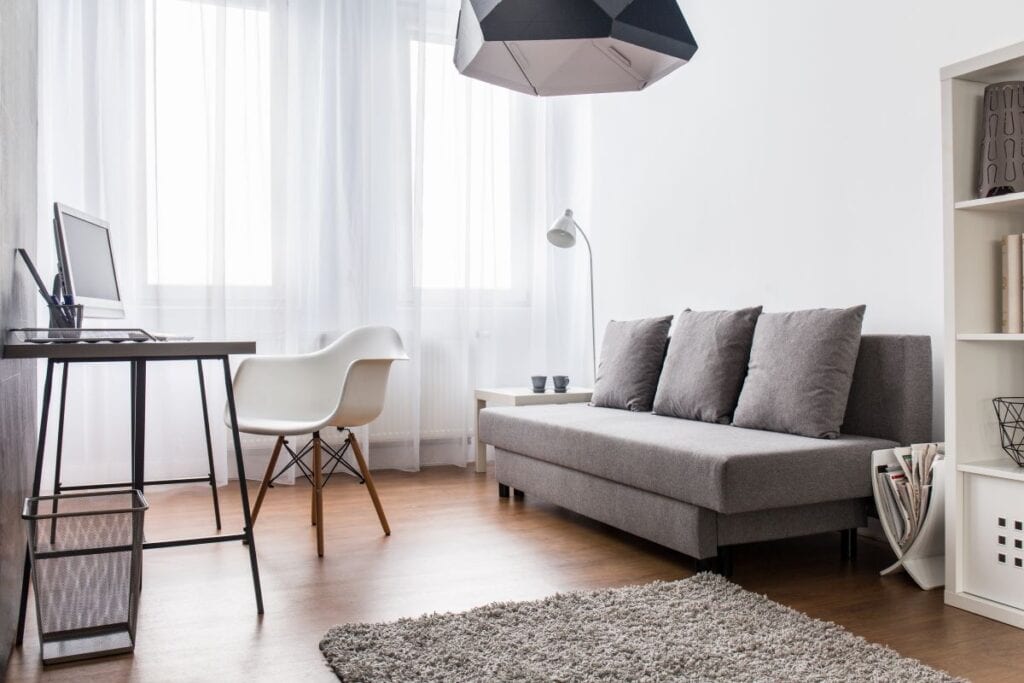
Turn a Guest Room into Home Office when Not in Use

If you don’t have a guest bedroom, another option is to turn a room into a home office when it’s not in use. This will give your guests a place to stay without taking up space in your main living area.

You can either put a bed in the room or use it as an office and provide sleeping accommodations elsewhere. Opt for a sofa bed that will sit back against the wall when not in use. For a restful feel, ensure your room is not overwhelmed with technology.

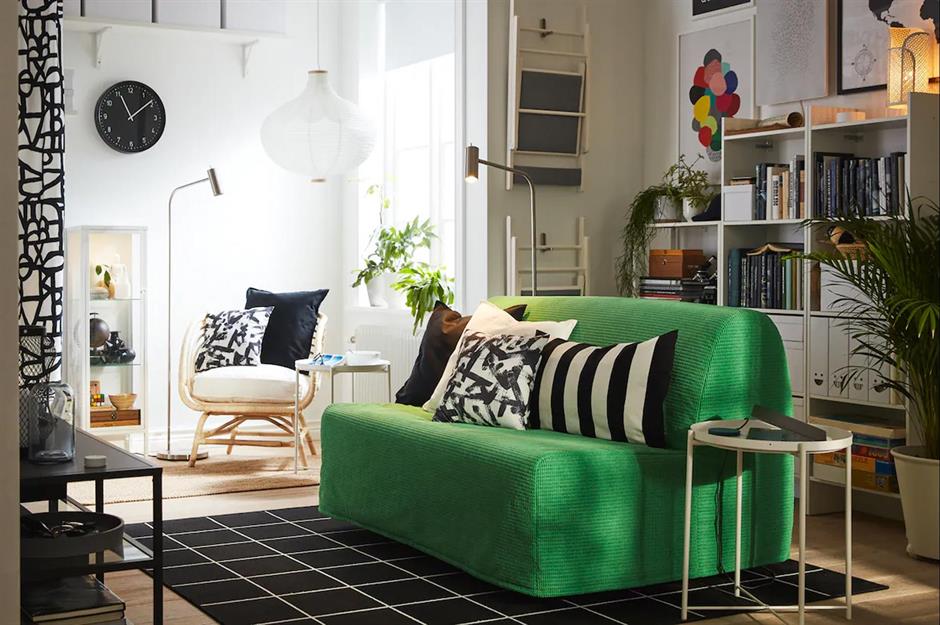
Give a Plain Guest Room a Colorful Update

Make your guest room stand out from other rooms by giving it a colorful update. Add a pop of color with a brightly colored bedspread, curtains, or wallpaper. This will make the room feel more inviting and welcoming.

Or, if you want to stick with a more neutral palette, add interest with fun accessories. Choose a mix of textures and patterns to add visual interest. Think about adding a statement item such as fresh flowers, an accessory tray, or a colorful area rug.
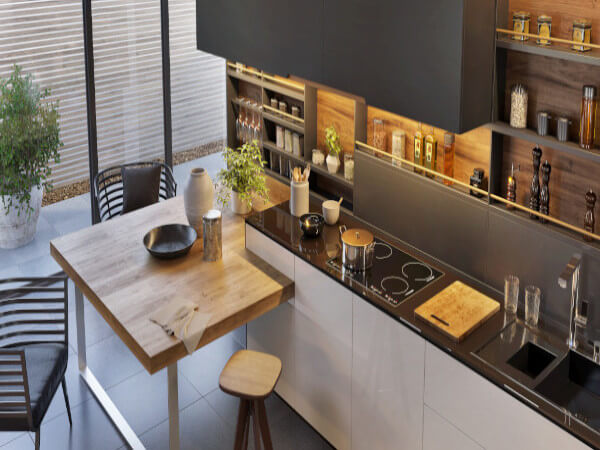
dd Furniture

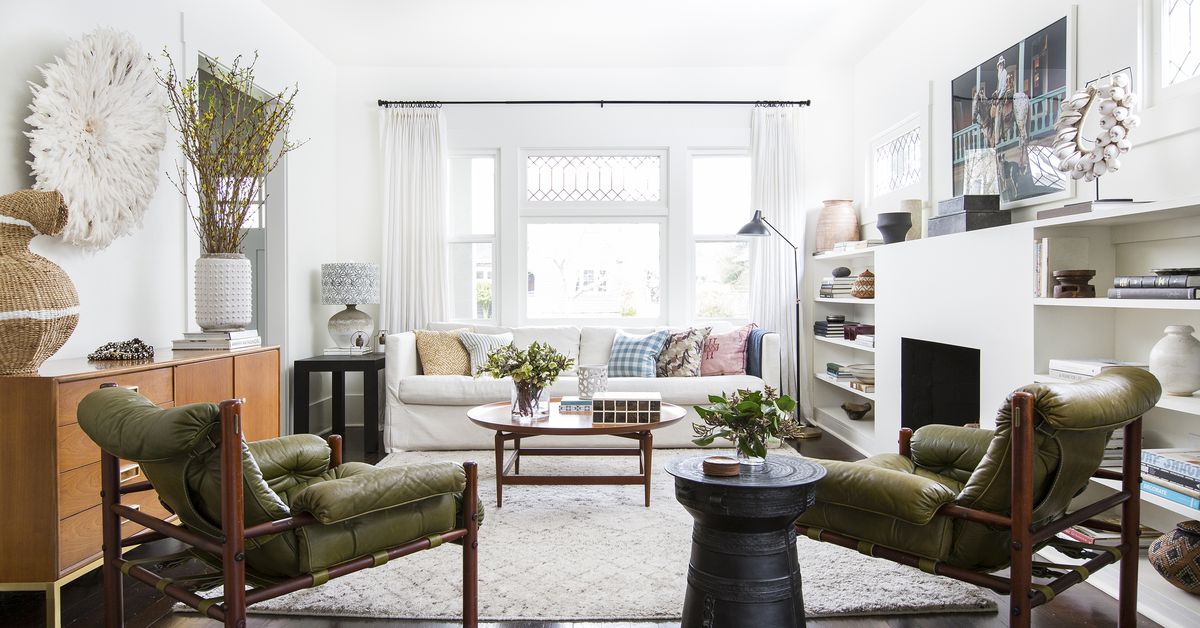
If you have space at home, the best guest bedroom should contain more than just a bed. Adding a small desk and a side chair can be a great way to provide your guests with an extra sitting area to work or relax. If you have room, consider adding a comfortable armchair or sofa as well.

Add Furniture
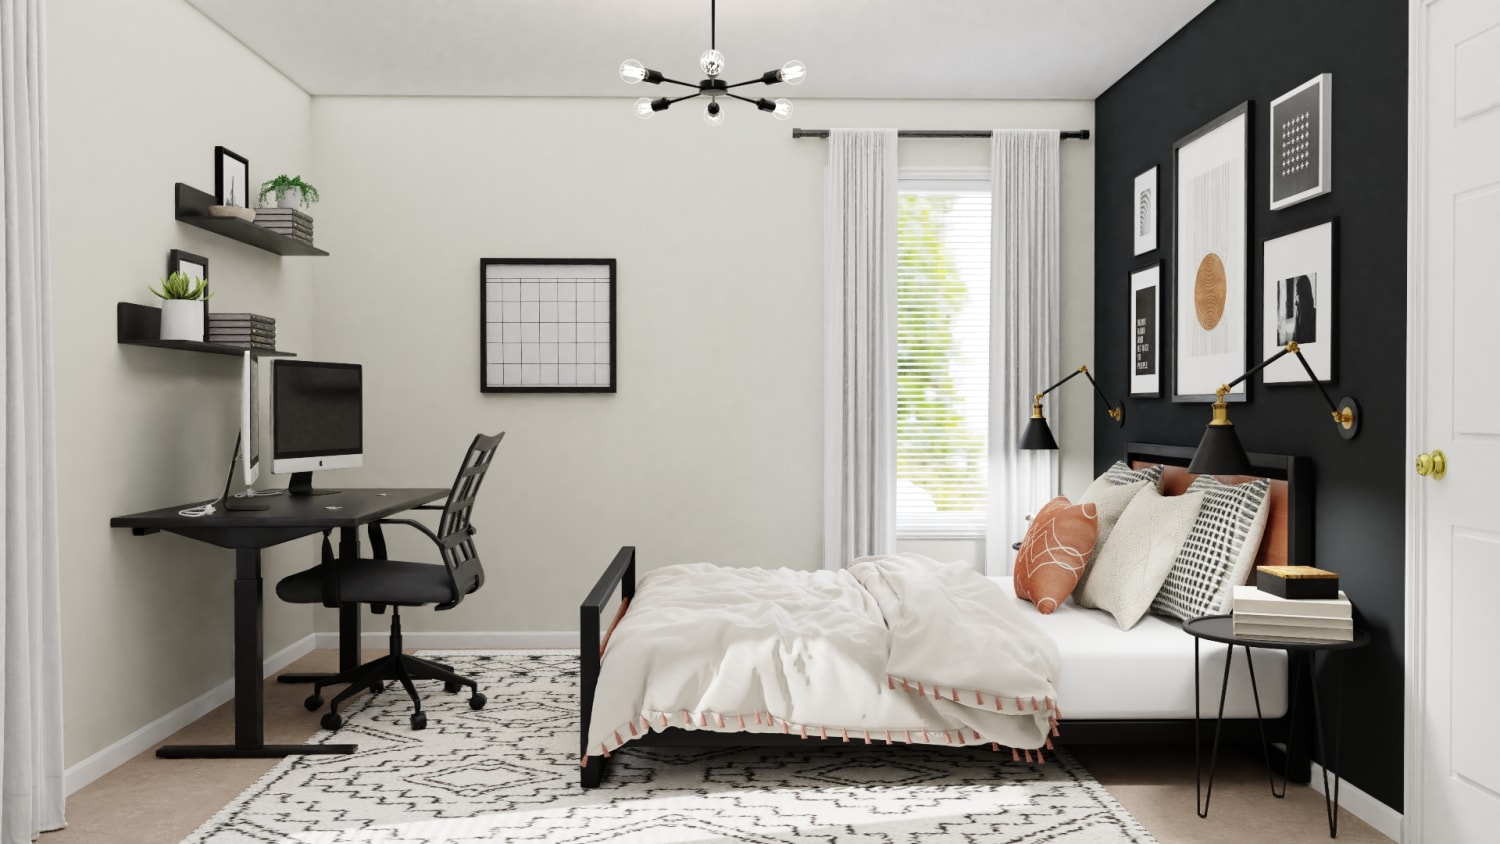
Image credit: https://res.cloudinary.com/

Also, invest in multifunctional furniture for your smallest bedroom. A sofa bed and a desk can double as a dressing table and a little seating area. You should consider double-duty furniture that will make your small space look larger. Don’t shy away from buying furniture for your guest bedroom.

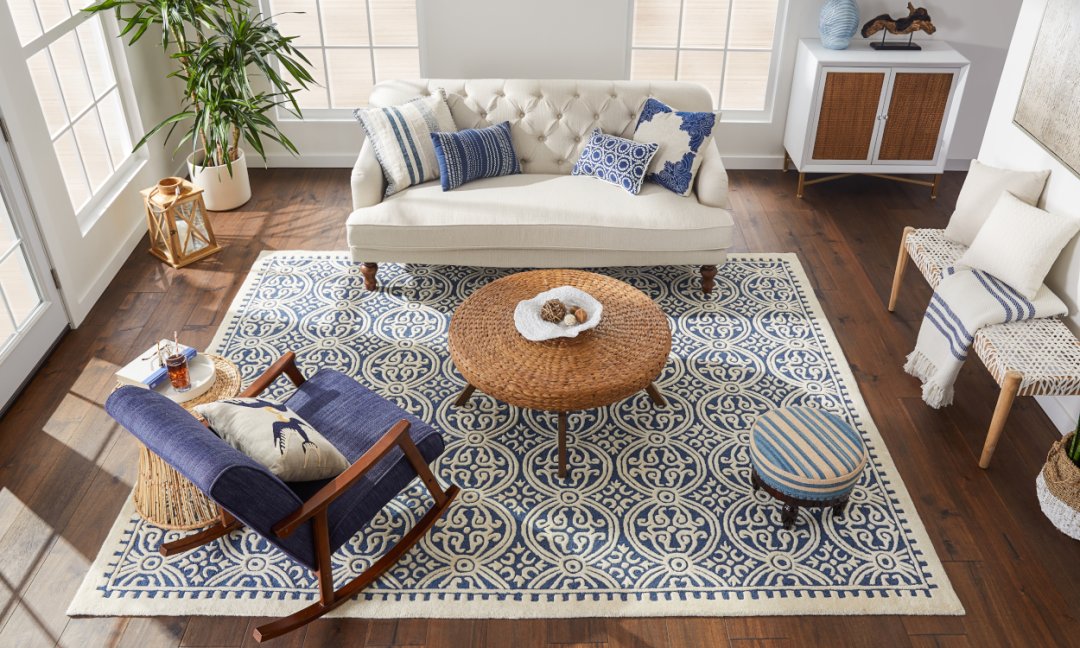
Opt for a Cozy Guest Room

Even if you have enough room, you can still create a perfect guest room that your family and friends will love. You can consider a day bed and can serve as bed and sofa. If your room is lacking in square footage, focus on wall paint colors that will make your room feel larger.

If you have the luxury of a large guest room, consider adding extra features that will make your guests feel at home. A cozy rug, a comfortable chair, and a small table with a lamp are great additions. If you have the space, consider adding a television and a mini-fridge as well.

Create a Five Star Look in Your Guest Room

For the ultimate luxury bedroom for your guests, put together a scheme that resembles a first-class hotel suit. Avoid creating a space that’s too personal and idiosyncratic. Leave the room clutter-free to encourage relaxation.

Conceal a Mattress with Layers of Bedlinen

Add a few luxurious touches, such as high-quality bed linens and a goose-down duvet. Hang a large mirror on one wall to reflect light and create the illusion of space. Try to hide that unsightly bed frame by layering the bed with luxurious oversized throws. This will not only provide a comfortable night’s sleep but will also help conceal the mattress frame.

FAQs on How to Style the Perfect Guest Bedroom

What are the most important features of a guest bedroom?

Apart from the bed and a side table, a guest room should also have a storage solution, a comfy chair, and hooks with good-quality hangers. When it comes to guest bedrooms, also avoid furniture that looks intriguing and not practical.

Does a guest room need to have a closet?

Yes, a closet can offer a great storage solution, but it’s not that important if there are places where your guests can store their items.

Final Thought on How to Style a Perfect Guest Bedroom

Don’t forget your guest room as you go about decorating other rooms and making them feel comfortable. Consider the bed, bedding and accessories, and storage, seating area, and lighting. With these guest bedroom ideas, you can style the perfect guest bedroom in no time.

The post How to Style the Perfect Guest Bedroom appeared first on Kitchen Infinity.

Did you miss our previous article…
https://www.thelavkitchen.com/?p=871

Furniture Arrangement Ideas for a Small Living Room

Furniture Arrangement Ideas for a Small Living Room

Having a small living room can be tough to make it look bigger and better.  When you have a small living room, you can’t just add more furniture to it. You need to make sure that your space is well utilized by arranging furniture in your house properly.

There are several ways in which you can arrange your furniture in such a way that it would appear spacious even though there’s not enough space available. Here are some ideas that will help you with this problem.

Opt for a Symmetrical Living Room Layout

One of the best small living room ideas is making a symmetrical layout for your furniture. In order to do this, you need to put one of your sofas on the longest wall in your living room, along with two chairs on each side of it. Place a coffee table between these chairs and sofas so that it divides them equally.


Image credit: https://cdn.mos.cms.futurecdn.net/

Do not be too streamlined because your small space can feel boxy, so break up lines with plenty of curves and textured surfaces. Try to incorporate seamlessly hidden doors when wall space is at a premium. This way, the seating arrangement in your living room would look balanced and won’t seem crowded at all.

Float Furniture

Floating furniture is another great small living room idea that can help to open up the space. Using furniture that isn’t attached to the walls creates an optical illusion of more space. So instead of using a traditional sofa and chairs, try using a daybed or even a bench as your seating.

Float Furniture
Image credit: https://d28m5bx785ox17.cloudfront.net/

This will also allow you to use the wall space behind the furniture for storage or décor. Avoid the urge to push all your furniture against the wall. Creating space behind the furniture will make the room look bigger.

Consider Vertical Space in Small Living Rooms

Make use of the vertical space that you have in the room. Using floor-to-ceiling shelves will create instant storage and include some design elements in your living room. Utilizing both horizontal and vertical areas will again maximize the amount of space you have available for use.

Consider Vertical Space in Small Living Rooms
Image credit: https://www.thespruce.com/

Built-in Shelving

Whether you inherit a small sitting room or you’re making some renovations to your existing space, built-in shelves for an extra decorating storage zone. Floating shelves are also a great option if you can’t build in. You can build the bottom shelf so that it has enough room for an extra seating option. Keep the same color as the wall.

Layer Coffee Tables

If a set of nesting tables are too small for your room, plus a large and bulky coffee table is out of the question for your small room, don’t worry. Instead, layer two streamlined coffee tables to fit your space. If you can’t fit two coffee tables, these tables also look great as a set. Make sure you go to ornate furnishings and look for a table with simple or delicate lines. The table should seem to disappear to give the room an illusion of more space.

rrange Furniture Around Focal Point

You want to make sure that you have the furniture arranged around your focal points like a fireplace, a TV, a window, and a piece of wall decor to serve as the room’s center of attention. But make sure that the focal point is far enough away from the entrance and exit of the room so that there is enough space for people to enter and exit. Position your furnishings around or directly facing the focal point to maintain a clear view.

Hang a Chair

If you’re short on space, you can hang a chair from the ceiling. This will free up some floor space, and it can be a great place to relax or take a nap. Swing chairs are super fun and seem to be having a design moment right now. They can be a lifesaver in your family room.

Try Cafe Style Seating

Banish the traditional and conventional coffee and end tables instead of cafe-style seating. This is a great way to serve your guests, as it allows them some flexibility when holding their plates or mugs.

A single person or a pair of people doesn’t need a massive dining room table to suit their needs daily. If your living room is serving as a dining room, consider a round cafe table with two chairs. This way, you can easily pull it out from the wall to fit four in a dinner party by adding two folding chairs.

Get Creative with Furniture Layout

Limited space challenges you to think beyond seating conventions. You have to look for ways to maximize your space. If your small room is narrow and long, consider using furniture to divide the space into two separate living areas. For example, place a sofa and coffee table at one end of the room and a TV stand and chairs at the other. This will help to give the illusion of two separate spaces.

Create a Cozy Nook

Blank walls are the enemy of anyone who values cozy nooks. Give your small living room an illusion of depth by hanging a length of fabric behind the sofa, which will make your space seem larger than it is. Quirky niches and recesses can help transform your small room into a comfy seating area without taking much floor space.

Rethink Your Lighting Scheme

Of course, small living rooms also need decent lighting, but table lamps and floor lamps can feel like a luxury when you try to squeeze every square footage out of the floor plan. Consider swing arm wall sconces or ceiling-mounted fixtures to provide light where you need it. These will make stylish reading lamps, leaving side table surfaces free.

Utilize the Back of Your Sofa

In a tiny living room, every space is an opportunity, so think about using the back of your sofa as a low-profile storage unit. A bookshelf or plant stand placed here is the perfect way to display collectibles and offer extra space for small living room accessories, such as remotes and coasters. Make sure you incorporate these elements without interfering with the elegance of your small sitting room.

Utilize the Back of Your Sofa
Image credit: https://loveincorporated.blob.core.windows.net/

Consider Small Living Furniture Colors and Styles

When choosing furniture for a small living room, think outside the box. Go for unusual styles and colors to maximize visual interest and make the space feel larger than it is. With such a limited amount of square footage to work with, every choice you make needs to count. White walls, slipcovers, and accent furniture will make your entire room look larger.

llow the Light to Pour In

If your tiny living room has access to a ton of natural light, don’t block it out with black curtains. Let light pour in to make the space feel more airy and open. Even if you don’t have larger windows and tons of sunlight, choose lighter shades of paint and coverings to let your space feel as airy as possible.

Allow the Light to Pour In
Image credit: https://www.mymove.com/

One trick for letting light in is painting the ceiling a lighter color than the walls, which will give it a more open appearance even if painted a dark shade. This trick works especially well if you have vaulted ceilings or a very tall wall where your living room meets another space.

Maximize Space

Another way to make the most of a small living room is by maximizing your space. When buying furniture, choose those that can do double-duty, like an ottoman that can be used as a coffee table or extra seating. Look for tables and shelving that can be tucked away when not in use, and try to avoid leaving too many gaps that create wasted space.

Choose a Large Rug

Choosing a large area rug is a trick that will make your small space feel bigger. Unlike smaller rugs, larger rugs don’t break up the floor. This can also help you anchor the space and give you a foundation for the rest of your furniture arrangement.

Fill the Room with Furniture

One of the best ways to make a small living room feel bigger is to fill it with furniture. While this may seem counterintuitive, it will help to create visual boundaries and give the eye somewhere to rest. Choose furniture in different shapes and sizes to add interest, and be sure to use mirrors to reflect light and create the illusion of depth (and more space).

Fill the Room with Furniture
Image credit: https://cdn.vox-cdn.com/

When choosing furniture for a small living room, avoid bulky pieces. This will prevent the room from feeling too crowded. Instead of opting for large sofas or couches, choose loveseats or sectionals open on the ends. These can still seat many people, but they don’t take up as much room.

FAQs about Furniture Arrangement Ideas for a Small Living Room

What is the best furniture layout in a small living room?

Armless chairs such as slipper chairs can be great in a small living room. They don’t take up much space, and they add interest with their different shapes and textures. Another option is to use a small corner sofa that fits well in the corner of the room.

Can I use a sectional sofa in a small living room?

Yes, you can use a sectional sofa in a small living room. Just make sure that the sectional is open on one end, so it doesn’t take too much space.

Final Thought about Furniture Arrangement Ideas for a Small Living Room

Whether you’re working on a tight budget or looking for a specific style, you can never go wrong with furniture arrangement ideas for your small space. There’s always a way to make your furniture and room work and look great. You can also seek the help of an interior designer if you feel overwhelmed.

The post Furniture Arrangement Ideas for a Small Living Room appeared first on Kitchen Infinity.

Did you miss our previous article…
https://www.thelavkitchen.com/?p=853

How To Grow Black Lace Elderberry

How To Grow Black Lace Elderberry

If you are looking for a beautiful and unique ornamental plant, black lace elderberry is an excellent choice. It has dark purple foliage and blackberries, making for a dramatic landscape focal point during the growing season. This beautiful shrub goes by many names, including black lace, elderberry, common elderberry, black elder, European elderberry, Judas tree, and blue or black elderberry.

This versatile plant provides year-round beauty without much effort on your part. Whether you’re looking for a new ornamental shrub or simply want fresh fruit at your fingertips, this variety of Sambucus canadensis is sure to please. In this article, we’ll talk about everything you need to know about growing black lace elderberry.

Uses of Black Elderberry

Elderberry plants have gained popularity thanks to their lovely appearance and important uses in traditional industries, culture, and medicine. They fall under early spring flowers since they bloom creamy pink flowers in the spring. These are followed by blackish-red fall berries, which can be harvested for making elderberry wine and jam. You can also leave the elderberry wine on the plant to attract birds and other wildlife.


Image credit: https://www.thespruceeats.com/

Black lace berries are also edible and high in vitamin C. If you want to plant them for food and drink, then the American elderberry, also known as Sambucus canadensis, is the better choice than the European type known as Sambucus nigra.

The intense purple black foliage is finely cut, giving it an effect similar to Japanese Maple, also known as Acer palmatum. Some designers are even using it in the more tender maple varieties since black lace is extremely durable and adaptable.

It can also be used as a dramatic accent plant, planted en masse for a troublesome high hedge, or incorporated into the mix or perennial border. Black lace is also suitable for use in woodland gardens, rain gardens, and attracting birds and butterflies to the yard. You can also plant a black lace next to a shrub with brightly colored leaves to create contrast and interest.

This is a very cold hardy, and easy-to-grow plant adaptable to most sites. In addition, this plant is deer resistant, drought tolerant, fall heat tolerant, and a landscape plant. It can also be used as a potted shrub on the patio. It’s good in groupings or masses or perennial and shrub borders.

Common elderberry plants are deciduous plants or small trees that can reach up to 20 feet in height and width. Some specimens have grown as tall as 33 feet in their natural habitat.

Planting Black Lace Elderberry (Sambucus racemosa ssp. melanocarpa)

Black lace elderberry can grow in USDA plant hardiness zones 4-7 but is susceptible to winter damage. It is best planted in fertile, loamy soil with excellent drainage and receives full sun or partial shade. If planting specimens near homes or other structures, it is a good idea to place a barrier of mulch or fencing around the plants to protect them from being damaged by lawnmowers, mower debris, and deer.

Planting Black Lace Elderberry
Image credit: https://www.gardeningknowhow.com/

They are relatively easy to grow. They can be propagated from seeds, softwood cuttings, or semi-hardwood cuttings. Seeds need cold stratification. Seeds should be sown in the autumn and kept moist for 60 days before planting. A thin layer of vermiculite on top of the soil helps retain moisture. It also does well in wet soils.

These plants also do well in acidic to alkaline soils, but it’s also important to look for slightly acidic soil. Before planting this shrub, amend the soil with compost to ensure healthy growth. You can easily make your compost to use for the purpose. After that, it will benefit from regular fertilizing with compost once every year in the spring.

Due to their sporadic growth, elderberry plants tend to form a lot of suckers. So prune it regularly if you want to maintain size and shape for your shrubs. Pruning involves removing unhealthy, damaged, old, or dead branches in early spring.

Black Lace Elderberry Care

Black lace elderberry is self-pollinating, but if you wish to have as many berries as possible, you can plant another cultivar near your black lace elderberry for increased pollination.

Black Lace Elderberry Care
Image credit: https://i.pinimg.com/

Light Requirement

In the North, while black lace elderberry will tolerate partial shade, it will produce more flowers and a more attractive foliage color if grown in full sun. At the southern end of its range, it will benefit from afternoon shade.

Soil Requirements

Black lace elderberry grows best in slightly acidic, loamy soil that is moist but well-drained. The black lace elderberry bush also tolerates clay soil types better than many shrubs, but it performs better over time if planted in soil that drains well. Black lace does best in moist soil, although it will tolerate dry soils. It thrives under acid or alkaline soils.

Watering Common Elderberry

Black lace elderberry is a drought-resistant shrub and does not require large amounts of water to thrive. However, it benefits from supplemental watering during dry periods and in hot summer climates. The plant prefers evenly moist soil. And since elderberry shrubs often grow near wetlands, it tolerates wet soil better than many other plant species.

Fertilizer and Transplanting

This deciduous shrub needs to be fertilized in early spring by applying a slow-release fertilizer specialized for trees and shrubs. If you wish to transplant an existing plant, do so in spring or early summer while the soil is moist and warm. Elderberry shrubs do not recover well from root disturbance, so take care when moving them. You may harm or kill the plant with poor planning or execution.

When growing elderberry bushes in the home garden, plant them near a water source such as a drip irrigation system or pond, especially if rainfall is infrequent. Ensure that the roots get at least 1 inch of water weekly and keep an eye on soil moisture levels so you can provide supplemental watering during dry spells.

Pruning Elderberry

Best if pruned immediately after blooming. The correct time for pruning this plant is late winter or early spring. Pruning will keep it attractive, vigorous and check its spread. As the woody stems become older, they become weaker and less attractive. So, remove the older stems to direct more energy into the newer, more attractive ones.

Pruning Elderberry
Image credit: https://www.gardeningknowhow.com/

Propagating Common Elderberry

Cutting the branches of the elderberry bush back to four inches gives you a convenient place to collect cuttings.

To propagate common elderberry, remove the smaller tip shoots from grown branches’ end and dip them into rooting hormone. The best time for this operation is fall or early winter. Remove all leaves on the cutting except the top two pairs. This makes it easier to dip into rooting hormone and reduces the chances of disease spores falling into any open cuts.

Shorten all side branches by half their length to direct energy into the main stem. Root the cuttings in a pot filled with sand, peat moss, and perlite at a ratio of 1:1:1. Water sparingly until roots form.

After three weeks, the cuttings should be ready to plant in your garden or for overwintering. Select a location that gets at least six hours of sun per day and has well-drained soil.

Common Pests and Diseases

Prone to a number of diseases, including canker, leaf spot, and powdery mildew. Apply Neem oil once pollination begins for best results. Also, make sure there is proper spacing to promote good air circulation, irrigate at soil level, and keep mulch six inches away from the main stems of the bush.

FAQs on How to Grow Black Lace Elderberry

What plants are compatible with black lace elderberry?

White pine trees and quaking aspen are good elderberry companion plants, especially if you’re looking for something taller than the shrubs.

Final Thought on How to Grow Black Lace Elderberry

Elderberry plants are very popular plants that you can never miss. Not only do these shrubs look splendid and very familiar, but they’re also low maintenance in almost any environment and growing conditions.

The post How To Grow Black Lace Elderberry appeared first on Kitchen Infinity.

Did you miss our previous article…
https://www.thelavkitchen.com/?p=848

How To Remove Mold And Mildew

How To Remove Mold And Mildew

Mold and mildew can be a real problem for homeowners, especially if they’re not dealt with quickly.

Mold is notorious for growing in damp areas, such as bathrooms or basements that don’t have proper ventilation. Mildew grows where there is too much moisture present, such as on wet surfaces like windowsills or carpets.

In this article, we will discuss how to remove mold and mildew from your home.

What are mold and mildew?

The two types of mold and mildew work together to grow rapidly and cause health problems by releasing toxic spores into the air which can affect anyone who breathes them.

Image Credit: http://goldeagle.com

This combination can lead to symptoms such as coughing, sneezing, headaches, and difficulty breathing among other things. It’s important to take the issue seriously and eliminate it right away before it spreads any further.

If not, it can cause structural damage to the building and lead to costly repairs.

How do mold and mildew grow?

Mold needs three things to grow: darkness, food, and moisture. Mold spores are everywhere—inside your house or outside, in your plants or the soil. You might even have spores growing in areas of your home that you can’t see.

Mildew needs two of those things to grow: moisture and food. It feeds on a variety of organic materials, including plant sap, wood, paper, paint, and dust. Mildew can also grow on dirty fabrics.

How to clean mold and mildew

The best way to clean mold and mildew is by using a mixture of water and bleach. You can either use a spray bottle or a bucket.

Be sure to wear protective gear such as gloves and a mask while cleaning, especially if the area contains lead paint which can cause lead poisoning if not handled properly.

If the area is too large or the mold is too thick, you might want to consider hiring a professional to take care of it. Here are the steps involved when it comes togetting rid of mold

Clean off the mold or mildew with a solution of water and bleach

You can use a brush, cloth, or sponge soaked in the mixture and gently scrub away at the area.

It’s best to avoid using any chemicals that contain ammonia as this could increase your risk of breathing in harmful spores. Once you’ve finished cleaning, let it dry thoroughly before allowing anyone inside the area again.

Fill up the affected area with hydrogen peroxide then let it sit for 10 minutes before scrubbing it away You can fill up a bucket or spray bottle with hydrogen peroxide and apply it directly on top of the affected areas. Then leave everything alone for about ten minutes until you come back and scrub the surface clean. Use a fan to dry out the area after you clean it to prevent future growths

Now that the area is free of both mold and mildew, simply dry it thoroughly by sweeping or using a vacuum cleaner. Open up all doors and windows inside your home so that there is good ventilation throughout the house.

You can also use a fan for faster drying time if you don’t want to leave anything open overnight.

Be sure to wear gloves when cleaning anything that could contain lead paint, which can cause lead poisoning if not handled properly

Lead poisoning can be very serious depending on how much one has inhaled over an extended period. Make sure you’re wearing protective gear when cleaning any surfaces that might contain such paint.

Inspect the area for any signs of future growth and take steps to prevent it

Mold and mildew can grow back quickly if you’re not careful. Be sure to inspect the area regularly for any new growth and take measures to prevent it from happening again.

Mildew vs Mold – What's the difference? | Woodard

Image Credit: http://woodard247.com

This could include fixing any leaks in your home, increasing ventilation, or keeping surfaces clean and dry.

Other surfaces where mold and mildew might need to be removed

Mold and mildew can grow on a variety of surfaces both inside and outside your home. Here are some other areas where you might need to take action:

Basements: Basements are often damp and dark, making them the perfect place for mold and mildew to grow. Be sure to clean any spills or leaks as soon as they happen and increase ventilation by using a fan or opening up windows.Bathrooms: Mold and mildew can form on shower curtains, tile grout, caulking, and even the bathtub itself. Be sure to clean these areas regularly and keep them dry at all times.Sinks: Sink drains are a common place for mold and mildew to grow. Be sure to clean out your drain at least once every two weeks to keep it free of any buildup.Windows: Mold can form on window sills if they’re not cleaned regularly. Be sure to wipe down these areas with a bleach solution whenever you notice the growth of mold or mildew.Cooking surfaces: You might want to avoid using any wooden chopping boards, sponges, or brushes to prevent the growth of mold and mildew whenever you cook.Flooring: Many types of flooring can be affected by mold and mildew including linoleum, wood, and laminates.Vehicles: If left unattended for long periods, mold can grow underneath car seats which may lead to breathing problems.Clothes: Mold and mildew can form on clothing if they’re left to sit for too long without being laundered. Machine washable clothes should be washed after every few uses while non-washables should be cleaned with a solution of water and bleach then hung out in the sun to dry.Stucco: If you notice any areas of your stucco walls that are peeling or bubbling, then there’s a good chance they’re infected with mold. Be sure to scrape off the affected areas then apply an anti-fungal paint or primer directly onto the surface to prevent further growths.Cleaning stucco is a technical process and you should contact a professional if you aren’t sure how to handle it.– Wood: Both the inside and outside of your home’s wood walls need to be properly maintained for them to avoid any serious damage from mold growths. Be sure to inspect these areas regularly and treat them with a protective coating of paint or primer whenever they start showing signs of wear.

Removing mold and mildew from your home can be a bit of a daunting task, but it’s important to take action as soon as possible to prevent any long-term health problems.

Final thoughts on how to remove mold and mildew

In conclusion, removing the mold and mildew from inside your home is a necessary step to take if you want to keep yourself and others safe. Remember, mold and mildew can grow back quickly, so make sure to inspect the affected areas regularly for any new growths.

The post How To Remove Mold And Mildew appeared first on Kitchen Infinity.

Did you miss our previous article…
https://www.thelavkitchen.com/?p=842

Replacing A Water Heater

Replacing A Water Heater

Many people have had to replace their water heater at some point in their lives.

Most homeowners can expect to shell out around $1,000-$2,000 every decade or two to replace a water heater that has reached its expiration date. This article will give you information about what kind of things you need to consider before replacing your hot-water heater and tips for making the process of replacing one as easy as possible.

Let’s dive deep into this topic.

What is a water heater?

A water heater provides hot water for the household and is an insulated steel tank filled with an acid solution called ‘water glass’. This solution heats up and stores the energy to provide warmth when it’s needed. A gas burner or solar panels which use either natural or man-made gas create just enough heat to keep the water at a set temperature.

The right water heater for each household depends on several factors such as climate, average electricity and gas prices in your area, how often you use hot water, and the size of your home.

Why should I replace my water heater?

There are a few reasons why you might want to consider replacing your water heater:

If it is more than 10 years oldIf it has a leakIf you are experiencing water pressure problemsIf the tank is rusty or damagedIf you are not getting enough hot water

The most common reason for needing to replace a water heater is that it is old and past its prime. The average lifespan of a water heater is around 10-12 years, so if your water heater is older than that, it might be time for a replacement.

Image Credit: http://familyhandyman.com

Another reason to replace your water heater is if it leaks. If there is a hole in the tank, it could potentially cause extensive damage to your home. A leaky water heater can also lead to high utility bills as you will be using more energy to heat the same amount of water.

If you are experiencing water pressure problems, this is a sign that your tank needs to be replaced. This can be caused by sediment build-up which usually happens over time. Sediment buildup will eventually reduce the amount of hot water your tank can supply and it could also affect the efficiency of its heating system as well as the thermostat control.

Finally, if you find yourself not having enough hot water for an entire household, this is another sure-fire sign that you need to have a replacement unit installed. A new tank should increase your flow rate so each person in your home won’t have to wait forever for a warm shower.

How do I replace my water heater?

There are several steps involved with replacing a water heater, and if you did not purchase the new unit yourself, you should check with your home insurance company before starting work.

You will need to shut off the gas supply or turn the power off at the breaker box.

Before disconnecting anything, you must do a few things:

Take photos of all the connections (this is an easy way to make sure they get reconnected properly) and mark them with a piece of painter’s tape so there isn’t any confusion while reassembling everything later on.

Write out a list detailing which connection is for what and where each one goes. Once everything has been marked and recorded, you can start disconnecting and collecting tools and supplies needed for installation.

Tools needed for installation:

JigsawBreaker barTape measureFlat tip screwdriverBig wrench or channel locks for gas supplyPhillips head screwdriver

The first step is to drain out all the water in your tank. This can be done safely with a small pump, but if you want to do it the old school way, shrimp nets are great for catching all that yucky sediment. Once you’ve drained out most of the water (and possibly all of the sediment), remove any panels on your tank and disconnect anything connected to it such as new water lines or pipes leading from your home’s plumbing system.

When everything has been disconnected, disconnect any electrical connections by turning off breakers and pulling them apart. You should also remove the temperature and pressure relief valves. This will give you a bit more room to work with while removing your unit’s insulation.

Now that your tank is ready, lift the water heater out of its place and carry it outside where you can begin removing it from its casing. Use a flat-head screwdriver if you encounter any stubborn screws on the way down. After all the screws have been removed, pry off whatever pieces might still be holding your old tank together. You’ll notice that most tanks are made up of different-sized sections – some larger than others which makes for an easy breakdown later on during reassembly.

Once all of the pieces have been separated, clean them thoroughly so they look new again before putting in your new water heater. You might also want to consider purchasing a new gasket kit – these tend to wear down over time and can cause water leakage.

Now it’s time to start putting everything back together.

Water Heater Installation & Replacement in Maryland | BGE HOME

Image Credit: http://billygo.com

Start by reassembling the tank using the photos and list you took before starting disassembly. It’s important that each pipe is reconnected properly and that nothing leaks when you turn on the water again. If you do encounter any leaks, stop and troubleshoot before continuing. It could be something as simple as a tightened screw or an improperly connected pipe.

Once the tank has been reassembled, connect the pipes leading from your home’s plumbing system and then reconnect the electrical connections. If you’re having trouble remembering where each pipe goes, you can always use the photos you took as a reference.

Turn on the gas supply (or flip the breaker box back on) and check for any leaks. Once everything has been checked and double-checked, it’s time to turn on your water and give it a test run. Take a shower, run the dishwasher – just make sure everything is working properly before calling it a day.

Replacing a water heater can be an intimidating task, but with a little bit of preparation and careful following of instructions, you’ll be able to do it like a pro. Not only will you save money in the long run by avoiding costly repairs or replacements, but you’ll also have the satisfaction of knowing that you did it yourself. So before you call a professional, give it a try. You might be surprised at just how easy it is.

Other things you need

Heavy-duty work gloves – You will have to touch the tank once it’s been removed from your home so be sure that you have a good pair of protective gloves.

Scouring pads – These are necessary for removing surface rust from the outside of the tank. Make sure that you use one that is free of harsh chemicals as they can seep into your water.

Heavy-duty work boots – The ground will get wet and slippery when you drain your tank so make sure you have a good pair of boots on to keep yourself from falling. If possible, avoid wearing other types of shoes as they will not keep you dry or safe.

Shrimp nets – These are great for removing sediment if you decide to do it the old-school way.

Flashlight – You might need light once everything has been disconnected inside of your home so make sure that you bring your flashlight along with already charged batteries (extra batteries wouldn’t hurt either). It’s also helpful if you decide to do any troubleshooting that might arise while reassembling your tank. Trust me; nothing is more frustrating than being in the dark.

Once you have all of these items, you’re ready to start your replacement project. Just be sure to take your time and follow the instructions closely – it’ll save you a lot of headache (and maybe even a little bit of money) in the long run.

Final thoughts on replacing a water heater

In conclusion, replacing a water heater is a big job but it’s one that most homeowners can do themselves with a little bit of instruction and preparation.

Make sure to have all of the necessary tools and supplies on hand before you start and be sure to take your time while following the step-by-step instructions. If you run into any problems, don’t be afraid to stop and troubleshoot – it might just save you some time (and hassle) in the long run. Good luck.

The post Replacing A Water Heater appeared first on Kitchen Infinity.

Did you miss our previous article…
https://www.thelavkitchen.com/?p=831