The Dos and Don’ts of Kitchen Color Schemes

The Dos and Don’ts of Kitchen Color Schemes

Choosing colors for your kitchen is a big decision that can have lasting effects on the way you feel when spending time in this space. When choosing hues, it’s important to consider whether or not they’ll become boring after some time. If so, this could lead to an unpleasant experience and make it harder to enjoy cooking and eating in your kitchen.

To avoid making decisions that will cause regret, later on, follow these dos and don’ts when choosing paint colors for your kitchen. These tips will help ensure you love what you see every day. Read on!

The Dos of Kitchen Color Scheme

Take Expert Advice

When it comes to choosing a kitchen color scheme, it can be confusing. So, take advantage of the knowledge and experience that color professionals and designers possess. They’ll know about how colors work together and will be able to make recommendations based on your lifestyle, preferences and tastes.

Some color advisors will also help you with color selections, while others will work as interior designers or architects that provide color consultation as part of their services.

Consider the Lighting

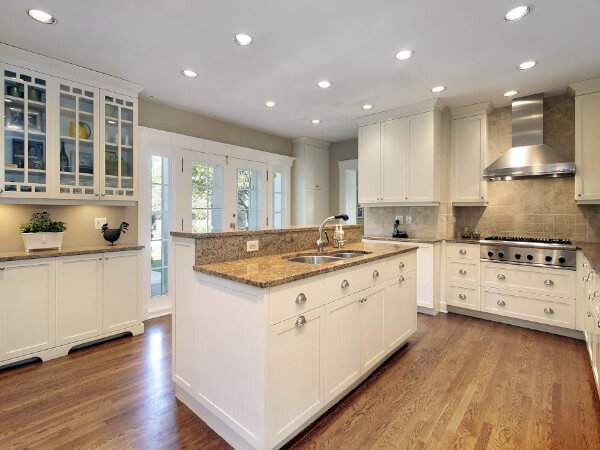
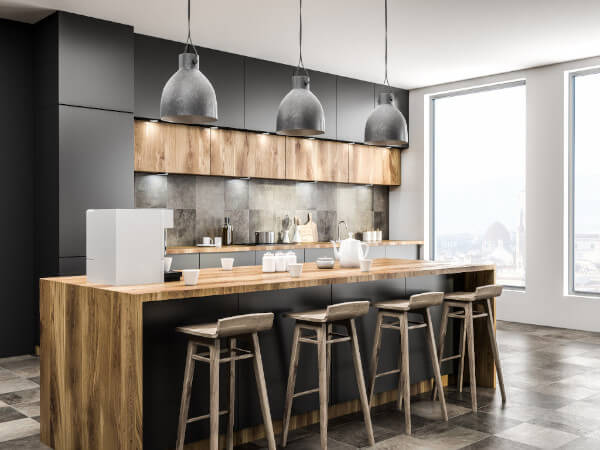
Lighting is key when it comes to choosing kitchen color schemes. The more natural light you have in your kitchen, the more real the colors appear. If your kitchen is small and dark, consider a kitchen color scheme to make the area look bigger and more inviting.

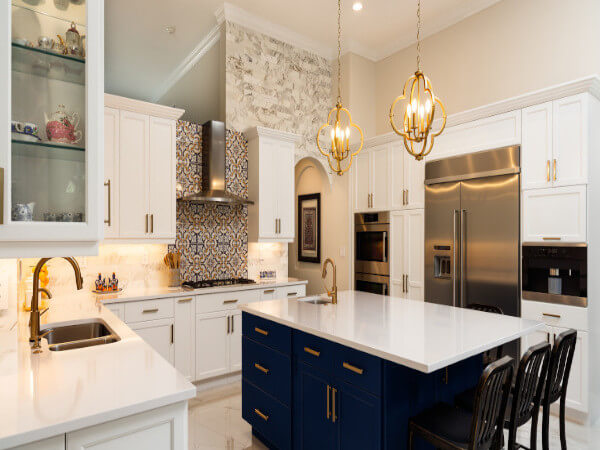
You can paint your walls a dark tone, but only if your countertops and cabinets are not dark. Along with natural light, think about the artificial light in your kitchen. Colors tend to appear different depending on the light fixtures you use. Adding soft gold light fixtures can be enough color to add depth to your kitchen color scheme. So, whenever you think about coloring your kitchen, also consider choosing the right lighting for your kitchen

Use Chalkboard Paint on the Kitchen Door or a Wall

A chalkboard makes a wonderful addition to any kitchen, whether it’s for keeping track of your grocery list or jotting down recipes as they come to mind. If your walls are dark, paint them with matte black Chalkboard Paint, and you won’t be able to miss them.


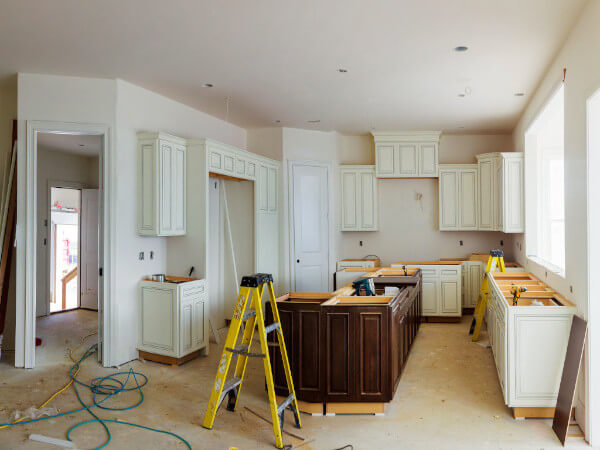
Image credit: https://diy.sndimg.com/

You can find a wide variety of chalkboard paint colors from most paint suppliers. It’s perfect for kids to scribble without damaging the walls and for adults to write lists and quotes or draw images while adding color. And if you’re not ready to commit to a wall of chalkboard paint color, a framed DIY chalkboard in your favorite color can also work.

Consider Cool vs. Warm Color Palettes

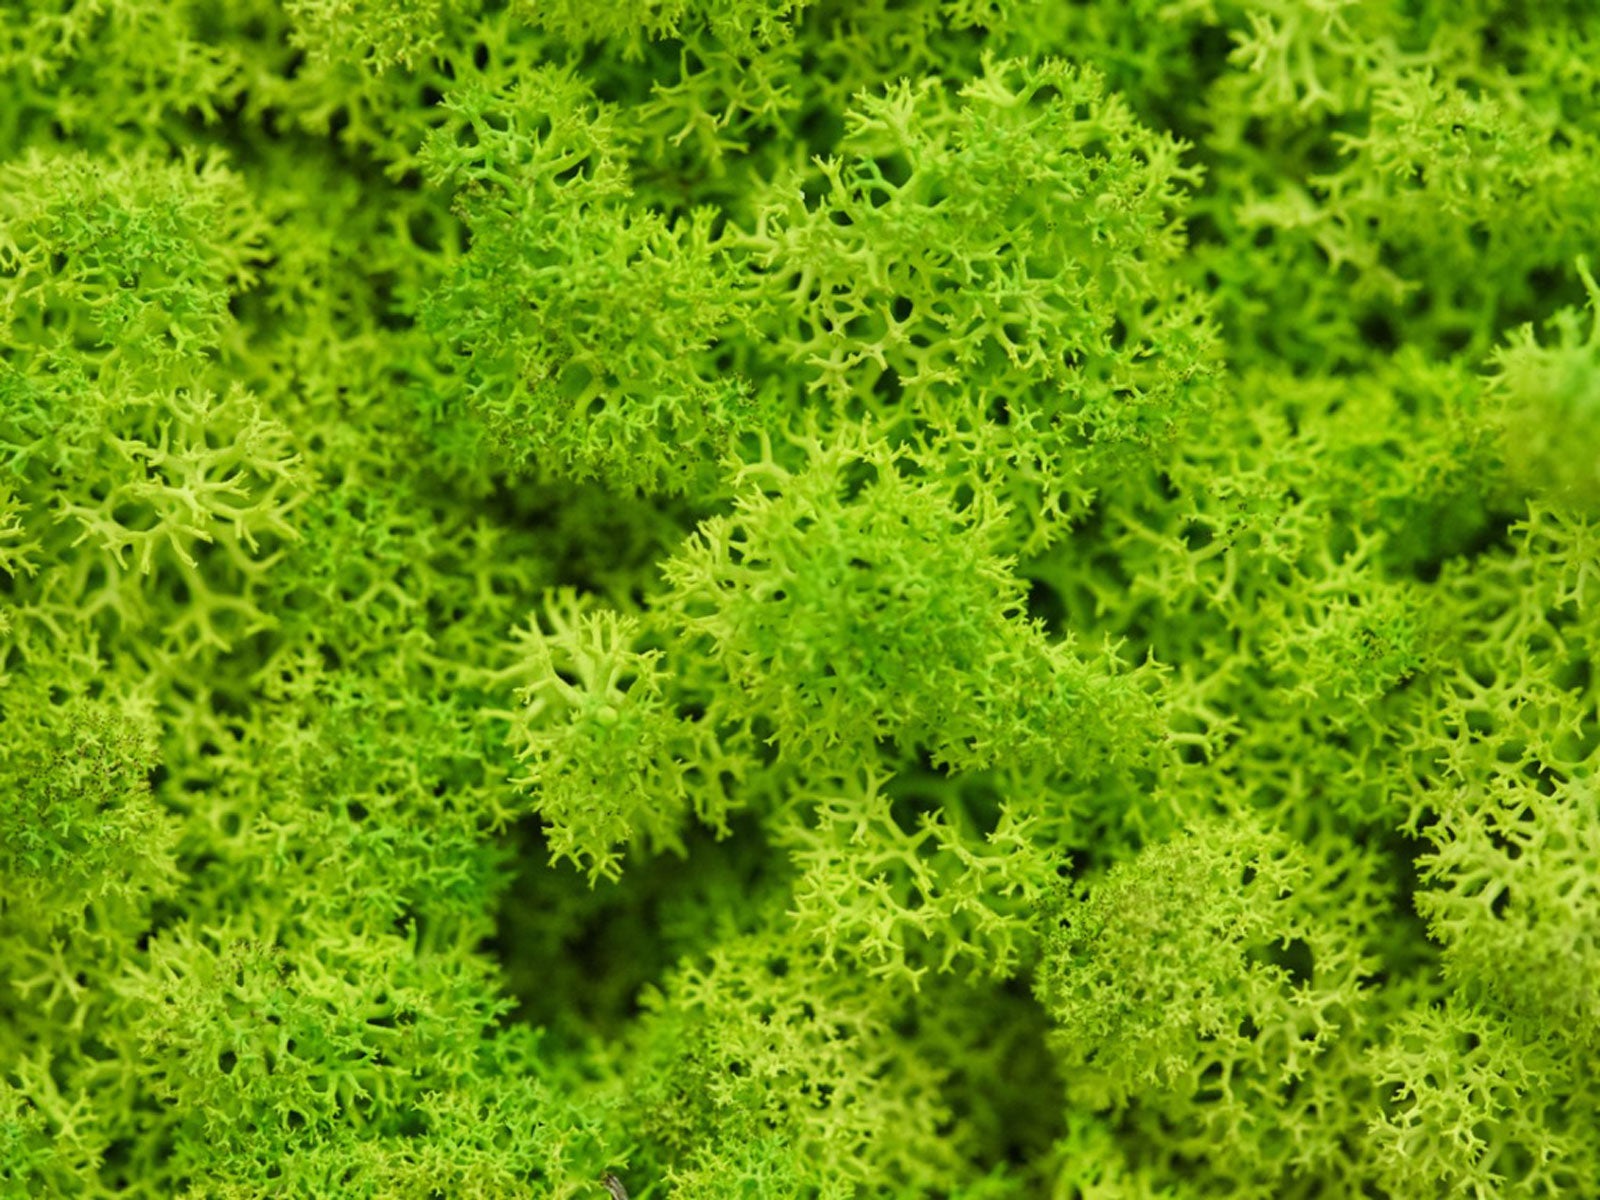
Most children learn about warm colors and cool colors during art class. Making up two halves of the color wheel, warm colors include reds, oranges and yellows, while cool colors include greens, blues and purples. These color groups tend to evoke different emotions.

Cool vs. Warm Color Palettes
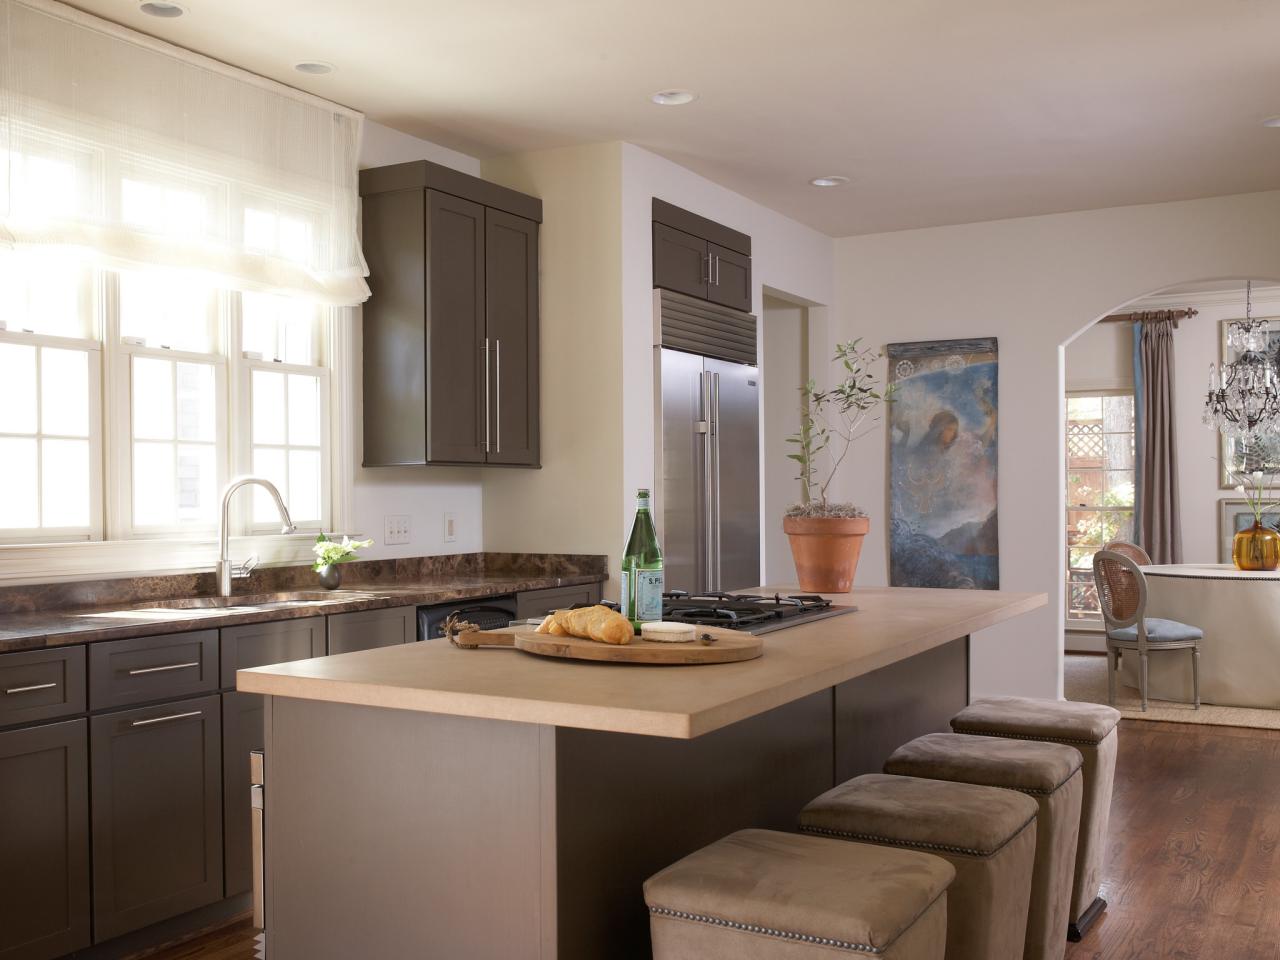
Image credit: https://hgtvhome.sndimg.com/

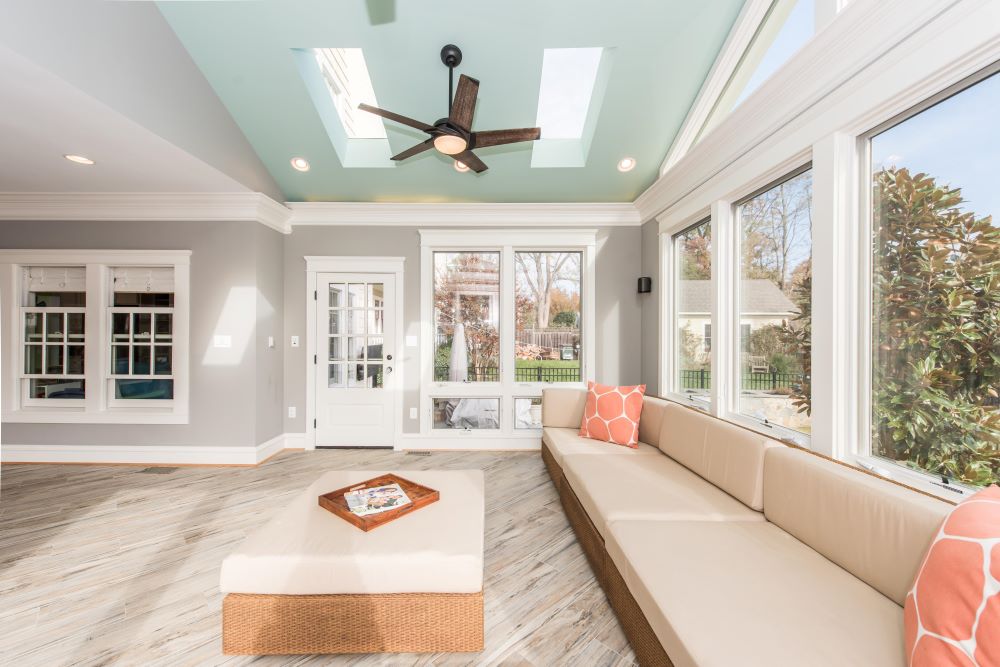
So deciding on the emotions you want in your kitchen can help you decide on these color palettes to use. Warm colors evoke cozy, warm feelings in a room, especially with yellows and oranges. These colors can also be bold, dramatic or dynamic if you focus on reds.

On the other hand, cool colors are often associated with tranquility and refreshing emotions, especially with blues and greens. Another option other than sticking to one color palette is to contrast them. For example, you can make any yellow kitchen feel more grounded by adding a touch of a cooler color.

Watch Your Undertones

Understanding how to paint undertones will help you get the colors that work best for your kitchen. All colors, even neutrals, have a color undertone that adds gray, green and even pink to an otherwise neutral space. Learning about different undertones can help you decide what colors go together in your kitchen color scheme.

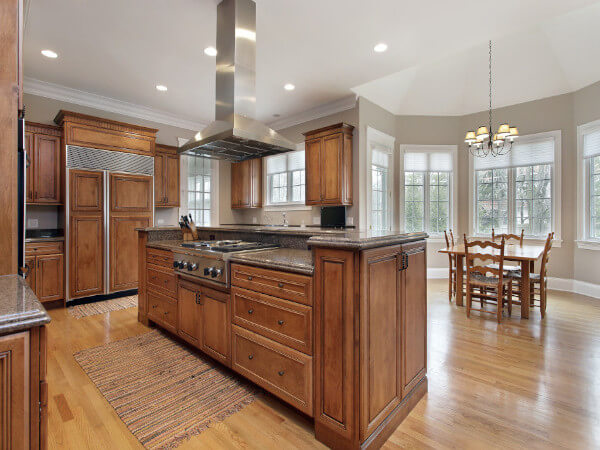
Look Carefully What’s in the Kitchen

You should take a close look at what’s already in your kitchen. This can help you decide which colors go together and which ones clash. Compared to other rooms in the house, kitchens have more things that you need to consider when choosing a color scheme.

Your countertops, cabinets and appliances all bring their colors and hues to the kitchen. These items may clash with whatever paint colors you pick. Decide whether part of your kitchen remodeling plans include repainting cabinets or putting in a new countertop.

If that’s not part of your plan, you’ll have to work around the existing colors. The kitchen floor also adds color to the space, which you’ll have to work with if new flooring isn’t in your plan. Think about how different wall colors will look contrasted against different colors of hardwood, tile or linoleum floors. If your floor pattern contains multiple colors, consider tying in one of those colors when choosing a kitchen color scheme.

Don’ts of Kitchen Color Scheme

Don’t Hesitate to Use Gray Wall Colors in Your Kitchen

Gray is a pretty neutral color, so that it will go with almost any other color in your kitchen. It’s also a great backdrop for artwork, light fixtures and shelves that you might hang above the cabinets or counters. These qualities make gray one of the best colors for the kitchen.

Don’t Overdo it With the Color

It’s easy to get carried away and paint every wall in your kitchen a different color, but this can be overwhelming. Mixing colors well is harder than you might think. Instead of going hog wild with several bright colors, stick to one or two that you like and try pairing them up with neutral shades.

Adding too many colors might also make the space appear cluttered and disorganized. A basic rule of thumb is to use three colors. These include primary color, neutral color and secondary color.

Don’t Forget About Connecting Areas

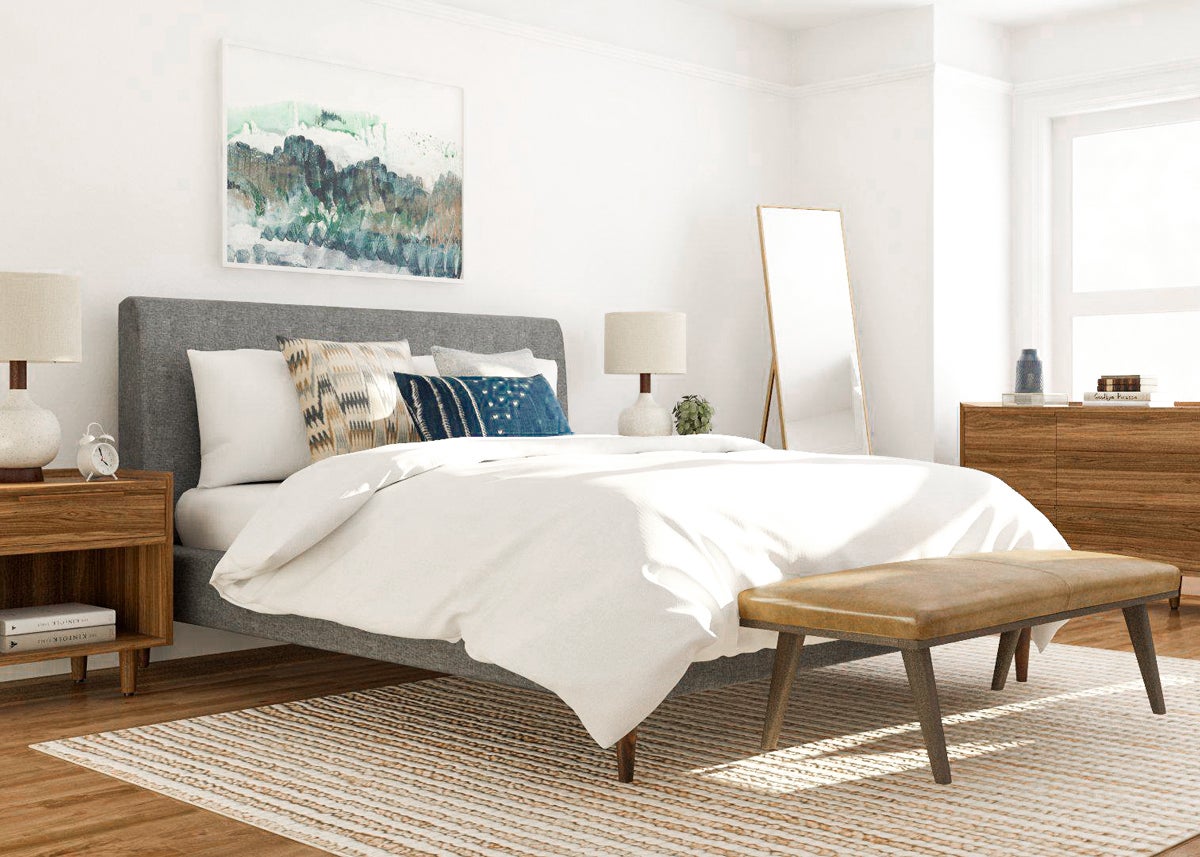
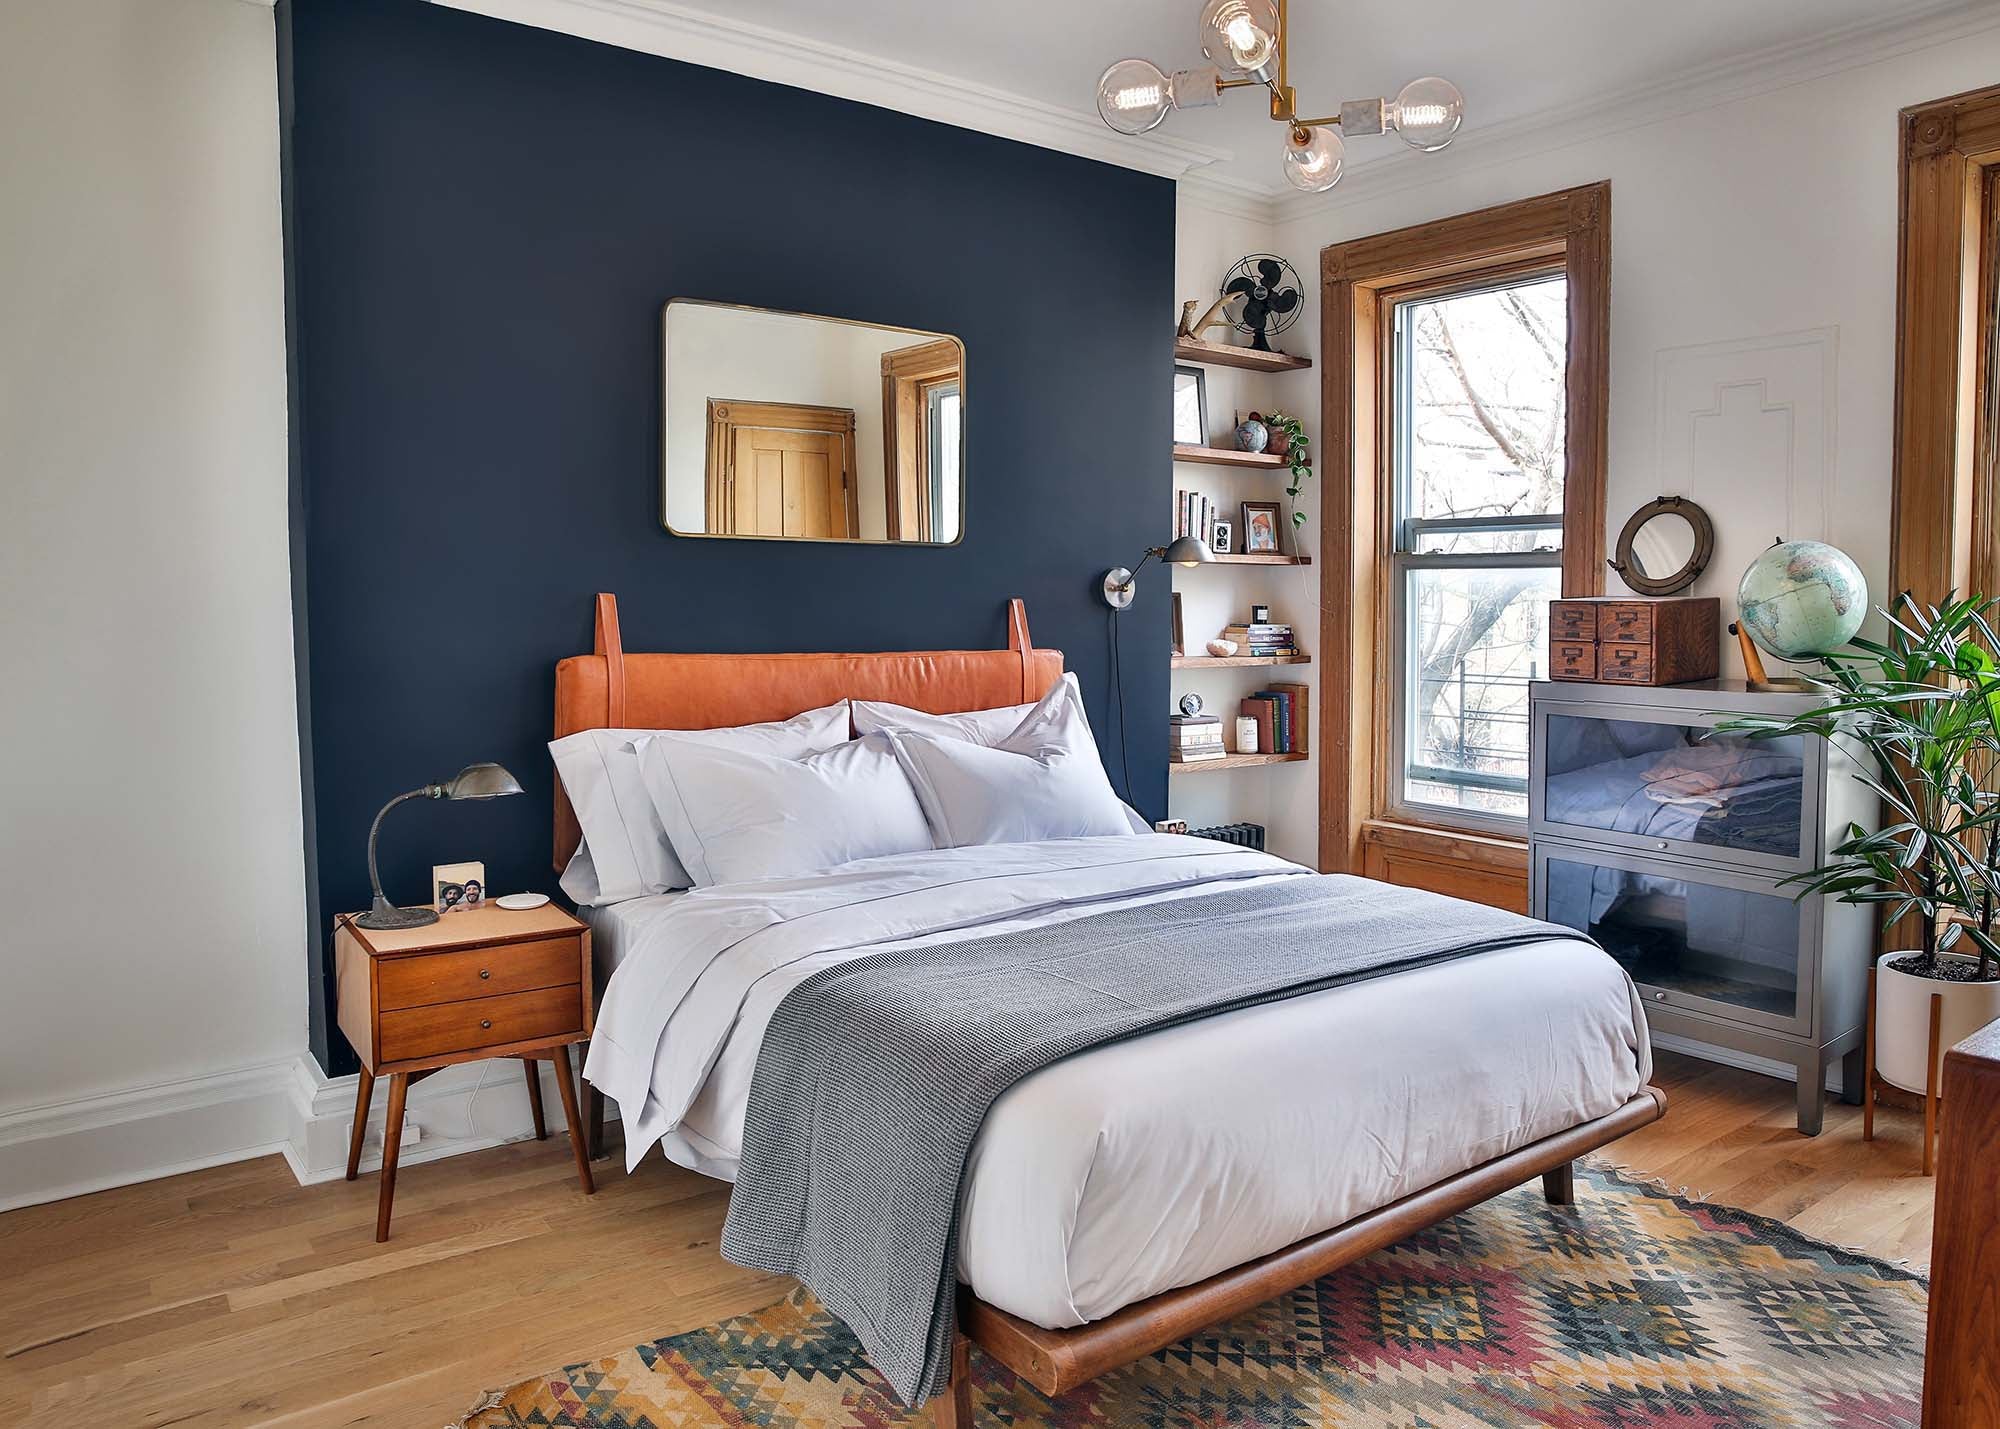
Don’t forget about adjoining rooms in your kitchen color scheme. An accent wall can provide more color to an open dining hall or a living area. By dividing a few of the room’s colors across the surrounding spaces, you may connect the color scheme. Also, consider the rest of your home.

If you want to go with a modern kitchen design but your property is older, add a few key features for the sake of consistency. And to avoid inconsistencies in the house, keep the color schemes of the room similar. In this case, adding a feature wall in the kitchen is a terrific approach to experiment with color.

Don’t Ignore the Undertones

Paint colors are usually made by combining two separate tones of paint, so when looking at a paint color, you’re looking at two different colors together. One is the primary color or mass tone, and the other is the color that achieves that specific tone.

Since your kitchen has a lot of cool elements, choosing a warm undertone, even if the overall tone is cool, will look odd. Comparing the shade of paint with the pure tone of the same color is the greatest approach to choosing the perfect color for your kitchen. Comparing your shade to the pure shade will help you see the undertone more clearly and decide whether it will look right in your space.

FAQs on the Dos and Don’ts of Kitchen Color Schemes

What colors make the kitchen look bigger?

White or light colors reflect light, making spaces look bigger and brighter. In contrast, darker colors absorb light, making a room feel smaller and cozier.

Final Thought on the Dos and Don’ts of Kitchen Color Schemes

Creating a flowing kitchen color scheme might seem like a daunting task at first. But with time, patience, and a little warmth, you’ll find yourself with the perfect kitchen color scheme within no time.

The post The Dos and Don’ts of Kitchen Color Schemes appeared first on Kitchen Infinity.

Did you miss our previous article…
https://www.thelavkitchen.com/?p=866

Peat Moss: What It Is and How To Use It

Peat Moss: What It Is and How To Use It

Peat moss is a natural growing medium with many applications, but it can be hard to know how to use it in your garden. But what exactly is peat moss? How does it differ from other types of soil or mulch?

This guide covers everything from the types of peat moss available to how much water each type holds. We’ll cover everything from planting trees and shrubs with peat moss as a potting medium or using it as alternative mulch material in vegetable gardens. You’ll also find out which kinds of plants grow best when grown directly in peat moss without any additional soil mixed into the mix. Let’s get started!

What Is Peat Moss?

Peat moss is a soil amendment that is harvested from peat bogs. Many of these peat bogs are found in wet areas of Canada. Peat bogs are formed over a long period as organic materials partially decompose.


Image credit: https://www.gardeningknowhow.com/

Although sometimes referred to as peat, peat moss and peat are not the same things. Peat moss is one of the products harvested from peat bogs. Other types of peat moss come from the partial decomposition of other organic materials. If you know how to make compost then you must know this type of peat moss. The moss in peat moss refers to sphagnum moss.

Where Does Peat Moss Come From?

Peat moss comes from your flower pot or garden from wetlands or bogs. It’s not decomposed material because the surface of the blogs doesn’t allow oxygen and air to filter underground. This makes the fibers of the sphagnum moss remain intact.

Types of Peat Moss

Sphagnum Peat Moss

The most commonly used type of peat moss is sphagnum peat moss. Sphagnum peat moss has a high ability to absorb moisture and holds ten times its dry weight in water. After it’s harvested and dried, sphagnum peat moss is light in color, making it retain 10-12 times its weight in water.

Sphagnum Peat Moss
Image credit: https://www.gardeningknowhow.com/

Don’t confuse sphagnum peat moss with sphagnum moss, even if their names are similar. Sphagnum moss refers to the plant material harvested when still alive and growing above water. The end product is the light, fibrous material often used to decorate line wire baskets.

Black Peat Moss

This is an important type of peat because it has high nutrient content, making it useful in growing orchids because orchids like organic material in their soil. It’s also used for potted flowering plants and nurseries that produce bedding plants. It’s a little more acidic than sphagnum peat moss and holds more water.

Black peat is harvested differently than sphagnum peat moss in a way that preserves the living plant. It’s cut from Sphagnum bogs in Canada and is probably black because of its high carbon content. It requires more processing before it’s sold but has less dust and fewer contaminants than brown peat moss.

History of Peat Moss

Peat was dried and used as a source of fuel in some countries for centuries. This is because it’s rich in carbon dioxide, just like other fossil fuels. It was until the 1940s that peat had a place in horticulture. Today, it’s used as a soil amendment, soilless mix, seed starting, and mushroom casting.

vailability of Peat Moss

Peat mosses are commonly found in bogs and wetlands of the earth’s northern hemisphere. It’s sold in gardening stores, online, hardware stores, and even supermarkets.

Mining Peat Moss

Before peat moss becomes a useful gardening product, it must be harvested by digging the ground and recomposing the bog’s ecosystem. When it comes to mining peat moss, the process is as follows:

Dig a network of ditches along the peatland to drain the water. Second, remove the native vegetation to get the peat exposed. Third, level the harvest to prevent drainage of the surface runoff. Fourth, harrow the top layer to speed up the drying process of peats. Fifth, suck up the dry peat layer using a large vacuum harvester.

Lastly, the harvested peats will be transported to a processing firm for cleaning, drying, and screening into different labels and packaging.

Pros of Peat Moss

Sterile

Peat moss has a natural ability to kill weed seeds and insects. When peat moss is added to the soil, it leaves no chance for mosquitoes and larvae to grow in your garden. This attribute can be very important if you want to avoid diseases such as malaria.

Cleanliness

Most of the growing materials are not clean. However, that’s not the case with peat moss. If you drop some wet moss, pick it up, get it dried or sweep it up.

Moisture Retention

Peat moss is believed to retain water for longer than other composts. This means that you will need less watering of your plants during dry seasons.

Peat Moss Has Slightly Acidic pH

Peat moss has a pH of 4.9 to 6.5, slightly acidic. This makes it better for soil mix because the acidity helps break down other compounds in the soil. This also makes it a good corrector, especially with plants that cannot stand alkaline soil.

It’s Fully Organic

If you are looking for an organic material to improve the content of your soil, using peat moss is a good option. It comes from bogs and is fully natural. The best part is that it’s now harvested at its optimal stage, further adding that this is an organic ingredient. Also, quarrying and transportation do burn a lot of fossil fuels, so if it’s produced organically, it’s not harvested and delivered organically.

Peat Moss Doesn’t Compact

Even though peat moss absorbs water well, it doesn’t compact, unlike soil. Compaction makes it hard to create space for the water and air to pass through. But if you add peat moss to any compact material, you’ll have solved the compaction problem and made the growing mix drain better.

The Drawbacks of Peat Moss

Poor in Nutrients

Some growers consider peat moss to be nutrient-poor. It doesn’t contain much nitrogen, potassium, or phosphorus, but it does have calcium and magnesium, which are essential nutrients for the growth of cannabis plants. Unlike other organic materials such as manure compost, peat moss is very poor in nutrients.

Dryness Issue

Since peat moss is very dry, it’s not 100% suitable for soil. It can be combined with other organic materials to improve the water retention capacity of your growing medium. When starting seeds with peat moss alone, ensure they get enough moisture. It’s also good to mix it with soils and some other soilless media.

Non-Renewable Resource

Peat bogs are made up of wetland plants accumulating for thousands of years. They are only found in areas where the average annual temperature is lower than 64 degrees F (18C). Peat moss from North America or Canada comes from old-growth forests. In other words, it’s a non-renewable resource that has to be harvested. This is not the case for peat moss harvested in Ireland or Scotland. Their bogs are managed wetland areas that grow peat moss yearly, so they can be harvested without causing permanent damage.

Peat Moss is Expensive

Peat moss exceeds the price of comparable mediums such as coconut coir. If you use it in bulk and the price is an issue, a better alternative is compost.

How to Use Peat Moss in the Garden

Soil Amendment

Peat moss is available in several grades, with different particle sizes. The larger the particles are, the more expensive it is. Use peat moss as a soil amendment to lighten heavy soils and increase water retention. For clay and heavy soils that get compact easily, it softens the soil structure and improves the drainage.

Peat moss helps retain moisture and nutrients for plant roots for sandy soil. If you intend to use it as a soil amendment, you should know that it changes soil pH levels. Ensure you measure and watch out if the pH level drifts too much by testing the soil pH

Hydroponic Growing

Peat moss is used in hydroponic systems because it creates a soil and nutrient solution barrier. This layer increases the stability of the system, keeping the plant roots away from harmful products that are designed to kill them.

People using it use it with other growing media like perlite and vermiculite to balance the moisture and aeration. When using peat moss for pure hydroponic growing, you should know some facts about it’s not appropriate.

Because it’s an organic matter, if provided with plenty of oxygen and nitrogen, it will start to decompose, making the material compress around plant roots and choke off your plants. So, better mix it with other materials.

Seed Starting

Peat moss is often used as a base layer to germinate and grow plants like vegetables and flowers. It provides aeration to the root zone, and it’s very easy to use for newcomers in hydroponics. When using peat moss for seed starting, you also need special trays with drain holes on the bottom because if you don’t, the peat moss will expand and block the water flow out of your seedling flat.

For this purpose, use the peat moss alone or in a mixture with some soils. You can also remove the hassle by getting the peat pellets sold on the market. Many people also prefer a soilless mix of peat moss, perlite, coconut coir, and others in different amounts. This prevents diseases, fungi, bacteria, weed seeds, and other bad things commonly found in the soil.

Peat Moss for Plant Transplants

Using peat moss granules is also the best way to transplant young trees and big plants. It can be easily handled since it is lightweight; you can use it with other components like the potting mix but make sure not to include any fertilizers or pesticides.

Peat Moss for Plant Transplants
Image credit: https://www.gardeningknowhow.com/

It provides nooks and crannies where new, tender roots can grow. Peat moss also keeps humidity high, essential when plants have a new home. It also corrects the acidity of the soil and breaks down the consistency and texture of the soil, especially if it’s clay soil.

Growing Acid-Loving Plants

Peat moss is also used to grow plants that prefer soil with low pHs, such as rhododendrons, gardenias, heathers, tomatoes, Pieris, azaleas, and camellias. These plants need a peat moss mixture for their acidic soil. When combined with the correct potting mix, these plants enjoy having an environment where they can take up essential nutrients from the soil and conserve water.

Peat Moss Alternatives

Compost

Compost can be used as peat moss alternatives. These are usually less expensive but do not have the pH balancing effects of peat moss, therefore it should be used in conjunction with other ingredients to create the correct balance for acid-loving plants.

Compost is made from decayed organic materials like rotted plants, leaves, vegetable scraps, and animal manures. It has a lot of commonalities with compost peat, like excellent water holding capacity and great material for soil amendment.

Compost is cheaper than peat moss and fully sustainable in that you can easily make your own. On the other hand, compost won’t last long like peat moss, and you’ll have to add compost regularly. And lastly, compost will compact faster and easier than peat moss, but to have a comparable effect, you can add sand, shells, and eggshells to the soil to improve its texture.

Perlite

Perlite is a volcanic rock heated and expanded with steam to produce a fine white, shiny-type growing medium, which lets good drainage and aeration of the roots. It is also widely used as an additive for potting soil or seed starting mixes as it helps increase the porosity of the root environment.

It provides an excellent oxygen supply to plant roots and will not compact under heavyweight. Perlite is a good natural drainage layer for the bottom of your containers, and it will also help prevent any root rot problems that can occur from sitting water in the bottom of the container.

Coco Coir or Coco Fiber

Coco coir is the partially processed fiber of the coconut husk. It’s sold compressed into bricks or blocks or in a loose form that can be expanded by adding water. Coco produces excellent drainage and aeration qualities with good retention properties.

Coco provides an ideal air to water ratio – twice as much air space compared to water-holding capacity. Coco coir is a sustainable resource that has been used for centuries to protect the health of natural shorelines and reefs. It’s highly resistant to insect, microbial, and mold attacks, making it perfect as a growing medium for both hydroponics and soil applications.

Vermiculite

Vermiculite is a naturally occurring mineral heated to expand it into wormlike particles that absorb moisture and provide aeration. Vermiculite provides the nutritional requirements of plants while allowing for excellent drainage and aeration qualities.

Organic Matter

Organic matter is what makes the nutrients in your soil available to plants. It increases the number of good, healthy microorganisms in your soil by providing them with food and habitat. Organic matter also absorbs water during irrigation, reducing runoff.

What’s more, organic matter improves porosity in your soil by opening tiny spaces between soil particles for air and water, giving your plants room to grow.

Sand as Peat Moss Alternative

Sand has very coarse particles that do not release nutrients to plants easily. It does not change the pH of your soil, but it also doesn’t hold nutrients well, so adding sand on top of a peat moss/vermiculite mix is not ideal. Sand may be preferable if you are planting trees or other plants that don’t need consistent nutrients.

FAQs on Peat Moss

What is wrong with using peat moss?

Peat moss is not a natural substance. It is the partially decayed remains of plants that have been harvested from peat bogs and mires, an ecosystem formed by the incomplete decomposition of organic matter in wetlands. Peat bogs are fragile habitats that take thousands of years to form.

When should you use peat moss in your garden?

You should use peat moss as a soil amendment or potting mix, especially when growing fruits and vegetables such as tomatoes, blueberries, and camellias which are acid-loving plants.

Final Thought on Peat Moss

There you have it. Peat moss is harvested from bogs or mires and is used in planting or potting soil mixes for acid-loving plants. Peat moss is not a natural garden soil ingredient, but it will help your garden grow lovely flowers and delicious foods.

The post Peat Moss: What It Is and How To Use It appeared first on Kitchen Infinity.

Removing Shoe Odors With Baking Soda

Removing Shoe Odors With Baking Soda

Shoe odors are caused by bacteria growing in moist, dark places. They can also be caused by sweat and oil from your skin that gets into the fibers in the shoes.

The great news is that baking soda is a great way to get rid of shoe odor – sometimes once and for all.

In this article, you will learn how to remove shoe odors from your home and shoes, along with other crucial tips to remember when it comes to getting rid of annoying odors in your home.


Image Credit: http://housewifehowtos.com

What the most common sources of shoe odors are

Shoes are often lined with materials that cause odors to build up during everyday use.

This buildup of sweat, bacteria, and oil is known as foot funk, shoe funk, or shoe odor.

Other sources of shoe odor include dirty shoes that have been worn without socks, smelly shoes that were never cleaned before being placed in storage, and smelly athletic gear that needs washing after heavy use.

How to remove shoe odors from your home and shoes

Baking soda will do the trick for most people when it comes time to clean out old stinky shoes or get rid of new stinky shoe smell.

There are several simple ways you can use baking soda to remove the funky smells from your shoes.

Simply sprinkle baking soda into the inside of your smelly shoes and lace them up as usual for a couple of days or until the stench is gone.

Another way to use baking soda to remove shoe odors is to make a thick paste with water and baking soda, apply it to any surfaces that have been affected by the odor, let it dry, then take a damp rag and wipe it away.

It’s also a good idea to place a small container of baking soda in your closet, gym bag, or other places where you store your shoes as this will help absorb any lingering foot funk.

When removing shoe odors from carpeting or hardwood floors, porous materials can be treated with a mixture of baking soda and water, or baking soda can be sprinkled on the carpet or floor and brushed with a broom.

Please note that this method will not work for concrete floors, most sealed wood floors, tile floors, linoleum tiles, vinyl tiles, varnished wood floors, granite countertops, etc., because baking soda cannot penetrate the surface to neutralize the odors from below. In other words, these surfaces would have to be stripped of their coating for the baking soda to get through to where it’s needed.

However, if you want to clean sticky grease off kitchen cabinets, then baking soda is the way to go.

How do I use baking soda for removing shoe odors? What do I need?

You’ll need a jar or container that’s big enough to hold the shoes you want to soak, baking soda, water, and an old towel. Then, follow these steps:

Step 1 – Fill your container halfway with lukewarm water Step 2 – Mix in 3 parts baking soda with 1 part water. For example, for every cup of water use 1/3 cup of baking soda or for every liter of water use 10 tablespoons (about 80 grams) of baking soda. Adding more baking soda will lead to better results but it could take longer to dry out.Step 3 – Soak your shoes in this mixture for at least 12 hours (for larger shoes like boots you may need even more time). Step 4 – After you’ve soaked your shoes for as long as needed, take them out and put them in a cool dry place to dry off. If you have a fan nearby set it to blow on low. This will speed up the process of drying your shoes and prevent any mildew from forming.Step 5 – Once your shoes are completely dry, sprinkle some baking soda inside them and leave overnight so that they can absorb any odors still left behind. You should do this before wearing your shoes again or putting them back into storage.

Why baking soda is the best way to get rid of shoe odor

Baking soda neutralizes odors naturally by absorbing unpleasant smells into itself where it then breaks down into inert components that are not likely to cause any further harm. This makes it much safer than other household cleaners which typically mask bad odors with artificial fragrances or kill bacteria with harsh chemicals like bleach or ammonia.

Using these types of cleaners often causes the stinky shoes you’re trying to get rid of to smell even worse and in some cases, the fumes can be harmful.

Baking soda is also a natural deodorizer so it will not only remove shoe odor but also any other odors that may be present in your home.

Tips for using baking soda in your closet, on carpeting, and hardwood floors

When cleaning your home with baking soda it’s important to keep these tips in mind.

Test an inconspicuous area before applying baking soda to a large surface

Applying baking soda to an inconspicuous area should be enough to test if it’s safe to move forward. In addition, this will also help you determine how long you should leave the baking soda on the surface before rinsing it off.

lways use a damp cloth when wiping away baking soda residue – dry surfaces can become scratched.

A damp cloth will help you remove any residue without scratching the surface. This is especially important when cleaning delicate surfaces like wood floors or furniture.

Never mix baking soda with other cleaners – this can create hazardous fumes.

When it comes to removing shoe odors using baking soda it’s always best to stick with just the baking soda and water. This is because other cleaners like bleach or ammonia can react with baking soda and create harmful fumes.

Keep in mind that baking soda may not be suitable for all surfaces

You should avoid using baking soda on marble, granite countertops, tile floors, varnished wood floors, painted walls, etc. If you do so, it can leave behind a dulling film or even etch the surface if left to sit too long before being washed away with water.

Do not pour water onto baking soda if it is being used in shoes – this will damage the footwear.

Baking soda should always be used dry in shoes. If it gets wet, for example from a spilled liquid, the material will start to break down and eventually turn into a sticky mess that can damage your shoe.

Baking soda can be harmful to pets

Put your pets away when using baking soda to clean as it can be harmful if ingested. Baking soda is not poisonous to pets but it can cause them to vomit or have diarrhea if they consume too much of it.

Removing Shoe Odors With Baking Soda – FAQ

Why should I use baking soda to remove shoe odors?

Baking soda can help you keep your stinky shoes smelling fresh. It’s the best way to deodorize and neutralize smells like those from your athletic shoes, footgear, and boots.

How to Clean White Shoes with Baking Soda | Arm & Hammer™

Image Credit: http://armandhammer.com

Is it safe to use baking soda in my shoes?

Baking soda is a safe way to soak up any odor-causing bacteria or fungus which may be living in your sneaks. It’s also an all-natural remedy that has no side effects. However, if you happen to have any open cuts on your feet please refrain from using this method because of the risk of infection.

What if my shoes are wet?

If your shoes are wet, removing as much water as possible before using the baking soda is ideal. You can do this by using a shoe dryer, airing them out in the sun, or stuffing them with newspapers. Once your shoes are mostly dry, you can then proceed with the baking soda remedy.

Can I use this method for all types of shoes?

This method should work for all types of shoes, but if you have leather or suede shoes be careful not to soak them for too long. Baking soda can be harsh on these materials and may cause discoloration or damage.

Odors from sneakers, footgear, and boots can be a real nuisance. But with a little baking soda, these smells can be neutralized and removed in no time. Soak your shoes in a baking soda and water solution, or sprinkle some baking soda inside your shoes to help absorb any unwanted smells.

Baking soda can also be used tomake DIY laundry detergent so you can keep your clothes smelling fresh too.

Final thoughts on removing shoe odors with baking soda

In conclusion, using baking soda is the best way to deodorize and neutralize smells such as those from your athletic shoes, footgear, and boots. This safe solution can help you ensure your stinky shoes start smelling fresh.

The post Removing Shoe Odors With Baking Soda appeared first on Kitchen Infinity.

Did you miss our previous article…
https://www.thelavkitchen.com/?p=845

What is the KonMari Method?

What is the KonMari Method?

Many people live in cluttered homes which end up complicating their life as well. It’s not that they don’t know how to declutter your room but the process itself is very complicated.

Well, if you could focus on the things in your home that give you joy, then everything else would fall into place. Marie Kondo has developed a method that makes this easy and simple, so you can get rid of clutter fast without having to sort through every item in your house one by one. It’s called the KonMari Method because she says we should only keep items that spark joy.

Here’s everything you need to know about the KonMari method.

What is the Konmari Method?

KonMari, also known as KonMarie or Marie Kondo, is a tidying expert in Japan. She has written several bestselling books on the process she uses to transform individuals and families. Created by Marie Kondo, professional home organizer and author of the bestselling book, The Life-Changing Magic of Tidying Up, the Konmari method emphasizes removing clutter from your home and surrounding yourself with things that spark joy.


Image credit: https://tidycasa.com/

In other words, the konmari method is a simple but effective tidying method that ensures you’ll never relapse to clutter again. It uses unique selection criteria by choosing what sparks joy. Through this tidying process, you can reset your life and spend the rest of your life surrounded by the people and things you love most.

After the release of the Netflix TV show Tidying Up with Marie Kondo in 2019, many people globally have been using Marie Kondo’s tips to declutter their homes and stay organized.

How Does the KonMari Method Work?

KonMari has six basic rules that can help you declutter, get organized and create a home filled with items that make you happy. Here’s how the KonMari method rules work:

Commit Yourself to Tidy Up

The KonMari method is not a quick fix for a messy room. Instead, it’s a chance to reset your entire life, but only if you commit to following its principles. The first rule of tidying is setting your intention to seriously tidy up and resolving to put in the time and effort required.

When approaching your tidying festival with a clear vision and a can-do attitude, you’ll find the energy and motivation you need to tidy all your belongings in one go. The effort will be worth it in the end, and you’ll not only experience the joy of living with objects that you love, but you’ll also be on the path of establishing your ideal lifestyle.

Marie Kondo’s theory is the more you can get rid of, the easier it will be to tidy up and remain organized. So, don’t get discouraged if the process takes longer than a day.

Imagine Your Ideal Lifestyle

Before you start, imagine your ideal lifestyle and identify the objects that make it a reality. If this is your first time tidying up, you might not be able to picture what your perfect life looks like. But it’s never too late to change and improve after all.

Marie Kondo’s tidying process isn’t about decluttering your house or making it look neat on the spur of the moment for visitors. It’s all about tidying up in a way that will spark joy in your life and change it forever.

Consider what kind of a house you want to live in and how you want to live in it. Make sure you describe your ideal lifestyle. You can draw and sketch out what it looks like if you like. You can also describe in a notebook or cut out photos from magazines.

When you imagine your ideal lifestyle, you’re clarifying why you want to tidy and envision your best life. The tidying process represents a turning point, so make sure you consider the ideal lifestyle you inspire.

Finish Discarding First

Once you know what your ideal lifestyle is, you’ll be able to decide which items have value in your home and fill a purpose for that lifestyle. Considering each item and sorting them to keep and discard piles allows you to create more space for the organization and storage solutions that come later in the Konmari method.

Discarding items is not the point of the Konmari method, but it’s important because it provides the opportunity to determine the items that will help you live your life as you envision it as well as those items that no longer fit into your lifestyle. After you’ve discarded, you can turn your full energy and attention to what sparks joy.

Sort by Category, Not Location

The Konmari method advises sorting by category rather than the room. This allows you to work on one type of item at a time and ensures that each category is treated with equal importance. In other words, you’ll have a hard time getting motivated to finish if all of your clothes are in one room and the books are in another.

If you’re cleaning your home room by room, you’re most likely rearranging items and tossing out only a few things since it doesn’t feel like a ton of clutter for that room. Tidy by categories such as clothes, books, papers, miscellaneous items and sentimental items.

This way, you’ll be on the right track to success. If you find yourself doing this, try to give each category its own dedicated space and do your best not to keep related items together. The Konmari method prefers that you spread out categories throughout your entire home.

Follow the Right Order of Tidy

This is probably the most important aspect of Konmari. You want to tidy up in the correct order to meet your tidying needs by starting with what’s most necessary first.

The right order for this method includes clothes, books, papers (all documents and manuals), miscellaneous items like small electronics and accessories, and mementoes.

sk Yourself if it Sparks Joy

Deciding if something sparks joy is the criteria for keeping and discarding items when decluttering. In the Konmari method, your feelings are the standard for decision making, especially knowing what sparks joy. To determine this when tidying, you need to pick up each object at a time and ask yourself quietly if it does spark joy.

Pay attention to how your body responds. Joy is personal, so that everyone will experience it differently. By selecting only those things that inspire joy, you can precisely identify what you love and what you need.

How to Use The Konmari Method at Home

Clothes

The first category you need to tackle for a tidy house is clothing. While you might be used to cleaning out clothes in your closet and then your drawers, the Konmari method suggests gathering clothes and accessories from all over your home, including your bedroom closets, coat closets, drawers and under the bed and put them all in one pile.

This will allow you how much you have and help you realize how much you don’t wear. If an item sparks joy, keep it and if not, give it to gratitude and donate your clothing. You can then learn how to iron the clothes remaining ones correctly and arrange them the right way.

Books

After clothes, the next category on the Konmari method checklist books, gather every book in your home and put them in a pile to decide which ones spark joy and which ones don’t. If your ideal lifestyle means that your space is filled with books, keep them.

Books
Image credit: https://www.shortform.com/

Papers

Every paper in your home, including documents, letters, bills and receipts, should be sorted using the Konmari method. Keep only what you need or use daily, plus one copy of everything else.

Miscellaneous Items

Any other items that don’t fit into the above categories should be put in a pile to determine what sparks joy and what doesn’t. Sort through everything carefully. Create groups like electronics, beauty supplies, home decor, canned goods and writing utensils.

Miscellaneous Items
Image credit: https://storage.googleapis.com/

It might be tempting to go room by room for an extensive category; make sure you gather items from all over your home and put them in one pile. That way, you’ll be able to store similar items together to easily find them and not have anything to spread out.

Sentimental Items

Sentimental items hold deep meaning and can be tough to part with. If you’ve ever seen the episode of ‘Hoarders’ where the woman won’t get rid of her deceased mother’s old suitcase, this method isn’t for you.

Sentimental Items
Image credit: https://justagirlandherblog.com/

Keep only those sentimental objects that truly bring you joy and store them in a designated area. That way, you’ll have them but won’t be reminded of them at every turn.

How to Store Items that Spark Joy

After deciding what to keep in your home, good storage solutions will help you keep everything organized. Here are some of the best Konmari organization and storage tips:

Try Konmari Folding

The Konmari folding method is perfect for organizing your clothes. Marie Kondo didn’t only create her method of decluttering and organizing, but she has also shared a unique folding technique for clothes and linens. The Konmari method of folding helps keep drawers, baskets and bins neat and tidy.

Use Boxes in Drawers

Don’t toss them out if you have gift boxes, shoe boxes, and jewelry boxes. These are great DIY home storage solutions for keeping small things like jewelry, beauty supplies, phone chargers and other miscellaneous things organized in drawers and cabinets.

Store Papers in File Organizers

The paper file organizer is perfect for storing mails, bills and other papers. It protects your documents from getting lost in the clutter of the drawer.

Invest in Wicker Baskets

Wicker baskets are great for keeping your cupboard free from clutter. Use them to store foodstuffs, dry fruits, snacks and other kitchen essentials.

FAQs on What is the KonMari Method

Is the Konmari method effective?

The Konmari method is a highly efficient and effective organizing strategy that has helped many people declutter their homes. The beauty of this method is that it doesn’t follow any specific order in tidying up – you can start from anywhere and go on to the next activity.

What are the benefits of the Konmari method?

The Konmari method advises people to get rid of useless, unnecessary belongings. If applied correctly, this will help you find more relaxation and peace in your life. It also teaches you not to keep hold of things that do not bring joy into your life.

Final Thought on What is the Konmari Method

Do you have items that spark joy that you can’t fit in your home? Well, get organized with these temporary storage solutions with extra space storage to keep items that fit your ideal lifestyle, even if you don’t have room for them now.

The post What is the KonMari Method? appeared first on Kitchen Infinity.

Did you miss our previous article…
https://www.thelavkitchen.com/?p=837

Install A Prefabricated Unit Or A Tiled Shower

Install A Prefabricated Unit Or A Tiled Shower

It’s not always easy to decide whether or not you should install a new shower unit in your home. There are many different types of showers available on the market, and there are several factors that come into play when determining which type is right for you.

In this article, we will take a look at the pros and cons of installing a prefabricated shower unit vs a tiled shower. We will also provide you with some tips on how to make the decision that’s right for you.

Let’s get right into it.

Image Credit: http://homeadvisor.com

Most important considerations

The most important thing to consider before installing any shower unit is what you will be using it for (for example, if it will primarily be used by individuals with mobility impairments, then your choice might be easier).

A prefabricated unit would likely be best for this use case because they’re typically easier to get in and out of than tiled units, but there are other considerations as well. These include cost, installation process, pros/cons of tiled showers vs prefabricated units, etc.

In addition to this, it’s important to consider if you have the skills necessary to install a prefabricated unit. If not, then installing a tiled shower will likely be your best option.

Prefabricated vs Tiled

Here are the basic things you need to know about these two types of showers.

Prefabricated

Installed in sections and brought into the home already assembled (typically more expensive than other options)

Pros:

Easy installation, generally considered to be more leak-proof than other types of showers

Cons:

More expensive than other types of showers, may not be as aesthetically pleasing as some tiled showers

Tiled

Built by gluing tiles directly onto the surface of an existing shower; typically installed with mortar on floor and ceiling (more labor-intensive but less costly than prefab units)

Pros:

Aesthetically pleasing, can be customised to fit any space

Cons:

More difficult and time-consuming to install than prefabricated showers, may be more prone to leaks

Other types of showers you might want to consider

Shower kit

A pre-made shower unit that uses standard fiberglass or acrylic tub/shower unit with a built-in shower receptor. These units typically have a vinyl liner and come in a variety of colors.

Pros:

Inexpensive, easy installation

Cons:

May not be as aesthetically pleasing as other types of showers, may not last as long as other types of showers

Sliding tub door

Installed like a typical tub/shower combo except that it uses sliding glass doors instead of curtains; typically installed in bathtub area (preferred by many for its ease of use)

Pros:

Easy installation, no curtains to deal with, typically more watertight than other types of showers

Cons:

May not be as aesthetically pleasing as some tiled showers, can be expensive if the glass is used

Steam shower

A closed unit that uses steam to create a sauna-like environment; typically installed in a separate room

Pros:

A relaxing, invigorating environment, can help with respiratory problems and skin conditions

Cons:

Installation can be expensive and complex, may not be suitable for all homes

There are many different types of showers to choose from, so it’s important to take into consideration what you will primarily be using the shower for.

If you’re looking for something easy to install and relatively leak-proof, then you’re likely best off with a prefabricated shower unit. If on the other hand, you want something aesthetically pleasing but still easy to use, then installing a tiled shower will likely be your best option.

Cost Analysis

When considering the cost of installing a shower unit, it’s important to remember that there is a wide range of options to choose from. A prefabricated unit will likely be more expensive than other types of showers, but it may be easier to install and less prone to leaks.

Conversely, a tiled shower will likely be less expensive than a prefabricated unit, but it will require more labour and may be more difficult to install.

Installation process

The installation process for a shower unit can vary depending on the type of shower you choose. A prefabricated unit will likely require less labour than a tiled shower, but it may be more difficult to install if the existing plumbing is not compatible. Conversely, a tiled shower will require more labour, but it may be easier to install if you already have the necessary tools and materials.

If on the other hand, you choose to install aDIY walk-in shower, the process will be even more straightforward. Since these units are designed to be easy to install, you simply have to plan the space for the shower, cut the proper size holes in your floor and ceiling, and fit the pieces together.

The most difficult part of the installation process is usually cutting the holes in the floor and ceiling, so be sure to have a good saw on hand.

Leak-proofing

One of the biggest concerns with showers is whether or not they are leak-proof. This concern is especially important if you plan to install a tiled shower, as even a small leak can cause extensive damage over time.

There are a few things you can do to help ensure that your shower does not leak. First, be sure to use waterproof sealant around all of the joints to create a watertight seal. You should also consider using tile grout that is specifically designed for showers, as it will be more water-resistant than other types of grout. Finally, be sure to use a quality shower pan to help prevent water from seeping through the floor.

If you’re still concerned about leaks, you may want to consider installing a shower unit that comes with a warranty for water tightness. This will give you peace of mind that your shower will not leak, even if it is used frequently.

Leaks cause all kinds of headaches, no matter if you’re trying to fix a leaking shower,leaking ceiling, or even aleaky bathtub faucet. Be sure to take all the proper precautions to prevent any water damage in your bathroom.

Install A Prefabricated Unit Or A Tiled Shower – FAQ

What is the difference between a prefabricated unit and a tiled shower?

A prefabricated shower unit is a ready-made shower that is installed in your bathroom as a complete unit. A tiled shower, on the other hand, involves installing tiles over an existing bathtub or shower base.

Which is better – a prefabricated unit or a tiled shower?

There is no definitive answer to this question as it depends on your specific needs and preferences. Some people prefer the look of a tiled shower, while others find that prefabricated units are more convenient and easy to install. Ultimately, it comes down to personal preference.

How do I choose between a prefabricated unit and a tiled shower?

The best way to decide between these two options is to consider your budget, bathroom space, and installation skills. If you are on a tight budget, a prefabricated unit may be the better option. If you have a large bathroom and plenty of installation experience, then a tiled shower may be the better choice.

How do I install a prefabricated unit?

Most prefabricated units come with detailed installation instructions that you can easily follow. However, if you are unsure about how to install it, you can always hire a professional installer.

Shower Pans - Tile vs Solid Surface - Select Kitchen And Bath

Image Credit: http://selectkitchenandbath.com

How do I install a tiled shower?

Installing a tiled shower is a more involved process than installing a prefabricated unit. You will need to remove the existing bathtub or shower base and install the tiles over the new shower base. If you are not confident in your tiling skills, you may also want to hire a professional tiler to do the job for you.

What are the advantages of a prefabricated unit?

A prefabricated unit can be a good choice if you want a contemporary look in your bathroom and don’t have much time for installation work. They are also cheaper than tiled showers, so they may be better value for money.

Final thoughts on installing a prefabricated unit or a tiled shower

In conclusion, there are several factors to consider when installing a prefabricated unit or a tiled shower. Cost, ease of installation, and durability are all important factors to consider when making this decision.

Prefabricated units are generally less expensive than tiled showers, but they may not be as durable. Tiled showers are more expensive to install, but they can last for many years if properly maintained.

In the end, the best option for your home will depend on your specific needs and budget. Be sure to weigh the pros and cons of each option before making a final decision.

The post Install A Prefabricated Unit Or A Tiled Shower appeared first on Kitchen Infinity.

Did you miss our previous article…
https://www.thelavkitchen.com/?p=834

How to Remove Gasoline Stains and Odors

How to Remove Gasoline Stains and Odors

Gasoline is one of the most difficult stains to remove from clothing or carpeting. The stain will not only be hard to remove, but it can also cause an unpleasant odor. Since gasoline evaporates quickly, you have a short time frame to clean up and treat the stain before it becomes permanent.

Luckily, there are several ways that you can go about removing gasoline stains and odors from your clothes and carpets. Below, we’ll cover some of the more popular removal methods.

Before You Begin

Before you start, make sure you test any detergents or cleaning solutions in an inconspicuous area to avoid damaging the fabric. Cleaning chemicals and the dryer’s high heat can interact with the gasoline, so it’s not safe to use a home dry cleaning kit for these stains.

If it’s dry clean only, immediately take the garment to a professional dry cleaner. Do not dry the clothes in a clothes dryer until the stain is entirely gone. This is because if gasoline is still present in the garment, it can ignite your dryer and cause a fire.

Tools and Materials

Paper towelsSoaking basinWashing machineScrub brushBaking sodaWaterStain remover stick, spray, or gelAmmoniaVinegarOrange cleanerDish soap

Instructions

Remove Excess Gasoline

If the gasoline splashes on your clothing and has begun to soak into the fibers, you need to remove it as much as possible immediately. Place a couple of paper towels over the stained area’s top, press down, and then pat dry with another clean paper towel until no more gasoline transfers from the garment.


Image credit: https://www.thespruce.com/

You can also use baking soda to absorb gasoline from a wet spot on your clothing. Make sure you prevent the flammable towels or cloths used for blotting from starting a fire by setting out the cloth or towel to air dry. Flammable gas fumes will dissipate in the open air.

Once your item is dry, find a sealable metal tin, put the towel or cloth in it, and wet the material until it’s damp. Seal the container and discard it with your trash.

Pre Treat with Stain Remover

Before you treat the stain with a stain remover, test the product on an inconspicuous area of the garment to ensure that it does not cause any discoloration or damage to the fabric. Apply a liberal amount of the stain remover to the clothing.

Pre Treat with Stain Remover
Image credit: https://www.thespruce.com/

Stain removers can be found at most local grocery stores in either an aerosol can or a liquid form. Wash the clothing at the hottest setting appropriate for the fabric. Hot water is necessary to remove the gas fully from the clothing.

Use Liquid Dish Soap or Heavy-Duty Laundry Detergent

Dish soap has powerful enzymes that can help it break down oil and grease left behind by food, and it can work very well for other stains such as gasoline. You can also use enzyme-based heavy-duty liquid detergent.

Apply two tablespoons of dish soap or liquid detergent with a soft-bristled brush. Allow your clothing to sit for up to five minutes before soaking it in hot water for 30 minutes. Make sure you use the hottest water safe for the fabric type. Remember not to use DIY laundry detergent as it won’t be effective enough.

Treat with Baking Soda Paste

Another great way to remove gasoline stains and odors is to make a baking soda paste. Mix two parts baking soda to one part water in a bowl. Apply it to the stain, then use a scrub brush to rub it into the fabric. Leave your clothing out to air dry to absorb the paste, then brush off the excess baking soda.

If the stain and odor remain, repeat the step or soak the stained clothes overnight submerged in water with one cup of baking soda added. Wash, rinse, and check for odor. Repeat the baking soda paste application or baking soda soak until the odor is gone.

Soak Lingering Odors White Vinegar

If you still have a gasoline smell after trying baking soda, you can try using white vinegar. Pour white vinegar into a spray bottle and spritz the area where the gasoline odor is present. Let the vinegar sit for about 30 minutes, then blot it up with a cloth.

The vinegar smell will dissipate over time. If you want to get rid of the gas smell in your car, soak the gas with old towels or clean rags as quickly as possible. Then use a mixture of equal parts baking soda, white vinegar, and hot water to neutralize the odor.

Rub and wipe it away with a clean rug. If the smell lingers, use a few sprays of Febreze to get rid of the smell.

Soak Heavily Soiled Items in Ammonia Solution

Another way to remove gas stains and odors is by using ammonia. Soak the clothing in the washer full of warm water and one cup of non-sudsing household ammonia. This will smell, so make sure you shut the lid. Let them soak for several hours overnight, then drain and wash as usual.

The ammonia will neutralize the gasoline odor. Never use chlorine bleach or detergent containing chlorine with ammonia. This mixture can make a dangerous chlorine gas that produces toxic fumes.

Remove Gasoline Stain with Coca Cola

Another household remedy for gasoline odor and stains is Coke. Soak the stained clothing in a bucket of Coca-Cola and let sit overnight before washing as usual. This will also remove any grease, oil, or tar stains from items such as motor oil and grease stains on clothes, driveway spills, and grass trimmings stuck to your clothes after cutting the lawn.

You can also add two cans of Coke and one box of baking soda to a sink filled with cold water. The Coke will break down the stain while baking soda absorbs the odor.

Fast Orange Laundry Detergent

If you have a severe gasoline odor, Fast Orange is a laundry detergent that can help. This detergent is formulated to remove stains and odors on clothes caused by gasoline, oil, and other mechanical fluids. Add one cup to your washing machine and let it run through the entire cycle.

You can also use this detergent for hand washing by pouring a little of it into the water, stirring it up, and letting the fabric soak for about 30 minutes. Then rinse the clothing, and the gasoline stain and odor will be removed.

FAQs on How to Remove Gasoline Stains and Odors

Can you put gasoline-stained clothes in the dryer?

It’s not good to put gasoline stained clothes in the dryer because the heat will set the stain and make it harder to remove. The best way to dry clothing that has been stained with gasoline is to line dry or air dry the clothing outside. This will help to dissolve the fumes and reduce the risk of fire.

Can you use bleach on gasoline stains?

You should never use bleach on gasoline stains because it will make them worse. Gasoline stains are oil-based, and bleach will only set the stain, making it more difficult to remove.

Final Thought on How to Remove Gasoline Stains and Odors

Gasoline can be a tough stain to remove. But if you follow the above tips carefully, removing gasoline stains and odors won’t be a problem. Also, consider pre-heating the clothing with the right products to break down the stain and odor before washing to effectively remove these types of stains.

The post How to Remove Gasoline Stains and Odors appeared first on Kitchen Infinity.

Did you miss our previous article…
https://www.thelavkitchen.com/?p=804

Midcentury Modern Bedroom Ideas

Midcentury Modern Bedroom Ideas

One of the best things about mid century modern bedrooms is that there are many different options to choose from. Whether you want your room to be simple and elegant or bold and in-your-face, there’s something out there for everyone. The trick is finding it.

In this article, we will discuss some of the most popular mid century modern bedroom designs that people use when they want to make their bedrooms look stylish and luxurious without breaking the bank.

dd a Mid Century Modern Nightstand

One of the easiest ways to add a touch of mid century modern style to your bedroom is by adding a nightstand. Nightstands are a great way to add extra storage space to your bedroom, and they can also be used to add extra visual interest to the room.

If you’re looking for a simple, elegant nightstand that will help you create a midcentury design, then try this one-piece mid century modern furniture to give your bedroom a shot of style. Nightstands are easy to find, and many of them are inexpensive.

Splash of Boho with Midcentury Modern Bedding

If you’d like to add a touch of bohemian style but don’t have the budget for new bedding, you can always choose to change out your duvet cover. This will help transform your room’s look while also being an economical option that doesn’t require extra money on accessories or furniture.

Incorporate Mid Century Modern Lighting

One of the easiest and most effective ways to add a touch of mid century modern style to your bedroom is by incorporating some mid century modern lighting into the design. Pendant light, for example, is a perfect way to introduce this look and can be found in a variety of price points.

If you’re looking for a sophisticated bedroom, then mid century modern decor pendant lights in matching finishes and some classic molded plastic chairs would be ideal.

Use Natural Materials

Instead of using modern materials, opt for natural wood and natural finishes. This will reduce the coldness found in many mid century modern designs. When using natural materials, consider combining wooden furniture as this will combine lots of sunlight and some plants to round out the colors.


Image credit: https://blog.modsy.com/

Focus on Earth Tones and Colors

For a classic mid century modern style, you’ll want to focus on color palettes such as neutrals and earth tones. Try to play with different shades of brown, rust, mustard, yellow, and green with a touch of gray and white. If you’re using a dark wall color, make sure you have enough natural light coming in so your room doesn’t look too gloomy. You can also learn other ways to brighten a dark room and make it livelier.

Skip the Classic Color Scheme

If you’re looking for something a little more unique, then you can try playing with different color schemes. If you also love clean lines, geometric shapes, and the overall clean feel of the mid century modern style but you’re not thrilled about the muted tones, then keep the style and ditch the colors.

Look for Tapered Legs

The mid century modern style is typically associated with furniture pieces with tapered legs, which gives the table, the dresser, and a bed frame a distinct look. If you choose between two otherwise identical tables, one of them has tapered legs, and the other doesn’t go for the more interesting design. Their sleek, round frames make for a roomier and more spacious look.

Look for Tapered Legs
Image credit: https://blog.modsy.com/

Consider Bold Accent Wall

Do you want to give a simple mid century modern bedroom a powerful shot of style? Well, create a boldly patterned accent wall. A busy wallpaper with a strong geometric pattern or a solid color in a deep hue can make a big impact. It will also draw the eye and create a focal point in the room.

Consider Bold Accent Wall
Image credit: https://cdn.shopify.com/

Keep it Neutral

When decorating a mid century modern bedroom, you’ll want to stick to neutral colors as much as possible. That doesn’t mean you have to go for a beige or gray overall color palette, though. Use a soft white in the walls, with off-white trim and accessories. For dark brown furniture, consider painting it a lighter shade of tan instead.

Keep it Neutral
Image credit: https://www.mydomaine.com/

Go With Eames Chair

When it comes to furniture, the key is simplicity and functionality. A great way to achieve this look is with an Eames chair. These iconic chairs come in a variety of colors and styles so that you can find the perfect one for your room. Plus, they’re comfortable and stylish, making them perfect for mid century modern design.

Look for Natural Wood Furniture

Mid century rooms are all about natural materials, so feel free to go a little more rustic with your furniture choices. Look for pieces made from natural wood, such as maple, walnut, or oak. Also, consider clean lines and muted tones to bring mid century modern into your bedroom. These woods will add a warm and cozy feeling to your room while keeping with the mid century modern aesthetic.

Change Things Up with a Platform Bed

Don’t hesitate to change your bed frame for a more glamorous platform bed. The straight lines of a platform bed work well with mid century decor. So, opt for a nice platform bed, and then stack it with books and throw pillows to give your room extra personality.

Change Things Up with a Platform Bed
Image credit: https://cdn.shopify.com/

Create a Gallery Wall to Act as a Focal Point

A gallery wall is a great idea for a mid century modern bedroom because it can be a focal point for the room. Choose a few of your favorite pieces of art and hang them up on one wall. This will add some interest to the room and help pull the design together.

Use Geometric Patterns

Geometric patterns are a huge part of mid century modern bedrooms, so use them in your room. Bring in a nightstand, a dresser, organic shapes of lamps, and clean, straight lines of furniture in the room. Choose clean and modern patterns to work well with your decor.

Incorporate Colorful, Fun Mid Century Modern Bedroom Furniture

One great way to add some fun to your bedroom is incorporating colorful furniture. This can be done with a bed frame, dresser, or even just with accent pieces. Add a pop of color with a bright pillow or blanket, and you’ll have a stylish and fun mid century modern bedroom.

Bright Accents in the Mid Century Modern Bedroom

If you prefer to keep your bedroom decor simple, then the use of bright colors is a great way to liven your space. You can incorporate these with wall art, patterned textiles, or even just with small pieces of decor placed on top of furniture. Adding a few shots of accent color will help liven up neutral bedroom space.

Glamorous Mid Century Modern Style

If you are looking to add a touch of glamor to your mid century modern bedroom, there are a few things you can do. You can start by adding metallic finishes to your furniture or accessories. You can also add plush fabrics such as velvet, faux fur, or silk since they also make the best ideas for those looking for how to decorate the bedroom

This will give the room a more luxurious feel. As demonstrated beautifully in this bedroom by an interior designer, the use of bold abstract paintings, luxurious fur throw, mustard armchair, and elegant furniture adds to a sophisticated and glamorous bedroom.

Built-In Bookcases in the Mid Century Modern Bedroom

If you are looking to build-in storage into your mid century modern bedroom, the best option is to install built-in bookshelves. This gives the room a more polished feel, but at the same time, it is functional. Shelves do not clutter up space and can be decorated with ornamental bookends or vases of flowers.

White Mid Century Modern Bedroom

A room with a white tone is always modern and chic. This bedroom oozes elegance and luxury through white silk curtains and plush white carpeting. The bed follows the line of symmetry and leaves plenty of space for the window. The bedside lamps give a warm glow that sets the mood for romance.

White Mid Century Modern Bedroom
Image credit: https://www.thespruce.com/

FAQs on Mid Century Modern Bedroom Ideas

What is a mid-century bedroom?

Mid-century modern refers to the decorating style that rose to popularity in the 1950s and 1960s.

What are modern bedrooms?

Today, a modern bedroom is typically one that is minimalist in design, with clean lines and little ornamentation.

What is the difference between mid-century and contemporary?

Mid-century refers to the period around the 1950s, while contemporary usually means designs from the past 10 to 15 years.

Final Thought on Mid Century Modern Bedroom Ideas

Well, there you have it. You don’t have to be overwhelmed by all these modern bedroom ideas. Start with one thing at a time and move on from there while keeping in mind the key elements of mid-century design, including functionality, simplicity, and modernity.

The post Midcentury Modern Bedroom Ideas appeared first on Kitchen Infinity.

Did you miss our previous article…
https://www.thelavkitchen.com/?p=774

How to Kill Crabgrass

How to Kill Crabgrass

Crabgrass is an invasive weed that can ruin your lawn. If you do not fight back, it will become a serious problem for you and may even lower your home’s value.

The first step in fighting crabgrass is knowing about its behavior and lifestyle. By understanding how this weed behaves, you will have an easier time finding ways to kill it and defend your turf from this invasive plant.

Many products out there claim they can help you get rid of crabgrass once and for all, but only a few works as advertised. In fact, some may cause more harm than good if used incorrectly because they contain harmful chemicals or toxins that can damage the grass when applied incorrectly or too often.

To make sure you choose the right product for killing crabgrass, check out our guide on how to kill crabgrass below.

How to Kill Crabgrass Naturally

If crabgrass is a problem in your yard, you have more than one way of getting rid of this weed. The most natural way is to cultivate a healthy lawn and outcompete the pesky weed. Other natural ways include pulling the weed in the spring, providing your lawn with the proper nutrients, and reseeding where necessary.


Image credit: https://peppershomeandgarden.com/

For tenacious crabgrass infestation, you can learn how to kill crabgrass with post emergent herbicides that kill grass well after germination. Post emergent herbicides work by killing the crabgrass plant.

On the other hand, pre eminent herbicides kill crabgrass before the seeds emerge. This makes it easier to get the job done and allowing you time in the season to cultivate a lawn where there once were weeds.

When to Kill Crabgrass

It’s important to familiarize yourself with the plant’s life cycle to effectively eradicate crabgrass. When spring soil temperatures reach 55 to 60 degrees Fahrenheit, crabgrass seeds germinate. From mid summer through fall, the plant produces more seeds to increase its numbers. Once the first frost arrives, the plants themselves are killed, not the seeds.

When using an organic method, wait until the seedlings are big enough to hand pull the roots and all. While crabgrass doesn’t spread via roots, removing the whole plant in early spring before amending the soil and reseeding is essential.

Pre-emergent herbicide, also known as crabgrass preventer, comes in either a granular or liquid form and kills crabgrass seedlings right as they germinate.

How to Kill Crabgrass Step by Step

Tools and Materials

Post emergent herbicidePre emergent herbicideNon selective herbicideWork glovesOrganic compostPitchfork or weeding toolGrass seedPump sprayerGarden rakeSpadeSafety glasses

Pull Out the Crabgrass by Hand or Using a Tool

Before you start, you should gear up. Wear eye protection, gloves and old clothing that you don’t mind getting dirty. Also, the soil will be wet, so make sure your shoes aren’t worn out. Before hand pulling the young crabgrass, water the problem area with a sprinkler or garden hose and wait about 30 minutes for the water to soak in.

Pull Out the Crabgrass by Hand or Using a Tool
Image credit: https://ae01.alicdn.com/

This method is very important because even if you use herbicide to kill crabgrass weed, you’ll still have to dig it out to completely get rid of it. Try this method before using chemicals because chemicals have detrimental effects on the surrounding lawn grasses. Removing crabgrass naturally by digging up is a great way of eliminating the weeds without killing lawn grass.

pply a Crabgrass Killer Herbicide

Different types of crabgrass killer herbicides are available, but you need to make sure the one you choose is for your type of lawn. For instance, a homeowner with a St. Augustine grass lawn should not use a product designed for a Bermuda grass lawn because it will kill St. Augustine and the weed.

Apply a Crabgrass Killer Herbicide
Image credit: https://www.thespruce.com/

For buffalo grass, centipede grass, fine fescue, Kentucky bluegrass and perennial ryegrass, use herbicide with mesotrione as an active ingredient. It’s also important to read and follow the herbicide label instructions carefully. Improper use of these products can not only kill crabgrass but also other plants in your lawn.

Use a quality broadleaf weed killer to kill the crabgrass plants that remain after the seeding process. It will take several weeks to work, but it should eventually kill off any remaining crabgrass plants. Raking up all dead grass will make it easier for homeowners to keep the area free of crabgrass seeds.

dd Compost

Use a fertilizer with crabgrass fertilizer added to it to save time. Apply the fertilizer just before it rains to work the fertilizer and the herbicide into the soil. This will help thicken the turf. Thicker turf helps to squeeze out crabgrass plants missed by the herbicide. You can also learn how to make compost to use instead of artificial fertilizer.

pply Grass Seed

If you have large bare patches in your lawn, reseed these areas with a good quality grass seed mix. A mix that contains perennial ryegrass, Kentucky bluegrass and tall fescue is a good choice. These grasses are all cool-season grasses that will germinate and grow quickly, helping to fill in the bare spots.

pply Corn Gluten Meal

Corn gluten meal is a by-product of the corn milling process. It is a natural, organic herbicide that helps to suppress crabgrass growth. Apply it in the spring, before crabgrass germinates, at the rate of 10 pounds per 1,000 square feet.

Water the area well after application. Corn gluten also works as a lawn fertilizer due to its high nitrogen content. It works by inhibiting crabgrass seeds from forming roots after germination. Corn gluten meal can be put down as pre-emergent to prevent crabgrass and other weeds that germinate in the spring.

However, corn gluten doesn’t prevent the germination of crabgrass. Instead, it only controls it by feeding lawn grass with sufficient nitrogen, making lawn grass grow faster, choking out crabgrass.

Fight Crabgrass with Healthy Lawns

Fight those pesky crabgrass infestations by first building a healthy lawn. Black Medic, tall fescue and hybrid Bermuda grass varieties are all known for their ability to handle stress and drought and do not encourage the spread of crabgrass. A thick lawn provides a dark canopy of grass blades over the seeds to sprout.

Thoroughly water your lawn once a week to encourage the grass’s root system to go deeper, making the whole lawn hardier and heat tolerant. Avoid short, frequent watering as the sips will promote a shallow, weaker root system in your lawn. Also, don’t mow wet grass if you want to encourage healthy growth.

pply a Double Dose of Herbicide to Crabgrass Hotspots

Limit crabgrass growth in areas like driveways, sidewalks and curbs or on south-facing banks by doing a targeted double treatment when necessary. This is because these areas absorb a lot of heat during the summer months, making them more susceptible to crabgrass.

Once you’ve treated your entire lawn, go back and make another pass about six to eight feet wide, along with hotspot areas. This will help keep crabgrass from taking hold.

Burn Weeds Off With a Blow Torch

When you’ve got an area where there is no grass at all, or you want to kill the weeds and not take out the entire lawn, try this trick. The target weeds absorb so much heat that they will pop when hit with flame. Some varieties of quack grass, for example, will burst into flames with just a couple of seconds of direct exposure to the torch flame.

However, be careful when using this method, as you can also damage nearby plants if you’re not careful. Make sure that you keep the flame moving and don’t hold it in one spot for too long. Also, avoid burning the lawn if it’s still wet from dew or rain.

This method is effective for killing weeds growing underneath the base of a tree, as the flame will effectively kill everything within about 3 to 4 inches of where it meets the ground.

Mow the New Grass

Crabgrass has a tough triangular stem to slice with a weed eating blade. However, if you take your mower and raise the blades as high as they will go, you can effectively cut the grass at its base. While this may not kill it immediately, it will prevent it from growing back for a period of time while the new grass takes hold.

If you have a lot of crabgrass, it’s best to start with the highest blade height and then work your way down as the new grass grows in. This will allow the lawn grass to protect its turf, depriving crabgrass seeds of the light they need to germinate.

Use Vinegar to Kill Crabgrass Organically

Vinegar is a natural herbicide that can be used to kill crabgrass. It’s important to use white distilled vinegar, as other types of vinegar may not be effective. To use vinegar to kill crabgrass, mix one part vinegar with three parts water in a spray bottle.

Spray the mixture on the crabgrass and weeds, and then wait for the weeds to die. Be sure to avoid spraying vinegar on any plants you want to keep, as it will kill them.

Use Baking Soda to Kill Crabgrass Naturally

Baking soda can be used to kill crabgrass. When making the mixture, it’s very important that no additional ingredients are included. To use baking soda for killing crabgrass, mix one tablespoon of baking soda with one cup of water.

Add baking soda slowly, so the solution doesn’t bubble over when mixed. Pour this mixture on the crabgrass that you want to kill.

FAQs on How to Kill Crabgrass

What kills crabgrass and not the lawn?

Post emergent herbicides such as all in one weed killer or image herbicide kill crabgrass plus other lawn weeds and leave the lawn healthy.

Is there an organic way to kill crabgrass?

Yes, you can use baking soda as an organic way to kill crabgrass. Baking soda is a natural herbicide and will not harm the green lawn or surrounding areas.

What causes crabgrass?

Crabgrass is a summer annual weed that thrives in hot summer weather conditions and does best in soil with a neutral to acidic pH level, typically between 6 and 7.5. It becomes dormant during the winter months and will remain until springtime when the soil warms up.

Crabgrass is typically seed produced; however, it can also reproduce via its roots or stolons in the same season in which it germinated.

Final Thought on How to Kill Crabgrass

As you can see, crabgrass is an unsightly weed that can wreak havoc on your lawn. It is important to get rid of crabgrass at the first sign of its germination to keep it from spreading. The most effective way to get rid of crabgrass is through preventative measures, such as applying pre-emergent herbicides in early springtime when the soil is still cool.

If you cannot get to your lawn early in the season, you should apply a post-emergent herbicide to kill the crabgrass. These methods, when used together, will give you good results in keeping these weeds under control so they won’t wreak havoc on your lawn.

The post How to Kill Crabgrass appeared first on Kitchen Infinity.

How to Grow and Care for Heather Shrubs

How to Grow and Care for Heather Shrubs

It can be hard to choose the perfect ground cover for your garden. There are so many options, like grasses and perennials, but not all will work well in every situation. Heather plants are a great option for those who want an attractive flower that acts as a natural weed suppressant.

This is because heather plants have deep roots that help keep weeds from growing around their base. They also make a great butterfly garden and attract other plant pollinators to your garden. If you’re looking for a ground cover that can keep your garden lush and green all year round, consider heather plants.

Here’s how to grow and care for heather shrubs.

Understanding Heaths and Heathers

As calluna Vulgaris, Heather plants are evergreen perennials found in woodlands and open fields, most often in sandy climates with low drainage and acidic soils. On the other hand, heaths or Erica describe an unrelated group of flowering plants.


Image credit: https://s3.amazonaws.com/

Although heaths and heathers belong to the same family called, they’re botanically different and are divided into the Calluna genus and Erica genus. But for practical purposes, they are both referred to as heaths or heathers. Heaths bloom from May to September and come in pink, purple, red, white, and yellow.

Heather blooms from August to November and comes in dark pink, purple, and white shades. Both heaths and heathers have fine foliage that forms a dense carpet. The tiny leaves are evergreen with needle-like shapes that grow in four rows along twisted stems.

Heathers and Landscaping

While the blooms of heather plants are the main attraction for gardeners and pollinators alike, their foliage should be your main focus. For example, you can choose to grow a variety called Calluna Vulgaris Firefly because it changes foliage color from copper in the summer to deep red in the winter.

When other ornamental plants are either dormant or looking weary in the winter, your heathers will radiate different shades of bright and lively colors. This makes them ideal for pathways and open areas in your garden. It’s also recommended to pair them with dwarf conifers.

Heather Plant Varieties

You have plenty of choices when it comes to heather varieties to grow. Even though heaths and heathers are often mistaken for each other, heaths are usually smaller and less colorful than heathers. Here are the heather plant varieties:

Erica

Also known as winter is fluffy foliage that changes color from winter to summer. Some varieties bloom in the summer, while others have their flowers open up in the winter. By growing different blooming varieties, you can have bright colors all year round.

Erica
Image credit: https://upload.wikimedia.org/

Daboecia

A popular choice for colder climates, this heather plant variety can thrive in USDA zone 4 or 5. They are known to be low maintenance, but they are recommended to grow with acidic soil. They have green foliage, but they bloom in white, lavender, and purple.

They can tolerate partial shade, although they favor full sun. Their flowers bloom from mid-spring through fall. They’re also called bell heath, thanks to their bell shape.

Calluna Vulgaris

This is the most popular of all heather types. These heather shrubs have different shapes, sizes, and colors. They’re the recommended type to grow in your garden, thanks to their high tolerance to cold. They can also thrive in rocky or poor soil, making them perfect rock garden plants. Most varieties bloom in the summer and early fall.

How to Grow Heather Plants

Plant heaths and heathers in open areas, up hillsides, or along pathways.  They pair well with dwarf conifers which require similar acidic soil conditions. They tolerate poor, rocky soil and even salty spray, making them marvelous along coastal hillsides where little else will grow.

Avoid planting in dry sites, under trees, or in areas exposed to harsh winter winds because they’ll suffer dehydration as evergreens. Heathers don’t become drought tolerant immediately, so they may not be the best choice if your garden is very dry. Heaths grow about one foot tall by 11/2 feet wide while heathers about 2 feet tall by 2 to 3 feet wide.

Space them as far apart as their mature width and at least 2 feet away from other shrubs to foster good air circulation. Most heather plant cultivars have USDA hardiness zones between 4 and 6, making them ideal for cold to moderate climates. Some heather shrubs can also grow in hardiness zones between 3 and 10, allowing them to grow in diverse climates and weather conditions.

No matter the type of soil you have, make sure you till it before planting heathers. Consider a sunny spot and dig a hole in the soil twice as deep and wide as the plant’s root ball you got from the nursery.

Your foliage should be as close to the ground as possible and water the soil to help the plant rest and avoid soaking. This is because the roots of heathers are sensitive to waterlogged soil. Choose acidic mulch to cover the soil as heathers prefer slightly acidic soil.

Caring for Heather Plants

Soil Requirements

Heather plants do well in a variety of soils but prefer acidic soil. Till the soil before planting heathers to ensure good drainage. If your soil is not acidic, mix in some organic matter to make it so. They’re also tolerant to very poor, rocky soil, but acidity is important.

If you have neutral or alkaline soil, consider acidic soil amendments such as damp peat moss. Avoid using sedge peat or spent mushroom compost as these can be too alkaline. Yellow leaves are a sign that soil pH lacks enough acidity for the plants. So, consider testing the soil pH for growing this shrub.

If you have heavy clay soil, you can double-dig the ground and incorporate lots of peat moss or ericaceous compost mixed with one-third of sand or grit to improve drainage. You can also plant your heather shrub on a raised bed using an equal mix of compost, composted bark, or peat moss and sand. This will not only create acidic soil but will also create well-drained soil.

Consider Sun Exposure

Heather plants need full sun to partial shade. In hot climates, it provides afternoon shade. A heather garden should be planted in a position where it will be unshaded for all or most of the day. If possible, site your heather plants, so the main view is from the south as foliage heathers always color well on the southern side.

Plant your heathers where they’ll get at least six or more hours of sunlight each day for the foliage effect, with afternoon shade on hotter days. Too much shade makes the plants leggy and dulls the brilliance of those that have colorful foliage.

Watering Heather Plants

Water heathers regularly, keeping the soil moist but not wet. Heather plants do not like to have their roots sitting in water, so make sure that the soil drains well. Mulching heather plants will help retain moisture in the soil. Their drought tolerant is normally established within two to three years from planting.

After that, your heather shrubs will take care of themselves. So, make sure you water your heather shrub during this time to keep the soil evenly moist and not soggy.

Temperature and Humidity Requirements

The ideal temperature range for heather plants is between 35-55 degrees Fahrenheit. You can grow these lovely evergreen shrubs throughout the country as long as you take care of them properly, but some zones are better than others.

Fertilizer Requirements

Heathers require very little fertilizer. You can apply for a slow-release, granular form of balanced 10-10-10 fertilizer in the spring and summer months at the rate recommended on the package.

However, unless you grow heather for its flowers, never fertilize during the winter months. Doing so will encourage tender new growth, which will be damaged or killed when the inevitable cold of winter arrives.

Pruning Requirements

After the blooms fade and the snows blow in, Heathers can look a bit ragged and scraggly. To remedy this, cut back any remaining flower stalks to just above where they emerge from the shrub’s foliage.  Pruning heather is a snap with most models of hand pruners.

The best time for heather pruning is in early spring, shortly before the plants go dormant for winter. In areas prone to harsh winters, it’s especially important to prune heathers at this time because any tender new growth that emerges in the spring will be killed off by the cold.

Common Problems for Heather

Heather isn’t susceptible to many problems, but the available ones are easily avoidable. These include:

Powdery Mildew

The single most common problem that heather faces are powdery mildew. If you’re growing your shrub in an area with hot, dry summers, this could be the problem you’re facing when keeping your plant healthy.

To prevent powdery mildew from appearing on your heather, make sure you prune faithfully every spring to keep plants compact, thereby improving airflow. Also, avoid overhead overwintering.

Root Rot

Rot typically sets in during very wet winters or springs. The telltale sign of root rot is plants that suddenly wilt, despite being well watered. If you think your heather might have root rot, dig around the base of the plant and take a look at the roots. If they’re brown and mushy, then your plant has root rot.

To prevent rot, make sure your heather is in sunny, well-drained soil and water sparingly when it’s going through a dry spell or very cold periods. If you suspect root rot, re-pot your plant into a fresh potting mix before bringing the shrub indoors during winter.

FAQs on How to Grow and Care for Heather Shrubs

What are the practical uses of heather shrubs?

Heather is an excellent plant for the landscape or garden. It can be used as a ground cover, border plant, or specimen. It can be made into tea and herbal remedies. It has been thought to help with cough and stomach upset ailments.

Final Thought on How to Grow and Care for Heather Shrubs

As you can see, growing and caring for these plants is not too difficult. They require little care and maintenance, and their bright colors and fragrant blooms make them a pleasant addition to any garden or landscape.

The post How to Grow and Care for Heather Shrubs appeared first on Kitchen Infinity.

Did you miss our previous article…
https://www.thelavkitchen.com/?p=748

Sunroom Additions vs. Full-Room Additions

Sunroom Additions vs. Full-Room Additions

Are you looking to add some additional space and versatility to your home? Well, consider hiring a contractor to build a room addition or full room addition. A home addition has a lot of benefits such as increased home value and square footage, cozy outdoor seating areas, and more private spaces like offices and home gyms.

Both sunrooms and full room additions often use frameless glass walls and doors to increase natural light and seamlessly integrate indoor and outdoor spaces. However, when choosing between sunroom addition and full room addition, there are a few things you need to consider.

This guide talks about the difference between a sunroom and full room extensions to help you decide which one fits you best.

Sunroom Addition

If you’re looking for a cost-effective way to create additional space in your home and a welcoming area with more natural light, then sunroom additions are a great option. Sunrooms are typically less expensive to build than full room additions, and they can be used for a variety of purposes, such as a home office, family room, or even a bedroom.


Image credit: https://livingspacesunrooms.com/

Sunrooms are often referred to as screen rooms or solariums, and they are glass room additions that integrate indoor and outdoor spaces. The additions are built on concrete slabs with a light aluminum frame, and about 80 percent of the wall space is glass.

They can be equipped with stacking glass walls that lead to your patio or yard, and they can be fully enclosed and only accessible from the inside of the house. Sunrooms are a cheaper alternative to traditional room additions because they don’t require as many building materials, labor costs, insulation, and HVAC system.

Sunrooms come in two categories. These include prefab vs. custom-built sunrooms. Sunrooms can be custom-built by a local contractor who will design and build sunrooms to your specifications. Such sunrooms have traditional studs and truss framing, and shingle roofs, but the walls are predominantly glass formed by patio doors or full-length windows.

Three season sunrooms are not heated or cooled by an HVAC unit. They’re not well insulated as full room additions, so their temperatures fluctuate greatly depending on the outdoor conditions. In contrast, four season sunrooms are better insulated and boast central heat and air.

Despite being more costly than three season sunrooms, four season sunrooms are great for homeowners living in a cold climate for year-round addition. But today, sunrooms are constructed from prefabricated kits that come with framework pieces of steel, aluminum, and fiberglass, and glass panels for the walls.

Prefab sunrooms are assembled in a puzzle-like fashion by technicians. A prefab sunroom is designed and fabricated off-site then shipped in pieces to your home packed in flat cartons. Assembly can be done by a homeowner or a contractor affiliated with the prefab kit manufacturer.

Pros of Sunrooms

Lower construction cost per square foot than regular room additions.Increased natural lighting for reading, growing plants, and hosting a spaEfficient construction timeAdditional space

Sunroom Cons

May not include electrical wiring or HVAC systemLimited privacyLack of insulation makes them unusable during the winter weatherLimited to the side, front, and back of the house

Stick Built Addition

If you’re restricted by space or have a tight budget, sunroom addition is the way to go. A stick build addition is a better option if you want to add space and recent updates such as wide-open interiors with an open floor plan. Stick built is a shorthand term for any structure built from scratch.

Stick Built Addition
Image credit: https://www.theprojectplanshop.com/

In this case, it refers to house additions, room additions, and other bump-outs constructed from traditional building materials such as wood, concrete, glass, house sheathing, and shingles. These additions are great for mudrooms, kitchen extensions, home offices, and extra bedrooms.

Unlike sunroom additions, a traditional room addition is not limited to existing structures, meaning they can be built on any area of your home to increase square footage and overall property value. Room additions usually come equipped with a foundation, doors, windows, finishes, HVAC, and insulation, making them a more complicated version, although it benefits year-round usability.

They’re accessed through an interior door or archway rather than an exterior door. According to the International Energy Conservation Code, any conditioned living space cannot have more than 40 percent of the wall space given to glass windows.

Full Room Addition Pros

You can add them to any area of the houseIncreased square footage and property valueInsulation and HVAC for year-round usageIdeal for private areas

Cons of Full Room Addition

Less natural lighting and window spaceExtensive construction processExpensive materials and labor costPossible increase in property taxes and insurance

How Much Does a Full Room Addition Cost?

The cost of full room additions is similar to the cost of sunrooms, with parts and labor, plus a building permit and the frequency of use all factoring into the overall price. The increased materials used will also drive the cost up, and since room additions take more time to build than sunrooms, the labor hours will also increase the price.

Unlike sunrooms, which homeowners opt to use in part of the year, a full room addition needs insulation and to be fitted with electrical and best air conditioner connections to make it usable all year round. The use of full room addition may also help offset the overall price.

For example, if you use it only occasionally, maybe as a guest bedroom, the infrequent use may help you save money when it comes to household costs. But a frequently used entertainment or living room, complete with additional electronics, may increase your household costs.

Uses of Sunroom vs. Full Room Addition

It’s important to establish your new room’s primary use before deciding whether to opt for sunroom or full room addition. Sunrooms consisting more of glass walls don’t offer much privacy, so they’re best reserved for areas that don’t require it.

Uses of Sunroom vs. Full Room Addition
Image credit: https://idealconstructionva.com/

Family rooms, playrooms, second living rooms, and hobby rooms are popular options for sunroom use, allowing a comfortable place with natural light in which to relax. On the other hand, full room additions are best if you intend to use the additional space for something personal like a bedroom or home office.

A living room and an entertainment room can also be a great full room addition. However, most homes already have one enclosed living or entertainment, making a sunroom a better and more unusual option for communal areas.

FAQs on Sunroom Additions vs. Full Room Addition

re sunrooms worth it?

This is a great question, and it depends on what you intend to use the space for. But other than adding value to your home, a sunroom is an upgrade that can improve the quality of your life all year round.

Which side of the house is best for a sunroom?

If you want your sunroom, you catch as much sun as possible, then build on the south-facing section of the house. If you like watching the sun come up, then an east-facing position is best, while west-facing allows you to enjoy the late afternoon sun and sunset.

Final Thought on Sunroom Additions vs. Full Room Additions

Whether you’re looking to create a cozy place to relax, a private home office free from distractions, or a bright playroom for kids, a sunroom is a great addition. If you’ve always wanted more space and fresh air, then consider adding on a sunroom to enjoy all four seasons.

A full room addition provides those nice things and new square footage that can feel like an entirely new part of your home. You’ll gain functional floor space and perhaps even some needed storage. If you decide to add a sunroom or full room addition, be sure to work with a professional contractor that can help you determine your best option.

The post Sunroom Additions vs. Full-Room Additions appeared first on Kitchen Infinity.

Did you miss our previous article…
https://www.thelavkitchen.com/?p=740