How To Wash A Silk Pillowcase

How To Wash A Silk Pillowcase

Washing silk pillowcases is not as easy as you might think. Not only do they require special care, but also dry cleaning can be expensive and time-consuming. Luckily, there are some

simple steps to follow for washing a silk pillowcase at home. Follow these instructions to keep your silk pillows in tip-top shape and avoid the risk of ruining them with improper care. Here we go!

What You’ll Need

Mesh laundry bagWasher or sinkIronDrying rackDistilled white vinegarGentle detergentCold water

Washing a Silk Pillowcase by Your Hand

There’s always a way to hand washing your silk products. However, it will take time to do, and the results may not be as satisfactory as you would like. It’s best to ask a silk product professional for guidance if hand washing is your preferred method, although we encourage you to try it on your own first before taking such a big step. Here are some things to remember:


Image caption: https://www.thespruce.com/

Read the Label on Your Pillowcase to Check How it Should be Washed

Most silk products will come with care instructions that you should always keep in mind. The care label is always on the inside corner of the pillowcase. It would recommend hand washing your pillowcase. If there’s no care label attached to the pillowcase, then get it dry cleaned to be on the safe side.

Fill Your Basin with Cool Water and Detergent

Fill a basin with lukewarm water and add a little bit of gentle detergent. You can learn how to make homemade laundry detergent for this purpose. Mix the detergent well with your

hands before soaking it in the pillowcase. Use your fingers to rub the laundry detergent around all parts of the silk material, making sure it’s properly cleaned. Make sure you don’t use hot water, as this can cause the silk to shrink.

dd Some Drops of Detergent

If you want to make sure the pillowcase is clean, then add a few drops of detergent. Make sure it’s not too much, as this will cause the silk to become dry and rubbery because of leftover residue.

Put in your hand and gently knead that into the silk pillowcase. Unlike how you do laundry or washing your silk in the machine washing, ensure you use less detergent. Excess detergent, even if it’s a gentle detergent, can break down your natural fiber.

Soak Your Pillowcase in the Basin Sink or Bucket for 5 Minutes

Just like the washing cycle, leave your pillowcase to soak for 5 minutes. This will allow the detergent to soften up dirt or oil that has settled into the material over time, causing it to look dirty and dull.

Soak it in a bucket of lukewarm and laundry soap, then set the timer for 5 minutes. Don’t soak it for longer than 5 minutes, as this can damage your silk pillowcase. Swirl the silk gently while soaking but do not scrub or wring as this can damage silk fibers.

Drain Water and Laundry Soap from the Bucket or Basin Sink

Remove the silk from the water and laundry soap. Quickly remove any excess water by squeezing it with your hands. Make sure you do not wring the silk pillowcase as this can cause damage to its fibers.

Refill Your Bucket with Cool Water, White Vinegar, and Fabric Softener

After removing the excess water, refill your bucket with 3/4 white vinegar and 1/4 cup of fabric softener. Stir well to mix the contents. Make sure the fabric softener is safe for the silk before adding it to the mix. The white vinegar will remove excess soap and alkalinity while the fabric softener adds softness and shine to your pillow.

Rinse Your Pillowcase in Cold Water

Once you’ve properly washed and cleaned your pillowcase, finish off with cold rinse water. Do not soak your silk pillowcase in cold water, as this may result in shrinkage. Washing it in cold water will help you clear out all the soap and water, hence keeping your pillowcase clean.

Lay Your Pillowcase Flat on a Fresh Towel to Let it Dry

Once you’ve rinsed your silk pillowcase, lay it flat on a clean towel to dry. Use a fresh towel or rag as this will serve as your drying cloth. After laying the silk pillowcase flat on the new dried cloth, let it air dry before putting it back in place. Never hang your silk fibers in a clothesline to dry, and always dry them out of direct sunlight. Exposing your pillowcase to direct sunlight may cause the colors of your silk pillowcase to fade and deteriorate quickly.

How to Wash Silk in the Washing Machine

Washing your silk bedding in the washing machine is quite possible, but you must follow a specific washing procedure to preserve its silk fibers. Also, ensure you know the washing machine brands to avoid with your silk materials so you don’t end up incurring losses.

How to Wash Silk in the Washing Machine
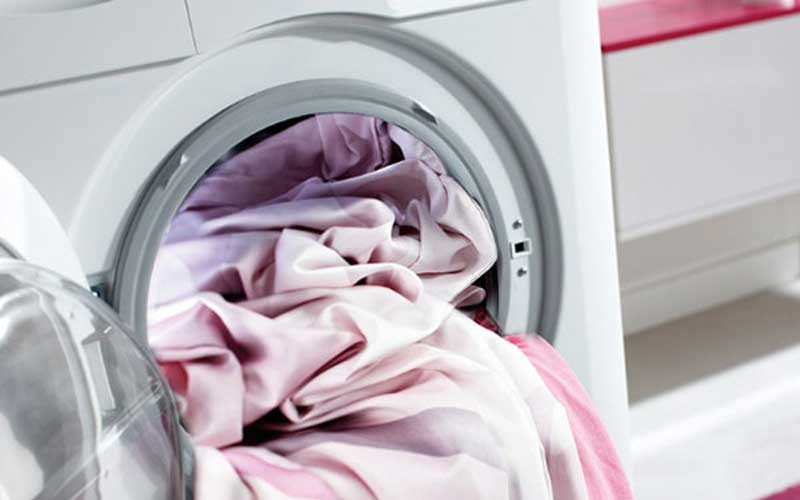
Image caption: https://lightsleeper.co.uk/

Check the Care Label

The label attached on the inside corner of your pillowcase should tell you whether it’s appropriate to machine wash your silk pillowcase. If it’s not, check the label attached to your silk bedding for washing instructions.

Wash Your Silk Separately from Other Fabrics

Avoid mixing your silk cloth with heavy fabrics, such as jeans or towels, because its fibers are much weaker. Remember to wash it separately from other delicate clothes. Make sure you wash your silk items alone because their fibers are very weak and could tangle with other fabrics.

Fill the Washing Machine with Suitable Temperature Water

Fill the washing machine with tepid water. The maximum water temperature that is safe for silk in a washing machine is around 40 degrees Celsius or 105 degrees Fahrenheit. Make sure you choose the most gentle cycle that the washing machine offers. If you choose a hotter cycle, you risk damaging your silk or causing it to shrink.

Put Your Pillowcase into a Mesh Laundry Bag

Pour the correct amount of silk-specific detergent into the washing machine, making sure you choose a gentle or delicate cycle. Close the mesh bag and put it inside the washer with your pillowcase. The laundry bag will help your silk stay separated from the other fabrics being washed, preventing it from developing pulls or tangling with other items such as the washing machine drums.

Use Mild Detergent

The silk-specific detergent you chose needs to mix with the water before it can spread out and get on your pillowcase. Avoid using harsh detergents such as bleach to protect your delicate fabric from getting damaged.

Put bleach in your washing machine by accident, and you risk ruining the color of your silk or dulling its sheen. If you need to bleach your clothes,  pre-soak the silk in a mixture of water and bleach before washing it to protect the fabric. You can skip the fabric softener and instead use white vinegar to give your pillowcase a fresh scent.

Use the Delicate Cycle

Add a mild laundry detergent and start up your washing machine using the most delicate setting the delicate cycle. If you have a front loader, lower its water level and increase the agitation speed to protect your silk from getting torn or wrinkled. Use cold water to prevent color bleeding and set the spin speed to its lowest level.

Let it Soak with Your Detergent

Unlike other fabrics, silk doesn’t let go of dirt and dust so easily. So to release as much grime as you can, let the pillowcase soak for about 15 minutes with lukewarm water before putting it in the washer. Put a few squirts of your mild detergent and white vinegar into the basin to soften up stains.

Leave the Pillowcase Resting Flat on a Clean Towel to Dry

Remove silk pillowcases from the washer and lay them flat on a clean towel. Leave it there to dry for another half-day before putting it away in your linen closet. Do not dry your silk fabric in direct sunlight, as this can cause yellowing and damage the silk fibers.

FAQs on How to Clean a Silk Pillowcase

How often should you wash a silk pillowcase?

Silk fabrics should be cleaned after every two weeks to maintain their freshness. Don’t skimp on this step if you want to keep your silk pillowcase looking well for a long time.

What detergent is safe for washing silk?

Powdered detergents are ideal for washing silk in the laundry. Since powdered detergents are more diluted compared to liquid ones, you can be sure that it’s gentle enough not to irritate the fabric.

Final Thought on How to Wash Your Silk Pillowcases

If you’re conscious about the appearance of your silk fabric, then it’s best to wash and dry them after every two weeks. You can also clean stains in your silk pillowcase by using cool water and spot stain removers.

Remember not to rub the fabric harshly when washing silk because it may cause damage to the material. With all these tips, you’ll have a clean pillowcase that will not only beautify your night but will serve you for a long time. Feel free to pin and share this article.

The post How To Wash A Silk Pillowcase appeared first on Kitchen Infinity.

12 Inspirational Kitchen Wallpaper Ideas

12 Inspirational Kitchen Wallpaper Ideas

If you are looking for ways to make your kitchen look unique, then try out kitchen wallpaper. Decorating your kitchen is not an easy task. You need to consider the design, colors, and patterns of the wallpapers before you start decorating your kitchen walls. Wallpaper can be used in any room of the house for a stylish look with minimal effort.

Kitchen wallpaper is one such type that adds elegance to any home décor. It can transform an ordinary space into something extraordinary and unique. These days, there are many options available when it comes to choosing from different designs of wallpaper for kitchens.

If you want a creative way to makeover your kitchen wall, try out these new ideas on how you can use wallpaper on your walls instead of paint, tiles, and marble pieces.

1. Pantry Makeover

Adding wallpaper in the kitchen pantry will instantly hide any stains on your walls. However, you must choose the right color that will complement the design of your cabinets. Consider a small pantry that uses uplifting, colorful floral wallpaper as a backdrop for shelving and storage.


Image credit: https://www.classyclutter.net/

Taking risks in this small risk space is a great way of experimenting without huge investment and commitment. Dressing up the utilitarian corners of your home in bright colors and patterns is a small life-affirming act of care for your room.

2. Backsplash

Instead of using a tile backsplash, consider vinyl wallpaper that is easy to clean and replace. If you think that tile might be too permanent, you can try samples of stone-look textured wallpaper attached only temporarily onto the wall with double-sided tape or light adhesive.

Backsplash
Image credit: https://www.thespruce.com/

This way, if your taste changes or you decide to change your kitchen layout,, you can quickly use wallpaper remover to remove it and restore your kitchen to its original look. Vinyl wallpaper will also save you a lot of money in the long run.

3. Feature Wall

Feature walls are a great way to make your kitchen look one of a kind. While everyone else uses subway tiles or standard white tiles, you can stand out from the crowd by putting up wallpaper. You might think this idea sounds too bold, but remember that you can always use accent colors and patterns and be as daring as you want.

Feature Wall
Image credit: https://www.thespruce.com/

Install an accent wall of wallpaper in any pattern that strikes your fancy. Don’t worry about coordinating colors and styles if you want to keep the rest of the space neutral. Feel free to go bold by dressing your contemporary cookie kitchen.

4. Get Inspired by Art Deco

From the late 1890s through the early 1940s, art deco was all about bold colors and geometric patterns. This trend has made something of a comeback over the past few years in interior design, so you can even find wallpapers that look like they came straight from an art deco painting.

Get Inspired by Art Deco
Image credit: https://s3-us-west-1.amazonaws.com/

These art deco prints will never get old despite their age. So, get a huge range of art deco-inspired patterned wallpapers. Make sure you line them up well due to their intricate pattern.

5. Add a Geo Backsplash for a Special Pop

To add a special touch to the kitchen, you can use this glazed Geo backsplash tile. These handmade tiles come in all kinds of colors and shapes. You can choose the right combination for your wall and decorating palette with different colors and patterns. The silky smooth surface of these handmade tiles makes them easy to clean.

However, to keep them in top shape, you need to wipe them with a damp cloth at least once daily. If the bright color doesn’t look appealing, opt for black and white wallpaper in a neat geometric design. Geo patterns can go well with any kitchen color scheme.

6. Consider Shades of Green in the Kitchen

Choosing a green color for your kitchen wallpaper is a great idea. It will add an organic touch to the room without making it look dull and grey. If you want something more striking, use bright lime or grass green shades in your wallpaper design. The dark background makes these colors stand out beautifully to give the room a bright look.

An otherwise simple white kitchen is the perfect blank canvas for a bold usage of pretty graphic wallpaper. Green is also a great color for bringing plants into the kitchen. Grasses, ivies, and ferns will look stunning when paired with these colors. If you aren’t comfortable with grasses and plants inside your home, use different shaped plants like bottles of ferns to give the same effect.

7. Consider Tie in Statement Colors with Existing Wallpaper

When designing your kitchen, you can go bold by using striking wallpaper for the whole room or around one wall. If you want to have an interesting statement wall in your kitchen, try creating a beautiful pattern with various shades of green.

The blue and white wallpaper print makes the teal shiplap and marble countertops look like a match made in home decor heaven. Blue and white is a classic kitchen colorway that always feels fresh.

8. Bring in Dark Floral Prints for a Hint of Dramatic Flair

A pretty floral print on wallpaper can turn your kitchen from dull to fab in one simple stroke. To keep the look from being overwhelming, use it as an accent wall. In this smart and stylish kitchen, there is no room for boring or bland, so they have used their statement wallpaper to beautiful effect.

Bring in Dark Floral Prints for a Hint of Dramatic Flair
Image credit: https://www.thespruce.com/

Green patterned wallpaper is used on the kitchen ceiling, which is unusual, but it adds an interesting feature to this contemporary kitchen. If you are looking for a bold statement and a stylish focal point, go for a dark geometric pattern. The black dots are also echoed in the tiling on the wall behind the cooker unit and the hob.

9. Bring the Texture

The texture is a very important addition to any room, kitchen included. The right wallpaper not only adds visual interest to your wall but can also bring elements of texture to your entire kitchen.

10. Add a Black Kitchen Backsplash

To create a sleek and modern kitchen, you can combine black kitchen cabinets with black countertops, backsplashes, and flooring. It looks very stylish even when it is done in contrast to other colors. Black-and-white geometric tiles give you the opportunity to put your stamp on the kitchen design project. This is an inexpensive alternative to tile and gives you a perfect kitchen backsplash

11. Corner Booth

Wallpaper is a great way to add personality to any room, including the kitchen. One of the underappreciated aspects of this idea is using wallpaper in an unexpected place. When you are tired of plain tile or give up on painting cabinets, consider covering them with wallpaper instead.

Corner Booth
Image credit: https://loyalistforest.com/

12A booth can be used as both a decoration and a functional space, including a dining area where you can have family dinners and late-night drinks once the kids are in bed.

12. Go French Countryside with a Muted Floral Themed Design

You can even buy cloth wallpaper that looks just like the real thing. The best part of this idea is you will have a unique kitchen unlike anyone else’s in your neighborhood.

Thanks to the paned windows and muted floral wallpaper print, a charming kitchen will feel like a traditional chateau off the French countryside. The sage-colored cabinets, marble countertops, and minimal conces add a modern twist that helps the kitchen feel more current and upscale.

FAQs about Kitchen Wallpaper Ideas

Is peel and stick wallpaper good for kitchens?

Yes, peel and stick wallpaper lets you add fun and color patterns to your kitchen without the permanence and expense of traditional wallpaper.

Is kitchen wallpaper a good idea?

Designers say wallpaper is a secret ingredient for creating a unique, whimsical kitchen. Whether you keep it in your backsplash, bar, breakfast nook, or cover every wall, wallpaper can instantly transform your kitchen.

Final Thought on Kitchen Wallpaper Ideas

As you can see, kitchen wallpaper ideas can be easily customized to your specific tastes and requirements. Today, we have seen how an elegant and stylish kitchen can be made just by changing the wallpaper, and this makes it easy for you to go ahead with the same idea to get that stunning kitchen you always wanted.

If you love fun and adventurous styles, then there are innumerable options available at your disposal. So what are you waiting for? Go ahead and give your kitchen a touch of elegance by changing the way it looks.

The post 12 Inspirational Kitchen Wallpaper Ideas appeared first on Kitchen Infinity.

Did you miss our previous article…
https://www.thelavkitchen.com/?p=457

16 Best Backpacks for College of 2021

Choosing the right backpack can be a difficult task for students, especially in high school or college. It is not easy to pick the best backpack that will suit your needs. With so many options available today, it can be overwhelming and confusing to choose one. Which type of bag should you get? What features do you need?

Below is the list of the best backpacks for college and high school kids in 2021.

1. Herschel Pop Quiz Backpack Herschel

Pop Quiz Supply Co. is an independent designer, distributor, and manufacturer of luxury backpacks, bags, and accessories. One of their best-sellers is the Herschel Pop Quiz Backpack which has everything you need for college. This backpack is spacious, durable, and lightweight.


Image credit: https://www.gadgetreview.com/

It offers enough compartments to keep your must-have organized. This bag comes equipped with a padded laptop sleeve, fleece-lined sunglasses, and a few other compartments you can use to store your go-tos. The base of this bag is also lined with a water-resistant faux leather panel that keeps your items safe from spills and puddles.

2. Moleskine Metro Backpack

This backpack is a multi-purpose bag you can use to store all your college essentials. It has several compartments where you can store your laptop, phone, charger, and even your notebooks. It features padded straps that add extra comfort when carrying the pack for hours.

Moleskine Metro Backpack
Image credit: https://www.moleskine.com/

If you’re looking for a sleek, compact backpack that can help you keep your laptop safe from elements, then this is the right choice. This bag is crafted from water-repellent nylon, and it boasts a protective polyurethane base that keeps your electronics safe from spills and puddles.

3. Everlane Modern Snap Backpack

For minimalist college students, this backpack from Everlane is a good choice. This pack doesn’t have traditional compartments or zippers. Instead, it features a series of pouches and slots that allow you to store your stuff in the most efficient way possible.

Everlane Modern Snap Backpack
Image credit: https://i.pinimg.com/

Plus, its design allows you to store laptops, notebooks, and other school supplies. It has an exterior side pocket for your water bottle, making it safer for your inside belongings. You can also keep it for the longest time, thanks to its water-resistant cotton twill exterior.

4. The North Face Borealis Backpack

One of the best backpacks for college is this one from The North Face. It has 28 liters of storage space, perfect for carrying your books and notebooks on campus. Additionally, it features a fleece-lined pocket that allows you to keep sunglasses protected when you’re on the go.

The North Face Borealis Backpack
Image credit: https://images.thenorthface.com/

If you need a whole lot of space, the Borealis backpack is a perfect choice. Upfront, it has an elastic bungee system. This bag is also comfortable, and there’s also a version that can fit women’s bodies. It comes in various colors, fitting everyone’s preferences.

5. Mokuyobi Flyer Backpack

This is one of the best backpacks for college students because it’s got a huge amount of space. If you want to carry your laptop, tablet, or iPad with you, there are two pockets in the front that can fit most laptops with screen sizes up to 15 inches. You’ll also find several exterior pockets with zipper closures.

Mokuyobi Flyer Backpack
Image credit: https://cdn.shopify.com/

There is an open space that’s perfect for carrying several books. If you’re worried about running out of time, this is for you. It has some space for extra clothes, some make-up or perfume, and a few items.

6. Herschel Heritage Classic Backpack

If you’re looking for a stylish backpack for college, this is your answer. Herschel is a brand that’s known for its affordable and trendy bags and accessories. It has several designs to choose from, so you’ll surely find one that complements your style.

This backpack has a bit more than enough space for most students with 19 x 13.5 x 8 inches. If you also like a light, classy backpack, this may be the best backpack for you. It has a large compartment with a sleeve that can hold a 15-inch laptop and a small media pocket with a headphone port.

The classic black color with a saddle brown faux leather bottom is one of the 23 designs available. It has an air mesh back padding and cushioned straps that keep you comfortable across the campus.

7. Dagne Dover Dakota Backpack

This is a cool backpack for students who are always on the go. It has one main compartment with dividers to provide easier organizing. The exterior also features two front zippered pockets, one of which is padded to protect your laptop or tablet.

There are three colors available, including dark pink camo, midnight camouflage, and navy blue. For comfort and better back support, the designers made the straps adjustable. It also has the signature feature of Dagne Dover’s backpacks and bags, which is the key leash.

The superior material is made of premium neoprene, making it water-resistant, hand-washable, and one of the most durable backpacks on the market.

8. Modoker Vintage Laptop Backpack with USB Charging Port

This is great for any college student. It can fit most laptops up to 15 inches with its slim design, making it perfect for many carrying cases during the day. With two front pockets, one of them with a built-in USB port, this backpack will make it easier for you to access your phone or tablet while on the go.

This backpack has a roomy main compartment with a padded laptop sleeve and an internal organization panel. There is also a front pocket for your accessories, such as pens, calculators, tablets, phones, and more. This backpack also boasts spacious main compartments, two water bottle pockets, and two compact pockets.

9. Day Owl Backpack

If you want to live a sustainable life on campus, then the qualities of this backpack suit you well. While the bag looks trendy and small with its circular design, the interior of this backpack is very spacious and can hold your laptops, a few books, and other belongings. You can also send this backpack back for repairs to make it last longer.

Also, if you’re looking for an eco-friendly backpack that will suit all your outfits while carrying all your items in it, then you should consider this one. Since the bag is made with non-toxic materials and the company’s claim that every feature in the backpack has an environmental purpose is convincing, I’d say that there is no reason not to buy this for yourself or even friends who are into sustainable living.

10. Fjallraven Kanken Laptop Backpack

Fjallraven Kanken Laptop Backpack is a highly practical and stylish backpack. If you’re looking for a high-quality, durable backpack that does not look like a typical boring one, this should be your choice. In addition to its durability, the Fjallraven Kanken is also waterproof and highly functional.

It comes with a number of pockets and compartments inside and out, which means you can fit everything you need in the backpack, including assorted snacks for your college days. If you’re looking for something trendy but functional, this might be the best choice for you.

The Fjallraven Kanken comes in 17 colors inspired by nature, including acorn forest green and autumn leaf. The ergonomically designed padded shoulder straps also make a comfortable journey between classes.

11. Timbuk2 Spire Laptop Backpack

This is another great choice of student college backpacks. It’s designed to protect all your 15-inch laptops and tablets. With careful details like the Napoleon pocket that makes it easy to quickly access important items, rugged ballistic zips, and a scratch-resistant lining, this bag is just an example of what you can expect from Timbuk2 products.

If you’re going to school in a rainy city, this bag should be one of your options. It’s made out of canvas fabric and waterproof material, enabling it to keep your laptop dry. It also has a laptop compartment and a zip pocket that can hold your phone, wallet, and other small, significant items.

It has multiple storage spaces for pen holders, water bottles, and other school supplies on the inside. Apart from the laptop compartment, the main compartment can carry books, extra jackets, and other essentials. It has incognito back zip access and a secure pocket for valuable items. It also has comfortable straps which are adjustable and come with a sternum strap suitable for travelling.

12. Vera Bradley Signature Cotton Campus Backpack

Vera Bradley is a globally recognized brand with an extensive selection of luggage and backpacks. This backpack comes in 13 different designs, giving you a wide range of options to choose from depending on your style preferences.

The bag has double carrying options, a short handle, and adjustable shoulder straps. It has a front pocket with a flap and an additional zipped pocket for your valuables. It also has three pen holders. In addition, it has no natural wool fiber, making it perfect for animal lovers.

13. JanSport Right Pack

The Right pack features the signature suede leather bottom, padded laptop sleeve, two front pockets, and a side water bottle pocket. This backpack is also made of durable Cordura fabric and comes with an organizer. The company is also committed to providing durable and reliable products offering you a lifetime guarantee.

If the bag breaks down, you can send it back, and the company will fix or replace it. Additionally, there are many colors and designs you can choose from. For example, you can display your personality in bright, floral, and evergreen tones.

14. Lululemon City Adventurer Backpack

This college student backpack is for you if you’re a sports enthusiast and want academic success and a fit body. It has enough room for your laptop and comes with an expandable pocket that could hold your gym clothes. It has a water repellent fabric and comes in different colors.

The minimalist design of this college backpack makes it fit well in both class and at the gym. If you want to save time and money, this is the backpack for you.

15. Kenneth Cole Reaction Women’s Chelsea Backpack

If you’re looking for a feminine backpack with enough for all your school essentials, grab this Kenneth Cole Reaction backpack. It has enough room for your laptop and all the other things you need during class, plus it comes with an extra compartment where you can keep your sunglasses safe. It also has interior pockets where you can place your pens, phone and tablet.

Kenneth Cole Reaction Women's Chelsea Backpack
Image credit: https://qvc.scene7.com/

16. Herschel Dawson Backpack

Hershel backpacks are very popular. However, this one differs from other backpacks belonging to the same brand through its separate front pockets.

Herschel Dawson Backpack
Image credit: https://herschel.eu/

The pocket has a drawstring closure with foam padding for extra protection. Plus, the main compartment has a capacity of 20.5 liters and can hold laptops and notebooks effortlessly.

FAQs on Best Backpacks for College 2021

How do you choose college backpacks?

By the total capacity. It should be spacious enough to carry all your books, laptop, computer accessories, and toiletries.

How do you choose a durable backpack for college?

By its fabric and construction. Good backpacks are made of robust materials like leather and canvas to ensure long-lasting durability.

Final Thought on Best Backpacks for College of 2021

Being a student is already hard enough. Try to make it simple by choosing the right backpack. Remember that a good backpack shouldn’t only have trendy looks and enough space for your things. It will also contribute to your health, and a low-quality backpack can deform your spine and put you in tremendous pain.

The post 16 Best Backpacks for College of 2021 appeared first on Kitchen Infinity.

Did you miss our previous article…
https://www.thelavkitchen.com/?p=451

What are Faucet Aerators and Why You Should Install Them

What are Faucet Aerators and Why You Should Install Them

As a homeowner, you should constantly look for ways to improve your home functions. Home renovation helps you conserve water and energy, improve user experience and help you save money in the long run. One thing that often gets overlooked is faucet aerators.

Faucet aerators reduce the pressure at which water comes out of a faucet by reducing the flow rate. This reduces the amount of water used per action and brings down your monthly water bill. The truth is that there are many reasons why installing an aerator can be beneficial to your home, regardless of whether you live alone or with family members. Keep reading.

What is a Faucet Aerator?

A faucet aerator is a round device installed on the ends of faucets that channel water into steady steam. But without a faucet aerator, your faucet will still deliver water, but the stream will splutter and splash. A faucet aerator helps to reduce splashing and spluttering because it uses a small channel to introduce water from the faucet into a larger channel, creating a steady stream.

The result is that your dishes and laundry will be cleaner, and you can also save water. In addition, an aerator is a small screen that breaks up the flow of water into multiple small streams, adding air in between. Today, a faucet aerator is very common in all kitchen and bathroom faucets.

By diluting the water stream with air, the aerator significantly reduces the volume of water flowing from your faucet. The aerator does this while maintaining the feeling of a high-pressure flow.  Aerators also reduce splashing in sinks.

Choosing Faucet Aerators

Daniel O’Brian, a technical specialist with SupplyHouse.com, says that different faucet aerators are designed to enforce different flow rates. Here are what you should consider before installing a faucet aerator

Consider the Flow Rate When Installing an Aerator

You might be tempted to choose an aerator with the lowest flow rate to maximize savings. You should also remember that you’ll rely on certain gallons per minute GPM minimums on activities such as washing the dishes. However, O’Brian suggests choosing an aerator with a flow rate between 1 and 1.5 gallons per minute GPM is a good compromise between conservation and practicality.

To wrap it up, there’s no rule here, so your personal preference and use cases will dictate what GPM you should choose. For the most part, it’s considered to install an aerator with a flow rate of 1.5 gallons per minute GPM if you want to conserve water while maintaining functionality.

erators Come in Different Sizes

Apart from knowing how many GPMs you require, you should also know the size of the aerator you’ll need. Faucets come in different shapes and sizes, and aerators come in three different varieties. These varieties include standard, junior and Tom thumb.


Image credit: https://upgradedhome.com/

Other than the diameter, you also have to know if your faucet has a male or female spout. You’ll be able to identify this by locating the sprout’s threads, which are grooves found at the end of the spout. If the threads are outside, then it has a male spout and requires a female aerator. If the threads are inside, then it’s a female spout and requires a male aerator.

erators Provide Different Water Streams

You’ll also want to consider what kind of water stream you would like your aerator to provide. There are three different stream designs to choose from. These include the aerated stream, which is the most common in households.

In the aerated stream, the air is introduced to the water flow, causing the water to come out in even. There is also a laminar stream where the air isn’t mixed with water. The laminar stream also differs from the aerated stream by offering more gallons per minute GPM. The last one is spray stream, where faucets require very few GPMs.

Benefits of Faucet Aerators

Decreased Faucet Noise

Also, by installing a faucet aerator, you will end up having a decreased flow rate without actually needing to cut your water pressure. The water stream that comes out of the faucet is frizzy and mist-like. This makes it much quieter than the concentrated streams.

Decreased Faucet Noise
Image credit: https://kitcheneminence.com/

As mentioned above, water flow can be reduced by up to 35 percent. This is a great benefit as the faucet remains to deliver adequate water without causing any inconvenience or discomfort.

Lower Water Bills

As you save more water, your water bills will also get lowered. Though this might not be noticeable in the short term, it is great to note that the faucet aerator can help you lessen your water expenditure over time.

According to the Environmental Protection Agency, installing a faucet aerator is the single most effective water-saving plumbing change you can make. This is true because you’ll use less water when you use an aerator to accomplish the same task.

More Consistent Water Pressure

A mesh screen allows the water pressure to be more consistent. It also slows the flow of water, making it possible for you to use less water and still achieve the same task. Instead of experiencing pressure changes right away as they happen, the steam will stay steady due to water caught behind the aerator.

Reduced Overall Water Use

Reducing the flow rate of water may cause some people to feel like they need to use more water to get the job done. However, experts say that using an aerator will not cause you to increase your overall water usage.

They claim that it is possible for you to reduce your total amount of daily and total monthly water usage. Apart from reducing water consumption at home, installing an aerator means less water usage, thus, reducing your home’s impact on the local and global environment.

Increased Filtration

With a faucet aerator, drinking water is filtered as it comes out of the tap. By using a filter, you can ensure that water used for drinking is free from toxic chemicals and metals. This reduces the overall amount of money spent on bottled water which would have been required if no aerator was installed.

The small screens increase the particle filtration for an individual faucet. A high-quality aerator works with a filtration system to keep your water clean and clearer. Ensure that if you have dirt and debris problems, you deal with them by regularly cleaning your aerator to prevent buildup.

FAQs on Faucet Aerators

How do faucet aerators work?

Faucet aerators work by getting air mixed into the flow, reducing the amount of water passing through the tap.

Final Thought on Faucet Aerators

That’s all about faucet aerators! Make sure you clean your faucet regularly to keep it as clean as possible. Do not forget to use a filter if you need it to keep your water pure and clear.

The post What are Faucet Aerators and Why You Should Install Them appeared first on Kitchen Infinity.

Did you miss our previous article…
https://www.thelavkitchen.com/?p=448

How To Hang A Door

How To Hang A Door

You want to change the look of your home by a simple act such as replacing a door. But you don’t have time or money for a professional installation. Installing a new interior door can be simple once you know how to do it. The key is knowing what tools and materials are required and having the right safety gear on hand.

We’ll walk you through each step of the process so that hanging your doors will be easy as pie. No matter whether your project requires one or two doors, we’ve got all of the instructions, tips, and tricks it takes to get them hung safely and securely in no time at all.

Our guide includes everything from choosing hardware to cutting out holes for knobs and locks. And we even show you how to install decorative molding around your new door’s frame if desired. With our handy checklist at hand, there’s no reason why anyone should struggle with hanging doors ever again.

Required Tools and Materials

Sharp chiselScrewdriverUtility knifePencilHandsawTape measureDoor slabElectric or smoothing planeSpirit levelWooden Shims

Steps on How to Hang a door

Remove the Existing Door

If the old door has a transom, remove it from its hinges before you begin to hang your new door. If there’s an old lock in the way of your new slab, position the chisel where it meets the jamb and tap lightly with a hammer until you can knock out the plug by hand. Place wedges of wood underneath your old door to support the jamb while you work.


Image caption: https://www.wcmanet.org/

Then unscrew it from its hinges and remove it from the opening. If your hinge is still in good condition, you can set them aside for reuse. Be careful not to damage the hinge recesses in the jamb while you remove it. Also, don’t hang a new door in an old door frame, or you’ll end up fixing a sagging door in the future.

Measure the Space for Your New Door

Move on to measure the space for your new door. You can use a stud finder to locate the framing members to make sure that you can secure the hinges into place. Be sure that you center it evenly across the opening and between both jamb edges.

The old door can also guide you, as you can lay it on the new one and mark where you’ll cut the new door with a pencil. You can work with someone to help you position the door in the door frame and level it.

Get the Floor Level

Take your spirit level and check to see if the threshold on your new door is level with the floor. You can use a pencil and mark the high and low points where needed. If the floor is finished but not leveled, then you’ll need to trim one of the door jambs.

Use shims to position each door jamb evenly against the floor. Mark the shim at the point where the gap is big using a sharp pencil. Measure the thickness of the shim as that measurement is what you’ll need to cut off your door jamb from the opposite side. You can also learn how to level a floor so you avoid any such future problems when hagging a door.

Mark the Hinges

The hinges on a door are usually placed at 1/3 of the total height from the top. Mark the point around the edge of the door, as well as where you will want to hang your new hardware on both sides. Use a sharp pencil to mark clear lines on both the lining and the door.

Once you’ve marked all the hinge positions, remove your door from the lining, place it in the saddle, and wedge it. After that, hinge the side up, square all the pencil lines, and hinge it to the opposite side. Use a straight edge and level to ensure that your door is completely square and plumb. Use shims under either side of the hinges to adjust for deviations, then tack each hinge in place with nails only along the top line.

Place the hinge to mark its length on the door’s edge. Slide it up to the line and mark the first hole. Set your marking gauge up and scribe the width of the hinge into the door edge. Use a sharp Stanley knife to ensure your door won’t always close flush. You can repeat to ensure all hinges are positioned and set the gauge to the same thickness as the hinge between the door and the frame.

Chop the Hinges Out

Use a sharp chisel to chop your hinge horizontally from the top and bottom. Sand, the remaining pencil lines, then drill correct pilot holes for your screws. You can also use a mallet to cut around the perimeter of the hinge recesses you’ve marked. By placing your chisel at 45 degrees, make several cuts apart and to the depth you’ve marked across the wood grain. Put the flat side down, then use the chisel to pare away the wood as you position the hinges. Drill all the holes and ensure one screw gets into each hinge flap.

Trim the Bottom

This is where you’ll need an electric plane or circular saw. Only use them if you need to remove a lot of trims from the bottom. You can as well score your door with a sharp Stanley knife before cutting the bottom to the angle you have designed. This will prevent your door from tearing.

Hold the Door Steady

Now it’s time to attach your wooden blocks on the sides of your interior door to the wall. Place your door in the middle of the space and check the level. Use the spirit level to ensure that your door is even on both sides, then mark where you need to drill the wooden blocks into the wall. Make sure the jambs are resting on the blocks to maintain the correct height.

If the jambs aren’t in the correct position, cut or plane the door using a saw or a block plane. Check if the hinge side of the door is plumb by using the level. If the hinge side of the door is plumb, attach the blocks by hammering 2-inch, 15 nails through each block on the hinge side and into the wall. Check if the gap between the side of the door is even, then do the same for the blocks on the latch side.

Ensure Your New Door will Shut

Now that your door is held in place make sure it will close properly. All you need to do is take out the plug that holds the door slab, then open and close the door as you carefully watch the gaps. If the jambs aren’t in the correct position, cut or plane the door using a saw or a block plane.

If one part is hitting the door, stop first and make sure you adjust the door jamb before you proceed. Move the jamb from the top to the bottom until the problem is solved. If there’s no gap between top and bottom, use a belt sander or plane to create a small gap.

Place Shims Behind the Hinges

If the hinge is too close to the floor, you’ll have a hard time opening and closing them. To avoid this, put a shim behind each hinge. Your door may not stay open by itself because its hinges aren’t level with each other. You can solve this dilemma by popping out the cover on one of the hinges and moving it to a level that aligns with the other.

Place Shims Behind the Hinges
Image caption: https://www.wcmanet.org/wp-content

After unscrewing and removing the middle screw from each hinge, put a shim behind the hole. Then check your jamb door if it’s still level. If it’s not, add the shim until you get a level door. Check if your door jambs are level with the wall. Check the gap between the slab door and door jambs if they’re still even. Double-check to ensure the gap between the door stop and slab is also even. You don’t want to come back here to learn how to fix a misaligned door, right? That’s what will happen if you skip this step.

Screw the Hinges

Start with the hinge plate at the top of the door. Move to insert a screw into the hole nearest the bottom of the plate, then tighten it. Repeat the same way with the lowest hole on the hinge plate at the bottom of your door. Open and close your door to ensure it works properly. Once you’ve set the hinge at the top of the door, put a level on top of your slab door and make sure it is perfectly even. You may need to adjust the height of the hinge plates if one side doesn’t line up with the other.

Mount the Latch and Doorknob

If your door frames have a strike plate, then measure how far it’s from the floor and measure the corresponding position of the door. You can also prevent your interior doors from slamming in high winds by enforcing the latch plate. All you have to do is to drill a bit and countersink a hole in the top corner of the space for the latch plate.

Make sure you position your hole away from the edge of the frame. You need to drill a hole in your door that matches the size of your latch plate. Then, position both pieces of wood together while you’re sure they’re level and mark exactly where you need to drill holes.

Remove the Blocks and Hang Your Door

Now that your door can open and close smoothly, the next step is to remove the blocks you have used to prop the door up. Follow the instructions that came with your door for this part of the installation. Use the nails and filler to cover any holes that you made.

Now, find out how to hang a door. Hold your door open on the wedges, and then screw the screw to the hinge using only one screw at each stage. Lift your interior door out of the clamp to give it a frame at a slight angle, then begin by screwing the top hinge to the lining.

FAQs on How to Hang a Door

Can you hang a door without a door frame?

Yes, it’s possible as long the frame is in good condition and not warped or worn out. The door frame doesn’t come with hardware attached; instead, you can either reuse the old frame hardware or replace it with new hardware in the new slab. But a pre-hung door comes set in a frame.

What is a pre-hung door?

The pre-hung door is the package of a door with its frame attached to it. You can hang the new slab on your existing door frame using three basic tools: drill, screwdriver, and hammer.

Can you hang a door on drywall?

Yes, but interior doors should be installed after the drywall is installed. This is because the drywall needs to be secured by nails if you intend to hang door slabs. If not, the door will not hold its weight and may eventually come crashing down, which can cause damage to its hardware, like hinges and screws.

Hanging your door after installing the drywall will make your doors stay cleaner and prevent any scratches and dents on the door surface.

Final Thought on How to Hang a Door

Hanging a door by yourself is much easier, especially if you’re using wooden blocks to hold the door in position. You don’t need any additional support. So, it’s something you can do on your own. If you have any questions, don’t hesitate to leave a comment below, and we’ll get back to you as soon as possible.

The post How To Hang A Door appeared first on Kitchen Infinity.

Did you miss our previous article…
https://www.thelavkitchen.com/?p=445

12 Gorgeous Flower Garden Ideas To Add To Your Home

12 Gorgeous Flower Garden Ideas To Add To Your Home

Flower gardening is a fun and rewarding hobby, especially if you know how to do it right. You can use beautiful flower garden ideas to create an amazing backyard oasis that will impress everyone who sees it. These beautiful flowers help you express yourself in ways you never thought possible. All it takes is a little creativity to show your personality through these amazing flower garden ideas. Here are some ideas that can help you start this amazing hobby.

1. Consider Large Garden Areas

Many flower garden ideas are perfect for smaller spaces, but consider planting something other than flowers if you have a large backyard area. If you’re looking for an easy way to create an impressive look that’s also functional, go with ornamental grasses or evergreen trees. These plants are great year-round and require very little maintenance over time.


Image credit: https://www.gardeningknowhow.com/

Choose two contrasting colors and one color family, such as purple or pink. You can then add perennial flowering plants in groups of three to five, and you’ll have an eye-catching flower. Make sure you carry out regular weeding because today’s weed might be tomorrow’s weed patch.

2. Create an Edible Flower Garden

Create an Edible Flower Garden
Image credit: https://www.gardeningknowhow.com/

If your goal is to create a garden as an outdoor kitchen, consider making a dedicated flower bed for herbs and vegetables. If possible, flower gardens should be beautiful and delicious. Vegetables will get a huge boost in productivity with the flowers available when pollinators are drawn to nectar-rich planting beds.

Edible plants such as tomato, squash, and cucumber will blossom in such flower garden beds. In addition, the beneficial insects that rely on floral nectaries will help control vegetable pests, thus, reducing the use of pesticides.  You can get ideas on types of squash to grow here so you know which one can work for your flower garden.

3. Plant Flowering Plants on Trellis

Trellises and topiary create focal points in the garden, especially when consistent color and style. When creating an edible flower garden, place trellises along walkways and at the edges of beds to lead visitors through the garden and to help keep plants upright as they grow. Make sure you define borders against which to plant flowers of varying heights.

They provide support for climbing vines such as morning glory, cucumber, and sweet potato, and vertical growing flowers such as clematis. Trellises also provide structure for flowering vines that may not need support, like the passion vine. You may also trellis-filling vine in one season from seed with morning glory and moon vine.

The passion vine can climb up an arbor or trellis to create a lush canopy of green leaves. Passion flower blooms are attractive to bees, which adds to the benefit of an edible garden. Gloxinias, petunias, and their foliage can also bring beauty to your trellis.

4. Combination of Bogs and Rain Gardens

Brighten that soggy spot in your backyard with a rain garden or bog garden. And when planning a bog garden, consider plants that love both full sun and wet soil. Flowering plants that thrive in bog gardens include candelabra primrose, cardinal flower, and yellow iris and leopard plants.

You can also introduce fun and funky in your wet by including carnivorous pitcher plants. Make sure your garden rain never dries out. A natural bog garden will be replenished by rainfall, but a dry spell hits; ensure you help it out with a hose.

If you see frogs, salamanders and turtles, know that a bog environment is present, so use it to plant some rain garden plants. If you don’t have a natural depression that collects water, create your own by sinking a plastic kiddie into the ground. You can use pond liner to create a bog garden as long as you disguise the edges with rocks and fill the bottom with peat moss and sand.

5. Consider Flower Garden Paths

When you think of your garden, do you see only the flowers that need to be planted? A flower garden is perfect for an area where you can walk through and view the various blooms. If your current yard doesn’t have one existing place, design a path with bricks or stones, so everyone has easy access.

Consider Flower Garden Paths
Image credit: https://www.thespruce.com/

But keep in mind that you’ll need to choose flowers that can handle foot traffic. A flower garden path should comfortably accommodate a wheelbarrow and a cart with room to turn around. Make sure you mulch your plant beds as much as possible to keep them flourishing.

6. Butterfly Flower Garden Ideas

The butterfly garden works especially well near a porch or patio area. Butterflies love water, so add a small pond, and you’ll be treated to the sight of not only butterflies but frogs and lizards as well. However, some beautiful flowers may fall flat when it comes to attracting butterflies.

Butterfly Flower Garden Ideas
Image credit: https://www.loveyourlandscape.org/

Some butterflies are designed to extract nectar from particular flower shapes, meaning that some blooms sound like the dinner bell while others miss the mark. Even though butterflies love bright colors, it’s important to include flowers with rich nectar stores easily accessible in shallow flowers.

Butterflies and other pollinators will stay in your garden throughout summer as long as you include seasonal blooms in your garden. This is because their food sources are usually most plentiful when the weather is hottest, and most plants bloom during springtime or summer.

Butterflies will truly thrive with a combination of butterfly-friendly flowers, annuals, and perennials, which they can land on for rest periods between nectar-feeding sessions.

7. Combining Tulips with Annuals and Perennials

Create a harmonious arrangement with this amazing flower garden idea. Extend your garden blooms with tulips, annuals, and perennials that will come back each year with less maintenance. Make sure you space out your flowers so that tulips stand taller than your shorter, low-growing annuals and perennials.

When winters are cold, your tulips will return for several years but won’t survive when grown in warmer, moist climates. A flower garden bed with a blend of red and yellow tulips will make the whole bed look amazing.

Create that festive effect in a mixed flower bed by planting clear, primary tulips. Daylily, catnap, salvia, and bells of Ireland are some of the great tulip companions, and once you should reconsider when recreating a gorgeous full flower garden bed.

8. Pallet Flower Garden Ideas

Flowers that provide color with the way you want the artwork to appear are a good start for any design. For example, mixed white and yellow flowers will provide interest for your garden whether you want a spring or summer look. The tulips will be particularly appealing in beds where most flowers are filled with one particular shade.

If you have a lot of flowers of the same style, plants with distinctive features will draw attention. Choose something really small tulip for this circumstance. Chives will certainly give you an option to create a variety of patterns by simply including or eliminating plants from your flower bed.

9. Recycled Rubber Tires Flower Garden Ideas

You can never go wrong with turning your old tires into a garden ornament. Rubber tires are tough and long-lasting, making them fantastic materials for your yard or business’s landscape design. This reclaimed rubber tire flower garden idea is a great way to recycle old tires while beautifying the area at the same moment.

Recycled Rubber Tires Flower Garden Ideas
Image credit: https://morningchores.com/

If you have an old bike lying around, make use of its tire as well. If you have some scrap tires lying around, turn them into a flower garden. This will not only make your lawn look good but will also help you avoid worrying about tires taking your space or disposing of them.

10. Potted Flower Garden Ideas

There’s nothing more pleasant than a stunning potted flower garden in the backyard. So take your time and plan it well so you can enjoy it for many years to come. When it comes to convenience, nothing beats flowers planted in clay pots and half buried in a bed of gravel.

Potted Flower Garden Ideas 
Image credit: https://nextluxury.com/

It doesn’t have to be complicated – using a simple pot will also do the trick. You can also bring in some hanging baskets if you have a nice outdoor space for them. To achieve a harmonious and colorful look, choose a different flower for each pot. Round your flower bed with pots.

A circle of purple, white, red, and white striped Bizzy lizzies spread out from the pine ringed by stonecrop, moss, and pots of pink and white Bizzy lizzies. And if you want to enjoy the view from your home or balcony, consider adding some cascading plants, vines, or grasses, which will make it look like an entry from fairy tales. Add in some wooden trellis and little lights too to complete the look.

11. Formal Flower Garden Ideas

Of course, the clean lines and tidy layout of a formal garden will provide a respite from the stresses of modernity. Adding some flowers on top of that grass and well-cut boxwood shrubs will be the finishing touch to the garden’s look. You can stick one or two flower varieties in the formal garden.

Lavender, roses, tulips, hydrangeas, and salvia are a few things that you can use in your formal garden. You can mass the flowers around a central fountain, use them to edge paths, and fill in geometric hedge plantings with blooms.

12. Flowering Cottage Flower Garden Ideas

You can turn your cottage garden into plant beds with the help of perennials, ornamental grasses, and flowering shrubs. Roses, lavender, cosmos flowers, lilies, snapdragons, and hydrangeas are among some of the plants that you might use to make up your cottage flower garden.

Grasses like colorful ornamental rye can be used as a ground cover to fill in spaces between other flowering plants. Perennials like bleeding heart, lupines, black-eyed Susan, and daylilies are among the many types of flowering perennials that you could use for your cottage garden.

FAQs about Beautiful Flower Garden Ideas

How do you lay out a flower bed plant?

Arrange border plants with plants taller than 2 to 3 feet tall, then place them in the back with the mild-size plants from 10 inches to 2 to 3 feet tall in the middle. After that, layout shorter plants in the front of the bed. It’s also best to use groupings and drifts of plants for a natural feel.

How do you plant a flower garden for a beginner?

First, make sure you remove the weeds and amend the soil. If it’s a new bed, put down a layer of landscape fabric to block weeds and top with six inches or more garden soil and topsoil. If your area doesn’t receive much sun, you can consider growing shade-loving flowers as they blossom in such areas.

Final Thought on Beautiful Flower Garden Ideas

Build your corner of paradise by adding different types of flowers in your backyard. You can enjoy your backyard for gardening, spending time with your loved ones, or just relaxing.

The post 12 Gorgeous Flower Garden Ideas To Add To Your Home appeared first on Kitchen Infinity.

Did you miss our previous article…
https://www.thelavkitchen.com/?p=439

10 Best Wallpaper Removers of 2021

10 Best Wallpaper Removers of 2021

Removing wallpaper can be a difficult task, especially when you haven’t done so in the past. But with the right tool, removing old wallpaper becomes easy and fast. If you’re planning to remove old or outdated wallpaper from your walls, then we have got an easy solution for you. With the help of these best wallpaper removers, your home remodeling project will be very simple and fast.

So without wasting any more time, let’s begin with our reviews on Best Wallpaper Steamers in 2021.

1. Wagner Spraytech Multipurpose Wallpaper Remover

Among all the wallpaper removers available in the market, Wagner Spraytech is an ideal choice for you. It’s easy to use and very efficient at removing even wallpapers with glue left on it. It will save you valuable time instead of using other methods like scrapping it out, which can consume a lot of time.


Image credit: https://images.zentail.com/

If you’re looking for an affordable steam cleaner optimized to use as a wallpaper remover, this pick suits you perfectly well. For those tough jobs that call for stronger tools, consider using this wallpaper steamer from Wagner. It’s an efficient and effective wallpaper remover. The steam plate has an easy-grip handle to help you complete long steaming jobs.

With its large tank capable of producing up to 70 minutes of steam, you’ll get enough working time out of this budget-friendly steamer as you steam and soften wallpaper and its adhesive backing. The steam plate also attaches to an 11-foot long hose, stretching to those hard-to-reach areas.

2. WP Chomp World’s Best Wallpaper Stripper

WP chomp citrus solvent is a darling to many people, thanks to its ability to transform the tedious task into a quick spray bottle. This ready-to-use wallpaper stripper is effective on all types of wallpaper, including vinyl, grass, strippable and temporary wallpaper. Its commercial strength formula is designed to penetrate quickly, making wallpaper adhesive and leftover residue easier to remove.

WP Chomp World's Best Wallpaper Stripper
Image credit: https://cdn11.bigcommerce.com/

This strip wallpaper remover has a mild citrus scent that won’t leave a strong chemical smell behind. However, WP chomp recommends using this spray with a wallpaper scoring tool, especially when it is tough to remove water-resistant wallpapers.

3. HomeRight Steam Wallpaper Remover Review

The HomeRight Steam Wallpaper Remover is a steam cleaner that can take wallpaper off your walls. The powerful handheld steamer features touch-free technology, which enables you to remove old wallpaper without touching it with your hands. Whether you want to remove double or triple-layered wallpaper, this steam wallpaper remover is equipped to separate paper glued with the toughest adhesive.

HomeRight Steam Wallpaper Remover Review
Image credit: https://cdn.wallpapersafari.com/

It’s powered by 120 volts of electricity, a 40 ounces water tank, heating element, jet nozzle, and a steam plate. These elements enable it to discharge pressurized steam as the only mode of effective wallpaper removal for fast and effective cleaning.

With different furnished nozzle attachments, this versatile cleaner isn’t only capable of wallpaper removal and works in showers, kitchen stovetops, bathtubs, and grills. This device is also equipped with a pistol-lock mechanism to promote continuous and intermittent steam discharge operation.

4. WP Chomp Wallpaper Scraping Tool

Apart from wallpaper removal, this device is also capable of scraping paint and rust. It’s an effective one-stop solution for various surfaces’ decontamination without the need to use a mop or brush. Vinyl is one of the harder wall coverings to remove due to its thicker construction and two-layer application. This makes it very hard to remove.

Fortunately, you can remove such stubborn wallpaper with WP wallpaper Chomp’s scorer. This wallpaper remover includes dual cutting wheels that are made of tempered steel for added strength and durability. It’s also easy to get into tighter areas, thanks to its compact size, plus the ergonomic design helps reduce fatigue.

5. Zinsser DIF Wallpaper Stripper

This wallpaper stripper from the house of Zinsser is a staple for any DIY enthusiast who wants to remove old wallpaper from their walls. It provides excellent adhesion and durability, giving you an easy time while removing stubborn wallpaper.

Zinsser DIF Wallpaper Stripper
Image credit: https://images.thdstatic.com/

This best solvent from Zinsser is a basic wallpaper stripper that will dissolve adhesive and soften paper, paving the way for a smooth transition to bare walls. You’ll need to dilute it before application with each 22-ounce bottle yielding two gallons of stripping solution.

You’ll also need to put in some work when using this budget-friendly wallpaper remover solvent. You can pair it with the best scoring tool and a scraping tool to supplement your efforts.

6. Bates Choice Scraper

If you’re planning to tackle a range of wall renovation jobs, consider this set of multi purpose scrapers from Bates Choice. This inexpensive dual pack comes with two metal scrapers to remove paint and wallpaper. The tool comes with a compact design, making it easy to work in tight spots like behind the toilet and underneath cabinets.

Bates Choice Scraper
Image credit: http://bateschoice.com/

The scrapers can also scrape windows and remove old adhesive leftover from decals or bumper stickers. Each scraper comes with a thick stainless steel blade and wooden handle. The dual edge blade is sharp and rust-resistant, making it ideal for sliding beneath wallpaper, even in damp and steamy conditions. The comfortable and sharp handle provides a soft grip to tackle long jobs with ease.

This wallpaper remover is made for multi-purpose use with a pointed end and a cut-out design to function as a go-to tool for home renovations. It’s also helpful in spackling drywall and removing crown molding to get walls back to tip-top shape.

7. Zinsser Paper Tiger Free-Floating Wallpaper Remover

With its three scoring heads, paper tiger free-floating wallpaper remover can perforate an entire room of wallpaper with ease. It has self-aligning heads that cover greater surface area than single head tools to finish the job in less time and with less effort. Paper tiger also has an ergonomic handle that can fit in the palm of your hand, making it easy to zip across the wallpaper surface.

While it can be a bit challenging to use paper tiger in corners, it still does a great job of quickly perforating large areas of wallpaper. You apply pressure and glide the wheels across the wall for a trail of tiny holes for effective wallpaper removal.

8. Spraytech 915 on-Demand Steamer

The Wagner 915 on-demand steamer is a handheld device that works as a steamer and a wallpaper remover. It’s called on-demand because it heats up instantly when you pull the trigger, producing steam immediately to remove wallpaper.

Once the trigger is released, the device cools down quickly to save energy and help preserve your wallpaper. With warm air and steam cleaner, this steamer can loosen the adhesive and lift the wallpaper without using any chemicals. This steamer cleaner is an essential household tool that you can easily adapt to remove wallpaper from plaster and drywall.

While it includes various attachments for different household cleaning tasks, you’ll be more interested in the wallpaper steam plate. You’ll then press the plate directly against the walls to loosen the paper. Making a few rounds with the steamer for wallpaper removal will take you some time, but it’s worth waiting for a chemical-free experience.

9. Husk Soft Grip Wallpaper Stripper

Wallpaper removal is a tough task, so householders need to have a powerful tool. This wallpaper stripper from Husk does the job effectively. The most impressive thing about this design is its top-loading boiler tank which ensures constant steam pressure for ease of use.

You can easily remove multiple layers of paper with this steamer within a short time. It features a replaceable blade securely held in a patented blade lock system with added tool-free blade changes.

With a 4-inch soft-grip handle, this wallpaper scraper is comfortable to hold and offers a safe, secure way to use the razor-sharp blade to peel back wallpaper. Its long handle provides additional leverage and proves useful when you’re working on hard-to-reach areas like ceilings and behind a radiator.

10. Roman’s Piranha Liquid Wallpaper Remover

When removing old wallpaper, you have to deal with both the paper and the adhesive. Some processes might help you bring down the paper quickly and leave behind an adhesive glue. In that case, try to use Roman’s Piranha Liquid Wallpaper remover.

This wallpaper remover is capable of dissolving wallpaper adhesives to give you a clean, smooth wall surface. Its spray bottle helps you quickly apply it to the wall without wasting too much of its contents.

FAQs about Best Wallpaper Removers of 2021

Do wallpaper steamers work?

Yes, wallpaper steamers use hot steam to soften the adhesive attaching the wallpaper to the wall. This makes it easy to peel and scrape away the old wallpaper.

What is the easiest way of removing old wallpaper?

This depends on the type of wallpaper you have. So, the ideal way to go about this is to know your wallpaper type; then, you’ll be able to use the tools of removing the old wallpaper.

Final Thought on Best Wallpaper Removers of 2021

Removing an old wallpaper doesn’t have to be an uphill task. Having the right tools and the required technology will help you do the job right and have a fresh new wall.

The post 10 Best Wallpaper Removers of 2021 appeared first on Kitchen Infinity.

13 Best Aqua Paint Colors for Your Home

13 Best Aqua Paint Colors for Your Home

We all know that interior design is a crucial part of home decor, but it can be hard to decide on the right paint colors. There are so many options out there, and you might find yourself overwhelmed with choice. You may also lack inspiration when trying to pick the perfect color for your walls or furniture.

Try out these bright, cheerful, muted, and relaxing aqua paint colors. Aqua paint colors are a hot choice right now and work perfectly in homes with modern, contemporary, or even rustic decor. Aquatic paint colors provide fresh feelings and look incredibly stylish.

This blog post will help you choose from the best aqua paint colors for your home. Each option has its personality and style, which makes it unique in its way. Read on!

1. Sherwin Williams Sea Salt

This shade of aqua is the most popular option right now, with its freshness and brightness. It can be used on walls or furniture to provide a contemporary feel to your interior design. It looks great paired with browns, blacks, greys, and whites.

If you’re looking for the best light aqua paint, Sherwin Williams sea salt is the right choice. With its rich colored accents, the green undertones in this light aqua paint shine through. Sea salt aqua paint color is perfect for any room, including bedroom, living spaces, and kitchens.

2. Benjamin Moore Jamaican Aqua

Jamaican Aqua paint color is one of the most popular aqua colors right now. With rich, bright blue undertones, this green aqua color will brighten up your living space instantly. Jamaican Aqua looks great when paired with white accent pieces and fabrics. This is a truly saturated color.


Image credit: https://st.hzcdn.com/

This shade of greenish aqua is the best choice for painting kitchen cabinets hardware, furniture, and the front door. Jamaican aqua is balanced perfectly between blue and green. Despite being vibrant and striking, Benjamin Moore Jamaican aqua is also relaxing and tranquil. It’s a good choice for bathrooms and cheery laundry. Plus, it’s the perfect blend of green and blue.

3. Sherwin Williams Comfort Gray

Comfort gray paint is one of the best aquamarine colors. This aqua paint color is made up of a gray undertone, making it the perfect shade for any room in your home. This aqua color is not too dark or heavy but also not too bright and vibrant. What makes this shade so unique are its warm gray undertones that make the aqua pop.

4. Behr Marina Isle

If you’re looking for the best dusty aqua paint colors, you’ve just found it. This color is perfect for a bathroom or laundry room to create a relaxing and restorative atmosphere. The best part about this shade is its ability to make the entire room feel more spacious, thanks to its blue-green undertones.

Behr Marina Isle
Image credit: https://www.behr.com/

This aqua paint pairs well with other muted tones such as beige and olive green. It works well in both large and small living rooms. Make sure you pick the bolder green accents to make this aqua hue pop.

5. Sherwin Williams Aquatint

A soft, light blue aqua paint color that makes your home feel clean and calm. This shade is perfect for a powder room, mudrooms, or even an accent wall behind the bed. This sea foam green shade would be beautiful in a guest room or master bedroom where you want to create a relaxing retreat space.

Pair it with white woodwork and a white tile shower for a crisp feeling. Sherwin Williams Aquatint is a versatile blue-based aqua suited for nurseries because of its cheerful nature. Light wood and crisp white trim would be perfect with aquatint for a contemporary bathroom and master bedroom.

6. Glidden Deepest Aqua

If you’re not afraid of trying deep bold colors, glidden deepest aqua is the right choice. This color is an excellent choice for almost every room. This rich, mermaid-inspired aqua is perfect for a playroom and an accent wall. Plus, it can pair well with other bright colors such as coral and pink.

7. Sherwin Williams Waterscape

Sherwin Williams’s waterscape is a soothing gray-aqua that is perfect for any living space. This color would be great in the bedroom or bath, because of its calm and serene nature. Adding watery blue curtains or an aqua rug could enhance this shade to tie the room together.

This refreshing aqua paint color works perfectly well in the home office and a kid’s bedroom. It is a great color for any room you want to add some youthful energy and calming feeling to it at the same time.

8. Benjamin Moore Palladian Blue

Palladian blue is a soft, muted aqua with blue undertones that works beautifully in airy, sunny living spaces and bathrooms. If you’re looking for a perfect blend of gray and blue with a calming effect, Palladian blue is your perfect combination.

Benjamin Moore Palladian Blue
Image credit: https://i.pinimg.com/

Add some little pigment to that small space using these aqua paint colors from Benjamin Moore. This soft aqua can add a little personality without becoming too intense.

9. Sherwin Williams Interesting Aqua

Sherwin Williams Interesting Aqua is bright with a little green in it. It’s like a bright teal and can be the perfect paint color for your kid’s room. It gives an impression of water, which makes it calm and soothing.

With its gray and green undertones, this unique aqua shade is a great choice of color for entryways, kitchen cabinets, and bedrooms. Interesting aqua adds the perfect dose of color without feeling juvenile and outdated.

10. Valspar Beach Blanket

Valspar Beach Blanket has gray and blue undertones, which means it is soothing like water and calming like the ocean. It’s probably not the best choice for your kid’s rooms, although you might want to try it, it can be great in bathrooms since they are usually small spaces that need something light and calm.

If you love green and beach-inspired vibe that much, then this aqua hue is a great choice. It’s a warmer aqua than others, making it a great paint to pair with neutral beiges and yellows.

11. Sherwin Williams Tame Teal

Sherwin Williams Tame Teal is one of the many sophisticated hues that come in this shade family. It has brownish undertones, which means it’s calming and cozy like the ocean at sunset. When paired with lighter tones, painting your bedroom and office space makes your room feel modern and updated.

Sherwin Williams Tame Teal
Image credit: https://i.pinimg.com/

Make a modern, contemporary girls’ room with a feature wall painted in tame teal and decorated with golden circles. This beautiful green, blue aqua paint looks excellent in the front door, kitchen cabinets, and tray ceiling as well.

12. Benjamin Moore Quiet Moments

Quiet moments from Benjamin Moore is an aqua paint color that leans more toward the green side of things with a good bit of gray undertone to it. If you’re looking for aqua paint colors to incorporate in your kitchen and dining room, Benjamin Moore quiet moment is one of those aqua paint colors you should never let go of.

13. Benjamin Moore Caribbean Breeze

Benjamin Moore Caribbean Breeze is a cool aqua hue. It’s a romantic color paired with warm colors like oranges and yellows to create a fun girls’ room painting. This soft aqua is also a wonderful choice for a space that has less than ample natural light. With its inner glow, the Caribbean breeze can light up a room regardless of its size.

FAQs on Ten Best Aqua Paint Colors for Your Home

Is aqua warm or cool?

Aqua is a color that lies somewhere in the middle of the spectrum. It’s best to think of aqua as its category and not associate it with any particular warm or cool family.

Is aqua paint easy to work with?

Yes, aqua paint is easy to work with as long as you know how to pick the right paint for your space. It’s important to realize that just because a trending color doesn’t mean it will work in every room. Aqua requires a cool or neutral backdrop so it can shine as its statement.

Final Thought on Best Aqua Paint Colors for Your Home

As you can see, aqua paint colors are trending big time. And their popularity is well deserved. Aqua paints are lively, calming, and refreshing all at the same time. Plus, they go with just about any color palette you can think of, so there’s no shortage of options when it comes to decorating with aqua hues. So, if you’re struggling to choose paint colors, aqua paint is for you.

The post 13 Best Aqua Paint Colors for Your Home appeared first on Kitchen Infinity.

Did you miss our previous article…
https://www.thelavkitchen.com/?p=429

Types of Flat Roof Material Options

Types of Flat Roof Material Options

Flat roofs are the most economical type of roofing. They offer great protection to your home or commercial building against weather elements while keeping the building’s interior dry and warm. Although flat roofs provide you with a lot of benefits, they also have their disadvantages.

Therefore, knowing what type of flat roofing material you’re going to use when building your own house is very important. This will help you make better decisions about maintenance and replacing an old flat roof system. It will also help you communicate and relate better to potential roofing contractors as you’re looking for the best roofing company for your project.

Here are the most common types of flat roofs:

Build Up Roofs or BUR

Build-up roofs or BUR type of flat roofs consist of a series of layers applied over the substrate. These layers, usually asphalt and felts, are necessary for getting watertight protection from your roofing system. Like other types of roofs, these systems will last you a long time if you do regular maintenance on them and get rid of any moisture build-up.


Image credit: https://www.homeadvisor.com/

Bur flat roofs are often referred to as tar and gravel roofs. They’re made of layers of materials bonded together by asphalt tar and hot tar to a liquid state and then mixed with gravel to ensure the mixture maintains its strength and durability.

This flat roof material option has solved the low-pitch roof problem for ages, a challenge that asphalt shingles could never handle. If you’re also concerned about fire safety in your building, then built-up roofings can meet higher fire ratings.

Pros of Built-Up Roof

Safety Against Fire

Built up roofings are known to be more rugged than other flat roof material options. They provide greater protection against heavy snow loads and high winds. Since they can handle these weather conditions, you don’t need to worry about damages, leaks, or breakage.

Most of all, built-up roofs are very safe against fires because their layers are made of non-combustible materials. They won’t increase the risk of fire or suffocate it completely.

Longevity

Built up roofings last longer because of the thick layers and the waterproofing materials used. This means you will spend less on maintenance and repairs for your roof.

Multiple layers also prevent leaks and tears, thanks to their heavy-duty construction. It won’t turn into a major problem that requires replacement or extensive repairs when a leak arises since you can spot it easily.

Cons of Built-Up Roof

Weight

The main downside to a built-up roof is its weight. It’ll be difficult for you to install one yourself because it will require a lot of time and effort to lift all those layers, particularly if you need to reach high altitudes. The materials used are also heavy, such as the gravel that’s designed to protect against fire.

Modified Bitumen Roofs

Modified bitumen roofing looks similar to built-up roofing, only that they use a single layer of adhesive roofing material, making it feasible for DIY installations.

Modified Bitumen Roofs
Image credit: https://coxroofing.com/

Modified bitumen roofs are only made of two layers and piles. These include a base sheet and a cap sheet. Both base waterproofing layer and a surface layer bonds to a material that resembles regular asphalt shingles.

dvantages of Modified Bitumen Roof

esthetics

You can find a number of modified bitumen roofing designs that mimic the traditional asphalt shingle roofs. This means that you can easily select a variety of materials to match your building exterior, which may have parts covered by asphalt shingles.

Easy to Install

The installation process of modified bitumen roofing is relatively the same as traditional asphalt shingles. This also means you can easily find a contractor for this project.

Insulation and Energy Efficiency

Because of its dark color or black, modified bitumen roofings absorb heat from sunlight. This makes it more energy-efficient than traditional roofing materials such as metal roofs that reflect this heat to the environment.

Cons of Modified Bitumen Roofs

Torch Down Systems

The torch-down systems can be a fire hazard. That’s why it’s not recommendable to install torch-down modified bitumen roofs on occupied buildings.

Durability

Another downside of modified bitumen roofing is that it’s not as durable and resistant to foot traffic and blown debris as other flat roofing materials. They also last about 10 to 20 years before they need to be replaced.

Fragility

These flat roofing materials are very fragile compared to other roof types, which are more resistant to hail and falling branches. When installers try to walk on your roof to put it in, it’s more fragile to break down.

EPDM Rubber Roofing

EPDM rubber roofing is an affordable solution for flat roofs. It’s also designed to last many years without the need for repairs or replacement, but it can get damaged by severe weather conditions like strong winds and hail. EPDM is a very durable synthetic rubber roofing membrane.

Rubber roofs are easy to recognize and are installed in two basic ways: ballasted or weighted down with a smooth river stone and adhered or glued down. The adhered rubber roofs are easy to spot since they’re black and are stretched over an insulation board or fiberboard.

Pros of Rubber Membrane Roofs

Easy Maintenance

Leaks in the rubber membrane roof can be easily repaired at a very cheaper price. Finding these leaks is also easy and straightforward.

Easy Installation

The rubber membrane material comes in a large single-layer roll, making it easy for the roofing contractor to work with. Thanks to its elastic and flexible nature, you also don’t have to use blowtorches to seal the seams together.

Resistance to Elements

The rubber is elastic, meaning it will naturally expand in the summer and contract in the winter. It can also withstand extreme temperatures without wear. Plus, rubber is fire retardant and naturally impact resistant.

It’s Affordable

The average installation price per square foot is around $2.50, making it more affordable than flat roofing systems.

Cons of Rubber Membrane Roofs

Shrinkage

While expandable, the rubber does shrink through time. This may lead to insufficient sealing and leaks, which will cost you additional money for repairs and maintenance. If left untreated, it could also cause damage to your other roofing systems, such as the flashing and insulation. It’s also harder to patch up compared to other materials like TPO or PVC.

Thermoplastic Membranes PVC or TPO

A thermoplastic roofing membrane is a more durable roofing system compared to rubber membrane roofs. It will be white or grey, but it can also come in other colors. There are two types of thermoplastic membrane roofing. These include polyvinyl chloride PVC and thermoplastic olefin TPO.

Thermoplastic Membranes PVC or TPO
Image credit: https://www.chaffeeroofing.com/

PVC roofing is the third most-produced synthetic plastic polymer. It’s also easy to install, thanks to its flexibility. If you’re looking for the sturdiest membrane among the two, then PVC is the right choice. On the other hand, TPO roofing is considered a more eco-friendly variation of the thermoplastic membrane roof. It’s best at UV absorption and flame resistance.

Pros of TPO Roofing

Cost-Effective

Like PVC roofs, TPO roofs come in at a more budget-friendly installed cost of about$3.50 per square foot.

Energy Saving

White coatings can reflect heat and keep the surface temperature lower than that of a dark roof.

Easy Maintenance

You don’t have to pressure wash this roofing material because the single-ply roof membrane’s surface is laminated. It’s very difficult for algae and fungus to grip in.

Lightweight Material

With its single-ply nature, this lightweight material can perform well over low slopes. It weighs an average of half a pound per square foot, making it an excellent choice for older structures that cannot withstand the pressure and load of a built-up roof.

Cons of TPO Roofing

Takes Longer to Install

You will need to order new tools for this product, but don’t worry, it is still a far less expensive material to install than metal roofs.

Spray Polyurethane Foam Roof

A spray foam roof begins with a layer of high-density polyurethane foam sprayed from a wand or sprayer. After that, the contractor will spray a layer of waterproof elastomeric topcoat. This roofing type will often have a grey or white finish.

Spray Polyurethane Foam Roof
Image credit: https://www.americanweatherstar.com/

Pros of Spray Polyurethane Foam Roof

Easy to Install

This type of roof is very easy to install. You can expect to pay about $1.15 per square foot for this type of foam roofing material without topcoats.

Cons of Spray Polyurethane Foam Roof

Expensive Top Coat

The downside to this type of roof is that it is the most expensive to install. Some homeowners have also reported having problems with bubbles after installation.

Metal Flat Roof

This type of roof is a great option if you want a long-lasting solution. The metal roofs come in many different colors and styles so that they can blend in with your home’s exterior design. Metal roofing thrives in dry, warm climates.

Metal Flat Roof
Image credit: https://roof-experts.ca/

The most used material is always aluminum because of its malleability. You can also choose other metals such as tin, copper, steel, and zinc.

FAQs on Different Types of Flat Roof Material Options

What is the best material to use for flat roofs?

This will depend on your budget and style, but PVC roofing is considered the best flat roof material.

What type of roof is a flat roof?

A flat roof is a roof that is almost level with many types of sloped roofs.

Final Thought on Different Types of Flat Roof Material Option

As you can see, there are several types of flat roof material options available. These flat roofing offer a few perks that even commercial building owners can enjoy. Before making any purchase decision, make sure you consult with a reputable flat roofing contractor so you can make the best choice for your house.

The post Types of Flat Roof Material Options appeared first on Kitchen Infinity.

Did you miss our previous article…
https://www.thelavkitchen.com/?p=423

17 Best Christmas Decorations

17 Best Christmas Decorations

Christmas is one of the most wonderful times of the year, but it can also be stressful for many people. It’s a time of year when it’s not always easy to get into the holiday spirit. The stress of getting everything ready for the big day can get in the way, and you might even miss out on some family fun along the way.

Finding the best Christmas decorations doesn’t have to be difficult or expensive. There are loads of great ways that we can help you enjoy your Christmas festivities this year. We’ve put together a list of the best Christmas decorations to ensure your home looks stunningly festive all through December. Read on!

1. Ceramic Christmas Tree Decorations

Finding the best Christmas decorations doesn’t have to be difficult or expensive.   You can opt for a green tree or bring a modern twist on the trend with a rose gold tree. The tree boasts removable and rearrangeable Christmas lights and tree toppers.


Image credit: https://i.pinimg.com/

Inside the ceramic structure, you’ll find a light bulb to provide a Christmassy glow. Kids love this Christmas decoration, and it’s sure to add a soft, warm light to any corner of your house.

2. Kurt Adler Christmas Decoration

The Kurt Adler Christmas decoration provides a bit of glitz and glam without being too over the top. This Christmas tree will become the most festive item in your house, and the perfect tree topper makes all the difference.

This best Christmas decoration won’t break the bank but will provide all the gold glitter needed to shine all season. The intricate die-cut pattern will let the light from your LED lights shine through for an impressive glow that fills the whole room.

3. Inflatable National Lampoon’s Christmas Vacation

This is a great decoration for those of us who work hard all year to enjoy a good time at Christmas. The inflatable presents and the large Griswold family all make this themed decoration one worth having. If you’re looking for interior Christmas decor, then this is the right choice.

4. Plush Christmas Gnome

These plush Christmas gnomes are perfect for kids. With the soft fabrics and cuddly characters, this is an interior decorating set that will make your child happy all season long. The plush isn’t just cozy; it’s also detailed with festive colors and patterns to keep them in a holiday mood from morning until night.

Plush Christmas Gnome
Image credit: https://m.media-amazon.com/

5. Pottery Barn Nottingham Faux Fur Plaid Throw

This is Pottery Barn’s best-selling plaid throw. It’s warm, luxurious, and the design with reindeers will fit in perfectly with your holiday decorating scheme. This faux fur rug can be used during all four seasons of the year to create a cozy atmosphere inside your home.

It’s made of 100 percent polyester, and Oeko-tex certified with faux fur on the other side. It doesn’t have any harmful chemicals and dyes. You can easily clean this festive throw pillow in your washing machine, and the product’s high yarn will retain its color after washing.

6. Advent Calendar

This wooden advent calendar is of notable quality, and it’s also very fun to build. Christmas countdown has never been so exciting before. This product features 24 pieces that you will have to put together to get the final product.

Once you’re done building this ultimate festive decoration, your home will feel like Santa’s workshop with its numerous hanging bells and baubles hanging everywhere. It’s simply not Christmas without an advent calendar counting down the days until Santa’s arrival.

7. Sea Team Christmas Ball Ornament Set

Preserve your holiday memories year after year with this set of 24 round decorations. It features a variety of designs, including reindeer, Santa hats, and snowflakes. Very festive and charming, the Ornament set is a versatile and affordable collection that will make your holiday feel infinitely more special.

Ornaments come in 86 sets, and each ornament set is crafted from eco-friendly shatterproof plastic. The sets come in 10 different colors, and each contains a similar pattern from glitter coated to mirror to design with small snowflakes. They’re great for a completely monochrome tree, and you can also buy a few packs to switch up your color scheme.

If you’re looking for a non-traditional feel, opt for pink or purple instead of the classic, red and green. But if you’re looking to mix up your ornamental bulbs and brighten up your tree, then this is the best Christmas decoration you should consider.

8. West Elm LED Light Bulbs

The best Christmas decoration of the year doesn’t necessarily have to be on top of your tree. If you want something more subtle that can provide some low-level lighting, then West Elm’s LED Light Bulbs is an economical and easy option to do this. They also come in a four-pack, so you can have some on the string or spread out around your house.

West Elm LED Light Bulbs
Image credit: https://christiannkoepke.com/

This Boxwood wreath from West Elm offers the perfect base for ribbons, ornaments, and lights. It’s made from real boxwood leaves and artificially preserved, and it comes in either 16 or 20 inches and should be used indoors to maintain the vibrancy of the green. The charming wreath can add rustic flavor to any home.

If you’re looking for that joyful country feel during the festive season, then place this beautiful Christmas decoration on the brick wall or a window and enjoy the view.

9. Mina Victory Van Holiday Square Throw Pillow

Add a touch of holiday cheer to your home by placing this festive pillow on your couch or chair. Featuring a vintage map design and hand-drawn illustrations of cities, countries, and continents across the globe by New York artist Mina Victory, this throw pillow brings an interesting touch to any space.

It’s a great piece, especially if you’re working on a tight budget. It features a carefully stitched scene of a bright green Christmas tree and cherry red Volkswagen against a cream-colored backdrop. Plus, it’s a hand-hooked throw pillow that will spark joy and holiday cheer in your home.

10. Kunyida Unique Burgundy and Ivory White Knit Christmas Stockings

A set of three handmade knit stockings with burgundy, ivory, and white coloring. This is the perfect addition to your holiday decor this season because it can be used throughout the year to hold odds and ends around the house or even as a delightful accessory for an outfit.

If you’re looking for something stylish to leave for Santa and Christmas Eve, these stockings are the way to go. With the cable pattern and rich colors, these stockings are both affordable and high quality.

11. LTD Commodities Set of 6 Reindeer Tea Light Holders

A set of six reindeer tea light holders. These adorable animal candle holders will be a hit at your next holiday party, and they’ll make any occasion special. Each reindeer is made with care and precision to provide years of quality use. The antlers are removable, so you can easily pull them off for cleaning purposes, although we don’t recommend letting them get too dirty.

These woodland reindeer tea light holders are great for buffet tables, side tables, bookcases, and any place that could use a touch of ambient candlelight. If you’re worried about having an open flame around kids, they can hold any standard tea light, including LED tea lights. Their simplistic design will also fit any aesthetic.

12. Hanging Snowflake Decorations

Try to turn your living space into a winter wonderland with these hanging home decorations. The snowflakes are made of high-grade pearl paper, giving them an enticing shimmer, and are sturdy enough to pack up for next year. You can hang them on a window, entryway, and across the dining room table to create a wintery holiday backdrop.

Hanging Snowflake Decorations
Image credit: https://i5.walmartimages.com/

13. Hashtag Home Snowman Globe with Penguins Inflatable

Add some holiday spirit to your front yard with this inflatable snowman from Hashtag. The large inflatable measures 8 feet tall, making it a great central character for an outdoor holiday scene. The snowman features an unusual but fun snow globe base. At night, switch on the LED light to illuminate the snow globe feature.

14. Outdoor Waterproof Flameless Candles with Timer

These flameless candles feature a realistic flickering flame and come in an elegant jar that can be used to decorate your fireplace for the holidays. With its waterproof exterior, this candle is great for outdoor use as well. Just put it on your covered patio or porch or by the poolside. It also comes with timers so you won’t have to worry about turning it off after the holidays.

These candles are an excellent choice to place on the dining table, credenza, windowsill, and outdoors. For more convenience, they come with a remote control to enable you to light up your Christmas display from across the room.

15. Roman Store Winter Scene Glitterdome

If you’re looking for a high-quality resin that you can use for several years, this is the one for you. With its LED lights, it can last up to 2000 hours without burning out. What’s more, the cardstock it comes on is fade-resistant and waterproof, so you don’t have to worry about inclement weather damaging your Christmas scene.

16. National Tree Company Pre Lit Artificial Mini Christmas Tree

If you’re in a tight space, then a mini Christmas tree can get you in the holiday mood without taking too much of your room. This pre-lit artificial mini Christmas tree from National Tree Company is ideal for bedrooms, dorm rooms, and apartments. This small tree comes ready and features built-in warm LED lighting to add to the holiday charm.

17. Pre Lit Frosted Berry Garland

The best way to add some holiday cheer. This pre-lit Christmas garland is an attractive choice for lining doorways, windowsills, and mantels. This realistic-looking Christmas decor is made from thick faux branches, pine cones, and red berry details to ensure your decor remains sturdy throughout the holiday season. Warm white lights also add a seasonal glow, making it a great addition indoors or outdoors-covered locations.

FAQs on the Best Christmas Decorations

Where should you buy Christmas decorations?

You can buy Christmas decorations from many market sites such as Amazon, Wayfair, and Walmart. Also, during colder months, you can never run short of these Christmas decorations, as many small shops will unveil their inventory once the fall rolls.

Can you make Christmas decorations?

Yes. Homemade Christmas decorations are simply adorable! Many people prefer to go the homemade route to save money and make their designs which is much more than you can ask for.

How long should you keep Christmas decorations up?

This differs just like any other decoration that hangs around your house for many days or weeks. However, it is best to follow your heart. If you do not like having the decorations up, then take them down.

Final Thought on the Best Christmas Decorations

As you can see, there are many best Christmas decorations that can please anyone. It just depends on your taste and your budget. Spice up your festive season with these creative ideas, and have a wonderful time.

The post 17 Best Christmas Decorations appeared first on Kitchen Infinity.

Did you miss our previous article…
https://www.thelavkitchen.com/?p=418