
You want to change the look of your home by a simple act such as replacing a door. But you don’t have time or money for a professional installation. Installing a new interior door can be simple once you know how to do it. The key is knowing what tools and materials are required and having the right safety gear on hand.
We’ll walk you through each step of the process so that hanging your doors will be easy as pie. No matter whether your project requires one or two doors, we’ve got all of the instructions, tips, and tricks it takes to get them hung safely and securely in no time at all.
Our guide includes everything from choosing hardware to cutting out holes for knobs and locks. And we even show you how to install decorative molding around your new door’s frame if desired. With our handy checklist at hand, there’s no reason why anyone should struggle with hanging doors ever again.
Required Tools and Materials
Sharp chiselScrewdriverUtility knifePencilHandsawTape measureDoor slabElectric or smoothing planeSpirit levelWooden Shims
Steps on How to Hang a door
Remove the Existing Door
If the old door has a transom, remove it from its hinges before you begin to hang your new door. If there’s an old lock in the way of your new slab, position the chisel where it meets the jamb and tap lightly with a hammer until you can knock out the plug by hand. Place wedges of wood underneath your old door to support the jamb while you work.
Image caption: https://www.wcmanet.org/
Then unscrew it from its hinges and remove it from the opening. If your hinge is still in good condition, you can set them aside for reuse. Be careful not to damage the hinge recesses in the jamb while you remove it. Also, don’t hang a new door in an old door frame, or you’ll end up fixing a sagging door in the future.
Measure the Space for Your New Door
Move on to measure the space for your new door. You can use a stud finder to locate the framing members to make sure that you can secure the hinges into place. Be sure that you center it evenly across the opening and between both jamb edges.
The old door can also guide you, as you can lay it on the new one and mark where you’ll cut the new door with a pencil. You can work with someone to help you position the door in the door frame and level it.
Get the Floor Level
Take your spirit level and check to see if the threshold on your new door is level with the floor. You can use a pencil and mark the high and low points where needed. If the floor is finished but not leveled, then you’ll need to trim one of the door jambs.
Use shims to position each door jamb evenly against the floor. Mark the shim at the point where the gap is big using a sharp pencil. Measure the thickness of the shim as that measurement is what you’ll need to cut off your door jamb from the opposite side. You can also learn how to level a floor so you avoid any such future problems when hagging a door.
Mark the Hinges
The hinges on a door are usually placed at 1/3 of the total height from the top. Mark the point around the edge of the door, as well as where you will want to hang your new hardware on both sides. Use a sharp pencil to mark clear lines on both the lining and the door.
Once you’ve marked all the hinge positions, remove your door from the lining, place it in the saddle, and wedge it. After that, hinge the side up, square all the pencil lines, and hinge it to the opposite side. Use a straight edge and level to ensure that your door is completely square and plumb. Use shims under either side of the hinges to adjust for deviations, then tack each hinge in place with nails only along the top line.
Place the hinge to mark its length on the door’s edge. Slide it up to the line and mark the first hole. Set your marking gauge up and scribe the width of the hinge into the door edge. Use a sharp Stanley knife to ensure your door won’t always close flush. You can repeat to ensure all hinges are positioned and set the gauge to the same thickness as the hinge between the door and the frame.
Chop the Hinges Out
Use a sharp chisel to chop your hinge horizontally from the top and bottom. Sand, the remaining pencil lines, then drill correct pilot holes for your screws. You can also use a mallet to cut around the perimeter of the hinge recesses you’ve marked. By placing your chisel at 45 degrees, make several cuts apart and to the depth you’ve marked across the wood grain. Put the flat side down, then use the chisel to pare away the wood as you position the hinges. Drill all the holes and ensure one screw gets into each hinge flap.
Trim the Bottom
This is where you’ll need an electric plane or circular saw. Only use them if you need to remove a lot of trims from the bottom. You can as well score your door with a sharp Stanley knife before cutting the bottom to the angle you have designed. This will prevent your door from tearing.
Hold the Door Steady
Now it’s time to attach your wooden blocks on the sides of your interior door to the wall. Place your door in the middle of the space and check the level. Use the spirit level to ensure that your door is even on both sides, then mark where you need to drill the wooden blocks into the wall. Make sure the jambs are resting on the blocks to maintain the correct height.
If the jambs aren’t in the correct position, cut or plane the door using a saw or a block plane. Check if the hinge side of the door is plumb by using the level. If the hinge side of the door is plumb, attach the blocks by hammering 2-inch, 15 nails through each block on the hinge side and into the wall. Check if the gap between the side of the door is even, then do the same for the blocks on the latch side.
Ensure Your New Door will Shut
Now that your door is held in place make sure it will close properly. All you need to do is take out the plug that holds the door slab, then open and close the door as you carefully watch the gaps. If the jambs aren’t in the correct position, cut or plane the door using a saw or a block plane.
If one part is hitting the door, stop first and make sure you adjust the door jamb before you proceed. Move the jamb from the top to the bottom until the problem is solved. If there’s no gap between top and bottom, use a belt sander or plane to create a small gap.
Place Shims Behind the Hinges
If the hinge is too close to the floor, you’ll have a hard time opening and closing them. To avoid this, put a shim behind each hinge. Your door may not stay open by itself because its hinges aren’t level with each other. You can solve this dilemma by popping out the cover on one of the hinges and moving it to a level that aligns with the other.
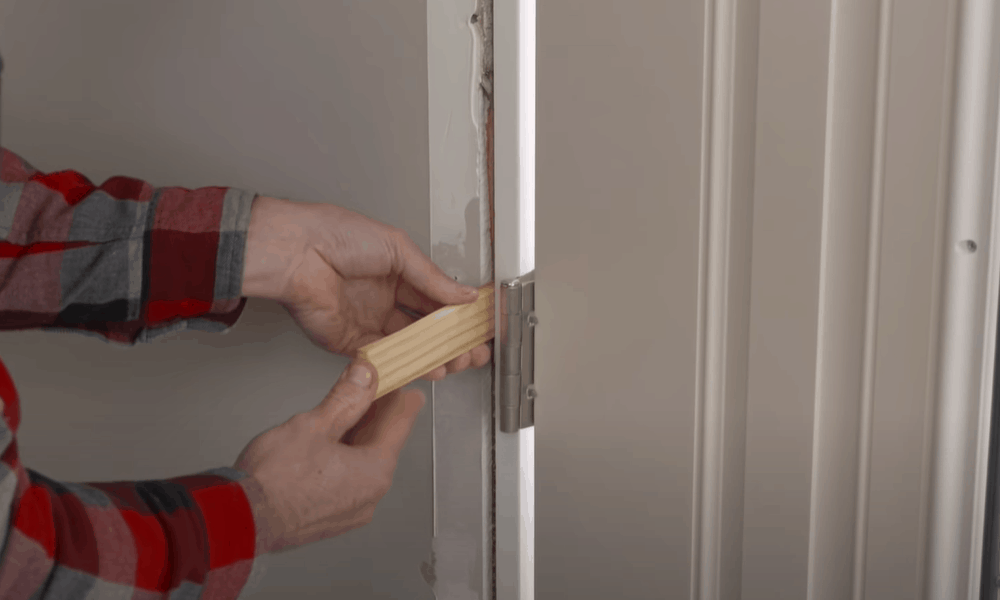
Image caption: https://www.wcmanet.org/wp-content
After unscrewing and removing the middle screw from each hinge, put a shim behind the hole. Then check your jamb door if it’s still level. If it’s not, add the shim until you get a level door. Check if your door jambs are level with the wall. Check the gap between the slab door and door jambs if they’re still even. Double-check to ensure the gap between the door stop and slab is also even. You don’t want to come back here to learn how to fix a misaligned door, right? That’s what will happen if you skip this step.
Screw the Hinges
Start with the hinge plate at the top of the door. Move to insert a screw into the hole nearest the bottom of the plate, then tighten it. Repeat the same way with the lowest hole on the hinge plate at the bottom of your door. Open and close your door to ensure it works properly. Once you’ve set the hinge at the top of the door, put a level on top of your slab door and make sure it is perfectly even. You may need to adjust the height of the hinge plates if one side doesn’t line up with the other.
Mount the Latch and Doorknob
If your door frames have a strike plate, then measure how far it’s from the floor and measure the corresponding position of the door. You can also prevent your interior doors from slamming in high winds by enforcing the latch plate. All you have to do is to drill a bit and countersink a hole in the top corner of the space for the latch plate.
Make sure you position your hole away from the edge of the frame. You need to drill a hole in your door that matches the size of your latch plate. Then, position both pieces of wood together while you’re sure they’re level and mark exactly where you need to drill holes.
Remove the Blocks and Hang Your Door
Now that your door can open and close smoothly, the next step is to remove the blocks you have used to prop the door up. Follow the instructions that came with your door for this part of the installation. Use the nails and filler to cover any holes that you made.
Now, find out how to hang a door. Hold your door open on the wedges, and then screw the screw to the hinge using only one screw at each stage. Lift your interior door out of the clamp to give it a frame at a slight angle, then begin by screwing the top hinge to the lining.
FAQs on How to Hang a Door
Can you hang a door without a door frame?
Yes, it’s possible as long the frame is in good condition and not warped or worn out. The door frame doesn’t come with hardware attached; instead, you can either reuse the old frame hardware or replace it with new hardware in the new slab. But a pre-hung door comes set in a frame.
What is a pre-hung door?
The pre-hung door is the package of a door with its frame attached to it. You can hang the new slab on your existing door frame using three basic tools: drill, screwdriver, and hammer.
Can you hang a door on drywall?
Yes, but interior doors should be installed after the drywall is installed. This is because the drywall needs to be secured by nails if you intend to hang door slabs. If not, the door will not hold its weight and may eventually come crashing down, which can cause damage to its hardware, like hinges and screws.
Hanging your door after installing the drywall will make your doors stay cleaner and prevent any scratches and dents on the door surface.
Final Thought on How to Hang a Door
Hanging a door by yourself is much easier, especially if you’re using wooden blocks to hold the door in position. You don’t need any additional support. So, it’s something you can do on your own. If you have any questions, don’t hesitate to leave a comment below, and we’ll get back to you as soon as possible.
The post How To Hang A Door appeared first on Kitchen Infinity.
Did you miss our previous article…
https://www.thelavkitchen.com/?p=445