Do you have a rocky landscape and are looking for something to grow there? Consider growing perennial plants that can withstand your soil and harsh conditions. Rock garden plants are non-demanding plants that can grow easily in your rocky landscape.
These plants are also drought-tolerant, and any poor soil conditions or extreme heat won’t stop them from making a colorful splash in your rock garden. As long as there’s good drainage, these plants will thrive and elevate the hardscape look provided by gravels and rocks. Take a look at these best rock garden plants.
1. Rock Cress
Rock cress is an evergreen perennial that grows to just 12 inches high. It makes a nice edging plant with narrow leaves and blooms in late winter through spring. Its clusters of pink or white flowers make this creeper plant beautify any rock garden.

Image credit: https://www.gardenia.net/
Both full sun and partial shade are accepted by rock cress, but well-draining soil is highly needed. It can be grown in any soil type except for water-logged conditions. Rock cress is also a hardy plant that matches rock garden aesthetics and requirements.
2. Thrift
Thrift is also known as sea pink, native to the coast of Great Britain. This evergreen perennial grows 1 foot high with grassy green foliage and flowers that last for a long time. It can be planted in a rock garden due to its small size.
This is a low-maintenance plant that you don’t need to worry about much. Like other perennials, this sea pink plant prefers well-drained soil because poor drainage can cause rot issues.
3. Blue Fescue Grass
Blue fescue is ornamental grass and is suitable for rock gardens and small spaces. This grass type can trail or cover the ground, making it a perfect choice to spread around rocks of any size. It produces its best foliage in full sun but can also tolerate a little shade.
4. Creeping Phlox
This plant produces clusters of small flowers which are pink in color. The creeping phlox can grow in rock crevices with minimum maintenance. It is a perfect ground cover if you have an area that gets at least four to five hours of sun each day. It grows well in sandy soil and can tolerate heat and drought better than some other phlox species.
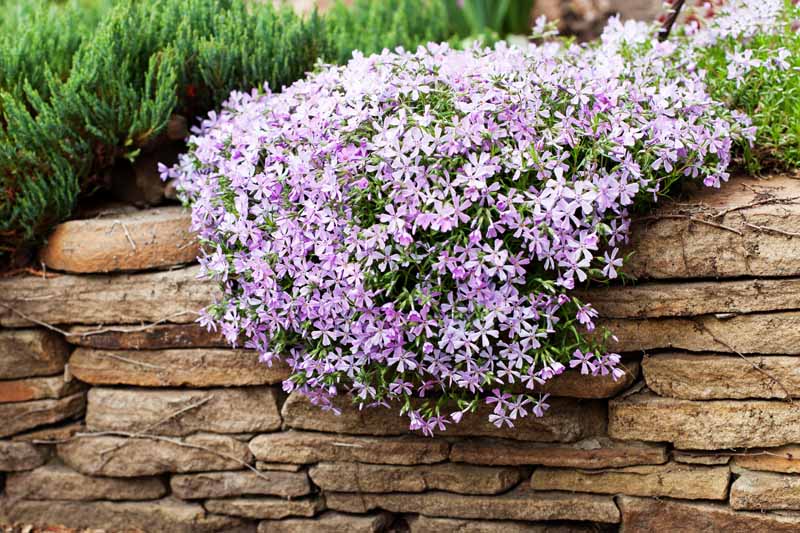
Image credit: https://gardenerspath.com/
5. Sedum Autumn Joy
This versatile perennial is perfect for your rock garden. They’re drought tolerant and adapt well to full sun and part shade, which means they’re suitable for any area of your yard or garden. It blooms bright yellow flowers in late summer through mid-fall fall and does best in well-draining soil. With its height and density, sedum autumn joy is a suitable substitute for shrub.
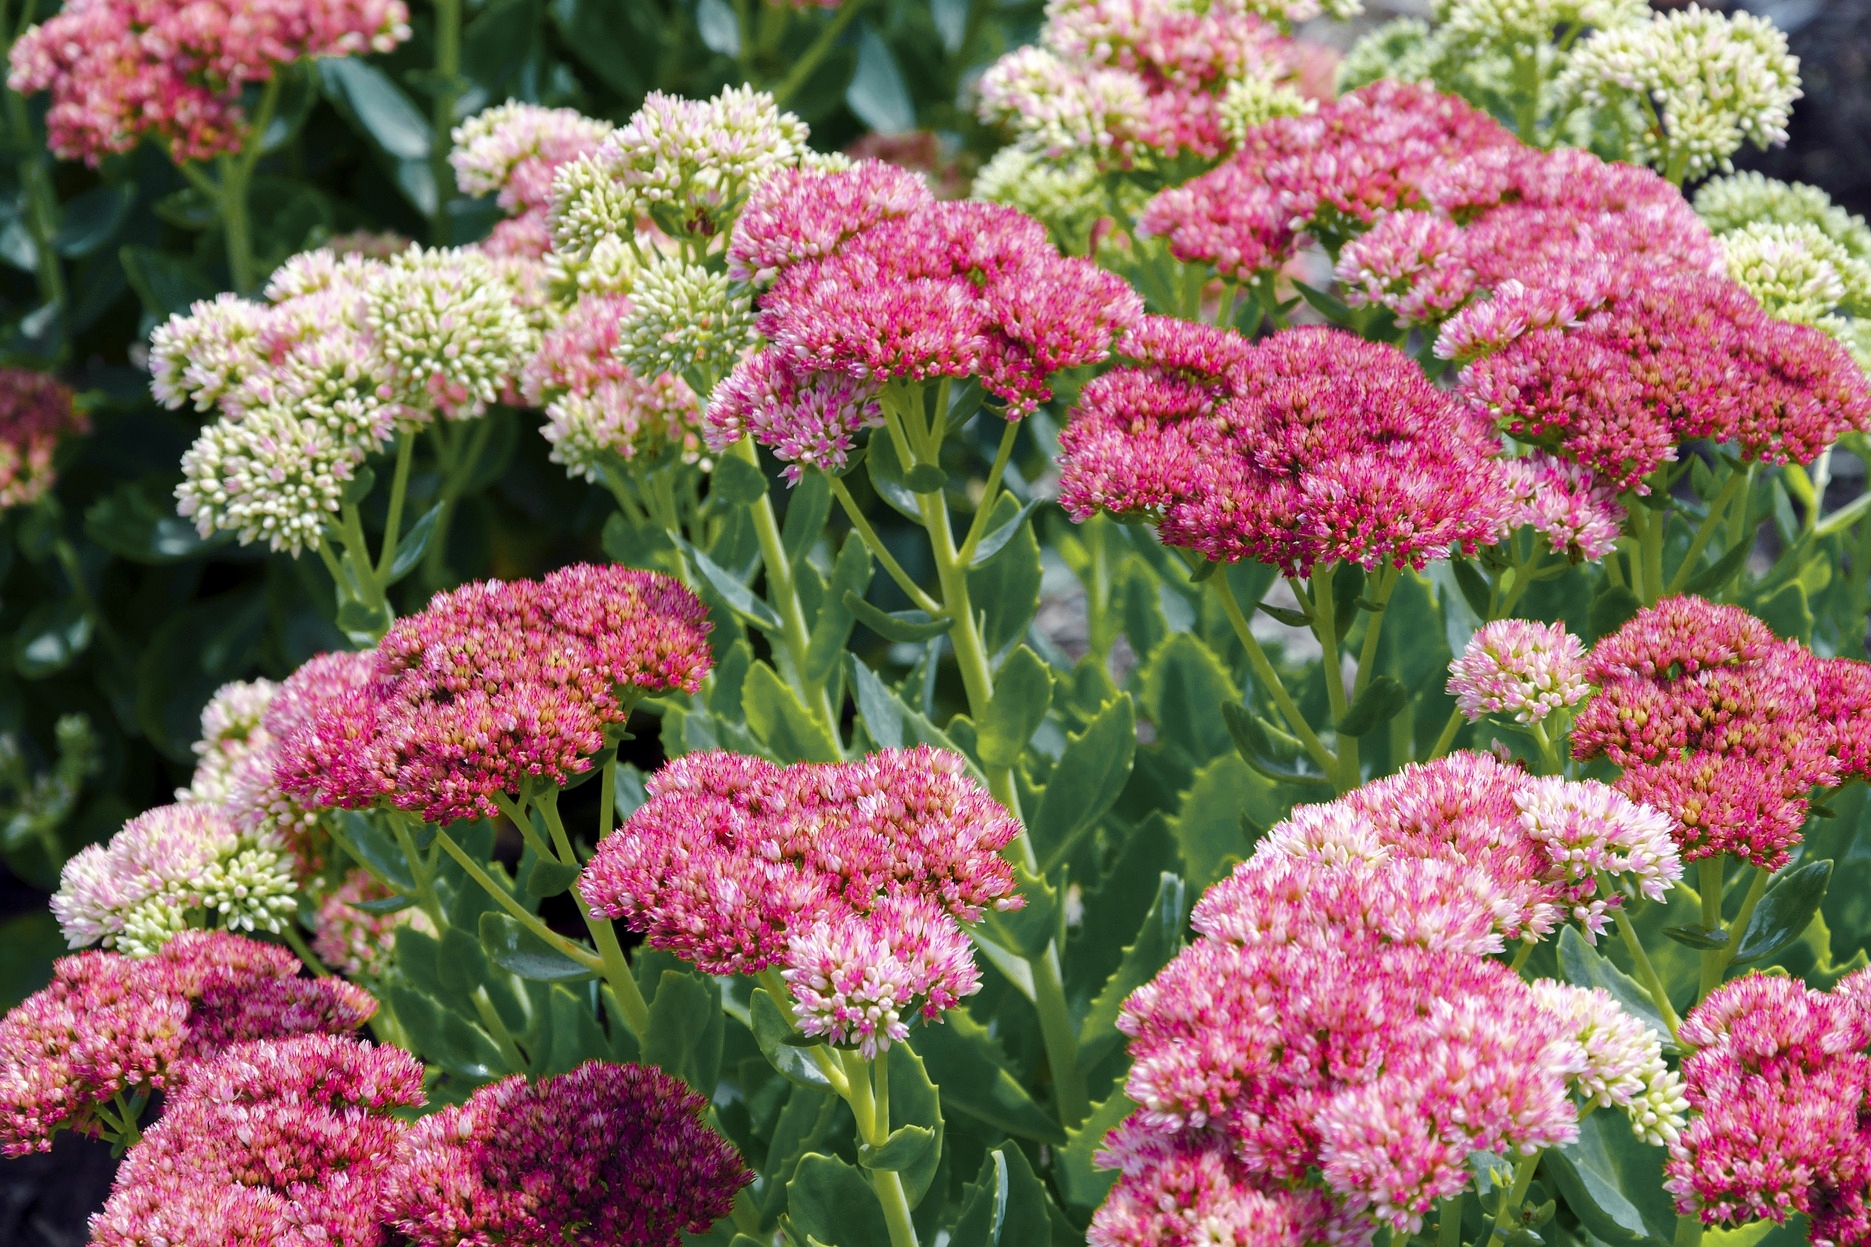
image credit: https://www.almanac.com/
6. Russian Sage
This fragrant flower is a good choice for rock gardens and other low-maintenance garden beds. It tolerates drought and heat well and forms blue, white, or purple flowers from mid to late summer. The fragrant leaves emit a strong scent as they warm in the sun, making them a great addition to outdoor spaces.
/how-to-grow-russian-sage-1402795-hero-f437971649e4482e82badf89e598d723.jpg)
Image credit: https://www.thespruce.com/
7. Red Creeping Thyme
Another beautiful choice for rock gardens, this low-growing plant is hardy, drought-tolerant, and spreads out to create a nice ground cover. The flowers are pink in the summer, with their leaves being evergreen.
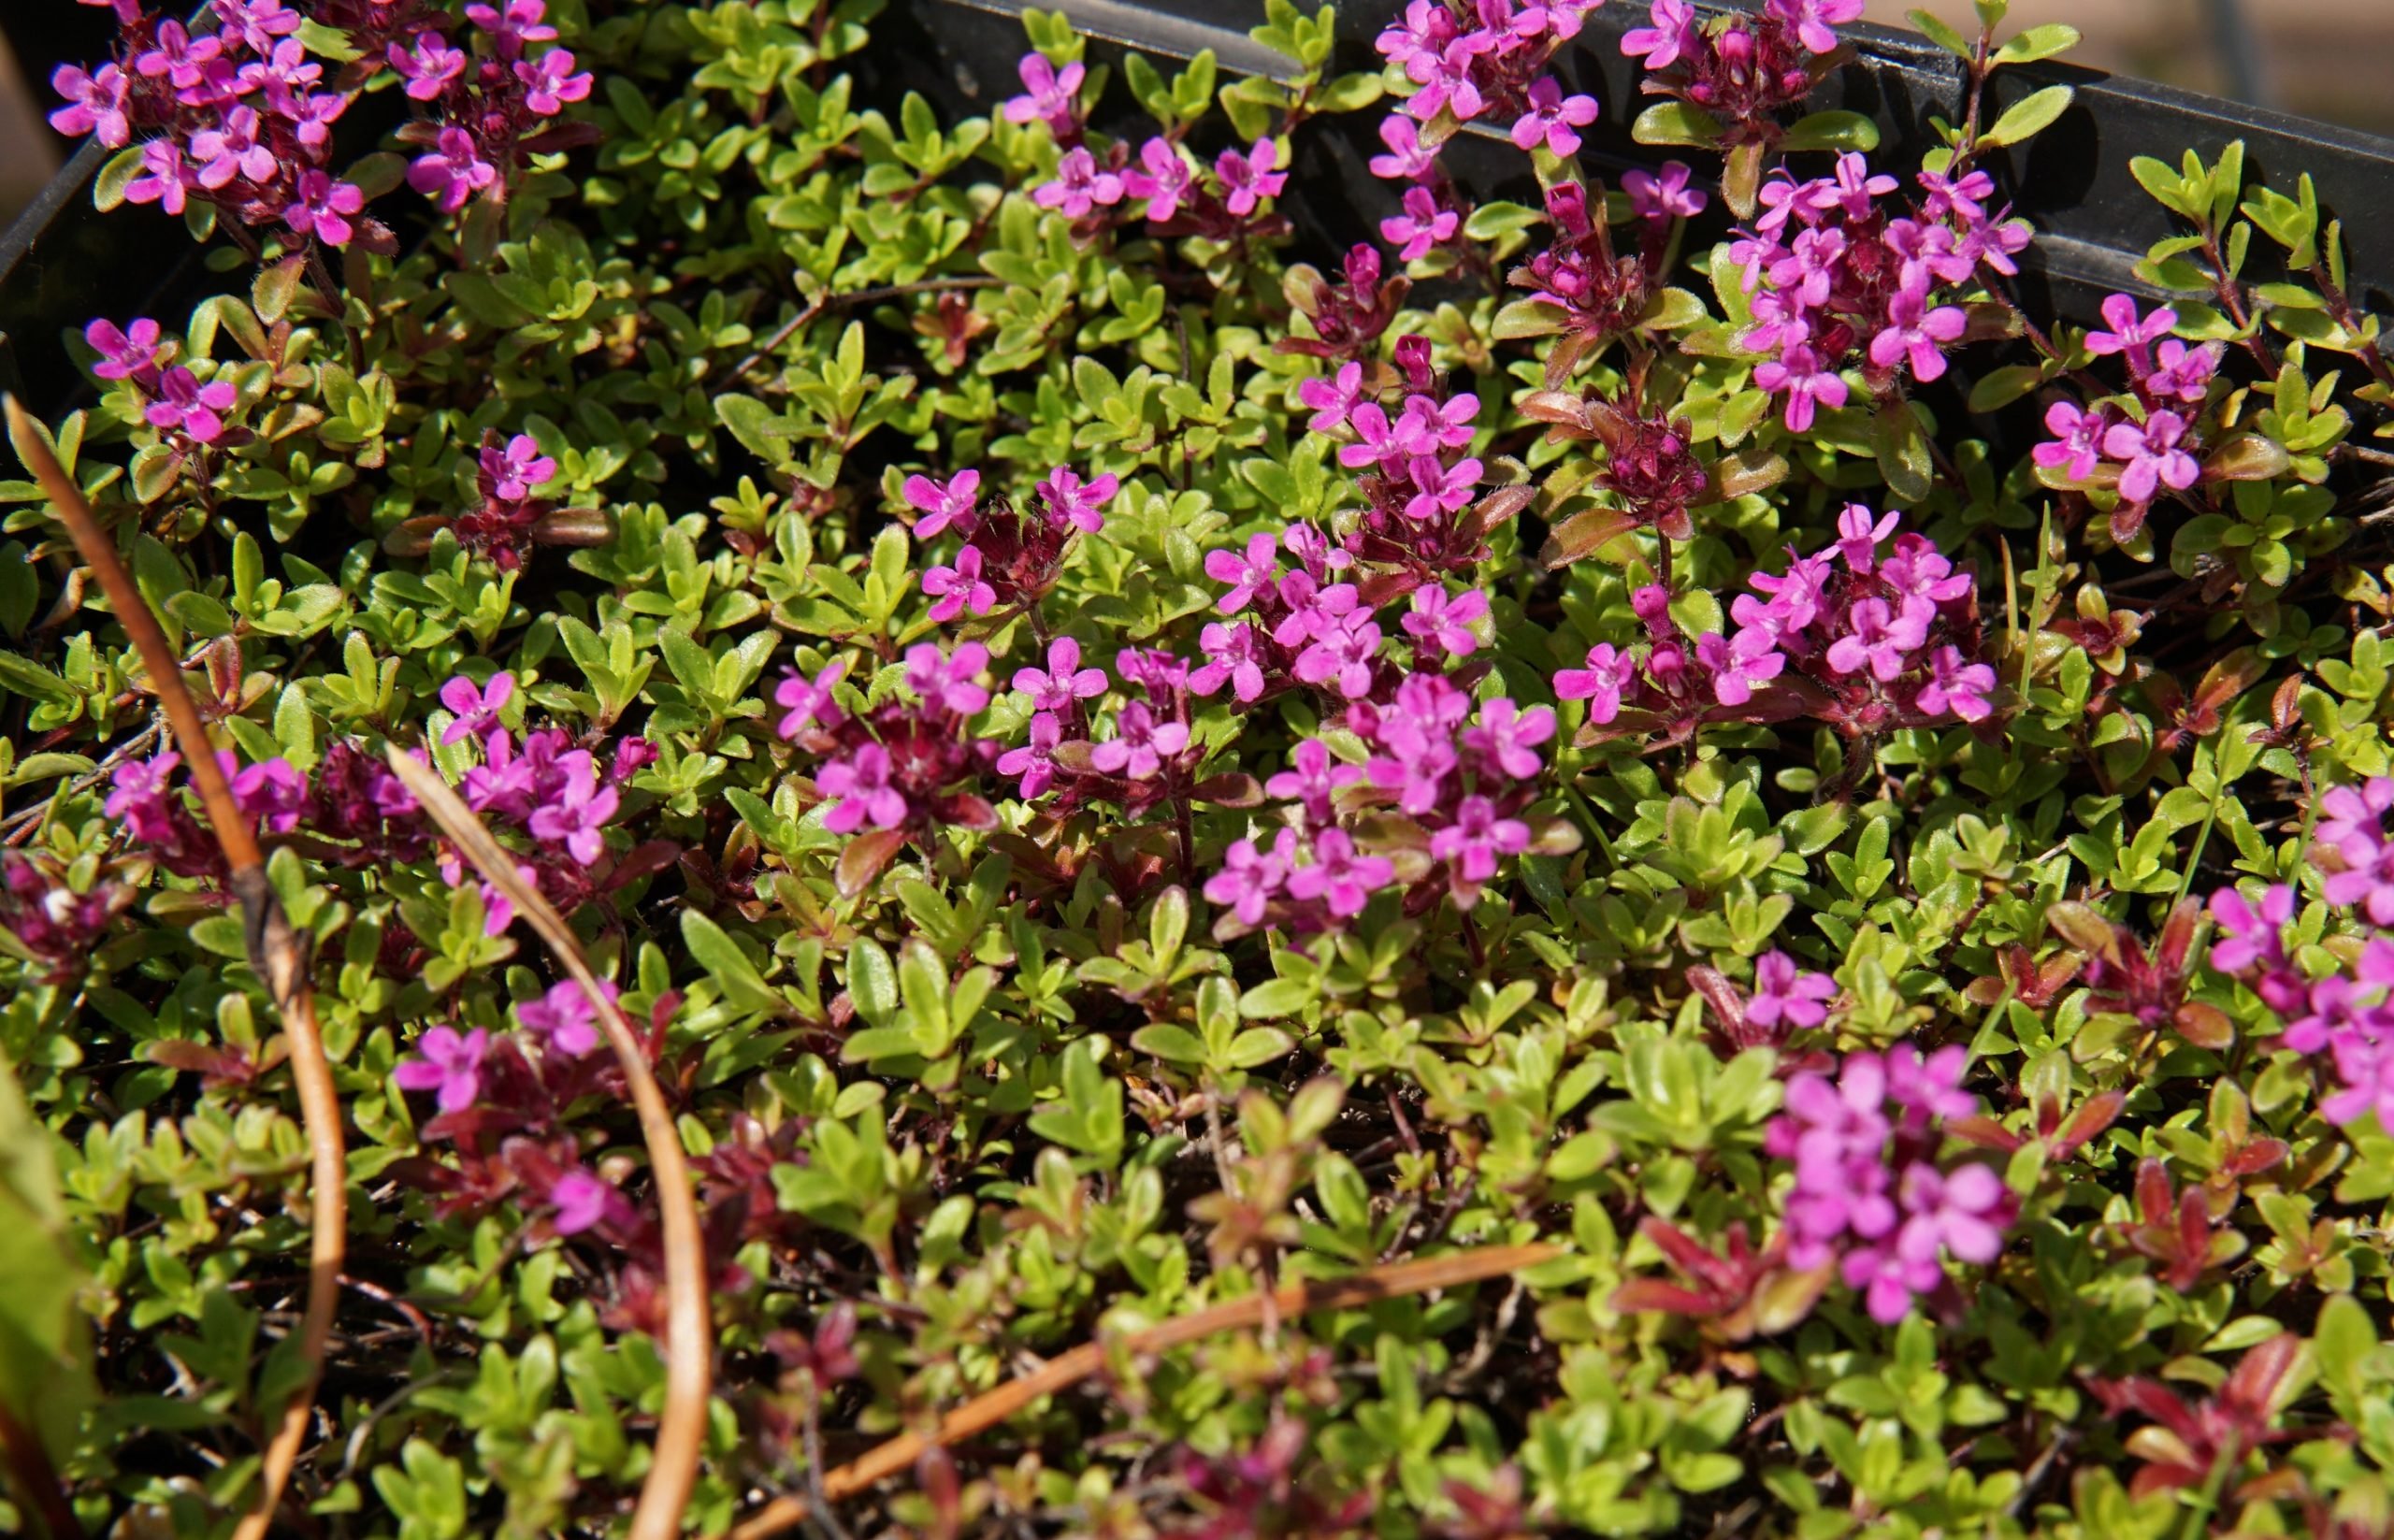
Image credit: https://kiwinurseries.com/
It tolerates heavy rainfall well but doesn’t do so hot in dry conditions. With its delicate greenery and fragrant pink blooms, red creeping thyme can be tucked among pavers and along walkways to add beauty and repel weeds.
8. Soapwort
This plant grows to about 8 inches and bears pink flowers. It is extremely drought tolerant and does well in the sun or shade but doesn’t work well in wet conditions. The flowers of soapwort resemble the look of phlox blossoms. They are usually small and produce a sweet fragrance. In terms of lower color, these alpine gardens bloom in shades of pink and white, and the green foliage can have some tinges of blue.
9. Thyme
Thyme can be a great decorative accent to any rock garden. It’s recommended to use thyme to cover more specific areas like an empty corner. But if you want to cover the entire ground, don’t worry because you can still find thyme varieties for the job. Thyme herbs have bright green foliage and light purple flowers. You can also use their aromatic properties to season your food.
10. Irish Moss
If you want to add a splash of lively green into your rock garden, then consider this lush groundcover. Irish moss thrives in full sun but can also tolerate intense heat. It requires regular watering, so plant it in a location that is easy to reach with water and remove it because the plant can also suffer from overwatering.
11. Prickly Pear Cactus
Prickly pear cacti are low-growing perennials, so place them in the rock garden to give it a unique look. It is an excellent plant for containers since it can’t survive cold temperatures and won’t require much maintenance. Prickly pear cactus also have pines on the leaves, so take care while planting them in your garden.
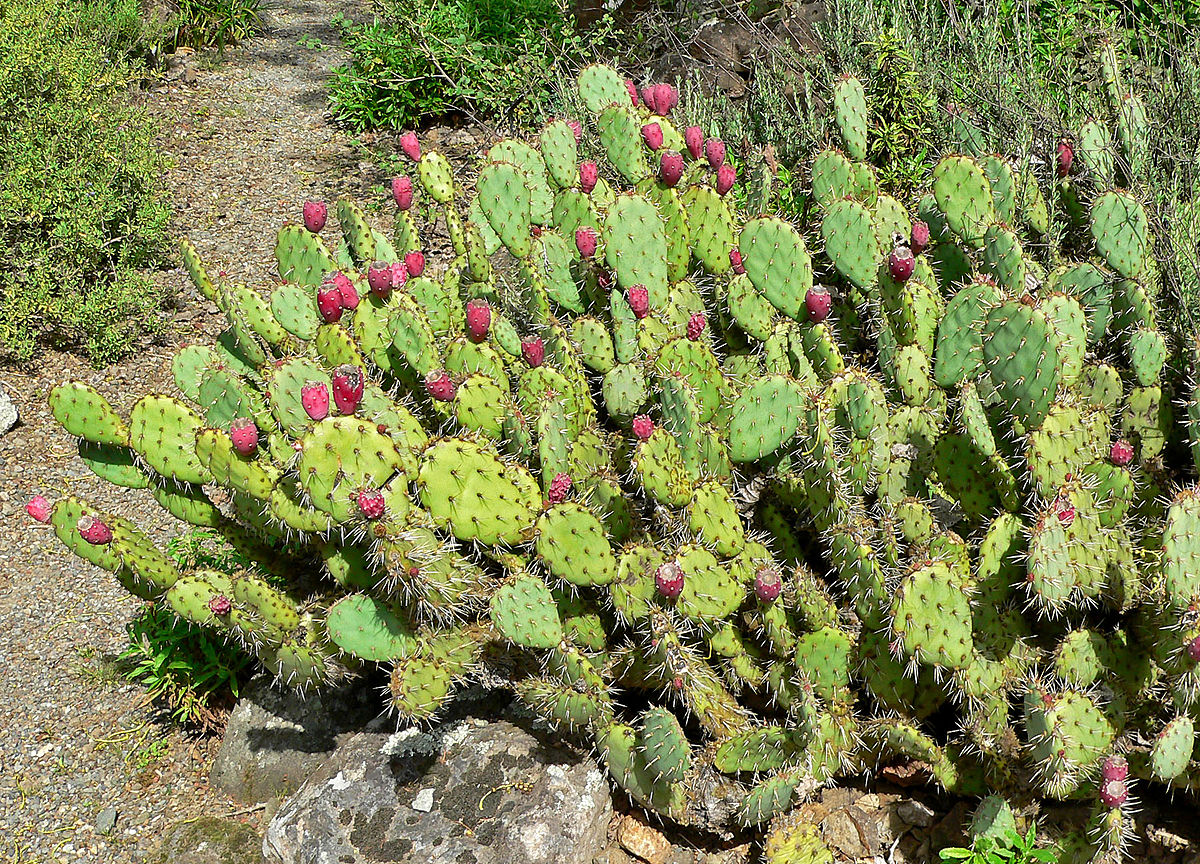
Image credit: https://upload.wikimedia.org/
12. Ice Plant
Ice plant, also known as glacier plant, is an evergreen perennial that will remind you of glaciers found in the mountain. It can be used to make low hedges or walls due to its compact structure. You should remember that an ice plant requires full sun, making it perfect for rock gardens. This compact plant is also heat and drought-tolerant but will die if it doesn’t have good drainage.
13. Purple Fountain Grass
If you want your garden to make a statement, plant this perennial plant as a focal piece in your rock garden. This ornamental grass grows best in full sun but can also tolerate little shade. You can use it as a standalone specimen plant or plant it as groupings for greater impact. With its low-maintenance and non-invasive, this perennial flower will continue to wow gardeners for many years to come.
14. Snow-in-Summer
If you want to have low-maintenance flowers and come back every year, plant the Snow-in-Summer perennial flower. It’s a small shrub with white blooms which can give off a mystical vibe to your garden. The plant will grow 1 to 3 feet tall so that it won’t take up too much ground space in your garden.
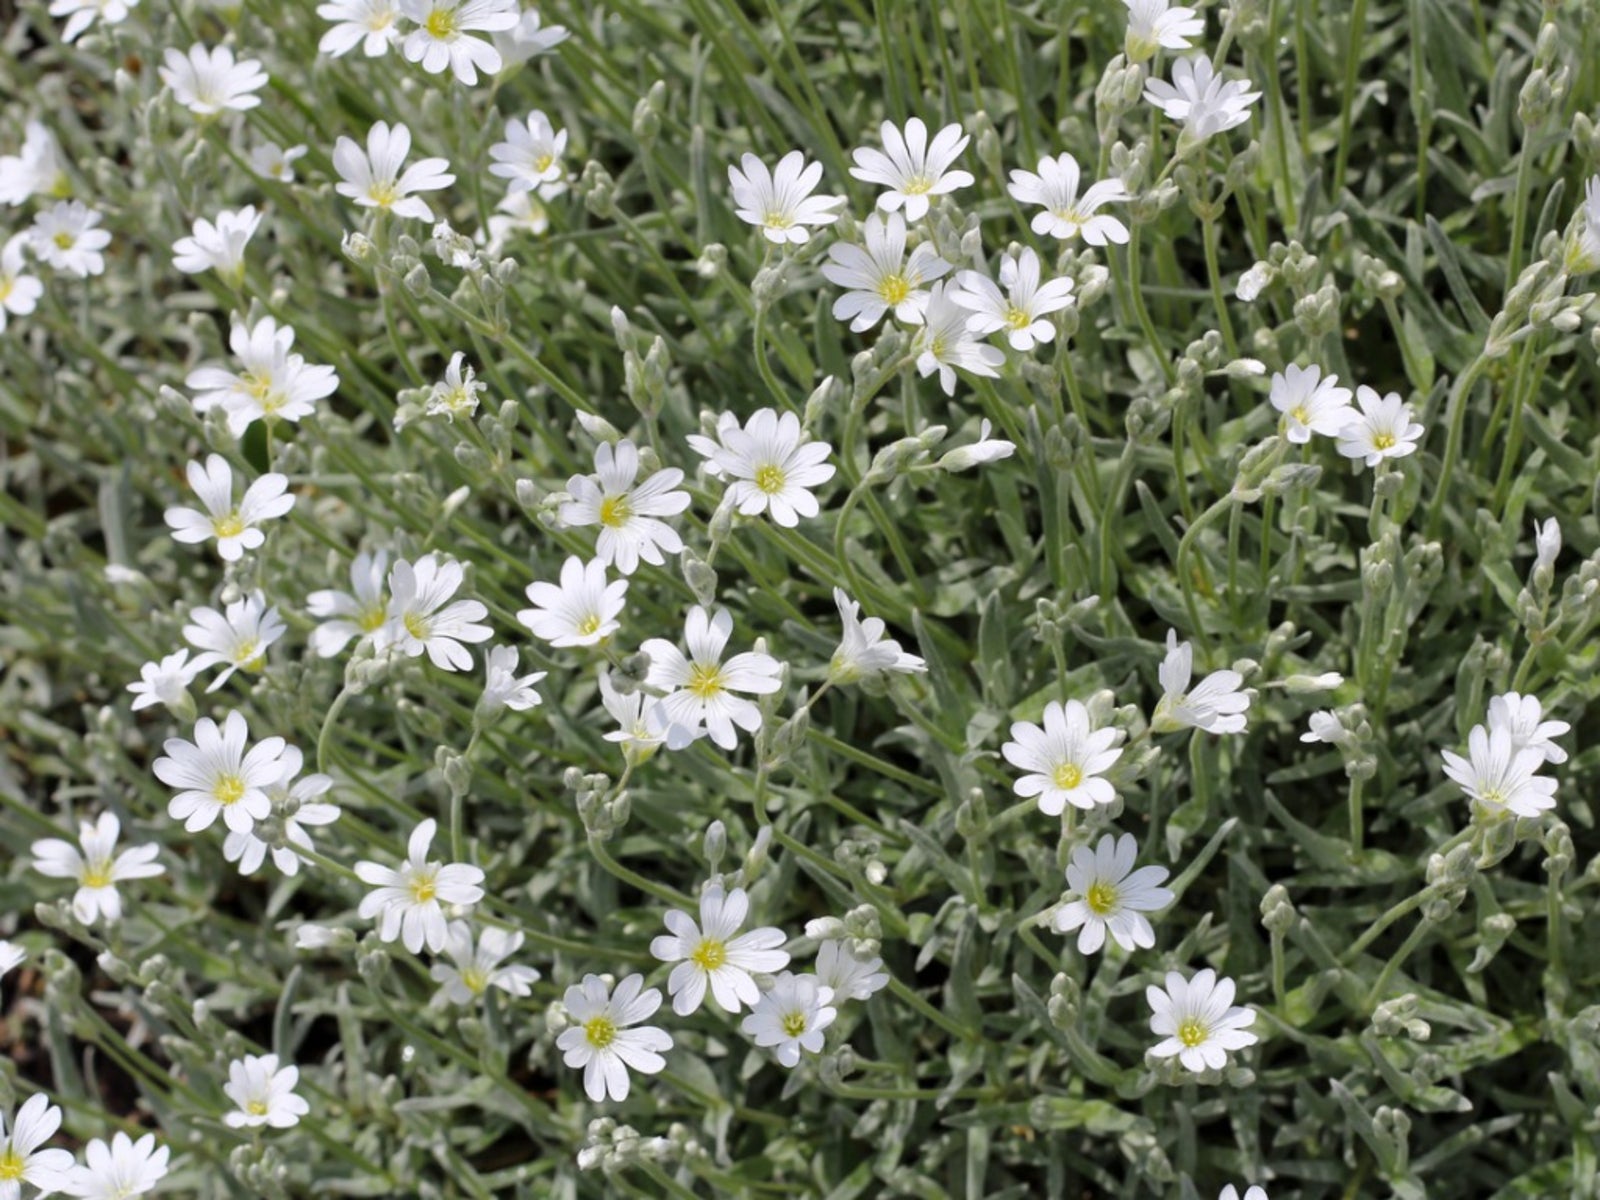
Image credit: https://www.gardeningknowhow.com/
It gets its name from its pristine white flowers that bloom in early summer and blanket the ground like a snowfall. It’s a low-growing plant and can thrive in poor rocky and sandy soil as long as the drainage is good.
15. Hens and Chicks
This succulent plant comes in different varieties like the Hens and Chicks Rough, which has red and yellow flowers. It blooms from early summer until the first frost. The plant only grows 4 to 8 inches tall, so it’s perfect for small spaces, rock gardens, or even ground cover.
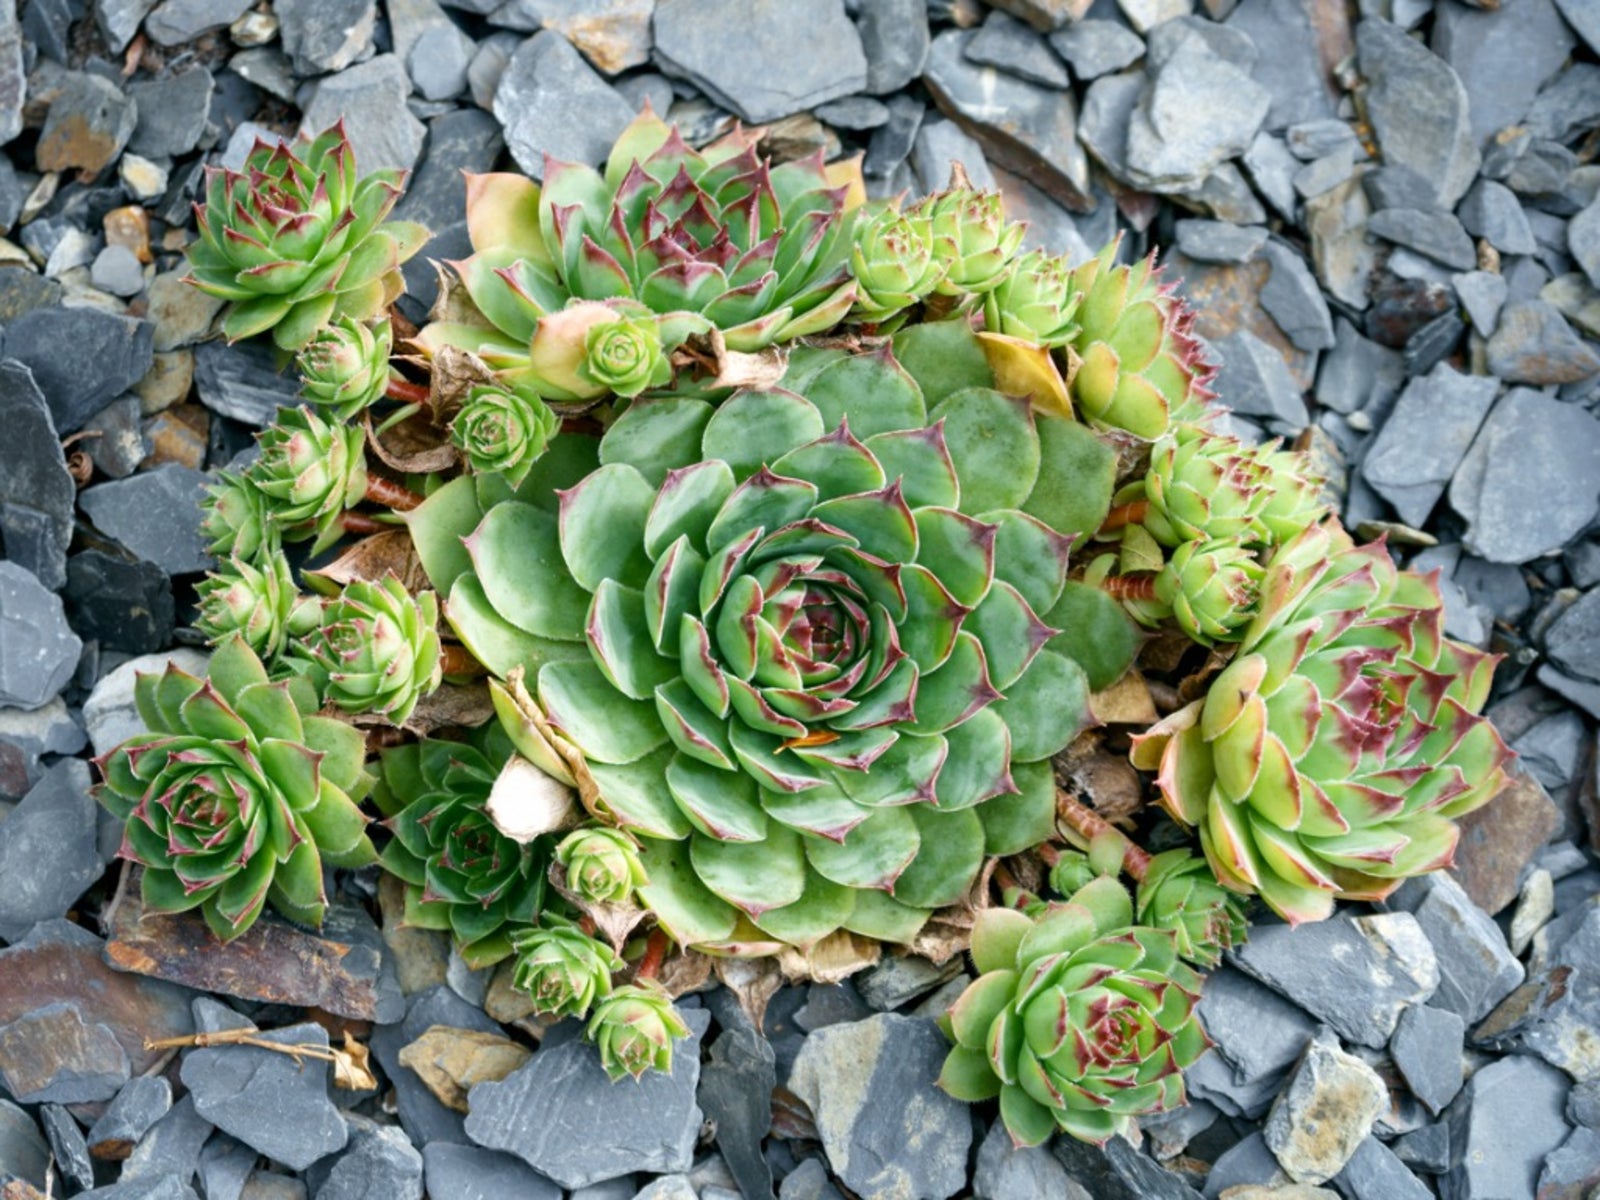
Image credit: https://www.gardeningknowhow.com/
This plant doesn’t need a lot of water to grow, making it ideal for rocky soil. This plant is also a flowering plant and is a great addition to the garden anytime because of the leaves’ red, pink, and purple highlights.
16. Candytuft
Candytuft blooms in mid-spring with showy flowers and is commonly used in rock gardens or as edging. Its petals form a pretty pattern, and the flowers have an unpleasant aroma. Plant the seeds in early spring. It is best to group about three or four plants or use them as edging.
It has bright yellow flowers that are very attractive to bees, butterflies, hummingbirds, and other pollinators. Like most golden glow families, this plant needs little watering because it’s adapted to dry soils. The flower blooms in early spring and summer.
17. Geranium Shepherds Warning
It blooms in late spring to late summer and is easy to grow from seed. It does well in either normal or clay soil but will tolerate drought. They look good when planted with other flowers, herbs, and vegetables. With its pretty pink flowers, it can be used in most border garden areas or containers.
18. Dragon’s Blood Stonecrop
Dragon’s blood stonecrop is a small rock garden plant classified under creepers. It can tolerate some drought and shallow rocky soil. This plant can spread up to four inches and will bloom from late spring to early summer. If planted under the sun, it has purplish stems and leaves with red flowers. It’s a great rock garden plant that should be cultivated for its easy care and unique look.
19. Lavender
If you want to add a sweet fragrance to your rock garden, this is the best choice. Lavender is a small herb plant that grows from two to three feet. It has narrow leaves and flowers growing on the top of the stalk. Lavender loves sunshine and will bloom in summer.
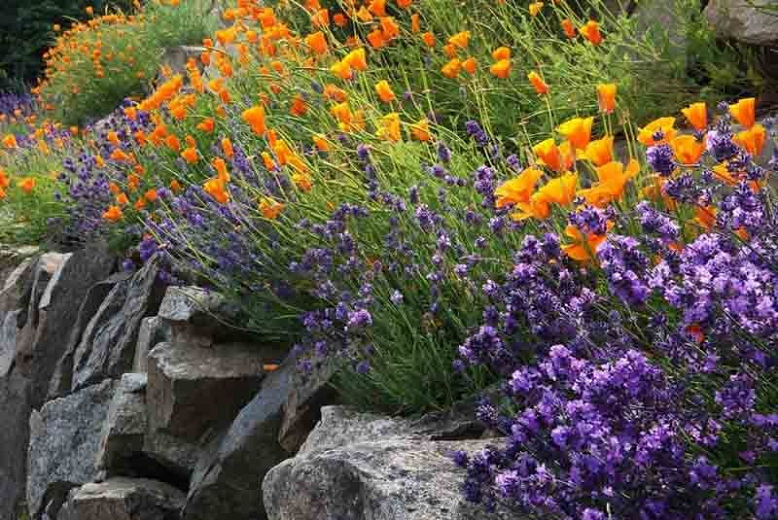
Image credit: https://www.gardenia.net/
Lavender is suited for hot weather and poor soil, making it ideal for rocky landscapes. It grows well on its own and can also do well when grown with other shrubs and ornamental grasses. It requires a good amount of sun exposure and medium moisture, plus well-drained soil.
20. Ajuga Black Scallop
Ajuga Black Scallop with green leaves and fragrant blue flowers has an interesting texture. It is a low-growing plant that spreads to form clumps of foliage that are very effective for ground cover. The dark scalloped edges on the green leaves are eye-catching, especially when set against the light lavender-colored flowers.
Ajuga Black Scallop is a hardy plant that requires bright sunlight and moist to dry soils. It will do best in USDA zones 4 to 9 but can be grown perennial even in colder regions by protecting the roots with mulch during winter months. This low-maintenance plant flowers from mid-spring until fall and do not require deadheading.
21. Lamb’s Ear
Lamb’s ear is an herbaceous plant grown more for its ornamental value than for culinary purposes. This plant is very easy to grow and thrives in full sun or part shade. Lamb’s ear has silvery gray leaves that are quite soft to the touch.
Lamb’s ear requires moist soil but can be easily grown in poor soils by adding compost before planting. Its tolerance for drought and poor soil also makes it a good rock garden plant. You also need to learn how to care for and control lamb’s ear for it to grow well.
22. Rugosa Rose
Rugose rose is native to East Asia and bears small, white flowers in the summer. This plant requires full sun but can tolerate light shade. Rugosa rose has grey-green leaves that turn reddish-orange during the fall months.
The blooms are edible and resemble miniature cabbage roses. Good air circulation and avoiding wet soil are what this rocky plant needs to remain healthy. Annual pruning is also needed to keep this shrub in a pleasing shape.
23. Columbine
Columbine is an herbaceous perennial plant native to Western Europe, North America, and western mountainous regions of Asia. Columbines can grow in any rocky environment and thrive with full sun exposure to partial shade and medium moisture.
It produces beautiful blooms in blue, purple, white, or yellow coloration. It spreads easily from seed, so cutting and removing the seed heads following bloom will help keep it in the garden.
24. Euphorbia
Euphorbia leaf plants are a genus of flowering plants with about 2,000 species. Euphorbia plants prefer rocky and dry environments, thriving in full sun exposure to partial shade and drought resistance.
If you live in warm climates, this type of plant can be used in landscapes, including desert rocks. Euphorbia, like cacti, can store water in its leaves or stems for days when there’s no rain or moisture; it will take care of itself even without you.
25. Alyssum
Alyssum is a genus of low-growing, often branching subshrubs native to the rocky mountainous regions in the Northern Hemisphere. Alyssum flowers are mostly white or pink, with four or five petals that may resemble daisies.
However, this type of plant does not need sun exposure and can survive drought conditions. As a ground cover, it can serve to prevent soil erosion. This plant is also appreciated for its subtle-like honey fragrance.
FAQS on Best Plants for Rock Gardens
Can you plant roses in a rock garden?
Yes, roses can be planted in rocky gardens as long as you make some amendments before planting because of the poor nutrients and less water in rocky landscapes. For them to grow well, you must learn basic care such as how to prune roses
Final Thought on Best Plants for Rock Gardens
As you can see, many types of plants can be included in a rock garden. It depends on the look that you want to achieve and your personal preferences. For example, if you love blooming flowers, there is a wide array of plants for a rock garden that will bloom in different seasons. As much as possible, it is best to choose low-maintenance plants.
Finally, it is very helpful to find out what kind of soil or substrate your specific plants need. With that knowledge, you will be able to choose the best plants for rock gardens.
The post 25 Best Plants for Rock Gardens appeared first on Kitchen Infinity.
Did you miss our previous article…
https://www.thelavkitchen.com/?p=238