A wooden gate that is not maintained will look ugly and uninviting. It can also be a safety hazard for your family, pets, or guests. The good news is that you don’t need to hire a professional to build or repair your gate. You can do it yourself with the right tools and instructions.
You can build your good-looking wooden gate from start to finish and make it as durable as you like. Here’s how to do it.
The Tools and Materials Needed for the Job
Other than the gate, you’ll need a few common hand-held carpentry tools to get started. These include:
Tape measureWheelbarrowScrewdriverPencilMiter sawCordless drillSmall diameter drill bitCarpenter’s glueStraight edge rulerHammerShovelSafety glassesSpeed squarePosthole diggerHearing protectionOne-handed bar clamps
Steps to Building a Wooden Gate
Step 1: Preparations
When planning the materials needed to build your gate, it’s important for you to do a little math to make sure that both of the posts will be at the same height. The idea is to set one post in concrete in one corner of your yard and then make another post on the opposite side of your yard match up with it. Think through the location and weigh out all the considerations and locations where you want to build your gate.
Step 2: Dig Holes and Plumb Posts
Take the time to dig your post holes to have the same depth and size. You will also want to make sure that your posts are plumb before you set them in the concrete. Use a level or speed square to test for plumb and adjust as needed.
Step 3: Measure and Cut the Tongue and Groove Boards
Once you have the posts in place and are sure of the height, it’s time to measure and cut the tongue and groove boards. You will want to cut four pieces that are each 72 inches long. Use a measuring tape to make a pencil mark at 72 inches on each tongue and groove board. After that, cut the boards 72 inches long using your miter saw.
The frame for a basic wooden fence gate should be a simple box with four sides, usually smaller than the gate opening. Typically, you would use the same variety of wood you used on the fence. If you want a different color, redwood is sometimes used for large gates.
Step 4: Measure and Cut the Horizontal Bases
Next, you will need to measure and cut the horizontal bases for your gate. You will need a measuring tape to measure three 42-inch segments on two of the 1×6 cedar boards and not tongue and groove boards. Cut these segments, so you have three boards that are 42 inches long.
Step 5: Lay Out the Boards
Once you have your boards cut, lay them out on a flat surface and make sure they line up with each other. If the tongue and groove boards fall apart while doing this step, then move them to where they will not get in the way of your layout. This won’t be hard if you understand other carpentry work such as building a floating deck
Imag credit: https://diy.sndimg.com/
Step 6: Attach the Tongue and Groove Boards
You will need to clamp the boards together while attaching them with screws. This keeps the boards in place while you attach them. Attach them to the 1×6 horizontal brace boards underneath the 7/8-inch exterior screws. Pre-drill holes for the screws to eliminate splitting. Keep a close eye on the lower boards, so they don’t move out of position when you work.
Step 7: Anchor and Plumb the Brace Posts
You will want to make sure the posts are plumb or vertical. You can use a level to check this. To keep them in place, you will need to anchor them to the ground. If your soil is soft, you can use a post hole digger to make a hole deep enough for the post to be stable. Post length should be at least ⅓ longer than the planned height of your gate.
Pour some gravel into the bottom of the hole to allow for drainage and place a cement brick at the base of each post. Make sure your posts are tall enough to reach about three feet off the ground when they are all put together or tall enough to be bent around by hardware cloth. Cover with soil and tamp down until it is solid.
Take your next two posts and place them about a foot from each other. The closer they are, the more support you will have. Decide which direction you want your gate to swing, then place one of the corner posts in between them so that it is even on both sides. Use a level again to make sure this post is straight.
Step 8: Measure and Cut the Diagonal Brace
Next, use a measuring tape to measure the length of your hardware cloth and cut it so that it is just a bit longer than the width of your yard. You can use wire cutters for this task. Put the hardware cloth into place and attach it at each corner with hog rings, pushing them down on either side of the post.
Now it is time to install the diagonal brace. This will help keep the gate stable and prevent it from sagging. Measure from the top of one post to the opposite of the other post. Mark this spot on each post and then use a level to draw a line between the two marks. Lay your straight edge over this diagonal brace, staying parallel with the lines of the horizontal slats.
Make six pencil marks on a diagonal brace parallel to the top and bottom of each horizontal brace. Remove the temporary screws, then cut the diagonal brace with your miter saw at those six marks. Three cut pieces will be discarded, leaving two cut pieces that you’ll use as the diagonal brace.
Step 9: Attach the Diagonal Brace
Run a line of carpenter’s glue over the end of the diagonal brace, then drive in a 3-inch screw. Then, press the pieces on the gate in between the horizontal braces. Weigh down the two glued pieces with cinder blocks, rocks, and anything sufficiently heavy. Let the glue dry for about two hours, then remove the weight. Drive-in two more screws, one at each end of the diagonal brace.
Step 10: Cut Frame Pieces to Size with a Miter Saw
Using a miter saw, cut the pieces of the frame to size. You can start the gate by cutting the top and bottom pieces to the same width or length as you planned for, slightly smaller than the opening in the fence. Cut the upright side planks about 3 inches shorter than the height of the gate.
Step 11: Screw-in Top and Bottom Planks
Screw the top and bottom boards to the gate frame. Position the plank, so its edges are flush with the frame, then screw into place every 16 inches or so, using three screws per board. Drill a pilot hole for the screws before putting them in to not split to the wood. Fasten with deck screws, pre-drilling to keep the wood from splitting.
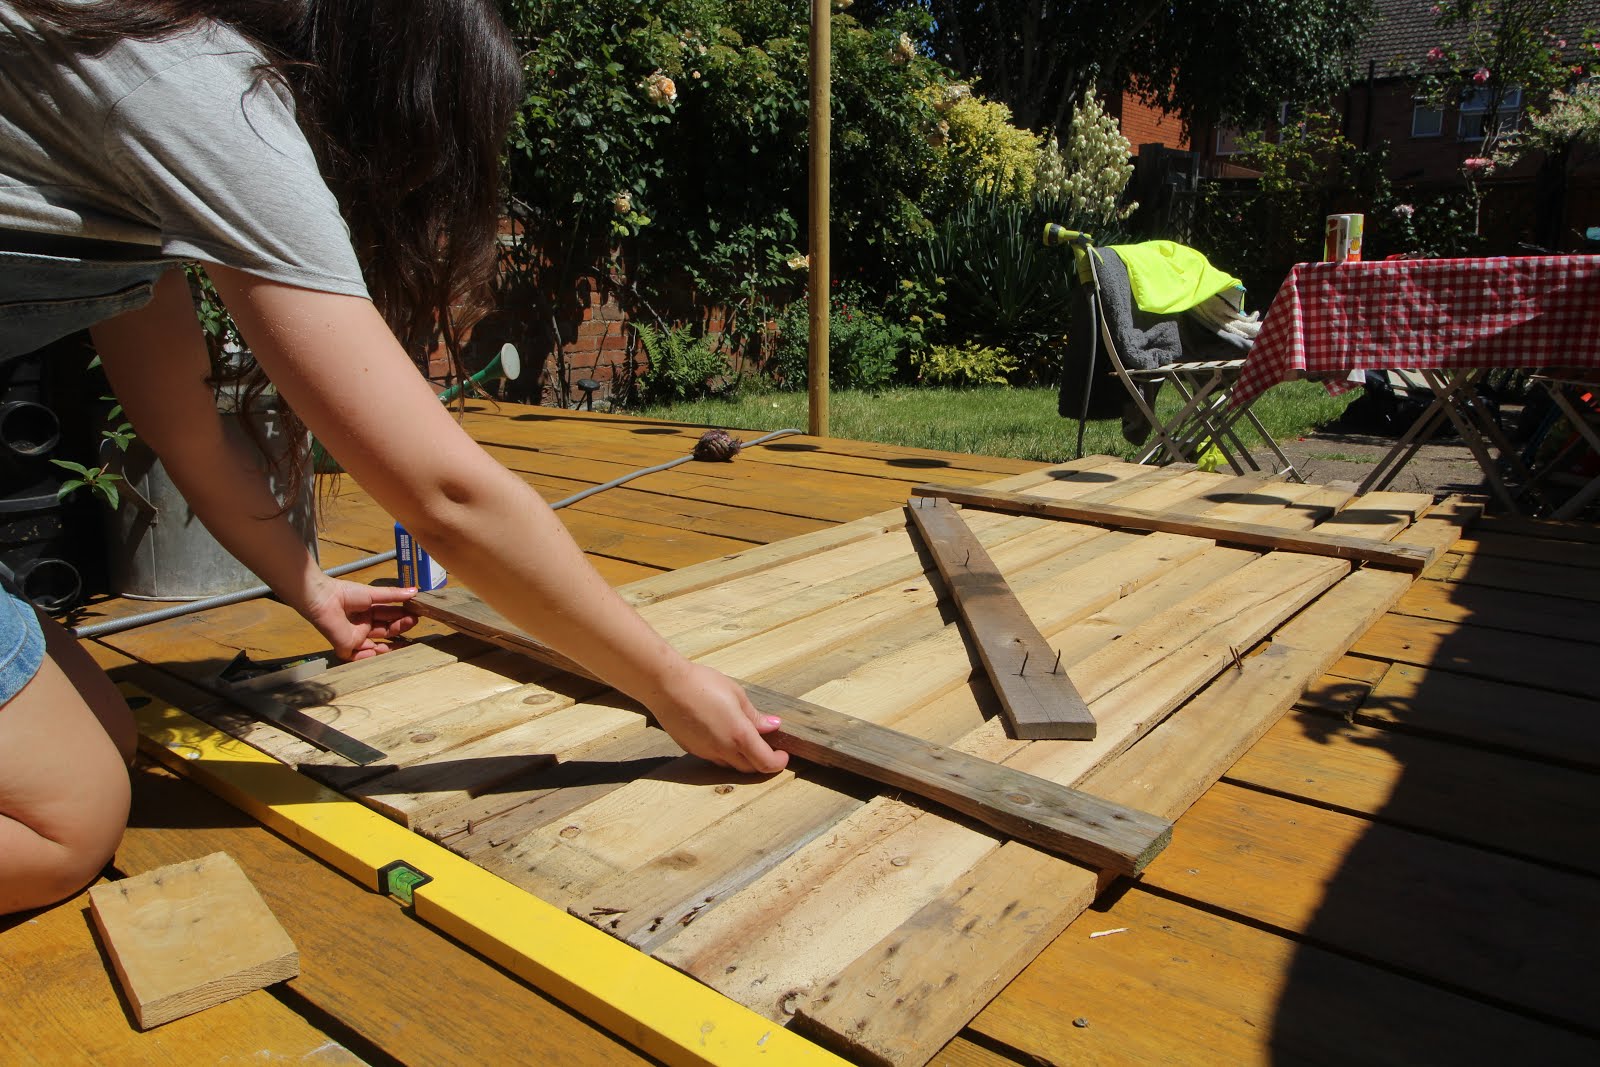
Image credit: https://4.bp.blogspot.com/
Measure from the top bend to the opposite bottom corner and make sure both sides are the same. As you start assembling the gate framing, it’s good to lay it out on a flat surface such as a patio or driveway. Attach the top and bottom rails to the side rails, ensuring it’s square.
Step 12: Cut an Angle Cross-Brace and Attach it to the Top and Bottom Rails
This will help to maintain strength and rigidity. Connect these to the frame boards that match the rest of the fence by using deck screws, pre-drilling. Use a miter saw to make your diagonal cut and place diagonally onto the box and trance with a pencil where the angles go. Place the cross-brace at a 45-degree angle extending from the bottom corner of the gate to the opposite corner of the top of the gate. But if it’s a rectangular frame, make a drawing to scale and measure the angle you’ll need with a protractor.
Step 13: Cut and Install the Planks
Place the first plank with its bottom side against the foundations and side rails and tight in between them at both ends. Use a combination square to ensure all of your planks are even before screwing down. Cut the planks using a table saw and secure them using deck screws, drilling pilot holes to keep your planks nice and clean.
Step 14: Design the Top of Your Gate
The top of your gate should have a nice curve to it. Cut the two 2x6s to the desired length and then use a jigsaw to cut out the arch. Drill pilot holes and then screw the boards together using deck screws.
Start by drawing an arc across the top of the fence gate using a string and a pencil, filling it with decorative curves of your taste. If you’re a woodworker, feel free to get fancy with your decoration. Use the jig to cut along your pattern.
Step 15: Install Hinges and Mount Your Gate
Once the top is finished, it’s time to install the hinges. Place them on the upper left and right corners of the gate. Pre-drill holes and then screw the hinges in place using 3-inch screws. The final step is to hang your gate. Have someone help you hold it in place while you screw it into the hinges.
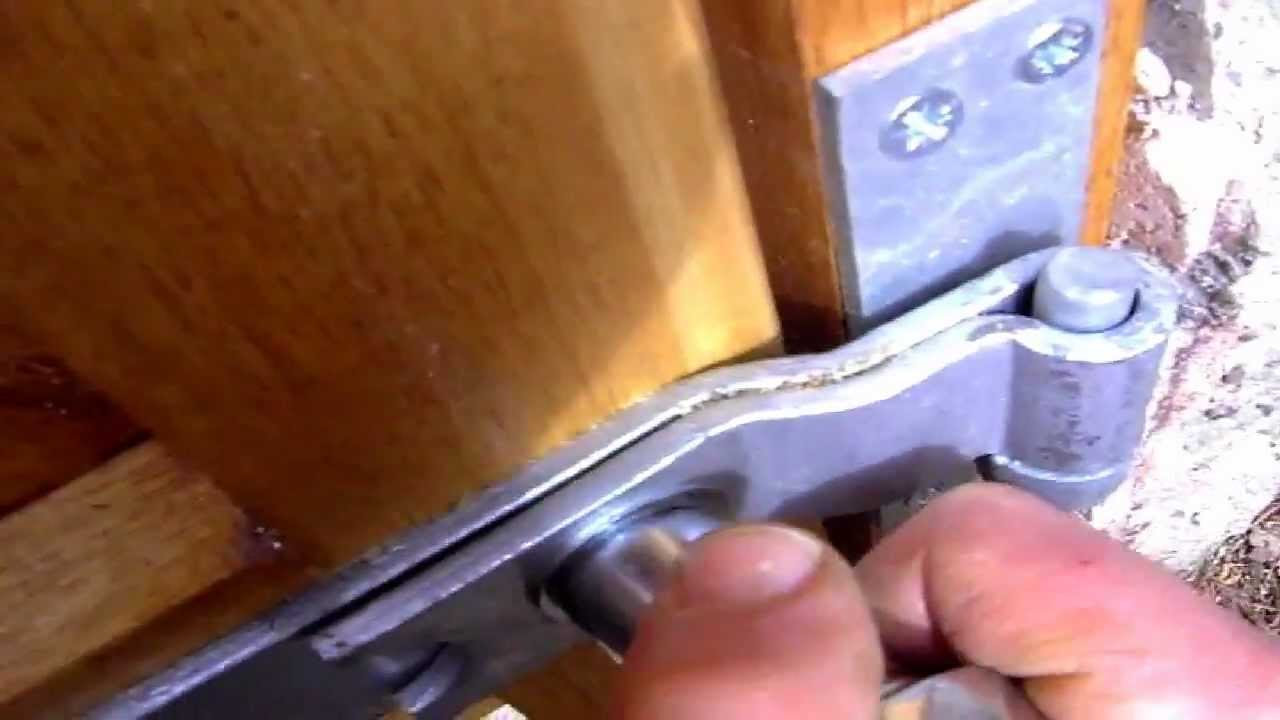
Image credit: https://i.ytimg.com/
Leave about a 1/4 inch of distance on the hinge side of the gate. Using the cordless drill and screws included with the hinges, screw the hinges at the top, middle, and gate frame. Check to ensure the gate swings properly. Adjust the hinges to level, tighten or loosen the gate if necessary. Add diagonal cross brace to keep the gate square and prevent sagging. Remember that installing a brace with a little pressure in the opposite direction will make your gate warp. So, take diagonal measurements to check for squareness.
Step 16: Mount the Gravity Latches
Mount the gravity latches on the gate frame, one near the top and one near the bottom. The latch should be positioned so that it will snap into place when the gate is closed and hold the gate shut. Drill pilot holes and then screw in place using 2-inch screws.
Use a cordless drill and the screws included in the latches to screw the slide latches in place on the top and bottom of the gate. Screw the receiving section of the latches to the gate frame and mount the flip latch in a similar fashion at the center of the gate.
Step 17: Seal the Wood
Seal the wood with a sealant or weather proofing product. This will help protect the wood from the elements and keep it looking nice for years to come. You can use a paintbrush or garden sprayer to apply your sealant.
Try to cover the whole surface evenly, making sure you hit the bottom of the planks, which absorb more water than the end grain. This area is likely to rot or become discolored so let it dry for a couple of hours in dry climates or a day in more humid climates.
Step 18: Use Your Wooden Gate
Now that your wooden gate is complete, it’s time to enjoy it! Not only will it add beauty and privacy to your home, but it will also provide a secure barrier for your family and pets.
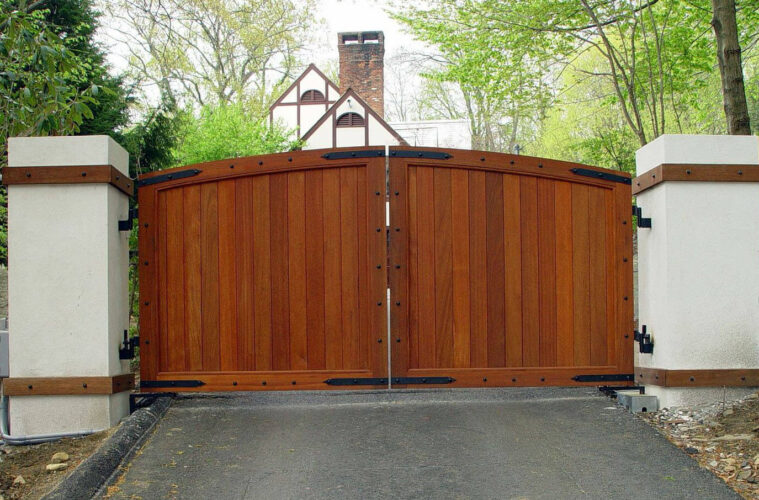
Image credit: https://thearchitecturedesigns.com/
FAQs on How to Build a Wooden Gate for Your Yard
What are the benefits of having a wooden gate at home?
The benefits of using a wooden gate over another material are many. If you’ve already learned how to build your own house, adding a gate with the traditional look can be the best decision. It can blend in with all home styles, from modern to Victorian to an earthy farmhouse. Unlike other materials, it requires very little maintenance and looks as good as the day you installed it years later.
How can you attach pickets to the frame?
Use one angled piece from the bottom of the hung side to the corner of the latch side. Lay out pickets on the frame to check spacing and mark when you’re not satisfied.
Final Thought on Building a Wooden for Your Yard
Wooden gates provide a sense of privacy and security for your home and yard. They also add beauty and value to your property. Installing a wooden gate is a relatively easy project that can be completed on the weekend.
If you have any questions or need assistance with this project, don’t hesitate to contact a professional contractor. They will be able to help you with the planning and installation of your wooden gate, ensuring that it is a beautiful and safe addition to your home.
The post How to Build a Wooden Gate for Your Yard appeared first on Kitchen Infinity.
Did you miss our previous article…
https://www.thelavkitchen.com/?p=717